
PORTABLE WEATHER STATION
Operation and Safety Notes
TRAGBARE WETTERSTATION
Bedienungs- und Sicherheitshinweise
KANNETTAVA SÄÄASEMA
Käyttö- ja turvallisuusohjeet
BÄRBAR VÄDERSTATION
Bruksanvisning och säkerhetsanvisningar
BÆRBAR VEJRSTATION
Betjenings- og sikkerhetshenvisninger
Z29592
3

GB / IE Operation and Safety Notes Page 4
FI Käyttö- ja turvaohjeet Sivu 34
SE Bruksanvisning och säkerhetsanvisningar Sidan 64
DK Brugs- og sikkerhedsanvisninger Side 91
DE / AT / CH Bedienungs- und Sicherheitshinweise Seite 120

3
5
6
7
8
9
10
11
14
12
13
1 2 3 4

4 GB/IE
Intended use .............................................................Page 6
Description of parts and features ..........Page 6
Technical data .......................................................... Page 7
Scope of supply ......................................................Page 8
General safety information ........................Page 9
Safety Instructions for the battery ...................................Page 10
Starting the weather station up
Regulating the default settings for language,
time, date, time zone .......................................................Page 12
Deactivating / activating the display ..............................Page 15
Switching the touch beep on / off ...................................Page 15
Switching off the automatic display / activating
the sleep function .............................................................Page 16
Setting the alarm time and activating the daily alarm...Page 17
Activating the hourly alarm .............................................Page 18
Using the stopwatch ........................................................Page 18
Timing / storing and retrieving lap times ........................Page 19
Using the countdown counter .........................................Page 20
Displaying the world times ..............................................Page 21
Using the barometer ........................................................Page 22
Adjusting the barometer ..................................................Page 24
Using the altimeter ...........................................................Page 24
Adjusting the altimeter .....................................................Page 25
Measuring the difference in height .................................Page 26

5 GB/IE
Weather forecast .............................................................Page 27
Reading off the temperature and humidity ....................Page 28
Retrieving the maximum and minimum values ...............Page 29
Battery display .................................................................Page 30
Changing the battery ......................................................Page 31
Cleaning and Maintenance..........................Page 32
Disposal .........................................................................Page 32

6 GB/IE
Portable Weather Station
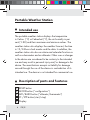
Intended use
The portable weather station displays the temperature
in Celsius (°C) or Fahrenheit (°F), the air humidity in per
cent (% RH) and their maximum and minimum values. The
weather station also displays the weather forecast, the time
in 12 / 24-hour clock modes and the date. In addition, the
weather station also has an alarm and calendar function as
well as a barometer and an altimeter. Other uses or changes
to the device are considered to be contrary to the intended
use and may result in personal injury and / or damage to the
device. The manufacturer accepts no liability for damage
caused through the use of the device in contradiction of its
intended use. The device is not intended for commercial use.
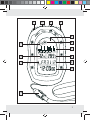
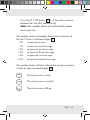
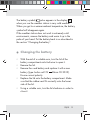
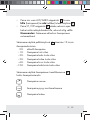
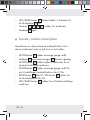
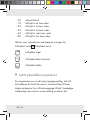
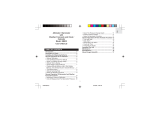
Description of parts and features
1
RESET button
2
MODE button (“configuration”)
3
ALTI / BARO button (“altimeter / barometer”)
4
ST. / STP button (start / stop)
5
Display

7 GB/IE
6
Weather symbol
7
Barometric pressure bar display
8
Temperature display
9
Date display
10
Time display
11
Daily alarm display
12
Relative humidity display
13
Barometric pressure trend display
14
Security strap
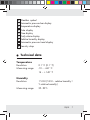
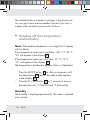
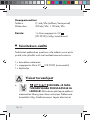
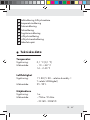
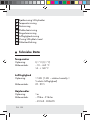
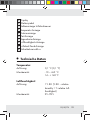
Technical data
Temperature
Resolution: 0.1 °C (0.1 °F)
Measuring range: -10 – + 60 °C
14 – + 140 °F
Humidity
Resolution: 1 % RH (% RH – relative humidity =
% relative humidity)
Measuring range: 25–99 %

8 GB/IE
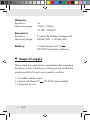
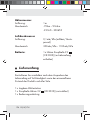
Altimeter
Resolution: 1 m
Measuring range: - 706 m – 9164 m
- 2316 ft – 30065 ft
Barometer
Resolution: 0.1 mb / hPa (millibar / hectopascal)
Measuring range: 300 mb / hPa – 1100 mb / hPa
Battery: 1 x Lithium button cell 3 V
(CR 2032) (included in delivery)
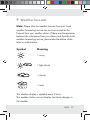
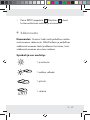
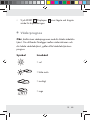
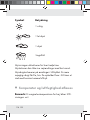
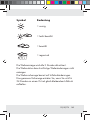
Scope of supply
Please check the supplied items immediately after unpacking
the device to ensure that there is nothing missing and that the
product and all of its parts are in perfect condition.
1 x portable weather station
1 x button cell lithium 3 V
(CR 2032) (pre-installed)
1 x directions for use

9 GB/IE
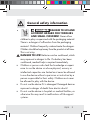
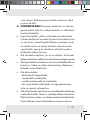
General safety information
DANGER TO LIFE AND
ACCIDENT HAZARD FOR TODDLERS
AND SMALL CHILDREN! Never allow
children to play unsupervised with the packaging material.
There is a danger of suffocation from the packaging
material. Children frequently underestimate the dangers.
Children should be kept away from the product at all times.
This is not a toy.
DANGER TO LIFE! Batteries can be swallowed, which
may represent a danger to life. If a battery has been
swallowed, medical help is required immediately.
Children or persons who lack the knowledge or experi-
ence to use the device or whose physical, sensory or
intellectual capacities are limited must never be allowed
to use the device without supervision or instruction by a
person responsible for their safety. Children must never
be allowed to play with the device.
Do not use the device if it is damaged. Damaged devices
represent a danger of death from electric shock!
Do not use the device in hospitals or medical facilities, as
otherwise this may result in malfunctions of life-support
systems.

10 GB/IE
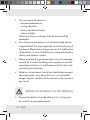
Do not expose the device to
– extreme temperatures,
– strong vibrations,
– heavy mechanical loads,
– direct sunlight.
Otherwise there is a danger that the device will be
damaged.
Do not expose the device to an extremely high electro-
magnetic field. This may impair the correct functioning of
the device. Electrostatic charge can result in malfunction
of the device. In case of malfunctions remove the battery
shortly and replace it again.
Please note that the guarantee does not cover damage
caused by incorrect handling, non-compliance with the
operating instructions or interference with the device by
unauthorised individuals.
Under no circumstances should you take the device apart.
Improper repairs may place the user in considerable
danger. Repairs should only be carried out by specialist
personnel.
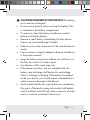
Safety Instructions for the battery
Remove the battery from the device if it is not going to
be used for a prolonged period.

11 GB/IE
CAUTION! DANGER OF EXPLOSION! The battery
must never be recharged!
Ensure correct polarity when inserting the battery! This
is indicated in the battery compartment.
If necessary, clean the battery and device contacts
before inserting the battery.
Remove a spent battery immediately from the device.
There is an increased danger of leaks!
Batteries must not be disposed of in the normal domestic
waste!
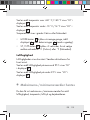
Every consumer is legally obliged to dispose of batteries
in the proper manner!
Keep the battery away from children; do not throw it in
the fire, short-circuit it or take it apart.
Use batteries of the same type only.
If the above instructions are not complied with, the
battery may discharge itself beyond its end voltage.
There is a danger of leaking. If the battery has leaked
inside your device, you should remove it immediately in
order to prevent damage to the device!
Avoid contact with the skin, eyes and mucous membranes.
Any parts of the body coming into contact with battery
acid should be rinsed off with copious amounts of water
and / or a doctor contacted if necessary!

12 GB/IE
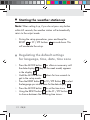
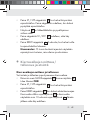
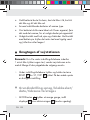
Starting the weather station up
Note: When setting it up, if you do not press any button
within 60 seconds, the weather station will automatically
return to the output mode.
During the set-up procedures, press and keep the
RESET
1
or ST. / STP. buttons
4
pressed down. This
will accelerate the set-up.
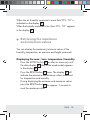
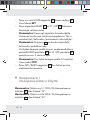
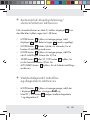
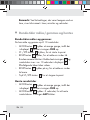
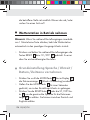
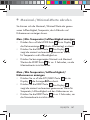
Regulating the default settings
for language, time, date, time zone
Press the MODE button
2
as often as necessary until
the date display
9
(day of the week mode) appears
in the display
5
.
Hold the MODE button
2
down for two seconds to
get to the set-up mode.
Press the RESET button
1
or ST. / STP. Button
4
to select
the language you wish to have for the date display
9
.
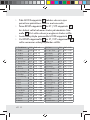
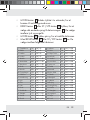
Press the MODE button
2
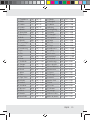
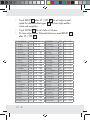
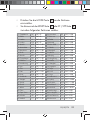
to set the time zone.
Using the RESET button
1
or the ST. / STP. button
4
to choose between the following time zones:

13 GB/IE
1. Casablanca CAS GMT +0
2. Dublin DUB GMT +0
3. Lisabon LIS GMT +0
4. London LON GMT +0
5. Munich AGB GMT +1:00
6. Amsterdam AMS GMT +1:00
7. Barcelona BCN GMT +1:00
8. Berlin BER GMT +1:00
9. Brussels BRU GMT +1:00
10. Copenhagen CPH GMT +1:00
11. Frankfurt FRA GMT +1:00
12. Luxembourg LUX GMT +1:00
13. Lyon LYN GMT +1:00
14. Oslo OSL GMT +1:00
15. Paris PAR GMT +1:00
16. Rome ROM GMT +1:00
17. Stockholm STO GMT +1:00
18. Stuttgart STR GMT +1:00
19. Vienna VIE GMT +1:00
20. Zurich ZRH GMT +1:00
21. Athens ATH GMT +2:00
22. Cairo CAI GMT +2:00
23. Cape Town CPT GMT +2:00
24. Helsinki HEL GMT +2:00
25. Istanbul IST GMT +2:00
26. Jerusalem JER GMT +2:00
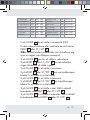
27. Moscow
MOW
GMT +3:00
28. Dubai DXB GMT +4:00
29. Karachi KHI GMT +5:00
30. New Delhi DEL GMT +5:30
31. Dhaka DAC GMT +6:00
32. Bangkok BKK GMT +7:00
33. Jakarta JKT GMT +7:00
34. Beijing BJS GMT +8:00
35. Hong Kong HKG GMT +8:00
36. Manila MNL GMT +8:00
37. Shanghai PVG GMT +8:00
38. Singapore SIN GMT +8:00
39. Taipei TPE GMT +8:00
40. Seoul SEL GMT +9:00
41. Tokyo TYO GMT +9:00
42. Melbourne MEL GMT +10:00
43. Sydney SYD GMT +10:00
44. Noumea
NOU
GMT +11:00
45. Auckland AKL GMT +12:00
46. Honolulu HNL GMT -10:00
47. Anchorage ANC GMT -9:00
48. Los Angeles LAX GMT -8:00
49. San Francisco SFO GMT -8:00
50. Vancouver YVR GMT -8:00
51. Denver DEN GMT -7:00
52. Chicago CGX GMT -6:00
53. Mexico MEX GMT -6:00
54. New York JFK GMT -5:00
55. Lima LIM GMT -5:00
56. Toronto YTO GMT -5:00
57. Caracas CCS GMT -4:30
58. Santiago SCL GMT -4:00
59. Buenos Aires BUE GMT -3:00
60. Rio de Janeiro RIO GMT -3:00

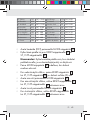
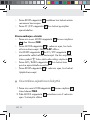
14 GB/IE
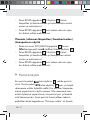
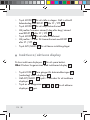
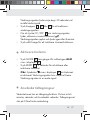
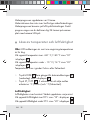
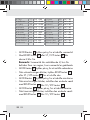
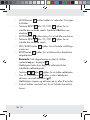
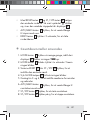
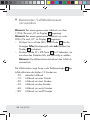
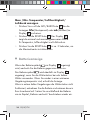
Press the MODE button
2
to set the daylight saving time
(DST).
Switch it on or off with the RESET button
1
or ST. / STP.
button
4
.
Note: Only switch the daylight saving time on if you
are in a region in which the daylight saving time applies.
Press the MODE button
2
again in order to set the
seconds.
When the second display flashes, use the RESET button
1
or ST. / STP. button
4
to set it to 0.
Press the MODE button
2
to set the minutes.
When the minute display flashes, use the RESET button
1
or ST. / STP. button
4
to set the value you wish to have.
Press the MODE button
2
to set the hours.
When the hour display flashes, use the RESET button
1
or ST. / STP. button
4
to set the value you wish to have.
Press the MODE button
2
to set the year. Use the RESET
button
1
or ST. / STP. button
4
to set the current year.
Press the MODE button
2
to set the month. Use the
RESET button
1
or ST. / STP. button
4
to set the current
month.
Press the MODE button
2
to set the day. Use the RESET
button
1
or ST. / STP. button
4
to set the current day.
Press the MODE button
2
, to set the date format.
Use the RESET button
1
or the ST. / STP. button
4
to
choose between the formats of month / day or day / month.

15 GB/IE
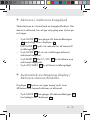
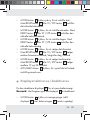
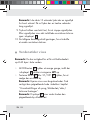
Press the MODE button
2
to select the hour format.
Use the RESET button
1
or the ST. / STP. button
4
to
choose between the 12-hour or 24-hour format.
Press the ALTI / BARO button
3
to leave the set-up mode
if needed.
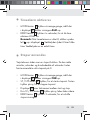
Deactivating / activating the display
You can deactivate the display
5
to save battery power.
Note: The clock will still work even if the display
5
has
been deactivated.
Press the MODE button
2
as often as necessary until
the date display
9
(day of the week mode) appears
in the display
5
.
Press the ALTI / BARO button
3
down for about 5 second
in order to deactivate the display
5
.
Press one of the buttons
1
,
2
,
3
,
4
to re-activate
the display
5
.
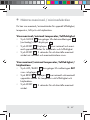
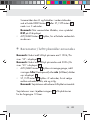
Switching the touch beep on / off
The weather station has a touch tone function. When it is
activated, a sound is made when you press a button.

16 GB/IE
Press the MODE button
2
as often as necessary until
the date display
9
(day of the week mode) appears
in the display
5
.
Hold the MODE button
2
down for two seconds to
get to the set-up mode.
Press the MODE button
2
as often as necessary until
you get to set-up procedure for switching the touch
beep function on / off (BEEP).
Press the RESET button
1
or the ST. / STP. button
4
to
switch the touch tone on or off.
Press the ALTI / BARO button
3
to leave the set-up mode.
Switching off the automatic display /
activating the sleep function
If the sleep function is on, the display
5
will switch itself off
if no button has been pressed for 48 hours.
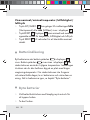
Press the MODE button
2
as often as necessary until
the date display
9
(day of the week mode) appears
in the display
5
.
Hold the MODE button
2
down for two seconds to
get to the set-up mode.
Press the MODE-button
2
as often as necessary until you
get to the set-up to switch the sleep function on / off (SLEEP).

17 GB/IE
Press the RESET button
1
or the ST. / STP. button
4
,
to switch the sleep function on or off.
Press the ALTI / BARO button
3
to leave the set-up mode.
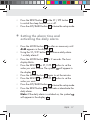
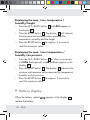
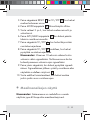
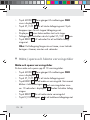
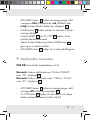
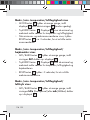
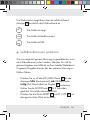
Setting the alarm time and
activating the daily alarm
Press the MODE button
2
as often as necessary until
ALM appears in the display
5
.
Using the ST. / STP. button
4
to choose daily alarm
1 or daily alarm 2.
Press the MODE button
2
for 2 seconds. The hour
display blinks.
Press the RESET
1
or ST. / STP.
4
button to set the
value you wish to have. The symbol
will appear in
the display
5
.
Press the MODE button
2
again to set the minutes.
Press the RESET
1
or ST. / STP.
4
button to set the
value you want.
Press the ALTI / BARO button
3
to leave the set-up mode.
Press the RESET button
1
to activate or deactivate the
daily alarm.
Note: If the daily alarm is switched on, the symbol
will appear in the display
5
.

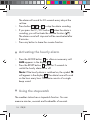
18 GB/IE
The alarm will sound for 30 seconds every day at the
set time.
Press button
1
,
2
or
3
to stop the alarm sounding.
If you press the ST. / STP. button
4
when the alarm is
sounding, you will activate the snooze function (
).
The alarm sound will stop and will be re-activated after
8 minutes.
Press any button to leave the snooze function.
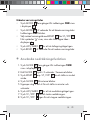
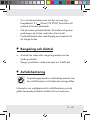
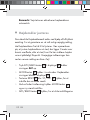
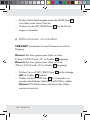
Activating the hourly alarm
Press the MODE button
2
as often as necessary until
ALM appears in the display
5
.
Press the RESET button
1
down for 2 seconds to
switch the hourly alarm on or off.
Note: If the hourly alarm is switched on, the symbol
will appear in the display
5
. The alarm tone will sound
on the hour every hour. The alarm consists of a single
beep sound.
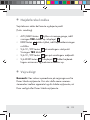
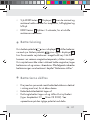
Using the stopwatch
The weather station has a stopwatch function. You can
measure minutes, seconds and hundredths of seconds.

19 GB/IE
Before using it for the first time, the stopwatch will read 0.
Press the MODE button
2
as often as necessary until
CHR appears in the display
5
.
Press the ST. / STP. button
4
to start the stopwatch.
Press the button again to stop the stopwatch.
The display
5
will indicate the time between start
and stop.
If you press the ST. / STP. button
4
again, the time will
continue to run again.
Press the RESET button
1
for 2 seconds to reset the
stopwatch display to 0 again.
Note: With time measurements longer than one hour,
the hours, minutes and seconds are indicated in the time
display.
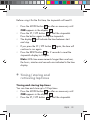
Timing / storing and
retrieving lap times
Timing and storing lap times
You can time and store up to 10 lap times.
Press the MODE button
2
as often as necessary until
CHR appears in the display
5
.
Press the ST. / STP. button
4
to start the stopwatch.

20 GB/IE
Press the RESET button
1
to time a lap. The lap number
will flash in the time display
10
and the lap time will be
indicated in the display
5
for about 10 seconds. After
that, the time will continue.
Press the RESET button
1
again to time another lap.
Press the ST. / STP. button
4
to stop the stopwatch.
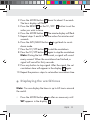
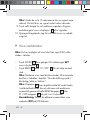
Retrieving lap times
Press the MODE button
2
as often as necessary until
CHR appears in the display
5
.
Press the MODE button
2
for 2 seconds in order to
retrieve the lap times. LAP flashes.
Use the RESET button
1
and the ST. / STP. button
4
to
select the lap times you want. The display
5
shows the
total stopped time as soon as the “
“ symbol appears.
Press the ALTI / BARO-button
3
again to get back to
stopwatch mode.
Press the RESET button
1
for 2 seconds to delete the
lap times.
Using the countdown counter
1. Press the MODE button
2
as often as necessary until
TMR appears in the display
5
.
Sidan laddas...
Sidan laddas...
Sidan laddas...
Sidan laddas...
Sidan laddas...
Sidan laddas...
Sidan laddas...
Sidan laddas...
Sidan laddas...
Sidan laddas...
Sidan laddas...
Sidan laddas...
Sidan laddas...
Sidan laddas...
Sidan laddas...
Sidan laddas...
Sidan laddas...
Sidan laddas...
Sidan laddas...
Sidan laddas...
Sidan laddas...
Sidan laddas...
Sidan laddas...
Sidan laddas...
Sidan laddas...
Sidan laddas...
Sidan laddas...
Sidan laddas...
Sidan laddas...
Sidan laddas...
Sidan laddas...
Sidan laddas...
Sidan laddas...
Sidan laddas...
Sidan laddas...
Sidan laddas...
Sidan laddas...
Sidan laddas...
Sidan laddas...
Sidan laddas...
Sidan laddas...
Sidan laddas...
Sidan laddas...
Sidan laddas...
Sidan laddas...
Sidan laddas...
Sidan laddas...
Sidan laddas...
Sidan laddas...
Sidan laddas...
Sidan laddas...
Sidan laddas...
Sidan laddas...
Sidan laddas...
Sidan laddas...
Sidan laddas...
Sidan laddas...
Sidan laddas...
Sidan laddas...
Sidan laddas...
Sidan laddas...
Sidan laddas...
Sidan laddas...
Sidan laddas...
Sidan laddas...
Sidan laddas...
Sidan laddas...
Sidan laddas...
Sidan laddas...
Sidan laddas...
Sidan laddas...
Sidan laddas...
Sidan laddas...
Sidan laddas...
Sidan laddas...
Sidan laddas...
Sidan laddas...
Sidan laddas...
Sidan laddas...
Sidan laddas...
Sidan laddas...
Sidan laddas...
Sidan laddas...
Sidan laddas...
Sidan laddas...
Sidan laddas...
Sidan laddas...
Sidan laddas...
Sidan laddas...
Sidan laddas...
Sidan laddas...
Sidan laddas...
Sidan laddas...
Sidan laddas...
Sidan laddas...
Sidan laddas...
Sidan laddas...
Sidan laddas...
Sidan laddas...
Sidan laddas...
Sidan laddas...
Sidan laddas...
Sidan laddas...
Sidan laddas...
Sidan laddas...
Sidan laddas...
Sidan laddas...
Sidan laddas...
Sidan laddas...
Sidan laddas...
Sidan laddas...
Sidan laddas...
Sidan laddas...
Sidan laddas...
Sidan laddas...
Sidan laddas...
Sidan laddas...
Sidan laddas...
Sidan laddas...
Sidan laddas...
Sidan laddas...
Sidan laddas...
Sidan laddas...
Sidan laddas...
Sidan laddas...
Sidan laddas...
Sidan laddas...
Sidan laddas...
Sidan laddas...
Sidan laddas...
Sidan laddas...
Sidan laddas...
-
 1
1
-
 2
2
-
 3
3
-
 4
4
-
 5
5
-
 6
6
-
 7
7
-
 8
8
-
 9
9
-
 10
10
-
 11
11
-
 12
12
-
 13
13
-
 14
14
-
 15
15
-
 16
16
-
 17
17
-
 18
18
-
 19
19
-
 20
20
-
 21
21
-
 22
22
-
 23
23
-
 24
24
-
 25
25
-
 26
26
-
 27
27
-
 28
28
-
 29
29
-
 30
30
-
 31
31
-
 32
32
-
 33
33
-
 34
34
-
 35
35
-
 36
36
-
 37
37
-
 38
38
-
 39
39
-
 40
40
-
 41
41
-
 42
42
-
 43
43
-
 44
44
-
 45
45
-
 46
46
-
 47
47
-
 48
48
-
 49
49
-
 50
50
-
 51
51
-
 52
52
-
 53
53
-
 54
54
-
 55
55
-
 56
56
-
 57
57
-
 58
58
-
 59
59
-
 60
60
-
 61
61
-
 62
62
-
 63
63
-
 64
64
-
 65
65
-
 66
66
-
 67
67
-
 68
68
-
 69
69
-
 70
70
-
 71
71
-
 72
72
-
 73
73
-
 74
74
-
 75
75
-
 76
76
-
 77
77
-
 78
78
-
 79
79
-
 80
80
-
 81
81
-
 82
82
-
 83
83
-
 84
84
-
 85
85
-
 86
86
-
 87
87
-
 88
88
-
 89
89
-
 90
90
-
 91
91
-
 92
92
-
 93
93
-
 94
94
-
 95
95
-
 96
96
-
 97
97
-
 98
98
-
 99
99
-
 100
100
-
 101
101
-
 102
102
-
 103
103
-
 104
104
-
 105
105
-
 106
106
-
 107
107
-
 108
108
-
 109
109
-
 110
110
-
 111
111
-
 112
112
-
 113
113
-
 114
114
-
 115
115
-
 116
116
-
 117
117
-
 118
118
-
 119
119
-
 120
120
-
 121
121
-
 122
122
-
 123
123
-
 124
124
-
 125
125
-
 126
126
-
 127
127
-
 128
128
-
 129
129
-
 130
130
-
 131
131
-
 132
132
-
 133
133
-
 134
134
-
 135
135
-
 136
136
-
 137
137
-
 138
138
-
 139
139
-
 140
140
-
 141
141
-
 142
142
-
 143
143
-
 144
144
-
 145
145
-
 146
146
-
 147
147
-
 148
148
-
 149
149
-
 150
150
-
 151
151
-
 152
152


Auriol Z29592 Bruksanvisning
- Typ
- Bruksanvisning
- Denna manual är också lämplig för
på andra språk
- Deutsch: Auriol Z29592 Bedienungsanleitung
- English: Auriol Z29592 Owner's manual
- dansk: Auriol Z29592 Brugervejledning
- suomi: Auriol Z29592 Omistajan opas
Relaterade papper
Andra dokument
-
Suunto Observer Bruksanvisning
-
Suunto Altimax Bruksanvisning
-
 Oregon Scientific RA282 Användarmanual
-
Suunto S6 Användarmanual
-
Suunto METRON Bruksanvisning
-
 Oregon Scientific EB833 Användarmanual
-
Nexus K0382 Användarmanual
-
Sony ICF-SW07 Bruksanvisning
-
Tesla CCS COMBO 2 ADAPTER Bruksanvisning
-
 Symmetry Surgical SW-5-12-R Bruksanvisningar


