Sony XAV-1550D Bruksanvisning

Typ
Bruksanvisning
XAV-1550D
5-013-447-11(1)
AV RECEIVER
Operating Instructions
GB
Mode d’emploi
FR
Bedienungsanleitung
DE
Manual de instrucciones
ES
Gebruiksaanwijzing
NL
Bruksanvisning
SE
To cancel the demonstration (Demo) display, see page 6.
For the connection/installation, see page 10.
To use smartphones with “WebLink Apps” installed, visit the Help
Guide on the back cover.
Pour annuler la démonstration (Démo), reportez-vous à la
page 6.
Pour le raccordement/l’installation, reportez-vous à la page 10.
Pour utiliser des smartphones sur lesquels « WebLink Apps » est
installé, visitez le Guide daide au dos de la couverture.
Zum Deaktivieren der Demo-Anzeige (Demo) schlagen Sie bitte
auf Seite 6 nach.
Informationen zum Anschluss und zur Installation finden Sie auf
Seite 10.
Informationen zum Verwenden von Smartphones, auf denen WebLink
Apps“ installiert sind, finden Sie in der Hilfe auf der hinteren Umschlagseite.
Para cancelar la pantalla de demostración (Demostración),
consulte la página 6.
Para la conexión/instalación, consulte la página 10.
Para utilizar teléfonos inteligentes con “WebLink Apps” instalado,
visite la Guía de ayuda que aparece en la contraportada.
Om de demonstratie (Demo) te annuleren, zie pagina 7.
Raadpleeg pagina 10 voor meer informatie over de Verbinding/
installatie.
Voor het gebruik van smartphones waarop "WebLink Apps" geïnstalleerd
is, raadpleegt u de Helpgids die op de achterkant wordt vermeld.
Se sidan 6 för att avbryta demonstrationsvisningen (Demo).
Se sidan 10 för anslutning/installation.
För att använda smarttelefoner som har ”WebLink Apps” installerat,
se Hjälpguiden på det bakre omslaget.
2GB
Warning
The nameplate indicating operating voltage, etc., is
located on the bottom of the chassis.
The validity of the CE marking is restricted to only
those countries where it is legally enforced, mainly
in the countries EEA (European Economic Area) and
Switzerland.
WARNING
To prevent fire or shock hazard, do not
expose the unit to rain or moisture.
To avoid electrical shock, do not open the
cabinet. Refer servicing to qualified personnel
only.
Made in Thailand
Hereby, Sony Corporation declares that this
equipment is in compliance with Directive 2014/53/
EU.
The full text of the EU declaration of conformity is
available at the following internet address:
http://www.compliance.sony.de/
Notice for customers: the following
information is only applicable to equipment
sold in countries applying EU Directives
This product has been manufactured by or on
behalf of Sony Corporation.
EU Importer: Sony Europe B.V.
Inquiries to the EU Importer or related to product
compliance in Europe should be sent to the
manufacturer’s authorized representative, Sony
Belgium, bijkantoor van Sony Europe B.V., Da
Vincilaan 7-D1, 1930 Zaventem, Belgium.
Disposal of waste batteries and
electrical and electronic equipment
(applicable in the European Union
and other countries with separate
collection systems)
This symbol on the product, the battery or on the
packaging indicates that the product and the
battery shall not be treated as household waste.
On certain batteries this symbol might be used in
combination with a chemical symbol. The chemical
symbol for lead (Pb) is added if the battery contains
more than 0.004% lead.
By ensuring that these products and batteries are
disposed of correctly, you will help to prevent
potentially negative consequences for the
environment and human health which could be
caused by inappropriate waste handling. The
recycling of the materials will help to conserve
natural resources.
In case of products that for safety, performance or
data integrity reasons require a permanent
connection with an incorporated battery, this
battery should be replaced by qualified service staff
only.
To ensure that the battery and the electrical and
electronic equipment will be treated properly, hand
over these products at end-of-life to the
appropriate collection point for the recycling of
electrical and electronic equipment.
For all other batteries, please view the section on
how to remove the battery from the product safely.
Hand the battery over to the appropriate collection
point for the recycling of waste batteries.
For more detailed information about recycling of
this product or battery, please contact your local
Civic Office, your household waste disposal service
or the shop where you purchased the product or
battery.
Disclaimer regarding services offered by third
parties
Services offered by third parties may be changed,
suspended, or terminated without prior notice.
Sony does not bear any responsibility in these sorts
of situations.
For safety, be sure to install this unit in the
dashboard of the car as the rear side of the unit
becomes hot during use.
For details, see “Connection/Installation”
(page 10).
Warning if your car’s ignition has no ACC
position
Do not install this unit in a car that has no ACC
position. The display of the unit does not turn off
even after turning the ignition off, and this
causes battery drain.
3GB
Caution
IN NO EVENT SHALL SONY BE LIABLE FOR ANY
INCIDENTAL, INDIRECT OR CONSEQUENTIAL
DAMAGES OR OTHER DAMAGES INCLUDING,
WITHOUT LIMITATION, LOSS OF PROFITS, LOSS OF
REVENUE, LOSS OF DATA, LOSS OF USE OF THE
PRODUCT OR ANY ASSOCIATED EQUIPMENT,
DOWNTIME, AND PURCHASER’S TIME RELATED TO
OR ARISING OUT OF THE USE OF THIS PRODUCT, ITS
HARDWARE AND/OR ITS SOFTWARE.
Dear customer, this product includes a radio
transmitter.
According to UNECE Regulation no. 10, a vehicle
manufacturers may impose specific conditions for
installation of radio transmitters into vehicles.
Please check your vehicle operation manual or
contact the manufacturer of your vehicle or your
vehicle dealer, before you install this product into
your vehicle.
Emergency calls
This BLUETOOTH car handsfree and the electronic
device connected to the handsfree operate using
radio signals, cellular, and landline networks as well
as user-programmed function, which cannot
guarantee connection under all conditions.
Therefore do not rely solely upon any electronic
device for essential communications (such as
medical emergencies).
On BLUETOOTH communication
Microwaves emitting from a BLUETOOTH device
may affect the operation of electronic medical
devices. Turn off this unit and other BLUETOOTH
devices in the following locations, as it may cause
an accident.
where inflammable gas is present, in a hospital,
train, airplane, or petrol station
near automatic doors or a fire alarm
This unit supports security capabilities that
comply with the BLUETOOTH standard to provide
a secure connection when the BLUETOOTH
wireless technology is used, but security may not
be enough depending on the setting. Be careful
when communicating using BLUETOOTH wireless
technology.
We do not take any responsibility for the leakage
of information during BLUETOOTH
communication.
If you have any questions or problems concerning
your unit that are not covered in this manual,
consult your nearest Sony dealer.
Important notice
4GB
Main Unit
Display/touch screen
HOME
Press to display the HOME screen (page 5).
ATT (attenuate)
Press and hold for 1 second to attenuate the
sound.
To cancel, press and hold again, or rotate the
volume control dial.
Volume control dial
Rotate to adjust the volume when the sound is
output.
OPTION
Press to display the OPTION screen (page 5).
USB port
AUX input jack
Guide to Parts and Controls
5GB
Screen displays
Playback screen:
HOME screen:
OPTION screen:
Status indication
(source option)
Opens the source option menu. The available
items differ depending on the source.
Application specific area
Displays playback controls/indications or show
the unit’s status. Displayed items differ
depending on the source.
Clock
Displays the time which are set on the
Date/Time setting.
(return to the playback screen)
Switches from the HOME screen to the playback
screen.
Sources and Settings select keys
Changes the source or make various settings.
Flick to select the setting icon and other icons.
Touch the source icon you want to select.
Lights up when the sound is attenuated.
Lights up when AF (Alternative
Frequencies) is available.
Lights up when the current traffic
information (TA: Traffic Announcement)
is available.
Lights up when a DAB announcement is
available.
Indicates the signal strength status of
the DAB radio.
Lights up when the Bluetooth® signal is
on. Flashes when the connection is in
progress.
Lights up when the audio device is
playable by enabling the A2DP
(Advanced Audio Distribution Profile).
Lights up when handsfree calling is
available by enabling the HFP (Handsfree
Profile).
Indicates the signal strength status of
the connected mobile phone.
Indicates the remaining battery status of
the connected mobile phone.
Radio DAB+ BT Audio
Phone USB WebLink
AUX
Rear
Camera
Settings
6GB
Sound select keys
Changes the sound.
 (standby)
Turns the unit in standby mode (USB charging is
still available). To resume, press any buttons.
(monitor off)
Turns off the monitor. When the monitor is
turned off, touch any part of the display to turn it
back on.
(EXTRA BASS)
Changes the EXTRA BASS setting.
(EQ10/Subwoofer)
Changes the EQ10/Subwoofer setting.
Pairing with a BLUETOOTH Device
When connecting a BLUETOOTH device for the first
time, mutual registration (called “pairing”) is
required. Pairing enables this unit and other devices
to recognize each other.
1 Press HOME, then touch [Settings]
[Bluetooth] [Bluetooth Connection] [ON]
[Pairing].
flashes while the unit is in pairing standby
mode.
2 Perform pairing on the BLUETOOTH device
so it detects this unit.
3 Select your model name shown on the
display of the BLUETOOTH device*.
When pairing is made, stays lit.
* If passkey input is required on the BLUETOOTH device,
input [0000].
Connecting Rear View Camera
By connecting the optional rear view camera to the
CAMERA IN terminal, you can display the picture
from the rear view camera. For details, see
“Connection/Installation” (page 10).
To display the picture from the rear view
camera
Press HOME, then touch [Rear Camera].
Canceling the Demonstration
Mode
1 Press HOME, then touch [Settings].
2 Touch [General], then touch [Demo] to set to
[OFF].
3 To exit the setup menu, touch (back)
twice.
Updating the Firmware
To update the firmware, visit the support site on the
back cover, then follow the online instructions.
Note
During the update, do not remove the USB device.
Basic Operations
7GB
Precautions
Power antenna (aerial) extends automatically.
When you transfer ownership or dispose of your
car with the unit installed, initialize all the settings
to the factory settings by performing the factory
reset.
Do not splash liquid onto the unit.
Notes on safety
Comply with your local traffic rules, laws, and
regulations.
While driving
Do not watch or operate the unit, as it may lead
to distraction and cause an accident. Park your
car in a safe place to watch or operate the unit.
Do not use the setup feature or any other
function which could divert your attention from
the road.
When backing up your car, be sure to look back
and watch the surroundings carefully for your
safety even if the rear view camera is connected.
Do not depend on the rear view camera
exclusively.
While operating
Do not insert your hands, fingers, or foreign
objects into the unit as it may cause injury or
damage to the unit.
Keep small articles out of the reach of children.
Be sure to fasten seatbelts to avoid injury in the
event of sudden movement of the car.
Notes on LCD panel
Do not get the LCD
panel wet or expose it
to liquids. This may
cause a malfunction.
•Do not press down
hard on the LCD panel
as doing so can distort
the picture or cause a
malfunction (i.e., the
picture may become
unclear or the LCD
panel may be damaged).
Do not touch the panel with objects other than
with your finger as it may damage or break the
LCD panel.
Clean the LCD panel with a dry soft cloth. Do not
use solvents such as benzine, thinner,
commercially available cleaners, or antistatic
spray.
Do not use the unit outside the temperature range
0 ºC to 40 ºC (32 ºF to 104 ºF).
If your car was parked in a cold or hot place, the
picture may not be clear. However, the monitor is
not damaged and the picture will become clear
after the temperature in your car becomes normal.
Some stationary blue, red, or green dots may
appear on the monitor. These are called “bright
spots” and can happen with any LCD. The LCD
panel is precision-manufactured with more than
99.99% of its segments functional. However, it is
possible that a small percentage (typically 0.01%)
of the segments may not light up properly. This
will not, however, interfere with your viewing.
Notes on the touch screen
This unit uses a resistive touch screen. Touch the
screen directly with your fingertip.
Multi-touch operation is not supported on this
unit.
Do not touch the screen with sharp objects such
as a needle, pen, or fingernail. Operation with a
stylus is not supported on this unit.
Do not let any objects contact the touch screen. If
the screen is touched by an object other than your
fingertip, the unit may not respond correctly.
Since glass material is used for the screen, do not
subject the unit to strong shock. If cracking or
chipping occurs on the screen, do not touch the
damaged part as it may cause injury.
Keep other electrical devices away from the touch
screen. They may cause the touch screen to
malfunction.
Additional Information
Preventing an accident
Pictures appear only after you park the car and
set the parking brake.
If the car starts moving during video playback,
the following caution is displayed and you
cannot watch the video.
[Video blocked for your safety.]
Do not operate the unit or watch the monitor
while driving.
8GB
Compatible iPhone models:
iPhone XS Max, iPhone XS, iPhone XR, iPhone X,
iPhone 8 Plus, iPhone 8, iPhone 7 Plus, iPhone 7,
iPhone SE, iPhone 6s Plus, iPhone 6s, iPhone 6 Plus,
iPhone 6, iPhone 5s
• Use of the Made for Apple badge means that an accessory
has been designed to connect specifically to the Apple
product(s) identified in the badge, and has been certified
by the developer to meet Apple performance standards.
Apple is not responsible for the operation of this device or
its compliance with safety and regulatory standards.
Please note that the use of this accessory with an Apple
product may affect wireless performance.
This product contains software that Sony uses under a
licensing agreement with the owner of its copyright. We are
obligated to announce the contents of the agreement to
customers under requirement by the owner of copyright for
the software.
For details on software licenses, select [Settings] [General]
[Open Source Licenses].
Notice on GNU GPL/LGPL applied software
This product contains software that is subject to the
following GNU General Public License (hereinafter referred
to as “GPL”) or GNU Lesser General Public License
(hereinafter referred to as “LGPL). These establish that
customers have the right to acquire, modify, and
redistribute the source code of said software in accordance
with the terms of the GPL or LGPL displayed on this unit.
The source code for the above-listed software is available
on the Web.
To download, please access the following URL then select
the model name “XAV-1550D.
URL: http://www.sony.net/Products/Linux/
Please note that Sony cannot answer or respond to any
inquiries regarding the content of the source code.
If you have any questions or problems concerning your unit
that are not covered in this Operating Instructions, consult
your nearest Sony dealer.
Specifications
Monitor section
Display type: Wide LCD color monitor
Dimensions: 6.2 in/157 mm
System: TFT active matrix
Number of pixels:
1,152,000 pixels (800 × 3 (RGB) × 480)
Color system:
PAL/NTSC automatic select for CAMERA IN
terminal
Radio section
DAB/DAB+
Tuning range: 174.928 MHz – 239.200 MHz
Antenna (aerial) terminal:
External antenna (aerial) connector
FM
Tuning range: 87.5 MHz – 108.0 MHz
Usable sensitivity: 7 dBf
Signal-to-noise ratio: 70 dB (mono)
Separation at 1 kHz: 45 dB
AM
Tuning range: 531 kHz – 1,602 kHz
Sensitivity: 32 µV
USB player section
Interface: USB port (Hi-speed)
Maximum current: 1.5 A
Wireless communication
Communication System:
BLUETOOTH Standard version 3.0
Output:
BLUETOOTH Standard Power Class 2
(Max. Conducted +1 dBm)
Maximum communication range*
1
:
Line of sight approx. 10 m (33 ft)
Frequency band:
2.4 GHz band (2.4000 GHz – 2.4835 GHz)
Modulation method: FHSS
Compatible BLUETOOTH Profiles*
2
:
A2DP (Advanced Audio Distribution Profile) 1.3
AVRCP (Audio Video Remote Control Profile) 1.3
HFP (Handsfree Profile) 1.6
PBAP (Phone Book Access Profile) 1.1
Corresponding codec: SBC, AAC
*1 The actual range will vary depending on factors such as
obstacles between devices, magnetic fields around a
microwave oven, static electricity, reception sensitivity,
antenna (aerial)’s performance, operating system,
software application, etc.
*2 BLUETOOTH standard profiles indicate the purpose of
BLUETOOTH communication between devices.
About iPhone
Notice on license
9GB
Power amplifier section
Outputs: Speaker outputs
Speaker impedance: 4  – 8 
Maximum power output: 55 W × 4 (at 4 )
General
Power requirements: 12 V DC car battery
(negative ground (earth))
Rated current consumption: 10 A
Dimensions:
Approx. 178 mm × 100 mm × 133 mm
(7
1
/8 in × 4 in × 5
1
/4 in) (w/h/d)
Mounting dimensions:
Approx. 182 mm × 111 mm × 120 mm
(7
1
/4 in × 4
3
/8 in × 4
3
/4 in) (w/h/d)
Mass: Approx. 0.9 kg (1 lb 16 oz)
Package contents:
Main unit (1)
Parts for installation and connections (1 set)
Ask the dealer for detailed information.
Design and specifications are subject to change
without notice.
The Bluetooth® word mark and logos are registered
trademarks owned by the Bluetooth SIG, Inc. and any use of
such marks by Sony Corporation is under license. Other
trademarks and trade names are those of their respective
owners.
Windows Media is either a registered trademark or
trademark of Microsoft Corporation in the United States
and/or other countries.
This product is protected by certain intellectual property
rights of Microsoft Corporation. Use or distribution of such
technology outside of this product is prohibited without a
license from Microsoft or an authorized Microsoft subsidiary.
Apple and iPhone are trademarks of Apple Inc., registered in
the U.S. and other countries.
WebLink is a registered trademark of Abalta Technologies,
Inc. in the U.S. and a trademark in the other countries.
All other trademarks are trademarks of their respective
owners.
Copyrights
10GB
Cautions
Do not install this unit in a car that has no ACC
position. The display of the unit does not turn off
even after turning the ignition off, and this causes
battery drain.
Run all ground (earth) leads to a common
ground (earth) point.
Do not get the leads trapped under a screw or
caught in moving parts (e.g., seat railing).
Before making connections, turn the car ignition
off to avoid short circuits.
Connect the power supply leads to the unit and
speakers before connecting it to the auxiliary
power connector.
Be sure to insulate any loose unconnected leads
with electrical tape for safety.
Choose the installation location carefully so that
the unit will not interfere with normal driving
operations.
Avoid installing the unit in areas subject to dust,
dirt, excessive vibration, or high temperature, such
as in direct sunlight or near heater ducts.
Use only the supplied mounting hardware for a
safe and secure installation.
Note on the power supply lead (yellow)
When connecting this unit in combination with other stereo
components, the amperage rating of the car circuit to which
the unit is connected must be higher than the sum of each
component’s fuse amperage rating.
Note on installing in cars with a start-stop system
The unit may restart when starting the engine from start-
stop. In this case, turn off the start-stop system of your car.
Note on installing in cars with electric parking brake
system
For cars with electric parking brakes, some related functions
(such as video blocking function) may not work properly.
Mounting angle adjustment
Adjust the mounting angle to less than 30°.
Parts List for Installation
This parts list does not include all the package
contents.
The mounting sleeve is attached to the unit
before shipping. Before mounting the unit, use
the release keys to remove the mounting
sleeve from the unit. For details, see “Removing
the mounting sleeve” (page 14).
Keep the release keys for future use as they are
also necessary if you remove the unit from your
car.
Connection/Installation
Power supply leads (1) Mounting screws
(5 × max. 9 mm
(
7
/32 × max.
3
/8 in)) (4)
Microphone (1) Flat-mount base (1)
Double-sided tape (1) Mounting sleeve (1)
Trim ring (1) Release keys (2)
11GB
Connection
*
3
*
3
*
3
Subwoofer*
1
Power amplifier*
1
from a wired remote control (not
supplied)
*4
*
6
*
7
from a car antenna (aerial)*
5
Rear view
camera*
1
*
3
Light green
Purple/white striped
For details, see “Making
connections” (page 12).
See “Power connection diagram”
(page 12) for details.
*
2
from DAB antenna (aerial)
(not supplied)*
8
12GB
*1 Not supplied
*2 Speaker impedance: 4  to 8  × 4
*3 RCA pin cord (not supplied)
*4 Depending on the type of car, use an adaptor for a wired
remote control (not supplied).
For details on using the wired remote control, see “Using
the wired remote control” (page 13).
*5 Depending on the type of car, use an adaptor (not
supplied) if the antenna (aerial) connector does not fit.
*6 Whether in use or not, route the microphone input cord
so it does not interfere with driving operations. Secure
the cord with a clamp, etc., if it is installed around your
feet.
*7 For details on installing the microphone, see “Installing
the microphone” (page 13).
*8 Set [Antenna Power] to [ON] (default) or [OFF] depending
on the type of DAB antenna (aerial) (not supplied).
Max. supply current 0.1 A
If you have a power antenna (aerial) without a relay
box, connecting this unit with the power supply
leads may damage the antenna (aerial).
To the car’s speaker connector
To the car’s power connector
To the parking brake switch lead
The mounting position of the parking brake
switch lead depends on your car.
Be sure to connect the parking brake lead (light
green) of the power supply leads to the
parking brake switch lead.
To the +12 V power terminal of the car’s rear
lamp lead (only when connecting the rear
view camera)
Memory hold connection
When the yellow power supply lead is connected,
power will always be supplied to the memory
circuit even when the ignition switch is turned off.
Speaker connection
Before connecting the speakers, turn the unit off.
Use speakers with an impedance of 4 to 8 and
with adequate power handling capacities to avoid
damage.
Check your car’s auxiliary power connector and
match the connections of leads correctly
depending on the car.
Common connection
Making connections
1
Rear speaker
(right)
Purple
2
Purple/black
striped
3
Front speaker
(right)
Gray
4
Gray/black striped
5
Front speaker
(left)
White
6
White/black
striped
7
Rear speaker
(left)
Green
8
Green/black
striped
12
continuous power
supply
Yellow
13
power antenna (aerial) /
power amplifier control
(REM OUT)
Blue/white striped
14
switched illumination
power supply
Orange/white
striped
15 switched power supply Red
16 ground (earth) Black
Power connection diagram
12
continuous power
supply
Yellow
15 switched power supply Red
Parking brake switch lead
Hand brake type Foot brake type
Auxiliary power connector
Red Red
Yellow Yellow
13GB
When the positions of the red and yellow
leads are inverted
For cars without ACC position
After matching the connections and switching
power supply leads correctly, connect the unit to
the car’s power supply. If you have any questions
and problems connecting your unit that are not
covered in this manual, consult the car dealer.
To capture your voice during handsfree calling, you
need to install the microphone .
Cautions
It is extremely dangerous if the cord becomes
wound around the steering column or gearstick.
Be sure to keep it and other parts from interfering
with your driving operations.
If airbags or any other shock-absorbing
equipment are in your car, contact the store where
you purchased this unit or the car dealer before
installation.
Notes
• When mounting on the dashboard, remove the visor clip
carefully from the microphone , then attach the flat-
mount base to the microphone .
• Before attaching the double-sided tape , clean the
surface of the dashboard with a dry cloth.
1 To enable the wired remote control, set
[Steering Control] in [General] to [Preset].
Installation of the rear view camera (not supplied) is
required before use.
The picture from a rear view camera connected to
the CAMERA IN terminal is displayed when:
the back lamp of your car lights up (or the shift
lever is set to the R (reverse) position).
you press HOME, then touch [Rear Camera].
12 switched power supply Yellow
15
continuous power
supply
Red
Installing the microphone
Red Red
Yellow Yellow
Red
Red
Ye l l ow
Yellow
Clip (not supplied)
Using the wired remote control
Using the rear view camera
14GB
Installation
Before installing the unit, remove the mounting
sleeve from the unit.
1 Insert both release keys until they click,
and pull down the mounting sleeve , then
pull up the unit to separate.
Before installing, make sure the catches on both
sides of the mounting sleeve are bent inwards
3.5 mm (
5
/32 in).
For Japanese cars, see “Mounting the unit in a
Japanese car” (page 14).
1 Position the mounting sleeve inside the
dashboard, then bend the claws outward
for a tight fit.
2 Mount the unit onto the mounting sleeve
.
Notes
• If the catches are straight or bent outwards, the unit will
not be installed securely and may spring out.
• Make sure the 4 catches on the trim ring are properly
engaged in the slots of the mounting sleeve .
Mounting the unit in a Japanese car
You may not be able to install this unit in some
Japanese cars. In such a case, consult your Sony
dealer.
When mounting this unit to the preinstalled
brackets of your car, use the mounting screws in
the appropriate screw holes based on your car:
T for TOYOTA and N for NISSAN.
Note
To prevent a malfunction, install only with the mounting
screws .
Removing the mounting sleeve
Mounting the unit in the dashboard
Face the hook inwards.
Catch
Larger than
182 mm (7
1
/4 in)
Larger than
111 mm (4
3
/8 in)
To the dashboard/center console
Parts supplied with
your car
Bracket
Bracket
15GB
When replacing the fuse, be sure to
use one matching the amperage
rating stated on the original fuse.
If the fuse blows, check the power
connection and replace the fuse.
If the fuse blows again after
replacement, there may be an
internal malfunction. In such a case, consult your
nearest Sony dealer.
Fuse replacement
Fuse (10 A)
2FR
Avertissement
La plaque signalétique reprenant la tension
d’alimentation, etc. se trouve sur le dessous du
châssis.
La validité du libellé CE se limite uniquement aux
pays la loi l’impose, principalement les pays de
l’EEE (Espace économique européen) et la Suisse.
AVERTISSEMENT
Pour éviter les risques d’incendie et de choc,
n’exposez pas l’appareil à la pluie ou à
l’humidité.
Pour éviter les chocs électriques, n’ouvrez pas
le boîtier. Confiez les réparations à du
personnel qualifié uniquement.
Fabriqué en Thlande
Le soussigné, Sony Corporation, déclare que cet
équipement est conforme à la Directive 2014/53/
UE.
Le texte complet de la déclaration UE de conformité
est disponible à l’adresse internet suivante :
http://www.compliance.sony.de/
Avis à l’attention des clients : les informations
suivantes s’appliquent uniquement aux
appareils vendus dans des pays qui
appliquent les directives de l’Union
Européenne
Ce produit a été fabriqué par ou pour le compte de
Sony Corporation.
Importateur dans l’UE : Sony Europe B.V.
Les questions basées sur la législation européenne
pour l’importateur ou relatives à la conformité des
produits doivent être adressées au mandataire :
Sony Belgium, bijkantoor van Sony Europe B.V., Da
Vincilaan 7-D1, 1930 Zaventem, Belgique.
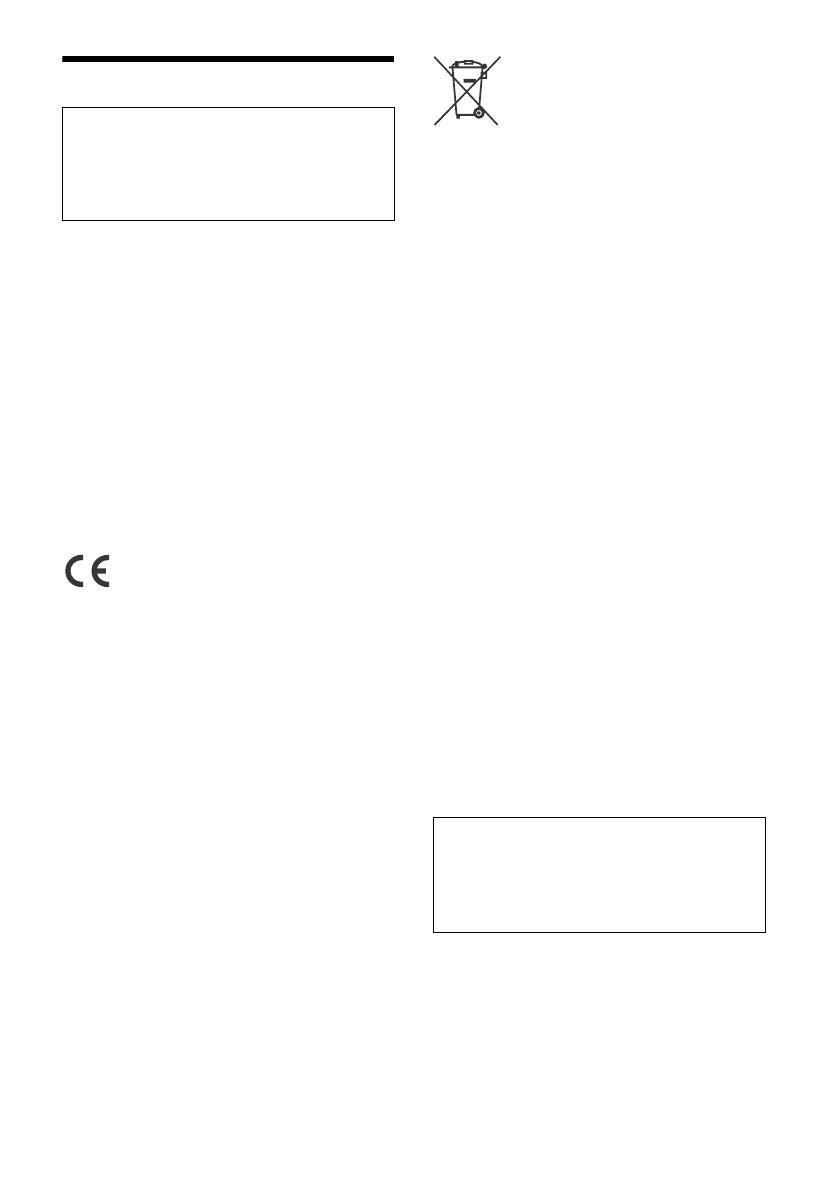
Elimination des piles et
accumulateurs et des
équipements électriques et
électroniques usagés (applicable
dans les pays de l’Union
Européenne et dans les autres pays disposant
de systèmes de collecte sélective)
Ce symbole apposé sur le produit, la pile ou
l’accumulateur, ou sur l’emballage, indique que le
produit et les piles et accumulateurs fournis avec ce
produit ne doivent pas être traités comme de
simples déchets ménagers. Sur certains types de
piles, ce symbole apparaît parfois combiné avec un
symbole chimique. Le symbole pour le plomb (Pb)
est rajouté lorsque ces piles contiennent plus de
0,004 % de plomb. En vous assurant que les
produits, piles et accumulateurs sont mis au rebut
de façon appropriée, vous participez activement à
la prévention des conséquences négatives que leur
mauvais traitement pourrait provoquer sur
l’environnement et sur la santé humaine. Le
recyclage des matériaux contribue par ailleurs à la
préservation des ressources naturelles. Pour les
produits qui, pour des raisons de sécurité, de
performance ou d’intégrité des données,
nécessitent une connexion permanente à une pile
ou à un accumulateur intégré(e), il conviendra de
vous rapprocher d’un Service Technique qualifié
pour effectuer son remplacement. En rapportant
votre appareil électrique, les piles et accumulateurs
en fin de vie à un point de collecte approprié vous
vous assurez que le produit, la pile ou
l’accumulateur intégré sera traité correctement.
Pour tous les autres cas de figure et afin d’enlever
les piles ou accumulateurs en toute sécurité de
votre appareil, reportez-vous au manuel
d’utilisation. Rapportez les piles et accumulateurs,
et les équipements électriques et électroniques
usagés au point de collecte approprié pour le
recyclage. Pour toute information complémentaire
au sujet du recyclage de ce produit ou des piles et
accumulateurs, vous pouvez contacter votre
municipalité, votre déchetterie locale ou le point de
vente où vous avez acheté ce produit.
Avis dexclusion de responsabilité relatif aux
services proposés par des tiers
Les services proposés par des tiers peuvent être
modifiés, suspendus ou clôturés sans avis
préalable. Sony n’assume aucune responsabilité
dans ce genre de situation.
Pour votre sécurité, veuillez installer cet appareil
dans le tableau de bord de la voiture en tenant
compte du fait que l’arrière de l’appareil chauffe
en cours d’utilisation.
Pour de plus amples détails, reportez-vous à la
section « Raccordement/Installation » (page 10).
Avertissement si l’allumage de votre
véhicule ne possède pas de position ACC
N’installez pas cet appareil dans un véhicule qui
ne possède pas de position ACC. Laffichage de
l’appareil ne s’éteint pas même si le contact est
coupé, ce qui décharge la batterie.
3FR
Attention
SONY NE PEUT ÊTRE, EN AUCUN CAS, TENU POUR
RESPONSABLE D’UN QUELCONQUE DOMMAGE
ACCIDENTEL, INDIRECT OU ACCESSOIRE, OU DE
TOUT AUTRE DOMMAGE, Y COMPRIS, MAIS SANS
S’Y LIMITER, LA PERTE DE BÉNÉFICES, DE REVENUS,
DE DONNÉES, DE JOUISSANCE DU PRODUIT OU DE
TOUT ÉQUIPEMENT ASSOCIÉ, SON INDISPONIBILITÉ,
ET LE TEMPS PERDU PAR LACHETEUR, LIÉ À OU
RÉSULTANT DE L’UTILISATION DE CE PRODUIT, DE
SES COMPOSANTS MATÉRIELS ET/OU LOGICIELS.
Cher client, ce produit contient un émetteur radio.
Conformément au règlement UNECE n° 10, un
fabricant automobile peut imposer certaines
conditions particulières pour l’installation
d’émetteurs radio dans ses véhicules.
Veuillez vérifier le manuel d’utilisation de votre
véhicule ou contactez le constructeur de votre
véhicule ou votre concessionnaire, avant d’installer
ce produit dans votre véhicule.
Appels d’urgence
Le système BLUETOOTH mains libres embarqué et
le dispositif électronique qui y est connecté
fonctionnent grâce aux signaux radio, aux réseaux
cellulaires et aux lignes terrestres, tout comme la
fonction de programmation par l’utilisateur. La
connexion n’est donc pas garantie en toutes
circonstances.
Par conséquent, ne vous reposez pas uniquement
sur un dispositif électronique pour vos
communications importantes (tels que les appels
médicaux d’urgence).
Communication par BLUETOOTH
Les micro-ondes émises par un dispositif
BLUETOOTH peuvent perturber le fonctionnement
des dispositifs médicaux électroniques. Dans les
circonstances qui suivent, mettez cet appareil,
ainsi que les autres dispositifs BLUETOOTH
présents, hors tension, car ils peuvent provoquer
un accident.
En présence d’un gaz inflammable, dans un
hôpital, un train, un avion ou une station-service
À proximité de portes automatiques ou d’un
système de détection d’incendie
Cet appareil prend en charge les fonctionnalités
conformes à la norme BLUETOOTH afin de fournir
une connexion sécurisée lorsque la technologie
sans fil BLUETOOTH est utilisée. Mais, en fonction
de l’environnement, la sécurité peut ne pas être
suffisante. Soyez donc prudent lorsque vous
communiquez en utilisant la technologie sans fil
BLUETOOTH.
Nous n’assumons aucune responsabilité en cas
de fuite d’informations au cours d’une
communication BLUETOOTH.
Si vous avez des questions concernant cet appareil
ou si vous rencontrez des problèmes qui ne sont
pas abordés dans ce mode d’emploi, contactez
votre revendeur Sony le plus proche.
Remarque importante
4FR
Appareil principal
Affichage/écran tactile
HOME
Appuyez pour afficher l’écran HOME (page 5).
ATT (atténuer)
Maintenez enfoncé pendant 1 seconde pour
atténuer le son.
Pour annuler, maintenez enfoncé à nouveau ou
tournez la molette de réglage du volume.
Molette de réglage du volume
Tournez cette pour régler le niveau du volume
quand le son est reproduit.
OPTION
Appuyez pour afficher l’écran OPTION (page 5).
Port USB
Prise d’entrée AUX
Emplacement des commandes
5FR
Affichages à l’écran
Écran de lecture :
Écran HOME :
Écran OPTION :
Indications d’état
(option de source)
Ouvre le menu d’option de source. Les éléments
disponibles varient selon la source.
Zone spécifique à l’application
Affiche des commandes de lecture/indications
ou bien l’état de l’appareil. Les éléments affichés
varient selon la source.
Horloge
Affiche l’heure selon le réglage défini sous
Date/Heure.
(retour à l’écran de lecture)
Bascule entre l’écran HOME et l’écran de lecture.
Touches de sélection des sources et réglages
Permettent de changer de source ou d’effectuer
divers réglages.
Tapez et glissez pour sélectionner l’icône de
réglage et d’autres icônes.
Touchez l’icône de la source que vous souhaitez
sélectionner.
S’allume quand le son est atténué.
S’allume quand AF (fréquences
alternatives) est disponible.
S’allume quand les informations de trafic
actuel (TA : annonces routières) sont
disponibles.
S’allume quand une annonce DAB est
disponible.
Indique létat d’intensité du signal de la
radio DAB.
S’allume quand le signal Bluetooth® est
activé. Clignote quand la connexion est
en cours d’établissement.
S’allume lorsque le périphérique audio
est lisible en activant le profil A2DP
(Advanced Audio Distribution Profile,
profil de distribution audio avancée).
S’allume lorsqu’il est possible d’appeler
en mains libres en activant le profil HFP
(Handsfree Profile, profil mains libres).
Indique létat d’intensité du signal du
téléphone mobile connecté.
Indique l’état de charge restant de la
batterie du téléphone mobile connecté.
Radio DAB+ Audio BT
Téléphone USB WebLink
AUX Cam. recul Réglages
6FR
Touches de sélection du son
Modifie le son.
 (veille)
Bascule l’appareil en mode veille (la charge USB
reste disponible). Pour reprendre, appuyez sur
n’importe quelle touche.
(Monitor off)
Éteint le moniteur. Lorsque le moniteur est
éteint, touchez une partie quelconque de
l’affichage pour le rallumer.
(EXTRA BASS)
Permet de modifier le réglage EXTRA BASS.
(EQ10/Caiss. bas.)
Permet de modifier le réglage EQ10/Caiss. bas.
Pairage avec un périphérique
BLUETOOTH
Lorsque vous connectez l’appareil à un
périphérique BLUETOOTH pour la première fois, il
est nécessaire qu’ils se reconnaissent
mutuellement (c’est ce que l’on appelle le
« pairage »). Le pairage permet à l’appareil et à
d’autres périphériques de se reconnaître
mutuellement.
1 Appuyez sur HOME, puis touchez [Réglages]
[Bluetooth] [Connexion Bluetooth]
[ACTIVÉ] [Pairage].
clignote lorsque lappareil est en mode de
veille de pairage.
2 Procédez au pairage sur le périphérique
BLUETOOTH afin qu’il détecte cet appareil.
3 Sélectionnez le nom de votre modèle sur
l’affichage du périphérique BLUETOOTH*.
Une fois le pairage effectué, reste allumé.
* Si la saisie d’une clé d’authentification est requise sur
le périphérique BLUETOOTH, saisissez [0000].
Raccordement d’une caméra de
recul
En raccordant la caméra de recul en option à la
borne CAMERA IN, vous pouvez afficher l’image de
la caméra de recul. Pour plus d’informations,
reportez-vous à la section « Raccordement/
Installation » (page 10).
Pour afficher l’image de la caméra de recul
Appuyez sur HOME, puis touchez [Cam. recul].
Désactivation du mode de
démonstration
1 Appuyez sur HOME, puis touchez
[Réglages].
2 Touchez [Général], puis [Démo] pour le
régler sur [DÉSACTIVÉ].
3 Pour quitter le menu de configuration,
touchez deux fois (retour).
Opérations de base
  • Page 1 1
  • Page 2 2
  • Page 3 3
  • Page 4 4
  • Page 5 5
  • Page 6 6
  • Page 7 7
  • Page 8 8
  • Page 9 9
  • Page 10 10
  • Page 11 11
  • Page 12 12
  • Page 13 13
  • Page 14 14
  • Page 15 15
  • Page 16 16
  • Page 17 17
  • Page 18 18
  • Page 19 19
  • Page 20 20
  • Page 21 21
  • Page 22 22
  • Page 23 23
  • Page 24 24
  • Page 25 25
  • Page 26 26
  • Page 27 27
  • Page 28 28
  • Page 29 29
  • Page 30 30
  • Page 31 31
  • Page 32 32
  • Page 33 33
  • Page 34 34
  • Page 35 35
  • Page 36 36
  • Page 37 37
  • Page 38 38
  • Page 39 39
  • Page 40 40
  • Page 41 41
  • Page 42 42
  • Page 43 43
  • Page 44 44
  • Page 45 45
  • Page 46 46
  • Page 47 47
  • Page 48 48
  • Page 49 49
  • Page 50 50
  • Page 51 51
  • Page 52 52
  • Page 53 53
  • Page 54 54
  • Page 55 55
  • Page 56 56
  • Page 57 57
  • Page 58 58
  • Page 59 59
  • Page 60 60
  • Page 61 61
  • Page 62 62
  • Page 63 63
  • Page 64 64
  • Page 65 65
  • Page 66 66
  • Page 67 67
  • Page 68 68
  • Page 69 69
  • Page 70 70
  • Page 71 71
  • Page 72 72
  • Page 73 73
  • Page 74 74
  • Page 75 75
  • Page 76 76
  • Page 77 77
  • Page 78 78
  • Page 79 79
  • Page 80 80
  • Page 81 81
  • Page 82 82
  • Page 83 83
  • Page 84 84
  • Page 85 85
  • Page 86 86
  • Page 87 87
  • Page 88 88

Sony XAV-1550D Bruksanvisning

Typ
Bruksanvisning