MILL GENTLE AIR 1500W OLJEOVN, HVIT Användarmanual
- Typ
- Användarmanual

EN
DK
NO
SE
FI
Assembly and instruction manual
Series:
Dette produkt er kun egnet til godt isolerede rum eller leijlighedsvis
brug.
This product is only suitable for well insulated spaces or
occasional use.
Denna produkt är endast lämplig för välisolerade utrymmen eller
sporadisk användning.
Dette produktet er kun egnet til godt isolerte rom eller ved spo-
radisk bruk.
Tämä tuote soveltuu ainoastaan hyvin eristettyihin tiloihin tai
satunnaiseen käyttöön.
Please read the instructions carefully before use.
Take good care of this manual for later use.
Gentle Air oil

Scandinavian home comfort
Mill is a Norwegian brand that develops heating and indoor air quality products tailored for
your modern home. Inspired by Scandinavian nature, our products are designed to sustain
good air quality.
Mill products are praised for their minimalistic and elegant features as they blend in
naturally with any modern interior. Our advanced and user-friendly technology will support
a relaxing and healthy home space with reliable temperatures and air quality. Mill’s vision
is to develop products that create an enjoyable and harmonic household atmosphere,
enhancing both comfort and style; the ultimate Scandinavian home comfort.
We hope you enjoy your Mill product.
Follow us on social media:
fb.com/millnorway
@millnorway
millnorway.com

1
EN
STORE THIS INSTRUCTION MANUAL FOR
FUTURE USE!
NEVER TOUCH YOUR HEATER OR ITS CASING
WITH WET HANDS!
IN ORDER TO AVOID OVERHEATING,
DO NOT COVER THE HEATER.
Content
P. 2-4
P. 4
P. 4
P. 4
P. 5
P. 5
P. 5
P. 5
P. 6
P. 6
P. 7
P. 7
P. 7
P. 7-8
P. 8
P. 8
P. 8
P. 9
P. 9
P. 9
P. 9
P. 9
P. 9
P. 10
P. 10
P. 10
P. 10
Important safety information
First use
Description of heater
Parts
Assembly
Instructions mechanical thermostat
Usage mechanical thermostat
Instructions day/night thermostat
Usage day/night thermostat
Timer function
Day- and nighttime setback
How to activate daytime setback
How to activate nighttime setback
Change setback temperature – daytime
Change setback temperature – nighttime
Change number of hours – daytime
Change number of hours – nighttime
Cancel (skip) setback period
Delete setback program
Temperature calibration
Resetting the heater
Memory function
Maintenance
Warranty
Waste disposal
Please read the instructions carefully before use. Take
good care of this manual for later use.

2millnorway.com
EN
Important safety information
You must obey common safety guidelines when using
electrical products, especially in the presence of chil-
dren.
WARNING! To avoid electric shock or damage due
to the heat, always make sure the plug is pulled out
before the heater is moved or cleaned.
READ THE INSTRUCTIONS CAREFULLY
• The product is intended for home use only.
• Make sure the heater is connected to the house’s regular
mains as indicated on the heater.
•
harmless.
• Check for any pieces of packing foam or cardboard that
may have fallen into the heating elements of the heater.
These pieces must be removed to avoid unpleasant odors.
• Prevent the heater from overheating — do not cover.
• Always turn off the heater and unplug it when not used for
a long period of time.
• Pay special attention if the heater is used in rooms where
children, the handicapped or elderly reside.
• The heater should not be set up directly beneath an electri-
cal socket outlet.
• The cord must not be laid under any kind of carpet. Make
sure the cord is laid in such a way that nobody can trip
on it.
• The heater must not be used if either the cord or plug
is damaged. The heater must not be used if it has been

3
EN
-
ing it to malfunction.
• The cord must be repaired by the manufacturer or by an ex-
pert if it has been damaged, to avoid dangerous situations.
• Avoid using extension cords, which may overheat and
•
hazards by making sure the air intakes are not blocked or
covered. The heater should be used in rooms with normal
• The heater should not be installed in close proximity to
• The heater must never be used in rooms where gasoline,
garage.
• Never touch an electric heater with wet hands. The heater
should be installed so a person showering or taking a bath
cannot come into direct contact with it.
• Some parts of this product can become very hot and cause
burns. Particular attention has to be given where children
and vulnerable people are present.
• The heater must be switched off, the plug removed and the
heater must cool down before it is moved.
• Avoid overloading the mains (the circuit) where the heater
is connected. The heater may overload the electrical circuit
if other electrical devices are plugged into the same socket
outlet.
• Do not use this heater in small rooms when they are occu-
pied by persons not capable to leaving the room on their
own, unless constant supervision is provided.
• The product cannot be used by children under 8 years of

4millnorway.com
EN
age and persons with reduced physical or mental abilities
or lack of experience and knowledge unless they have
been given supervision or instruction in the safe use of the
product and understand the hazards involved.
• Children should not play with the product. Cleaning and
maintenance should not be done by unsupervised children.
• Children under the age of 3 should be kept away from th
product, unless they are under constant supervision.
• Children aged 3 to 8 years are only permitted to turn th
product ON/OFF, assuming the heater is mounted accord-
ing to the assembly instructions and the children have
received.
• Do not use this heater in the immediate surroundings of a
bath, a shower or a swimming pool.
WARNING! The heater must not be used if the glass panels
are damaged (applies to AB-H1000DN GLASS only).
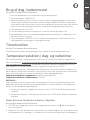
Model Thermostat Color Amperage Power (W) Mill Heat Boost
AB-H1000MEC Mechanical White ~ 1000 Yes
AB-H1000DN Day/night White ~ 1000 Yes
AB-H1500DN Day/night White ~ 1500 Yes
AB-H2000DN Day/night White ~ 2000 Yes
AB-H1000DN GLASS Day/night Glass ~ 1000 Yes
AB-H1000DN BLACK Day/night Black ~ 1000 Yes
After unpacking the heater, check to make sure the product was not damaged during
transport. Contact the retailer or importer if you discover any visible damages to the
product.
Keep the outer packaging to transport the heater in the future. If you want to dispose the
packaging, make sure it is done properly. Keep plastic bags away from children.
First use
heater can produce a burnt odor for a short time. This is normal.
Please read all the instructions carefully before use. Save the instruction manual for future use.

5
EN
Description of heater
Please see table above for which models that have mechanical/day- and night
thermostats.
See gure 1 on separate illustration sheet
and Day/night thermostat
1. Heat emission
2. LED display
3. Control panel
Output selector and thermostat
5. ON/OFF
Legs (aluminium)
Mechanical Thermostat
1. Heat emission
2. Indicator light
3. Thermostat
Output selector
5. Legs (aluminium)
Parts
See gure 2 on separate illustration sheet
1. 2 rails for the feet
2. 2 foot brackets
3. 8 screws (pre-mounted)
Assembly
See gure 3 on separate illustration sheet
1. Remove the pre-mounted screws on both legs before you insert them into the
brackets, so that you get a stable foot.
2. Attach the legs to the brackets by tightening 2 screws into each bracket.
3. Remove the pre-mounted screws from the bottom of the heater and place the heat-
er gently on its head to mount the feet.
Two screws must be fastened on each foot bracket.
5. NEVER USE THE HEATER BEFORE THE LEGS HAVE BEEN TIGHTLY SCREWED.
Instructions mechanical thermostat
Control Panel
See gure 4 on separate illustration sheet
1. Indicator light
2. Thermostat: Adjust the desired heat setting
3. Output selector:
0. OFF
I. Low
II. Medium
III. High
WARNING: BE SURE THE FOOT IS FITTED CORRECTLY AND ACCORDING TO THE
INSTRUCTIONS BEFORE USING THE HEATER!

6millnorway.com
EN
Usage mechanical thermostat
1. Set the output selector to the OFF position (O) and the thermostat to minimum Plug
the heater into a grounded outlet.
2. Set the output selector to position I, II or Ill. Turn the thermostat up to the maximum
position. When the desired room temperature has been reached, turn the thermostat
slowly down until you hear a click. The thermostat can now remain in this position
until a different room temperature is desired. As soon as the room temperature falls
below this level, the heater will automatically switch on again. When the room has
again reached the desired temperature, the heater will switch off again.
3. If you wish to change the room temperature, repeat the instructions in step 2.
The heater has an overheat protection that turns the device off if any parts become
extremely hot.
5. To switch the heater off, turn the output selector to the O position. If the heater will
be left unused for a longer period of time, pull out the plug.
Instructions day/night thermostat
Control panel
See gure 5 on separate illustration sheet
1. Standby
2. Daytime setback
3. Nighttime setback
Power indicator - Shows whether the heater is using power or not
5. Desired room temperature
9. Timer function
10. Daytime setback activation button
11. Nighttime setback activation button
12. Function button
13. Timer activation button
Thermostat and output selector:
i. Turn the selector to the left to decrease the temperature, and turn the selector to
the right to increase the temperature.
ii. Push the button to change the desired power level. 3 power levels
WARNING: BE SURE THE FOOT IS FITTED CORRECTLY AND ACCORDING TO THE
INSTRUCTIONS BEFORE USING THE HEATER!
If the temperature sensor is not functioning properly, you will see this symbol on
the display. Please contact the dealer or importer.

7
EN
Usage day/night thermostat
See gure 6 on separate illustration sheet
1. Plug the heater into a grounded outlet.
2. Press the ON/OFF button.
3. Choose the desired power |, || or |||, by pressing the output selector. Turn the ther-
mostat to the desired temperature while looking at the display. As soon as the room
temperature drops below this level, the heater will automatically start again. When
the room has reached the desired temperature again, the heater will turn itself off.
The thermostat goes from 5 to 35°C.
5. If you want to change the temperature in the room, repeat step 3.
The heater has an overheat protection that turns the device off if any parts become
extremely hot.
If the temperature sensor is not functioning as it should,$will be shown on the
display. In such instances, the heater will switch itself off. Please contact your
distributor or importer.
8. To turn off the heater, press the ON/OFF button. Should the heater be left unused
for a longer period of time, pull out the plug.
Timer function
See gure 7 on separate illustration sheet
The timer function will turn off the heater after a desired number of hours have passed.
Day- and nighttime setback
When programming the heater for either day- or nighttime setback, the setback period will
be active from the time you register the program. Which means; if you want to start your
You only need to program the heater 1 time for daytime setback and 1 time for nighttime
setback. If you have programmed the heater, the setback programs will be active on the
following days:
Daytime setback:
Nightime setback: All nights.
EXAMPLE:
Let us say you want to program the heater for both daytime- and nighttime setback (nor-
mally the heater is set to 23 degrees). You want the heater to do the following:
1.
2.
How to activate daytime setback
See gure 8 on separate illustration sheet
1. ☉ on the heater’s control panel.
2. “d” will be visible in the display. Use the wheel to set what day it is today when you are
programming the heater (1 = Monday, 2 = Tuesday etc.) You are not programming the
heater for the various days. This is simply to tell the heater what day it is when you
are programming the heater, since the daytime setback is active only Monday-Friday.

8millnorway.com
EN
Select 2 @
3.
@
@
5.
* Control light ☉ is green when the heater is in an active setback period. The control
light is red when the setback period is inactive but programmed.
How to activate nighttime setback
See gure 9 on separate illustration sheet
1. At 10.00 pm you go to the heater and press ☾ on the heater’s control panel.
@
@
setback temperature is 18 degrees.
*Control light @ is green when the heater is in an active setback period. The control light
is red when the setback period is inactive but programmed.
N.B. If a power cut occurs/you turn off the heater, the programming will be lost and you will
have to do this over again.
ATTENTION! 2012 models (series nr. HL12) have a different set up where you are not
asked to register number of hours and temperature while programming. The standards are
as follows:
Daytime setback
Nighttime setback:
Besides this they follow the same set up.
Change setback temperature – daytime
See gure 10 on separate illustration sheet
Press and hold ○and press ☉ 3 times.
Enter the desired temperature for daytime setback. Save by pressing @ or wait for 15
Change setback temperature – nighttime
See gure 11 on separate illustration sheet
Press and hold ○and press ☾ 3 times.
Enter the desired temperature for daytime setback. Save by pressing @ or wait for 15

9
EN
Change number of hours – daytime
See gure 12 on separate illustration sheet
Press and hold ○ and press ☉ 2 times.
Enter the desired number of hours for daytime setback. Save by pressing @ or wait for
Change number of hours – nighttime
See gure 13 on separate illustration sheet
Press and hold ○ and press ☉ 2 times.
Enter the desired number of hours for nighttime setback. Save by pressing @ or wait for
Cancel (skip) setback period
See gure 14 on separate illustration sheet
Press and hold ○ and press ☉ or ☾ once (depending on which setback period you
want to cancel).
*The heater will skip an active setback period or the next setback period.
*During the next setback period, the heater will automatically resume the
programmed temperature reduction.
Delete a setback program
See gure 15 on separate illustration sheet
Press and hold ☉ or ☾ (depending on which setback period you want to cancel)
for 3 seconds.
Temperature calibration
See gure 16 on separate illustration sheet
It may occur deviation between the temperature registered by the heater and the actual
temperature in the room. This can be caused by several reasons, however, the most com-
mon is that the heater is placed in a fair distance from where you usually reside. When you
set the temperature to for example 22 degrees, it is only natural that you expect the same
temperature where your sofa is placed for instance. However, the temperature sensor is
placed on the product itself, and therefore a deviation in temperature may occur. To adjust
this, all Mill heaters are equipped with a calibration function, which enables you to adjust
the temperature registered by the heater. N.B! The room must have achieved a stable
temperature before any calibration.
Press ○ 2 times and use + or – to set the actual temperature observed in the room.
@
Resetting the heater
See gure 17 on separate illustration sheet
Turn off the heater’s main switch. Press and hold @ while you turn on the heater’s main

10 millnorway.com
EN
switch.
Memory function
See gure 17 on separate illustration sheet
The heater remembers all the temperature settings and will automatically return to the
desired temperature after a power cut. Your day- and nighttime setbacks will however be
deleted after a power cut, and you will need to register the programs again.
Maintenance
1. For cleaning, always unplug the heater and leave it to cool.
2. Wipe the heater regularly with a damp cloth and dry the surface before turning on the
heater again.
3. The heater must be cleaned at least once a month during the heating season.
CAUTION! The heater should never be immersed in water.
Avoid using detergents to clean the heater.
Never let any water get inside the heater; this can be hazardous.
Dust etc. should be removed with a soft cloth.
5. The heater can be stored in a dry and clean place.
If the heater stops working, do not attempt to repair it yourself because it can cause a
Warranty
The warranty is valid for 2 years. The heater will be repaired or replaced during this time
should any malfunction occur. The warranty applies if the heater is used according to
these instructions and the customer can present a purchase receipt. If the heater malfunc-
tions in any way, please contact the store where it was purchased or the importer.
Waste disposal
The symbol#indicates that this product is not to be disposed of together with house-
hold waste. This product must be delivered to a recycling service or container for electrical
appliances and electronic equipment. This is done to avoid health risks and prevent harm
to the environment. Local businesses (or the environmental station in your neighborhood)
are required by law to accept and recycle such products, as a means of environmentally
sound disposal.
Mill International AS
Grini Næringspark 10
Norway
www.millnorway.com

1
NO
TA VARE PÅ DENNE BRUKSANVISNINGEN!
HA ALDRI VÅTE HENDER PÅELLER DEKK TIL
OVNEN
FOR Å UNNGÅ OVEROPPHETING,
IKKE DEKK TIL OVNEN.
Innholdsfortegnelse
2-4
4
4
4
5
5
5
5
6
6
7
7
7
7
8
8
8
8
8
9
9
9
9
9
10
10
10
Før førstegangsbruk
Førstegangsbruk
Beskrivelse av ovnen
Deler
Montering
Bruksanvisning mekanisk termostat
Bruk av mekanisk termostat
Bruksanvisning dag/natt termostat
Bruk av dag/natt termostat
Timerfunksjon
Dag- og nattsenking
Endre senketemperatur-dag
Endre senketemperatur-natt
Endre antall timer-dag
Endre antall timer-natt
Kansellere (hoppe over) s.enkeprogrom
Slette senkeprogrom
Kalibrering av temperatur
Resette ovnen
Huskefunksjon
Garanti
Vennligst les bruksanvisningen nøye før bruk. Ta godt vare
på denne bruksanvisningen for senere bruk.

2millnorway.com
NO
Vanlige sikkerhetsregler må alltid følges ved bruk av
elektriske artikler, spesielt når barn er tilstede.
ADVARSEL!
-
LES BRUKSANVISNINGEN NØYE
• Produktet er kun beregnet for hjemmebruk
• Sørg for at ovnen kobles til husets vanlige strømnett slik
ovnens merke viser
•
Dette gir seg etter en kort stund og er helt ufarlig
• Sjekk at det ikke har falt rester (isopor/papp) fra innpak-
• Unngå at ovnen blir overopphetet — må ikke tildekkes
•
er i bruk over lengre tid
•
barn, handikappede eller eldre oppholder seg
•
•
•
-
normalt.
• -

3
NO
•
overopphetet og muligens starte en brann
•
ørge for at ovnens luftinntak ikke er sperret eller
tildekket. Ovnen brukes i rom med vanlige rette gulv.
•
noe slag da det alltid kan være en fare for brann
•
eller andre lett antennelige væsker som for eks. i en garasje
• -
teres/plasseres slik at en person som dusjer eller tar et bad
ikke kan komme i direkte kontakt med den
• -
•
•
er tilkoblet. Ta hensyn hvis andre elektriske apparater er
koblet til samme strømuttak eller kurs
•
mindre de er under konstant tilsyn
• -
er med reduserte fysiske eller psykiske evner eller som
• Barn skal ikke leke med produktet. Rengøring og vedlike-
hold skal ikke utføres av barn uten tilsyn
•
har kontinuerlig tilsyn

4millnorway.com
NO
• -
satt at ovnen er montert slik monteringsanvisningen viser,
-
volvert
• Bruk aldri denne varmeovnen i nærheten av badekar, dusj
eller svømmebasseng.
ADVARSEL!
skadet (gjelder kun AB-H1000DN GLASS).
Modell Termostat Farge Strømstyrke Effekt (W) Mill Heat Boost
AB-H1000MEC Mekanisk Hvit ~ 1000 Ja
AB-H1000DN Dag/natt Hvit ~ 1000 Ja
AB-H1500DN Dag/natt Hvit ~ 1500 Ja
AB-H2000DN Dag/natt Hvit ~ 2000 Ja
AB-H1000DN GLASS Dag/natt Hvit ~ 1000 Ja
AB-H1000DN BLACK Dag/natt Sort ~ 1000 Ja
Før førstegangsbruk
Etter utpakking av produktet, kontroller om det er noen transportskader. Skulle det være
-
Førstegangsbruk
“brent” i en kort periode. Dette er normalt.
senere bruk.
Det er også vanlig at produktet lager "lyder" i opp/ned-varmingsfasen.

5
NO
Beskrivelse av ovnen
Se gur 1 på separat gurark
og Dag/natt termostat
1. Utslipp varme
2. LED display
3. Knapper
Effekt og temperaturvelger
5.
Ben (aluminium)
Mekanisk termostat
1. Utslipp varme
2. Indikatorlys
3. Temperaturvelger
Effektvelger
5. Ben (aluminium)
Deler
Se gur 2 på separat gurark
1. 2 stk skinner til fot
2. 2 stk fotbraketter
3. 8 stk skruer (premontert)
Montering
Se gur 3 på separat gurark
1.
2.
3. Skru ut de premonterte skruene fra undersiden av ovnen og plasser ovnen forsiktig
5. BRUK ALDRI OVNEN FØR BENA ER SKRUDD ORDENTLIG PÅ.
Bruksanvisning mekanisk termostat
Kontrollpanel
Se gur 4 på separat gurark
1. Indikatorlys
2. Termostat: Justere ønsket varme
3. Effektvelger:
0.
I. Lav
II. Medium
III. Høy
ADVARSEL!

6millnorway.com
NO
Bruk av mekanisk termostat
1.
jordet stikkontakt
2.
den ønskede romtemperaturen er oppn dd, skru termostaten sakte tilbake til du
-
av igjen.
3.
Ovnen har et overopphetingsvern som stenger ovnen om noen deler blir ekstremt
varme.
5.
lengre tid, trekk ut støpselet.
Bruksanvisning dag/natt termostat
Kontrollpanel
Se gur 5 på separat gurark
1. Standby
2. Dagsenking
3. Nattsenking
Strømindikator – viser om ovnen trekker strøm eller ikke
5.
9. Timerfunksjon
10. Aktiveringsknapp dagsenking
11. Aktiveringsknapp nattsenking
12. Funksjonsknapp
13. Aktiveringsknapp timerfunksjon
Termostat og effektvelger:
i.
temperatur.
ii.
ADVARSEL!
Om temperatursensoren ikke fungerer slik den skal vil du se dette symbolet i

7
NO
Bruk av dag/natt termostat
Se gur 6 på separat gurark
1. Sett støpslet i en jordet stikkontakt.
2.
3.
5.
Ovnen har et overopphetingsvern som stenger ovnen om noen deler blir ekstremt
varme.
tid, trekk ut støpselet.
Timerfunksjon
Se gur 7 på separat gurark
Timerfunksjonen vil skru av ovnen etter at det ønskede antaII timer har passert.
Dag- og nattsenking
være
aktiv fra det tidspunktet du programmerer ovnen. Det vil si at om du ønsker at en dagsen-
programmere ovnen 1 gang for dagsenking og 1 gang for nattsenking. Om du har program-
Dagsenking:
Nattsenking: Alle netter
EKSEMPEL:
1.
2.
Se gur 8 på separat gurark
1. ☉
2.
ovnen (1=mandag, 2=tirsdag etc). Du programmerer ikke ovnen for ulike dager. Her er
@
3.
dagsenkingen. @
@

8millnorway.com
NO
5.
*Kontrollys ☉
senkeperioden er inaktiv, men programmert.
Se gur 9 på separat gurark
☾
nattsenkingen. @
@
grader
*Kontrollys ☾
senkeperioden er inaktiv, men programmert.
OBS! 2012-modeller har et litt annet oppsett hvor man ikke blir spurt om antall timer og
temperatur mens man programmerer. Standardverdiene er som følger:
Dagsenk:
Nattsenk:
Ellers følger de samme oppsett.
Endre senketemperatur—Dag
Se gur 10 på separat gurark
Trykk og hold ○☉. Angi ønsket temperatur for dagsenkingen.
@ eller vent 15 sekunder for automatisk bekreftelse.
Endre senketemperatur—Natt
Se gur 11 på separat gurark
Trykk og hold ○☾. Angi ønsket temperatur for nattsenkingen.
@ eller vent 15 sekunder for automatisk bekreftelse.
Endre antall timer—Dag
Se gur 12 på separat gurark
Trykk og hold ○☉. Angi ønsket timer for dagsenkingen. Lagre
@ eller vent 15 sekunder for automatisk bekreftelse.
Sidan laddas...
Sidan laddas...
Sidan laddas...
Sidan laddas...
Sidan laddas...
Sidan laddas...
Sidan laddas...
Sidan laddas...
Sidan laddas...
Sidan laddas...
Sidan laddas...
Sidan laddas...
Sidan laddas...
Sidan laddas...
Sidan laddas...
Sidan laddas...
Sidan laddas...
Sidan laddas...
Sidan laddas...
Sidan laddas...
Sidan laddas...
Sidan laddas...
Sidan laddas...
Sidan laddas...
Sidan laddas...
Sidan laddas...
Sidan laddas...
Sidan laddas...
Sidan laddas...
Sidan laddas...
Sidan laddas...
Sidan laddas...
Sidan laddas...
Sidan laddas...
Sidan laddas...
Sidan laddas...
-
 1
1
-
 2
2
-
 3
3
-
 4
4
-
 5
5
-
 6
6
-
 7
7
-
 8
8
-
 9
9
-
 10
10
-
 11
11
-
 12
12
-
 13
13
-
 14
14
-
 15
15
-
 16
16
-
 17
17
-
 18
18
-
 19
19
-
 20
20
-
 21
21
-
 22
22
-
 23
23
-
 24
24
-
 25
25
-
 26
26
-
 27
27
-
 28
28
-
 29
29
-
 30
30
-
 31
31
-
 32
32
-
 33
33
-
 34
34
-
 35
35
-
 36
36
-
 37
37
-
 38
38
-
 39
39
-
 40
40
-
 41
41
-
 42
42
-
 43
43
-
 44
44
-
 45
45
-
 46
46
-
 47
47
-
 48
48
-
 49
49
-
 50
50
-
 51
51
-
 52
52
-
 53
53
-
 54
54
-
 55
55
-
 56
56


MILL GENTLE AIR 1500W OLJEOVN, HVIT Användarmanual
- Typ
- Användarmanual
på andra språk
Relaterade papper
-
MILL Oil Premium AB-H1500DN Assembly And Instruction Manual
-
MILL OIL PREMIUM MEC 1000W OLJEOVN Användarmanual
-
-
-
-
-
Andra dokument
-
 Purmo Kaba2 Installationsguide
-
puravent FRICO Användarguide
-
Nexans N-Comfort Kt+ Thermostat Användarmanual
-
OJ Electronics PRH-1212 Bruksanvisningar
-
Onninen 2601000 Installationsguide
-
CARLO GAVAZZI BEA-TEMDIS Installationsguide
-
Weller WAS 101 Operating Instructions Manual
-
Danfoss CF-RC Remote Controller Installationsguide
-
