Oregon Scientific Heart Rate Monitor SE188 Användarmanual
- Kategori
- Klockor
- Typ
- Användarmanual
Denna manual är också lämplig för

EN
1
Tap On Pro Heart Rate Monitor
Model: SE188
USER MANUAL

1
EN
Tap On Pro
Heart Rate Monitor
Model: SE188
USER MANUAL
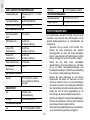
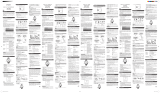
CONTENTS
Introduction .................................................................... 2
Key Features .................................................................. 3
Watch ......................................................................... 3
LCD Display ................................................................ 3
Getting Started ............................................................... 4
Unpacking the Watch ................................................. 4
Turning On the Watch (First-Time Use Only) ............. 4
Setting the Keypad Tone / Light Mode / Tap On
Lens ............................................................................ 4
Activating the Backlight .............................................. 5
Activating the Keypad Lock ........................................ 5
Tap On Lens ............................................................... 6
Switching Between Operation Modes ......................... 6
Using the Clock ............................................................. 6
Using the Alarm(s) ........................................................ 7
Setting the Alarm(s) .................................................... 7
Turning the Alarm Sound Off ...................................... 8
Activating / Deactivating the Alarm ............................. 8
Exercise Profile .............................................................. 8
Target Activity ............................................................. 9
Maximum / Lower / Upper Heart Rate Limit ............... 9
Heart Rate Alert .......................................................... 9
User Profile .................................................................. 10
Activity Level ..............................................................11
About the Fitness / Body Mass Index ........................ 11
Fitness Index .............................................................11
Body Mass Index ........................................................ 12
View Fitness / Body Mass Index ............................... 13
Wearing the Chest Belt and Watch ............................. 13
Transmission Signal .................................................. 14
Signal Search ........................................................... 15
About The SMART TRAINING PROGRAM .................. 15
Using the SMART TRAINING PROGRAM ................ 16
View Data while SMART TRAINING PROGRAM
is Running ................................................................. 16
View SMART TRAINING PROGRAM Memory
Records .................................................................... 17
Recovery Heart Rate ................................................ 17
Stopwatch .................................................................... 17
View Data while Stopwatch / Lap is Running ........... 18
View Stopwatch or Lap Memory Records ................. 18
Batteries ....................................................................... 19
Training Information ................................................... 20
How the Heart Rate Monitor Helps You ................... 20
Training Tips ............................................................. 20
Aquatic and Outdoor Activities ................................. 20
Specifications .............................................................. 21
Precautions .................................................................. 22
About Oregon Scientific ............................................. 23
EU-Declaration of Conformity .................................... 23

2
EN
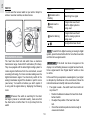
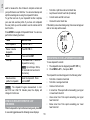
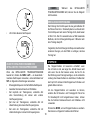
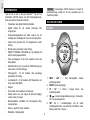
INTRODUCTION
Thank you for selecting the Oregon Scientific
TM
Tap On
Pro Heart Rate Monitor (SE188) watch as your sports
fitness product of choice. This device includes the following
features:
• Heart rate monitor with cordless transmission between
watch and chest belt.
• Digital coding system to reduce environmental
interference.
• Heart rate monitoring system when you go above or
below your upper and lower heart rate limit.
• Visual or sound alert for heart rate thresholds during
training.
• Memory stores heart rate figures during exercise.
• SMART TRAINING PROGRAM enables you to
complete exercise cycles effectively.
• Tap on lens to conveniently view exercise data.
• Calorie consumption and percent fat burn display
during and after exercise.
• Exercise profile - to calculate your personal heart rate
limit for training.
• User profile - to calculate your fitness index and body
mass index (BMI).
• Stopwatch.
• 99 lap memory storage showing average heart rate and
maximum heart rate.
• Dual alarms with a choice of daily, weekday or weekend
settings.
• Mounting bracket, chest belt and carrying case
included.
• Watch - up to 50 metres water resistant.
• Chest belt - splash proof.
IMPORTANT The use of the SE188 watch is for sport
purposes only and it is not meant to replace any medical
device.

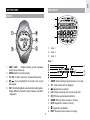
3
EN
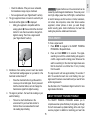
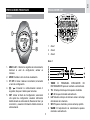
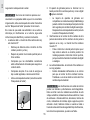
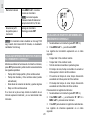
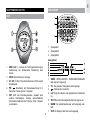
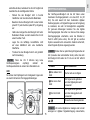
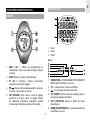
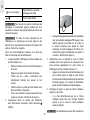
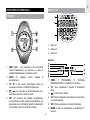
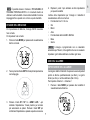
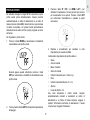
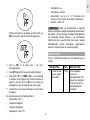
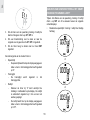
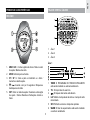
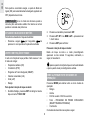
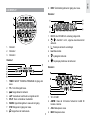
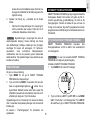
KEY FEATURES
WATCH
1. MEM / LAP / - : Display training records; decrease
setting value; mark a lap.
2. MODE: Switch to another display.
3. ST / SP / +: Start / stop timer; increase setting value.
4
/ : Turn on backlight for 3 seconds; lock / unlock
the keypad.
5. SET: Enter Setting Mode; select another setting option;
display different information during training; reset timer
/ stopwatch.
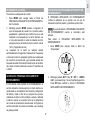
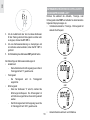
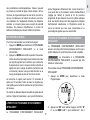
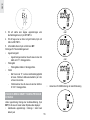
LCD DISPLAY
1. Area 1
2. Area 2
3. Area 3
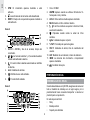
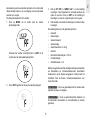
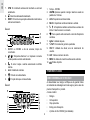
Area 1
1. TIMER: Smart Training Program is shown or running.
2. TTL: Total exercise time is displayed.
3.
: Keypad lock is enabled.
4. LAP: Shows current lap time or memory lap time.
5. SPLIT: Shows and calculates split time.
6. WARM: Warm-up timer is shown or running.
7. STW: Stopwatch is shown or running.
8.
: Keypad tone is disabled.
9. REST: Recovery timer is shown or running.

4
EN
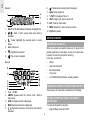
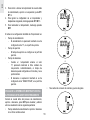
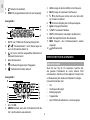
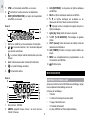
Area 2
1. MM:DD or DD: MM and day of the week; stopwatch time.
2.
/ : Alarm 1 and 2; waves show when alarm is
activated.
3.
: Cursor highlights the selected alarm in Alarm
Mode.
4. kcal: Calorie unit.
5.
: Light Mode is enabled.
6.
: Tap on lens is enabled.
Area 3
1. Time - HH:MM.
2. AM/PM: Appears when the 12-hour clock / alarm is
being used.
3. AVG: Average heart rate is displayed.
4. MAX: Maximum heart rate is displayed.
5.
: Heart rate is above or below limit; sound alert is
activated.
6. : Flashes when receiving heart rate signal.
7. kglbs: Body weight unit.
8. % FAT: Percentage of fat burn.
9. CM Yr: Height unit; year of user’s birth.
10. LAP: Take lap; lap number.
11. MEM: Stopwatch or timer memory is shown.
12.
: Battery status.
GETTING STARTED
UNPACKING THE WATCH
When you unpack your watch, make sure to keep all the
packing materials in a safe place, in case you need to later
transport or return the product for servicing.
In this box, you will find:
• Watch
• Heart rate chest belt
• Mounting bracket
• Carry case
• 2 x CR2032 lithium batteries - already installed
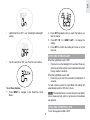
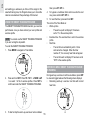
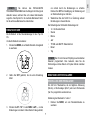
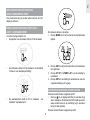
TURNING ON THE WATCH (FIRST-TIME USE ONLY)
Press any key for 2 seconds to activate the LCD display.
SETTING THE KEYPAD TONE / LIGHT MODE /
TAP ON LENS
You can set the watch to have the:
• Keypad “Beep” tone ON or OFF.

5
EN
• Light Mode ON or OFF - see “Activating the Backlight”
section.
• Tap On Lens ON or OFF- see “Tap On Lens” section.
To set these features:
1. Press MODE to navigate to the Real-Time Clock
Mode.
2. Press SET repeatedly until you reach the feature you
wish to change.
3. Press ST / SP / + or MEM / LAP / - to change the
setting.
4. Press SET to confirm the setting and move on to the
next one.
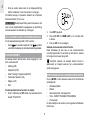
ACTIVATING THE BACKLIGHT
When the Light Mode is set to OFF:
• Press to turn on the backlight for 3 seconds. Press any
other key whilst the light is on and it will extend the light
time by another 3 seconds.
When the Light Mode is set to ON:
• Press any key to turn ON or extend the backlight for 3
seconds.
To help conserve power the Light Mode ON setting will
automatically switch to OFF after 2 hours.
NOTE The backlight does not work when the low battery
icon is shown and will return to normal once the batteries
are replaced.
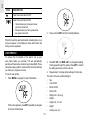
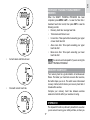
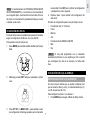
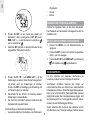
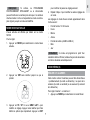
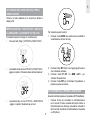
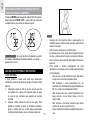
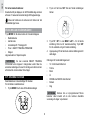
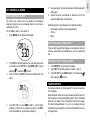
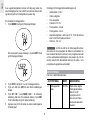
ACTIVATING THE KEYPAD LOCK
To turn the keypad lock ON or OFF:

6
EN
• Press and hold for 2 seconds. will appear
on the display when the keypad lock is on.
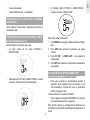
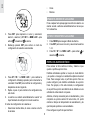
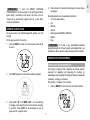
TAP ON LENS
The tap on lens feature gives you easy access to 1 of 6
preset modes:
• Heart rate (HR)
• Stopwatch (STW)
• Smart Training Program (SMART)
• Calorie measurement (CAL)
• Lap timer (LAP)
• Time
To set the tap on lens preset mode:
1. In clock mode, press SET repeatedly until you reach the
tap on lens “ON” display.
2. Press and hold SET to enter the preset modes
selection.
3. Press ST / SP / + or MEM / LAP / - to select the preset
mode.
4. Press SET to confirm.
To use the tap on lens:
Simply tap on the lens and your preset mode will display for
10 seconds before returning to the previous screen.
appears when the tap on lens is activated and flashes
when the preset display is shown.
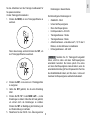
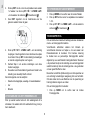
SWITCHING BETWEEN OPERATION MODES
Press MODE to switch between the 5 operation modes:
• Real-Time Clock
• Alarm Clock
• User Profile / Exercise Profile
• Timer - SMART TRAINING PROGRAM
• Stopwatch
The modes are described in the sections that follow.
NOTE You can run the SMART TRAINING PROGRAM or
stopwatch in the background as you access other modes.
The icon for the mode that is running will flash until you
switch back to that mode.
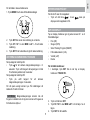
USING THE CLOCK
The real-time clock is the default display for the watch.
To set the real-time clock:
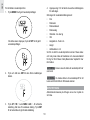
1. Press MODE to switch to Real-Time Clock Mode.
2. Press and hold SET until the first setting flashes.

7
EN
3. Press ST / SP / + or MEM / LAP / - to change the
setting. Hold to speed through the options. Press SET
to confirm the setting and move on to the next one.
4. Repeat step 3 to change other settings for this mode.
The order of the real-time clock settings is:
• 12 / 24 hour clock format
• Hour
• Minute
• Year
• DD:MM or MM:DD date format
• Month
• Day
NOTE The clock is programmed with a 50-year auto-
calendar, which means you do not need to reset the days of
the week and dates each month.
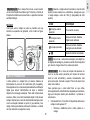
USING THE ALARM(S)
SETTING THE ALARM(S)
Your watch has 2 alarms that can be set to activate daily
(Mon-Sun), on a weekday (Mon-Fri), or on a weekend (Sat
/ Sun).
To set alarm 1 or alarm 2:
1. Press MODE to navigate to Alarm Clock Mode.
2. Press SET to move the cursor to select alarm 1 or alarm
2 and ST / SP / + or MEM / LAP / - to activate
or
deactivate
the alarm.
3. Press and hold SET to enter the setting mode for the
chosen alarm.
4. Press ST / SP / + or MEM / LAP / - to change the
setting. Hold to speed through the options. Press SET
to confirm the setting and move on to the next one.
5. Repeat step 4 to change other settings for this mode.
6. The alarm will automatically be activated once you have
finished setting the alarm time.
The order of the alarm clock settings is:
• Select daily, weekday or weekend alarm
• Hour
• Minute

8
EN
TURNING THE ALARM SOUND OFF
Press any key to turn the alarm sound off. The alarm will
automatically reset itself unless you deactivate it.
ACTIVATING / DEACTIVATING THE ALARM
1. Press MODE to navigate to Alarm Clock Mode.
2. Press SET to move to the cursor to select alarm 1 or 2.
3. Press ST / SP / + or MEM / LAP / - to activate
or
deactivate
the alarm.
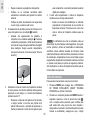
EXERCISE PROFILE
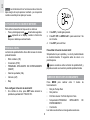
To calculate your minimum and maximum heart rate you
need to set the exercise profile.
Different activities exercise the body in different ways
and help you to achieve a variety of fitness goals. To
accommodate this the exercise profile can be set to suit
different exercise activities. For example, if you are running,
your exercise profile settings are likely to differ from those
you would use when undertaking a weight training activity.
Also, the time you require to warm-up and complete an
exercise will vary. That is why you can change the warm-up
and exercise countdown time to suit you.
To set the exercise profile:
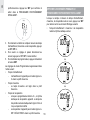
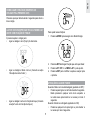
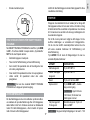
1. Press MODE to navigate to Exercise Profile Mode.
If this screen appears, press SET to navigate to the Exercise
Profile Mode.
2. Press SET to navigate to 1 of the 3 exercise profiles.
3. Press and hold SET until the first setting flashes.
4. Press ST / SP / + or MEM / LAP / - to change the
setting. Hold to speed through the options. Press SET
to confirm the setting and move on to the next one.
5. Repeat step 4 to change other settings for this mode.
The order of the exercise profile settings is:
• Target activity - 0 to 2
• Lower limit heart rate
• Upper limit heart rate
• Heart rate alert - ON / OFF
• Exercise timer - hour
• Exercise timer - minute

9
EN
• Warm-up timer - set to 5, 10, 15 to activate or 0 mins to
deactivate timer
• Rest timer - ON / OFF
NOTE Once you have set your exercise profile your lower
and upper heart rate limit will be set automatically. However,
you can manually change your upper and lower heart rate
limit if the automatic setting does not suit you. If you change
the target activity level, your upper / lower and maximum
heart rate will automatically be updated.
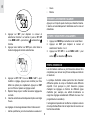
TARGET ACTIVITY
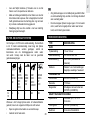
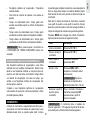
There are 3 target activity levels:
TARGET ACTIVITY MHR% DESCRIPTION
0 Health
Maintenance
65-78% This is the lowest
training intensity
level. It is good
for beginners and
those who want to
strengthen their
cardiovascular
systems.
1 Aerobic
Exercise
65-85% Increases strength
and endurance. It
works within the
body’s oxygen
intake capability,
burns more
calories, and can be
maintained for a long
period of time.
2 Anaerobic
Exercise
78-90% Generates speed
and power. It works
at or above the
body’s oxygen intake
capability, builds
muscle,and cannot be
maintained for a long
period of time.
MAXIMUM / LOWER / UPPER HEART RATE LIMIT
Before you begin any exercise program and to achieve
maximum health benefits from your workout, it is important
to know your:
• Maximum heart rate (MHR)
• Lower heart rate limit
• Upper heart rate limit
To manually calculate your own heart rate limits, follow the
instructions below:
MHR LOWER LIMIT UPPER LIMIT
MHR =
220 - age
MHR x lower target
activity %.
E.g. Target activity is
0. Lower Limit = MHR
x 65%
MHR x upper target
activity %. E.g.
Target activity is 0.
Upper Limit = MHR
x 78%
HEART RATE ALERT
You can set the heart rate alert in the exercise profile to the
following settings:

10
EN
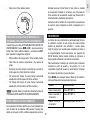
ICON DESCRIPTION
Heart rate sound alert is OFF
Heart rate sound alert is ON
• 1 beep means you have gone below
your lower zone limit
• 2 beeps means you have gone above
your upper zone limit
When the heart rate alert is activated, a flashing down or up
arrow will appear on the display to show which heart rate
limit you have surpassed.
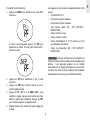
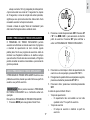
USER PROFILE
To access the full benefits of the watch, set up your
user profile before you exercise. This will automatically
generate a fitness index and body mass index (BMI). These
calculations along with the calorie and fat % burned will help
you track your progress over time.
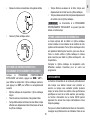
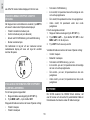
To set the user profile:
1. Press MODE to navigate to User Profile Mode.
If this screen appears, press SET repeatedly to navigate
to the User Profile Mode.
2. Press and hold SET until the first setting flashes.
3. Press ST / SP / + or MEM / LAP / - to change the setting.
Hold to speed through the options. Press SET to confirm
the setting and move on to the next one.
4. Repeat step 3 to change other settings for this mode.
The order of the user profile settings is:
• Sex
• Year of birth
• Month of birth
• Day of birth
• Weight unit - lbs or kg
• Weight
• Height unit - ft or cm
• Height
• Activity level - 0-2

11
EN
Once you complete your user profile, a fitness index and
body mass index is automatically calculated and displayed
for you. Refer to the “About the Fitness / Body Mass Index”
section for further information.
NOTE You can display and adjust your user profile at any
time.
NOTE You must set up your user profile to use the calorie
count and fat burn features.
ACTIVITY LEVEL
The activity level is based on your own self-assessment of
the amount of exercise you regularly perform.
ACTIVITY
LEVEL
DESCRIPTION
0 Low - You do not usually participate
in programmed recreation sports or
exercise.
1 Medium - You are engaged in modest
physical activity (such as golfing, horseback
riding, table tennis, callisthenics, bowling,
weight lifting or gymnastics) 2-3 times a
week, totalling 1 hour per week.
2 High - You actively and regularly
participate in heavy physical exercise
(such as running, jogging, swimming,
cycling, or skipping rope) or engage in
vigorous aerobic exercise (such as tennis,
basketball or handball).
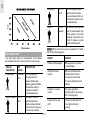
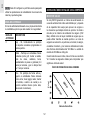
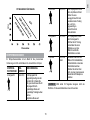
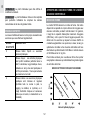
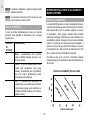
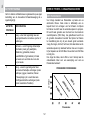
ABOUT THE FITNESS / BODY MASS INDEX
FITNESS INDEX
Your watch will generate a fitness index based on your
aerobic fitness. This index is dependent and limited by the
body’s ability to deliver oxygen to the working muscles in
training. It is often measured by maximum oxygen uptake
(VO2 Max), which is defined as the highest amount
of oxygen that can be utilized when exercising at an
increasingly demanding level. The lungs, heart, blood,
circulatory system, and working muscles are all factors to
determine VO2 Max. The unit of VO2 Max is ml/kg min.
The higher the index, the fitter you are. See the tables below
for a rough guide to what your fitness index means:
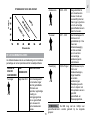
Fitness index
egA
RIAF
EGAREVA
DOOG

12
EN
egA
Fitness index
RIAF
EGAREVA
DOOG
BODY MASS INDEX
Your body mass index is a measurement of the relative
percentages of fat and muscle mass in the human body.
HEALTH
INDICATION
BMI
RANGE
DESCRIPTION
Underweight
Less than
20.0
Your body weight is
currently lower than
average. Work toward
healthy, regular food intake
and exercise routine to
build up your health to
recommended levels.
Recommended
20.0 to
25.0
Your health is at the
recommended level.
Maintain a balanced diet
and exercise to keep your
current level of health.
Overweight 25.1 to
29.9
Your body weight may be
above normal. Increase
your exercise and work out
a diet plan to lower your risk
for serious illness.
Obese
30.0 or
greater
At this level, you may be at
risk for heart disease, high
blood pressure, and other
illnesses. Consult with your
doctor to develop a proper
health and fitness plan.
NOTE BMI should not be used as a guideline for health
risks for the following groups:
GROUP REASON
Children and teenagers BMI ranges are only based
on adult heights.
Athletes and body
builders
BMI does not differentiate
between fat and muscle,
thus making it inaccurate
for persons with high muscle
volumes.
Pregnant or nursing
women
This group generates
naturally high fat reserves as
part of the pregnancy.
People over the age
of 65
Fat reserves naturally tend
to be higher with older
persons.

13
EN
NOTE The above BMI information is based on an average
Caucasian physique.
VIEW FITNESS / BODY MASS INDEX
Press MODE to navigate to the User Profile Mode. Then,
press MEM / LAP / - to display your fitness and body mass
index.
NOTE If you have not completed your user profile, these
will not display and “- -” will show on the display.
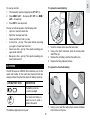
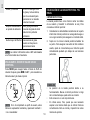
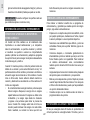
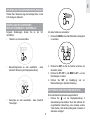
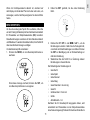
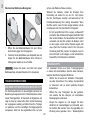
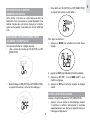
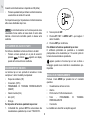
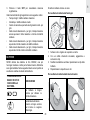
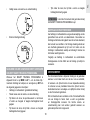
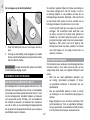
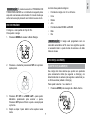
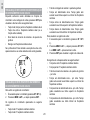
WEARING THE CHEST BELT AND WATCH
CHEST BELT
The heart rate chest belt is used to count your heartbeat and
transmit the data to the watch. To wear the chest belt:
1. Wet the conductive pads on the underside of the chest
belt with a few drops of water or a conductive gel to
ensure solid contact.
2. Strap the heart rate chest belt across your chest. To
ensure an accurate heart rate signal, adjust the strap
until the belt sits snugly below your pectoral muscles.
TIPS
• The position of the chest belt affects its performance.
Move the chest belt along the strap so that it falls above
your heart.
• Avoid areas with dense chest hair.
• In dry, cold climates, it may take several minutes for the
chest belt to function steadily. This is normal and should
improve with several minutes of exercise.
• To maintain the best performance of your chest belt,
please handle it with care according to the following:
• Do not wrap the chest belt in a wet towel nor
with other wet materials.
• Do not store the chest belt in a hot (about 50°C)
and humid (about 90%) environment.
• Do not place or wash the chest belt under
running water, instead clean it with a wet cloth.
• Do not place the conductive rubber face down
on a metal table or surface.
• Properly dry the chest belt immediately after use.
NOTE If the watch is kept idle without receiving a heart
rate signal for 5 minutes, the Heart Rate Mode will quit and
return to Clock Mode.

14
EN
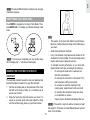
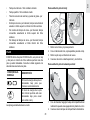
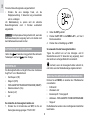
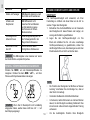
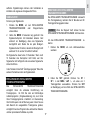
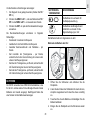
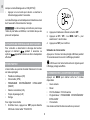
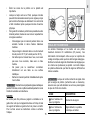
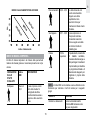
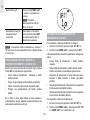
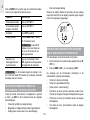
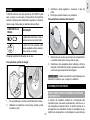
WATCH
You can wear the receiver watch on your wrist or strap it to
a bike or exercise machine, as shown below.
TRANSMISSION SIGNAL
The heart rate chest belt and watch have a maximum
transmission range of about 62.5 centimetres (25 inches).
They are equipped with the latest digital coding system to
reduce signal interference from the environment, as well
as analog technology. For more accurate readings use the
digital transmission signal. You should only switch to the
analog transmission signal if the situation in point 2 occurs
(see below). Your watch will advise you which system it
is using and the signal status by displaying the following
icons:
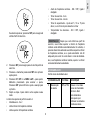
NOTE Whenever the watch is searching for the chest
belt signal (manual or automatic search), make sure that
the chest belt is no further than 10 cm (4 inches) from the
watch.
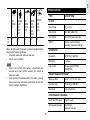
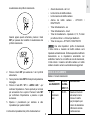
ICON DESCRIPTION
Outside heart is
flashing
Searching for a signal
Inside heart is
flashing
A signal has been found
and the digital system is
being used
Heart is flashing
A signal has been found
and the analog system is
being used
/
No signal has been found
NOTE To switch from digital to analog or analog to digital
system, press the chest belt button for more than 4 seconds
and then force a signal search.
IMPORTANT If the heart icon does not appear on the
display or is not flashing because no signal has been found,
force a signal search. See “Signal Search” section on how
to do this.
In the event that you experience a weak signal or your signal
is disrupted by interference in the environment, follow the
instructions below to identify and resolve the situation.
1. The signal is weak - the watch heart rate monitor will
only show “0”:
• Shorten the distance between the heart rate chest
belt and watch.
• Re-adjust the position of the heart rate chest
belt.
• Check the conductive pads are moist enough to
ensure solid contact.

15
EN
• Check the batteries. If they are low or exhausted,
the transmission range may be shortened.
• Force a signal search (see “Signal Search” section).
2. The gym equipment does not seem to work with your
chest belt and the digital icon
is displayed:
• Most gym equipment is compatible with the
analog system
. Press and hold the chest belt
button for more than 4 seconds to change from
digital to analog. Then force a signal search
(see “Signal Search” section).
3. Interference from another person’s heart rate monitor
- their heart rate readings appear on your watch, or the
heart rate monitor shows “0”:
• Press the chest belt button to get the watch to
receive your chest belt signal. Do not press and
hold the chest belt button, as it will change the
transmission signal from digital to analog.
4. The signal is jammed - the heart rate reading on your
watch is flashing:
• There is too much interference in the
environment for your heart rate monitor to
function. Move to an area where the heart
rate reading stops flashing.
WARNING Signal interference in the environment can be
caused by electromagnetic disturbances. These may occur
near high voltage power lines, traffic lights, overhead lines
of electric railways, electric bus lines or trams, televisions,
car motors, bike computers, some motor driven exercise
equipment, cellular phones or when you walk through
electric security gates. Under interference, the heart rate
reading may become unstable and inaccurate.
SIGNAL SEARCH
To force a signal search:
1. Press MODE to navigate to the SMART TRAINING
PROGRAM or Stopwatch Mode.
2. Press and hold MODE for 2 seconds. The signal-
searching icon with the outside flashing will appear to
confirm a signal search is taking place. Whenever the
watch is searching for the chest belt signal make sure
that the chest belt is no further than 10 cm (4 inches)
from the watch.
The signal search will take approximately 10 seconds. If
after 10 seconds the heart icon is not flashing, then your
signal search has been unsuccessful and you need to force
another signal search.
See the table in the “Transmission Signal” section for more
signal status information.
ABOUT THE SMART TRAINING PROGRAM
The SMART TRAINING PROGRAM enables you to
complete exercise cycles effectively. It will guide you through
from a 5-minute warm up (default setting), to the end of your
exercise program. In addition to monitoring your heart rate

16
EN
and alerting you whenever you fall out of the range for the
selected training zone, the Program allows you to check the
calories consumed and the percentage of fat burned.
USING THE SMART TRAINING PROGRAM
The SMART TRAINING PROGRAM monitors your exercise
performance once you have entered your user profile and
exercise profile.
NOTE You cannot use the SMART TRAINING PROGRAM
if you are running the stopwatch.
To enter the SMART TRAINING PROGRAM:
1. Press MODE to navigate to Timer Mode.
2. Press and hold SET. Press ST / SP / + or MEM / LAP
/ - to select 1 of the 3 exercise profiles. Press SET to
confirm and enter the SMART TRAINING PROGRAM.
3. To start or stop the warm-up, exercise or rest countdown
timer, press ST / SP / +.
4. To bypass a countdown timer and move onto the next
one, press and hold ST / SP / +.
5. To reset the timer, press and hold SET.
The order of the Timer Mode is:
• Warm-up time
- The warm-up will not display if it has been
set to “0” in the exercise profile.
• Exercise time -The exercise time is set in the exercise
profile.
• Rest time
- The rest time is automatically set to 3 mins
and cannot be changed. When the timer
reaches “0”, the recovery heart rate will appear.
- The rest time will not display if it has been set to
“OFF” in the exercise profile.
VIEW DATA WHILE SMART TRAINING PROGRAM
IS RUNNING
During warm-up, exercise or rest time countdown, press SET
to view and toggle between the following screen displays:
• Remaining warm-up / exercise / rest time with current
heart rate
or

17
EN
or
• Current calorie and fat burn level
• Clock with current heart rate
VIEW SMART TRAINING PROGRAM MEMORY
RECORDS
When the SMART TRAINING PROGRAM has been
completed, press MEM / LAP / - to view the “total time /
maximum heart rate” record, then press SET to view the
following records:
• Recovery heart rate / average heart rate
• Total calorie and fat burn level
• In zone time: Time spent without exceeding your upper
or lower heart rate limit
• Above zone time: Time spent exceeding your upper
heart rate limit
• Below zone time: Time spent exceeding your lower
heart rate limit
NOTE You cannot use the stopwatch if you are running the
SMART TRAINING PROGRAM.
RECOVERY HEART RATE
Your recovery heart is a good indication of cardiovascular
fitness. The faster your heart rate recovers after exercise,
the better shape you are in. The watch uses a time-based
recovery method, which checks your recovery heart rate 3
minutes after exercise.
Compare your recovery heart rate between exercise
sessions to track the effect your exercise is having.
STOPWATCH
The stopwatch function is particularly beneficial to use when
you are unsure how long your activity will take, or when you

18
EN
want to measure the time it takes to complete a task and
your performance over that time. You can also take lap and
split time readings when using the stopwatch function.
To get the most out of your stopwatch function complete
your user and exercise profile. If you have not completed
the user profile you will be unable to use the calorie and fat
burn function.
Press MODE to navigate to Stopwatch Mode. You can now
perform the following functions:
TASK INSTRUCTION
Start stopwatch Press ST / SP / +
Pause / resume
stopwatch
Press ST / SP / +
Reset Press and hold SET
Save lap
Press MEM / LAP / - while the
stopwatch is running
NOTE Up to 99 laps / 99 hrs,
59 mins total can be stored in
the memory
Select exercise
profile for stopwatch
Reset the stopwatch. Press
and hold SET
NOTE The stopwatch begins measurement in min:
sec:1/100 sec. After 59 minutes pass, the display will
change to hrs:min:sec.
VIEW DATA WHILE STOPWATCH / LAP
IS RUNNING
While the stopwatch or lap functions are being used, press SET
to view and toggle between the following screen displays:
• Total time / split time and current heart rate
• Lap time and current heart rate (if enabled)
• Current calorie and fat burn level
• Clock with current heart rate
If the battery is low when taking a lap, this screen will appear
and no more laps will be saved.
VIEW STOPWATCH OR LAP MEMORY RECORDS
To view stopwatch records:
1. The stopwatch must be stopped (press ST / SP / +).
2. Press MEM / LAP / -, then press SET.
The stopwatch records will appear in the following order:
• Total time / maximum heart rate
• Total time / average heart rate
• Calories / fat burn total
• In zone time: Time spent without exceeding your upper
or lower heart rate limit
• Above zone time: Time spent exceeding your upper
heart rate limit
• Below zone time: Time spent exceeding your lower
heart rate limit

19
EN
To view lap records:
1. The stopwatch must be stopped (press ST / SP / +).
2. Press MEM / LAP / -, then press ST / SP / + or MEM /
LAP / - to select lap.
3. Press SET to view lap record.
The lap records will appear in the following order:
• Lap time / maximum heart rate
• Split time / average heart rate
• Calorie and fat burn total - per lap
• In zone time - per lap: Time spent without exceeding
your upper or lower heart rate limit
• Above zone time - per lap: Time spent exceeding your
upper heart rate limit
• Below zone time - per lap: Time spent exceeding your
lower heart rate limit
BATTERIES
The SE188 uses two CR2032 lithium batteries, one for the
watch and another for the heart rate chest belt. Both are
already installed. See the table below for battery warnings.
LOW BATTERY ICON DESCRIPTION
/
The battery is too low
to run the backlight
The chest belt battery is
nearly too low to send a
signal to the watch
The batteries typically last one year.
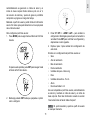
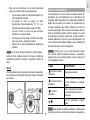
To replace the watch battery:
1. Undo the screws and remove the back plate.
2. Using a thin blunt instrument, hook the release catch
and lift the clip.
3. Replace the old battery and then the battery clip.
4. Replace the back plate and screws.
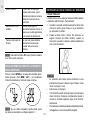
To replace the chest belt battery:
1. Using a coin, twist the battery door counter-clockwise
until it clicks out of place.
Sidan laddas...
Sidan laddas...
Sidan laddas...
Sidan laddas...
Sidan laddas...
Sidan laddas...
Sidan laddas...
Sidan laddas...
Sidan laddas...
Sidan laddas...
Sidan laddas...
Sidan laddas...
Sidan laddas...
Sidan laddas...
Sidan laddas...
Sidan laddas...
Sidan laddas...
Sidan laddas...
Sidan laddas...
Sidan laddas...
Sidan laddas...
Sidan laddas...
Sidan laddas...
Sidan laddas...
Sidan laddas...
Sidan laddas...
Sidan laddas...
Sidan laddas...
Sidan laddas...
Sidan laddas...
Sidan laddas...
Sidan laddas...
Sidan laddas...
Sidan laddas...
Sidan laddas...
Sidan laddas...
Sidan laddas...
Sidan laddas...
Sidan laddas...
Sidan laddas...
Sidan laddas...
Sidan laddas...
Sidan laddas...
Sidan laddas...
Sidan laddas...
Sidan laddas...
Sidan laddas...
Sidan laddas...
Sidan laddas...
Sidan laddas...
Sidan laddas...
Sidan laddas...
Sidan laddas...
Sidan laddas...
Sidan laddas...
Sidan laddas...
Sidan laddas...
Sidan laddas...
Sidan laddas...
Sidan laddas...
Sidan laddas...
Sidan laddas...
Sidan laddas...
Sidan laddas...
Sidan laddas...
Sidan laddas...
Sidan laddas...
Sidan laddas...
Sidan laddas...
Sidan laddas...
Sidan laddas...
Sidan laddas...
Sidan laddas...
Sidan laddas...
Sidan laddas...
Sidan laddas...
Sidan laddas...
Sidan laddas...
Sidan laddas...
Sidan laddas...
Sidan laddas...
Sidan laddas...
Sidan laddas...
Sidan laddas...
Sidan laddas...
Sidan laddas...
Sidan laddas...
Sidan laddas...
Sidan laddas...
Sidan laddas...
Sidan laddas...
Sidan laddas...
Sidan laddas...
Sidan laddas...
Sidan laddas...
Sidan laddas...
Sidan laddas...
Sidan laddas...
Sidan laddas...
Sidan laddas...
Sidan laddas...
Sidan laddas...
Sidan laddas...
Sidan laddas...
Sidan laddas...
Sidan laddas...
Sidan laddas...
Sidan laddas...
Sidan laddas...
Sidan laddas...
Sidan laddas...
Sidan laddas...
Sidan laddas...
Sidan laddas...
Sidan laddas...
Sidan laddas...
Sidan laddas...
Sidan laddas...
Sidan laddas...
Sidan laddas...
Sidan laddas...
Sidan laddas...
Sidan laddas...
Sidan laddas...
Sidan laddas...
Sidan laddas...
Sidan laddas...
Sidan laddas...
Sidan laddas...
Sidan laddas...
Sidan laddas...
Sidan laddas...
Sidan laddas...
Sidan laddas...
Sidan laddas...
Sidan laddas...
Sidan laddas...
Sidan laddas...
Sidan laddas...
Sidan laddas...
Sidan laddas...
Sidan laddas...
Sidan laddas...
Sidan laddas...
Sidan laddas...
Sidan laddas...
Sidan laddas...
Sidan laddas...
Sidan laddas...
Sidan laddas...
Sidan laddas...
Sidan laddas...
Sidan laddas...
Sidan laddas...
Sidan laddas...
Sidan laddas...
Sidan laddas...
Sidan laddas...
Sidan laddas...
Sidan laddas...
Sidan laddas...
Sidan laddas...
Sidan laddas...
Sidan laddas...
Sidan laddas...
Sidan laddas...
Sidan laddas...
Sidan laddas...
Sidan laddas...
Sidan laddas...
Sidan laddas...
Sidan laddas...
Sidan laddas...
Sidan laddas...
Sidan laddas...
Sidan laddas...
Sidan laddas...
-
 1
1
-
 2
2
-
 3
3
-
 4
4
-
 5
5
-
 6
6
-
 7
7
-
 8
8
-
 9
9
-
 10
10
-
 11
11
-
 12
12
-
 13
13
-
 14
14
-
 15
15
-
 16
16
-
 17
17
-
 18
18
-
 19
19
-
 20
20
-
 21
21
-
 22
22
-
 23
23
-
 24
24
-
 25
25
-
 26
26
-
 27
27
-
 28
28
-
 29
29
-
 30
30
-
 31
31
-
 32
32
-
 33
33
-
 34
34
-
 35
35
-
 36
36
-
 37
37
-
 38
38
-
 39
39
-
 40
40
-
 41
41
-
 42
42
-
 43
43
-
 44
44
-
 45
45
-
 46
46
-
 47
47
-
 48
48
-
 49
49
-
 50
50
-
 51
51
-
 52
52
-
 53
53
-
 54
54
-
 55
55
-
 56
56
-
 57
57
-
 58
58
-
 59
59
-
 60
60
-
 61
61
-
 62
62
-
 63
63
-
 64
64
-
 65
65
-
 66
66
-
 67
67
-
 68
68
-
 69
69
-
 70
70
-
 71
71
-
 72
72
-
 73
73
-
 74
74
-
 75
75
-
 76
76
-
 77
77
-
 78
78
-
 79
79
-
 80
80
-
 81
81
-
 82
82
-
 83
83
-
 84
84
-
 85
85
-
 86
86
-
 87
87
-
 88
88
-
 89
89
-
 90
90
-
 91
91
-
 92
92
-
 93
93
-
 94
94
-
 95
95
-
 96
96
-
 97
97
-
 98
98
-
 99
99
-
 100
100
-
 101
101
-
 102
102
-
 103
103
-
 104
104
-
 105
105
-
 106
106
-
 107
107
-
 108
108
-
 109
109
-
 110
110
-
 111
111
-
 112
112
-
 113
113
-
 114
114
-
 115
115
-
 116
116
-
 117
117
-
 118
118
-
 119
119
-
 120
120
-
 121
121
-
 122
122
-
 123
123
-
 124
124
-
 125
125
-
 126
126
-
 127
127
-
 128
128
-
 129
129
-
 130
130
-
 131
131
-
 132
132
-
 133
133
-
 134
134
-
 135
135
-
 136
136
-
 137
137
-
 138
138
-
 139
139
-
 140
140
-
 141
141
-
 142
142
-
 143
143
-
 144
144
-
 145
145
-
 146
146
-
 147
147
-
 148
148
-
 149
149
-
 150
150
-
 151
151
-
 152
152
-
 153
153
-
 154
154
-
 155
155
-
 156
156
-
 157
157
-
 158
158
-
 159
159
-
 160
160
-
 161
161
-
 162
162
-
 163
163
-
 164
164
-
 165
165
-
 166
166
-
 167
167
-
 168
168
-
 169
169
-
 170
170
-
 171
171
-
 172
172
-
 173
173
-
 174
174
-
 175
175
-
 176
176
-
 177
177
-
 178
178
-
 179
179
-
 180
180
-
 181
181
-
 182
182
-
 183
183
-
 184
184
-
 185
185
-
 186
186
-
 187
187
-
 188
188
-
 189
189
-
 190
190
-
 191
191
-
 192
192
-
 193
193
-
 194
194
-
 195
195
-
 196
196
-
 197
197


Oregon Scientific Heart Rate Monitor SE188 Användarmanual
- Kategori
- Klockor
- Typ
- Användarmanual
- Denna manual är också lämplig för
på andra språk
- italiano: Oregon Scientific Heart Rate Monitor SE188 Manuale utente
- español: Oregon Scientific Heart Rate Monitor SE188 Manual de usuario
- Deutsch: Oregon Scientific Heart Rate Monitor SE188 Benutzerhandbuch
- português: Oregon Scientific Heart Rate Monitor SE188 Manual do usuário
- français: Oregon Scientific Heart Rate Monitor SE188 Manuel utilisateur
- Nederlands: Oregon Scientific Heart Rate Monitor SE188 Handleiding
Relaterade papper
-
Oregon Scientific SE190 Användarguide
-
Oregon Scientific SE300 Bruksanvisningar
-
-
 Oregon Scientific ZONE TRAINER SE331 Användarmanual
-
Oregon Scientific SE122 Användarmanual
-
 Oregon Scientific SE336 Användarmanual
-
 Oregon Scientific SE232 Användarmanual
-
 Oregon Scientific SE833 Användarmanual
-
 Oregon Scientific SE200 Användarmanual
-
 Oregon Scientific AH 101 wireless Användarmanual


Andra dokument
-
Crivit 1-LD3945 Usage And Safety Instructions
-
Crivit 1-LD3604-3 Usage And Safety Instructions
-
Topcom Watch 1000 Användarmanual
-
Tristar 10002011 Användarguide
-
-
-
Sigma iD Go Snabbstartsguide
-
prologue YP04238/02 Användarmanual
-
Carrera 30355 Bruksanvisningar
-
Cateye MSC-HR20 Användarmanual