Yamaha MO6 Bruksanvisning

Kategori
Trummor
Typ
Bruksanvisning

Denna manual är också lämplig för

OWNERS MANUAL
MUSIC PRODUCTION SYNTHESIZER
EN
SPECIAL MESSAGE SECTION
This product utilizes batteries or an external power supply
(adapter). DO NOT connect this product to any power supply or
adapter other than one described in the manual, on the name
plate, or specifically recommended by Yamaha.
WARNING: Do not place this product in a position where
anyone could walk on, trip over, or roll anything over power or
connecting cords of any kind. The use of an extension cord is
not recommended! If you must use an extension cord, the
minimum wire size for a 25’ cord (or less) is 18 AWG. NOTE: The
smaller the AWG number, the larger the current handling
capacity. For longer extension cords, consult a local electrician.
This product should be used only with the components supplied
or; a cart, rack, or stand that is recommended by Yamaha. If a
cart, etc., is used, please observe all safety markings and
instructions that accompany the accessory product.
SPECIFICATIONS SUBJECT TO CHANGE:
The information contained in this manual is believed to be
correct at the time of printing. However, Yamaha reserves the
right to change or modify any of the specifications without
notice or obligation to update existing units.
This product, either alone or in combination with an amplifier
and headphones or speaker/s, may be capable of producing
sound levels that could cause permanent hearing loss. DO NOT
operate for long periods of time at a high volume level or at a
level that is uncomfortable. If you experience any hearing loss
or ringing in the ears, you should consult an audiologist.
IMPORTANT: The louder the sound, the shorter the time
period before damage occurs.
Some Yamaha products may have benches and / or accessory
mounting fixtures that are either supplied with the product or as
optional accessories. Some of these items are designed to be
dealer assembled or installed. Please make sure that benches
are stable and any optional fixtures (where applicable) are well
secured BEFORE using.
Benches supplied by Yamaha are designed for seating only. No
other uses are recommended.
NOTICE:
Service charges incurred due to a lack of knowledge relating to
how a function or effect works (when the unit is operating as
designed) are not covered by the manufacturer’s warranty, and
are therefore the owners responsibility. Please study this manual
carefully and consult your dealer before requesting service.
ENVIRONMENTAL ISSUES:
Yamaha strives to produce products that are both user safe and
environmentally friendly. We sincerely believe that our products
and the production methods used to produce them, meet these
goals. In keeping with both the letter and the spirit of the law, we
want you to be aware of the following:
Battery Notice:
This product MAY contain a small non-rechargeable battery
which (if applicable) is soldered in place. The average life span
of this type of battery is approximately five years. When
replacement becomes necessary, contact a qualified service
representative to perform the replacement.
This product may also use “household” type batteries. Some of
these may be rechargeable. Make sure that the battery being
charged is a rechargeable type and that the charger is intended
for the battery being charged.
When installing batteries, do not mix batteries with new, or with
batteries of a different type. Batteries MUST be installed
correctly. Mismatches or incorrect installation may result in
overheating and battery case rupture.
Warning:
Do not attempt to disassemble, or incinerate any battery. Keep
all batteries away from children. Dispose of used batteries
promptly and as regulated by the laws in your area. Note: Check
with any retailer of household type batteries in your area for
battery disposal information.
Disposal Notice:
Should this product become damaged beyond repair, or for
some reason its useful life is considered to be at an end, please
observe all local, state, and federal regulations that relate to the
disposal of products that contain lead, batteries, plastics, etc. If
your dealer is unable to assist you, please contact Yamaha
directly.
NAME PLATE LOCATION:
The name plate is located on the rear (MO8) or bottom (MO6) of
the product. The model number, serial number, power
requirements, etc., are located on this plate. You should record
the model number, serial number, and the date of purchase in
the spaces provided below and retain this manual as a
permanent record of your purchase.
Model
Serial No.
Purchase Date
PLEASE KEEP THIS MANUAL
MIDI
THRU OUT IN
USB
TO DEVICE TO HOST
MO8
MO6
1. IMPORTANT NOTICE: DO NOT MODIFY THIS UNIT!
This product, when installed as indicated in the instructions con-
tained in this manual, meets FCC requirements. Modifications not
expressly approved by Yamaha may void your authority, granted by
the FCC, to use the product.
2. IMPORTANT: When connecting this product to accessories and/
or another product use only high quality shielded cables. Cable/s
supplied with this product MUST be used. Follow all installation
instructions. Failure to follow instructions could void your FCC
authorization to use this product in the USA.
3. NOTE: This product has been tested and found to comply with the
requirements listed in FCC Regulations, Part 15 for Class “B” digital
devices. Compliance with these requirements provides a reason-
able level of assurance that your use of this product in a residential
environment will not result in harmful interference with other elec-
tronic devices. This equipment generates/uses radio frequencies
and, if not installed and used according to the instructions found in
the users manual, may cause interference harmful to the operation
of other electronic devices. Compliance with FCC regulations does
* This applies only to products distributed by YAMAHA CORPORATION OF AMERICA. (class B)
not guarantee that interference will not occur in all installations. If
this product is found to be the source of interference, which can be
determined by turning the unit “OFF” and “ON”, please try to elimi-
nate the problem by using one of the following measures:
Relocate either this product or the device that is being affected by
the interference.
Utilize power outlets that are on different branch (circuit breaker or
fuse) circuits or install AC line filter/s.
In the case of radio or TV interference, relocate/reorient the
antenna. If the antenna lead-in is 300 ohm ribbon lead, change the
lead-in to co-axial type cable.
If these corrective measures do not produce satisfactory results,
please contact the local retailer authorized to distribute this type of
product. If you can not locate the appropriate retailer, please con-
tact Yamaha Corporation of America, Electronic Service Division,
6600 Orangethorpe Ave, Buena Park, CA90620
The above statements apply ONLY to those products distributed by
Yamaha Corporation of America or its subsidiaries.
FCC INFORMATION (U.S.A.)
* This applies only to products distributed by
YAMAHA CORPORATION OF AMERICA.
COMPLIANCE INFORMATION STATEMENT
(DECLARATION OF CONFORMITY PROCEDURE)
Responsible Party : Yamaha Corporation of America
Address : 6600 Orangethorpe Ave., Buena Park, Calif. 90620
Telephone : 714-522-9011
Type of Equipment : MUSIC PRODUCTION SYNTHESIZER
Model Name : MO6, MO8
This device complies with Part 15 of the FCC Rules.
Operation is subject to the following conditions:
1)this device may not cause harmful interference, and
2)this device must accept any interference received including interference
that may cause undesired operation.
See user manual instructions if interference to radio reception is sus-
pected.
(FCC DoC)
OBSERVERA!
Apparaten kopplas inte ur växelströmskällan (nätet) så länge som den
ar ansluten till vägguttaget, även om själva apparaten har stängts av.
ADVARSEL: Netspæendingen til dette apparat er IKKE afbrudt,
sålæenge netledningen siddr i en stikkontakt, som er t endt — også
selvom der or slukket på apparatets afbryder.
VAROITUS: Laitteen toisiopiiriin kytketty käyttökytkin ei irroita koko
laitetta verkosta.
(standby)
(3)-9 1/2
PRECAUTIONS
PLEASE READ CAREFULLY BEFORE PROCEEDING
* Please keep this manual in a safe place for future reference.
WARNING
Always follow the basic precautions listed below to avoid the possibility of serious injury or even death from electrical
shock, short-circuiting, damages, fire or other hazards. These precautions include, but are not limited to, the following:
Only use the voltage specified as correct for the instrument. The required
voltage is printed on the name plate of the instrument.
Use the specified adaptor (PA-5D or an equivalent recommended by Yamaha)
only. Using the wrong adaptor can result in damage to the instrument or
overheating.
Check the electric plug periodically and remove any dirt or dust which may have
accumulated on it.
Do not place the AC adaptor cord near heat sources such as heaters or radiators,
and do not excessively bend or otherwise damage the cord, place heavy objects
on it, or place it in a position where anyone could walk on, trip over, or roll
anything over it.
Do not open the instrument or attempt to disassemble the internal parts or
modify them in any way. The instrument contains no user-serviceable parts. If it
should appear to be malfunctioning, discontinue use immediately and have it
inspected by qualified Yamaha service personnel.
Do not expose the instrument to rain, use it near water or in damp or wet
conditions, or place containers on it containing liquids which might spill into
any openings.
Never insert or remove an electric plug with wet hands.
Do not put burning items, such as candles, on the unit.
A burning item may fall over and cause a fire.
If the AC adaptor cord or plug becomes frayed or damaged, or if there is a
sudden loss of sound during use of the instrument, or if any unusual smells or
smoke should appear to be caused by it, immediately turn off the power switch,
disconnect the adaptor plug from the outlet, and have the instrument inspected
by qualified Yamaha service personnel.
CAUTION
Always follow the basic precautions listed below to avoid the possibility of physical injury to you or others, or damage
to the instrument or other property. These precautions include, but are not limited to, the following:
When removing the electric plug from the instrument or an outlet, always hold
the plug itself and not the cord.
Unplug the AC power adaptor when not using the instrument, or during
electrical storms.
Do not connect the instrument to an electrical outlet using a multiple-connector.
Doing so can result in lower sound quality, or possibly cause overheating in the
outlet.
Do not expose the instrument to excessive dust or vibrations, or extreme cold or
heat (such as in direct sunlight, near a heater, or in a car during the day) to
prevent the possibility of panel disfiguration or damage to the internal
components.
Do not use the instrument in the vicinity of a TV, radio, stereo equipment,
mobile phone, or other electric devices. Otherwise, the instrument, TV, or radio
may generate noise.
Do not place the instrument in an unstable position where it might accidentally
fall over.
Before moving the instrument, remove all connected adaptor and other cables.
When setting up the instrument, make sure that the AC outlet you are using is
easily accessible. If some trouble or malfunction occurs, immediately turn off
the power switch and disconnect the plug from the outlet.
Power supply/AC power adaptor
Do not open
Water warning
Fire warning
If you notice any abnormality
Power supply/AC power adaptor Location
(3)-9 2/2
Before connecting the instrument to other electronic components, turn off the
power for all components. Before turning the power on or off for all
components, set all volume levels to minimum. Also, be sure to set the volumes
of all components at their minimum levels and gradually raise the volume
controls while playing the instrument to set the desired listening level.
When cleaning the instrument, use a soft, dry cloth. Do not use paint thinners,
solvents, cleaning fluids, or chemical-impregnated wiping cloths.
Do not insert a finger or hand in any gaps on the instrument.
Never insert or drop paper, metallic, or other objects into the gaps on the panel
or keyboard. If this happens, turn off the power immediately and unplug the
power cord from the AC outlet. Then have the instrument inspected by qualified
Yamaha service personnel.
Do not place vinyl, plastic or rubber objects on the instrument, since this might
discolor the panel or keyboard.
Do not rest your weight on, or place heavy objects on the instrument, and do not
use excessive force on the buttons, switches or connectors.
Do not operate the instrument for a long period of time at a high or
uncomfortable volume level, since this can cause permanent hearing loss. If you
experience any hearing loss or ringing in the ears, consult a physician.
Saving and backing up your data
DRAM data (see page 150) is lost when you turn off the power to the instrument.
Save the data to a USB storage device.
Never attempt to turn off the power while data is being written to Flash ROM
(while an “Executing...” or “Please keep power on” message is shown). Turning
the power off in this state results in loss of all user data and may cause the
system to freeze (due to corruption of data in the Flash ROM). This means that
this synthesizer may not be able to start up properly, even when turning the
power on next time.
Backing up the USB storage device
•To protect against data loss through media damage, we recommend that you
save your important data onto two USB storage devices.
Yamaha cannot be held responsible for damage caused by improper use or modifications to the instrument, or data that is lost or destroyed.
Always turn the power off when the instrument is not in use.
Even when the power switch is in the “STANDBY” position, electricity is still flowing to the instrument at the minimum level. When you are not using the instrument for a long
time, make sure you unplug the AC power adaptor from the wall AC outlet.
Connections
Maintenance
Handling caution
Saving data
Introduction
6
Owner’s Manual
Introduction
Congratulations and thank you for your purchase of the Yamaha MO Music Production Synthesizer!
You now own a fantastic-sounding, highly versatile keyboard—one that combines comprehensive synthesizer sound-
crafting controls and powerful performance/recording features in a total music production instrument.
Virtually all of our synthesizer technology and music making know-how went into the design of this instrument. The new MO
not only gives you the latest and greatest sounds and rhythms (as well as the ability to create your own), it gives you
powerful, easy-to-use tools for playing, combining and controlling these dynamic sounds/rhythms—in real time, as you
perform!
Take time to look through this manual carefully. It’s packed with important information on how to get the most from this
amazing instrument.
Dive in now and enjoy!
Accessories
The following items have been included with your MO. Check to see that you have everything listed here.
Power adaptor (PA-5D)*
Owner’s Manual (this document)
Data List
* May not be included in your area. Please check with your Yamaha dealer.
The illustrations and LCD screens as shown in this owner’s manual are for instructional purposes only, and
may appear somewhat different from those on your instrument.
This product incorporates and bundles computer programs and contents in which Yamaha owns
copyrights or with respect to which it has license to use others’ copyrights. Such copyrighted materials
include, without limitation, all computer software, style files, MIDI files, WAVE data, musical scores and
sound recordings. Any unauthorized use of such programs and contents outside of personal use is not
permitted under relevant laws. Any violation of copyright has legal consequences. DON’T MAKE,
DISTRIBUTE OR USE ILLEGAL COPIES.
This device is capable of using various types/formats of music data, and it optimizes the data in advance
to the proper format for use with the device. As a result, the data may not be played back precisely as the
creators or composers originally intended.
Copying of the commercially available musical data including but not limited to MIDI data and/or audio
data is strictly prohibited except for your personal use.
• Windows is the registered trademarks of Microsoft
®
Corporation.
• Apple and Macintosh are trademarks of Apple Computer, Inc., registered in the U.S. and other countries.
• The company names and product names in this Owner’s Manual are the trademarks or registered
trademarks of their respective companies.
Main Features
7
Owner’s Manual
Main Features
Wide range of dynamic and authentic voices. Use the Category Search function to quickly call up the sounds you
want, based on their instrument type.
Page 42
Performance mode lets you use four different voices together—in layers or in a keyboard split. Page 44
Extensive effect processing, with Reverb (20 types), Chorus (49 types), three separate Insertion blocks each of which
has two blocks (total 116 types), Master Effect (8 types), and a digital equalizer (3-band Part EQ and 5-band Master
EQ).
Page 140
Comprehensive real-time control with four knobs and four sliders—letting you adjust filter, levels, effects, EG, and
more, while you play.
Page 51
Pattern mode functions let you craft different rhythmic sections and riffs as individual elements—which you can easily
and intuitively combine in real time to create full rhythm tracks.
Page 73
In addition to being able to create User voices in the Voice mode, you can create special Mixing voices for Songs and
Patterns. These voices can be edited and stored in the Song/Pattern mode, making it exceptionally easy and convenient
to create voices for use with Songs and Patterns.
Page 78
The versatile Arpeggio feature automatically plays a variety of sequenced phrases in response to the keys you play. This
function is especially powerful with drum voices—letting you easily call up various rhythm patterns at the touch of a key,
and providing instant inspiration for song creation and performance. When used with normal voices, the Arpeggio
phrase changes harmonically and melodically with the chords you play, giving you intuitive control over the patterns as
you compose or perform. Arpeggios can be triggered not only according to the keys you play, but also by how strongly
you play them—for even greater performance power.
Page 48
Once you’ve collected all the MIDI data and patterns you need for your song, use Pattern Chain to arrange the pieces in
real time. This hands-on approach makes it easier than ever to come up with great ideas and amazing songs.
Page 84
Song Scene is another powerful tool that lets you take “snapshots” of the sequencer track settings (such as pan,
volume, track mute and so on). Then, during playback or recording, simply switch among the Scenes for instant,
dynamic changes.
Page 89
Master mode—for using the MO as a master keyboard controller (with independent Zones), and for easily reconfiguring
the instrument between Voice/Performance play and Song/Pattern play in live applications.
Page 122
Exceptionally easy-to-understand interface with two-tiered operation buttons: [F1] – [F6] and [SF1] – [SF5] Page 33
Remote Control—for operating your favorite sequencing software from the panel controls. Mute tracks, control transport
(Play, Stop, Record, etc.), mix both MIDI and audio tracks (up to 16) with this instrument’s knobs and sliders, pan the
tracks, control EQ, and tweak effect sends—all without ever touching the mouse.
Page 113
The digital output jacks (DIGITAL) ensure completely noise-free, distortion-free sound output (44.1kHz, 24 bit). Page 103
The instrument features two USB connectors—USB TO HOST for connecting to computer, and USB TO DEVICE for
connecting to storage devices, such as a hard disk drive or flash disk.
Page 31
Compatibility with Yamaha’s powerful Voice Editor and Multi Part Editor software—featuring comprehensive, intuitive
editing of all parameters from your computer.
Page 112
How to use this manual
8
Owner’s Manual
How to use this manual
Application Index ................................................................................................................Page 9
This special index is organized not by single words, but by functions and applications—allowing you to quickly and
easily find how to perform a particular operation or explore a topic of interest.
The Controls & Connectors ...............................................................................................Page 14
Use this section to find out about all of the buttons, controls and connectors of this instrument.
Setting Up and Playing .....................................................................................................Page 20
Before going on to any other part of the manual, we strongly suggest you read this section first. It shows you how to get
started playing and using your new instrument.
Basic Operation.................................................................................................................. Page 27
This section introduces you to the basic operating conventions of this instrument, such as editing values and changing
settings.
Quick Guide........................................................................................................................ Page 40
In this tutorial section, you will take a guided tour through the various functions of this instrument, and get some
hands-on experience in playing and using it.
Basic Structure ................................................................................................................. Page 128
This section provides a detailed overview of all of the main functions and features of this instrument, and shows how
they fit together.
Reference .........................................................................................................................Page 151
The MO encyclopedia. This section explains all parameters, settings, functions, features, modes and operations in full detail.
Appendix ..........................................................................................................................Page 219
This section contains detailed information on the instrument, including the Specifications and an Alert Message List.
Troubleshooting............................................................................................................... Page 227
If this instrument does not function as expected or you have some problem with the sound or operation, refer to this
section before calling your Yamaha dealer or service center. Most common problems and their solutions are covered
here in a very simple and easy-to-understand way.
Data List (separate booklet)
This contains various important lists such as the Voice List, Preset Pattern Phrase List, Effect List, MIDI Data Format,
and MIDI Implementation Chart.
Throughout this manual, arrows are used in the instructions, indicating in shorthand the process of calling up certain
displays and functions. The example instructions below indicate to 1) press the [VOICE] button, 2) select a Normal
Voice, 3) press the [EDIT] button, 4) select an Element, 5) press the [F1] OSC button, and 6) press the [SF2] OUTPUT
button.
[VOICE] Normal Voice selection [EDIT] Element selection [F1] OSC [SF2] OUTPUT
n When a confirmation message (page 37) or Control Function window (page 51) is shown in the display, press the [EXIT] button to exit from
that condition, then execute the instructions as in the above example. Likewise, press the [DAW REMOTE] button to exit from the Remote
Control mode, then execute the instructions as in the above example when the MO is in the Remote Control mode.
Application Index
9
Owner’s Manual
Listening to the MO
Listening to the Demo Song/Pattern .............................................................................................................................................................. Page 73
Listening to Song Chain playback.................................................................................................................................................................. Page 95
Listening to Pattern Chain playback .............................................................................................................................................................. Page 84
Listening to Arpeggio playback...................................................................................................................................................................... Page 48
Playing the keyboard
Selecting a Voice and playing the keyboard..................................................................................Pages 40 (Voice mode), 76 (Song/Pattern mode)
Selecting a Performance and playing the keyboard..................................................................................................................................... Page 44
Using the instrument as a Master Keyboard ............................................................................................................................................... Page 122
Sounding the metronome..................................... [SONG] or [PATTERN] [UTILITY] [F3] SEQ [SF1] CLICK Mode = all .......... Page 206
Splitting the keyboard—Setting upper and lower ranges for the Voices................................Pages 47 (Performance mode), 125 (Master mode)
•Layering two Voices (or Parts) together.....................................................................................Pages 46 (Performance mode), 125 (Master mode)
Selecting programs and making settings on the MO
Selecting a Voice ..............................................................................................................................Pages 40 (Voice mode), 76 (Song/Pattern mode)
Using the Category Search function.............................................................................................................................................................. Page 42
Selecting a Performance ................................................................................................................................................................................. Page 44
Selecting a Song.............................................................................................................................................................................................. Page 74
Selecting a Pattern........................................................................................................................................................................................... Page 75
Selecting a Section.......................................................................................................................................................................................... Page 75
Selecting a Phrase and assigning it to a Pattern track................................................................................................................................. Page 78
Selecting a Mixing template for a Song/Pattern............................................................................................................................................ Page 77
Selecting a Master.......................................................................................................................................................................................... Page 122
Selecting an Arpeggio type....................................................................................... Pages 48 (Voice/Performance mode), 80 (Song/Pattern mode)
Selecting a Filter type.................................................................................................................................................................................... Page 170
Selecting an Effect type
Selecting a Reverb type/Chorus type/Insertion type
[VOICE] Voice selection [F3] EFFECT ................................................................................................................................................... Page 151
[PERFORM] Performance selection [F3] EFFECT [SF1] CONNECT ................................................................................................ Page 171
[SONG] or [PATTERN] Song/Pattern selection [MIXING] [F3] EFFECT [SF1] CONNECT ............................................................. Page 189
Selecting a Master Effect type
[VOICE] [UTILITY] [F3] VOICE [SF2] MEF ........................................................................................................................................ Page 206
[PERFORM] Performance selection [EDIT] [COMMON] [F2] OUT/MEF [SF3] MEF ................................................................ Page 172
[SONG] or [PATTERN] Song/Pattern selection [MIXING] [EDIT] [COMMON] [F2] MEQ/MEF [SF2] MEF ........................... Page 190
Selecting a Master EQ type
[VOICE] [UTILITY] [F3] VOICE [SF1] MEQ ....................................................................................................................................... Page 206
[PERFORM] Performance selection [EDIT] [COMMON] [F2] OUT/MEF [SF2] MEQ ................................................................ Page 172
[SONG] or [PATTERN] Song/Pattern selection [MIXING] [EDIT] [COMMON] [F2] OUT/MEF [SF1] MEQ ........................... Page 190
Using controllers
Understanding the organization and structure of the controllers........................................................................................................Pages 50, 69
Assigning functions to the controllers for each Voice (Controller Set) ...................................................................................................... Page 70
Assigning Control Change numbers to each controller............................................................................................................................... Page 72
Setting the Pitch Bend Range
[VOICE] Voice selection [EDIT] [COMMON] [F1] GENERAL [SF5] OTHER PB Upper/PB Lower ....................................... Page 154
[SONG] or [PATTERN]
Song/Pattern selection
[MIXING]
[EDIT]
Part selection
[F1] VOICE
[SF5] OTHER
PB Upper/PB Lower
........ Page 191
Checking the currently assigned parameters for knob control.......... Pages 56 (Voice mode), 65 (Performance mode), 96 (Song/Pattern mode)
Checking the currently assigned parameters for Control sliders control .................................................................................................. Page 52
Starting/stopping a Song or Pattern by pressing a Footswitch ............................... [UTILITY] [F4] CTL ASN [SF3] FT SW .......... Page 209
Changing a Voice or a Performance by pressing a Footswitch ................................ [UTILITY] [F4] CTL ASN [SF3] FT SW .......... Page 209
•Turning Arpeggio playback on or off by pressing a Footswitch............................... [UTILITY] [F4] CTL ASN [SF3] FT SW .......... Page 209
•Keeping the effect of a controller (Modulation Wheel, etc.) the same, even when changing Voices
[UTILITY] [F1] GENERAL [SF4] OTHER CtrlReset = hold ................................................................................................................. Page 206
Application Index
Application Index
10
Owner’s Manual
Sounding only the specified Part or Voice
•Turning each element on or off in the Voice Edit mode.................................................................................................................................Page 55
Determining whether each Element is used or not in the Voice Edit mode
[VOICE] [EDIT] Element selection [F1] OSC [SF1] WAVE ElementSw = on/off ........................................................................Page 158
Determining whether each Part is used or not in the Performance mode
[PERFORM] Performance selection [EDIT] Part selection [F1] VOICE [SF1] VOICE PartSw = on/off ..................................Page 174
•Turning each track (Part) of a Song/Pattern on or off....................................................................................................................................Page 75
•Turning off or muting playback of a Song/Pattern Part, by setting the receive channel to off
[SONG] or [PATTERN]
Song/Pattern selection
[MIXING]
[EDIT]
part selection
[F1] VOICE
[SF2] MODE
ReceiveCh
............Page 191
Adjusting the volume or output level
Overall
Adjusting the Master Volume output................................................................................................................ [MASTER VOLUME] .............Page 16
Adjusting the entire volume of the instrument’s internal tone generator block
..... [UTILITY] [F1] GENERAL [SF1] TG Volume ...........Page 205
Adjusting the output gain of each Output connector........................................................................... [UTILITY] [F2] OUTPUT ...........Page 206
In the Voice mode
Adjusting the volume balance of the Elements of a Normal Voice with the Control sliders
[VOICE] Normal Voice selection [EDIT] Element selection [F4] AMP [SF1] LVL/PAN Level ...................................................Page 56
Adjusting the entire volume for the selected Voice (common to all Elements/keys)
[VOICE] Voice selection [EDIT] [COMMON] [F2] OUTPUT Volume ..........................................................................................Page 154
In the Performance mode
Adjusting the volume balance of the Parts of an edited Performance with the Control sliders
[PERFORM] Performance selection [EDIT] Part selection [F2] OUTPUT [SF1] VOL/PAN Volume .......................................Page 65
Adjusting the entire volume for the selected Performance (common to all Parts)
[PERFORM] Performance selection [EDIT] [COMMON] [F2] OUT/MEQ [SF1] OUT Volume ...............................................Page 172
In the Song mode/Pattern mode
Adjusting the volume balance of the Parts of an edited Song with the Control sliders
[SONG] or [PATTERN] Song/Pattern selection [MIXING] Part Selection [F1] VOL/PAN VOLUME .............................................Page 97
Creating Data
Creating a Voice
Creating a Normal Voice in the Voice Edit mode............................................................................................................................................Page 53
Creating a Drum Voice in the Voice Edit mode...............................................................................................................................................Page 57
Creating a Mixing Voice especially for a Song or Pattern .............................................................................................................................Page 78
Creating a Performance....................................................................................................................................................................................Page 63
Creating a Song
Recording your keyboard performance to a Song track (Realtime Recording)..........................................................................................Page 88
Recording over (replacing) existing material in a Song track—Punch-in Recording
[SONG] [REC] [F1] SETUP Type = punch ...........................................................................................................................................Page 88
Recording additional material to an existing Song track (without erasing previous material)—Overdub Recording
[SONG] [REC] [F1] SETUP Type = overdub ........................................................................................................................................Page 80
Sounding the metronome during recording............................ [SONG] [UTILITY] [F3] SEQ [SF1] CLICK Mode = rec ...........Page 206
Recording a Song by using a Performance ...................................................................................................................................................Page 89
Using the Step Recording function..................................................................... [SONG] [REC] [F1] SETUP Type = step .............Page 80
Editing MIDI events for each track of an already-recorded Song ....................................... [SONG] [EDIT] Track selection .............Page 90
Inserting Tempo change information in the middle of the Song ............................................. [SONG] [EDIT] [F4] TR SEL .............Page 88
Inserting Voice change information
[SONG] [EDIT] Track selection Inserting a Bank Select MSB/LSB and Program Change ................................................................Page 182
Editing Song Mixing settings, such as the volume of each Part................................................................. [SONG] [MIXING] .............Page 93
Using convenient “Jobs, such as Copy, Clear, Quantize ....................................................... [SONG] [JOB] Job selection .............Page 91
Creating a Pattern
Assigning a Preset Phrase to each track of a Pattern (Patch function).......................................................................................................Page 78
Recording your keyboard performance to a Pattern track to create a Phrase............................................................................................Page 82
Recording a newly found Arpeggio rhythm pattern to a Pattern track........................................................................................................Page 80
Sounding the metronome during recording....................... [PATTERN] [UTILITY] [F3] SEQ [SF1] CLICK Mode = rec ...........Page 206
Using the Step Recording function................................................................ [PATTERN] [REC] [F1] SETUP Type = step .............Page 83
Editing MIDI events for each track of an already-recorded Pattern................................ [PATTERN] [EDIT] Track selection .............Page 90
Editing Pattern Mixing settings, such as the volume of each Part.......................................................... [PATTERN] [MIXING] .............Page 93
Using convenient “Jobs, such as Copy, Clear, Quantize .................................................. [PATTERN] [JOB] Job selection .............Page 91
Programming a sequence of a Section to create a Pattern Chain ...................................................... [PATTERN] [F6] CHAIN .............Page 85
Converting a Pattern Chain to Song data....................... [PATTERN] Pattern selection [F6] CHAIN [EDIT] [F3] SONG .............Page 86
Creating a Master............................................................................................................................................................................................Page 122
Creating an Arpeggio ......................................................................................................................................................................................Page 97
Application Index
11
Owner’s Manual
Storing/Saving the created data
Storing an edited Voice to internal memory (Flash ROM) and saving all the Voices in internal memory to a USB storage device
.......................... Page 60
Storing an edited Performance to internal memory (Flash ROM) and saving all the Performances in internal memory to
a USB storage device ...................................................................................................................................................................................... Page 66
•Saving the Song/Pattern data
Storing Song Mixing/Pattern Mixing settings to internal memory (DRAM).........................................................................................Pages 77, 94
Storing the entire Song/Pattern data to a USB storage device.................................................................................................................... Page 98
Storing Mixing settings to internal memory (Flash ROM) as a template.................................................................................................... Page 94
Storing an edited Master to internal memory (Flash ROM) and saving all the Masters on internal memory to
a USB storage device ................................................................................................................................................................................... Page 123
•Saving all Arpeggios in internal memory (Flash ROM) to a USB storage device.................................................................................... Page 214
Naming your created data.............................................................................................................................................................. Page 38
Recovering lost data
Comparing the Voice, Performance, Song, or Pattern before editing with the just-edited one (Compare function) .............................. Page 36
Recalling an edited, but not-stored Voice, Performance, Song or Pattern (when another Voice has been selected)
—Recall function.............................................................................................................................................................................................. Page 37
Song/Pattern
Canceling the changes made in the recent session such as Recording and Job to restore the data to its previous status
[SONG] or [PATTERN] [JOB] [F1] UNDO ................................................................................................................................................ Page 93
Initializing
Resetting the User Memory to the Initial Factory Settings.......................................................................................................................... Page 26
Formatting a USB storage device................................................................................................................................................................. Page 213
Initializing the edited Voice................................................................................................................ [VOICE] [JOB] [F1] INIT .......... Page 168
Initializing the edited Performance............................................................................................. [PERFORM] [JOB] [F1] INIT .......... Page 177
Initializing the edited Master......................................................................................................... [MASTER] [JOB] [F1] INIT .......... Page 218
Initializing the edited Song Mixing settings ................................................................ [SONG] [MIXING] [JOB] [F1] INIT .......... Page 192
Initializing the edited Pattern Mixing settings ........................................................ [PATTERN] [MIXING] [JOB] [F1] INIT .......... Page 202
Pitch related settings (Tune, Note Shift, etc.)
Overall
Changing the octave setting of the keyboard ............................................ [UTILITY] [F1] GENERAL [SF2] KBD Octave ............ Page 29
Shifting the note up or down on the keyboard ..................................... [UTILITY] [F1] GENERAL [SF2] KBD Transpose ............ Page 29
Shifting the note up or down in the tone generator block ........................ [UTILITY] [F1] GENERAL [SF1] TG NoteShift .......... Page 205
Adjusting the tuning to other instruments........................................................ [UTILITY] [F1] GENERAL [SF1] TG Tune .......... Page 205
In the Voice mode
Setting the tuning system for the voice
[VOICE] Voice selection [EDIT] [COMMON] [F1] GENERAL [SF2] PLY MODE M.TuningNo. ....................................... Page 169
Adjusting the pitch for each Element of the edited Voice in semitones
[VOICE] Voice selection [EDIT] Element selection [F2] PITCH [SF1] TUNE Coarse ............................................................. Page 159
Finely adjusting the pitch for each Element of the edited Voice
[VOICE] Voice selection [EDIT] Element selection [F2] PITCH [SF1] TUNE Fine ................................................................. Page 159
Setting the all notes (keys) to the same pitch
[VOICE] Voice selection [EDIT] Element selection [F2] PITCH [SF4] KEY FLW PitchSens = 0 ............................................ Page 159
In the Performance mode
Shifting the note up or down for each Part of the edited Performance
[PERFORM] Performance selection [EDIT] Part selection [F4] TONE [SF1] TUNE NoteShift ............................................ Page 176
Finely adjusting the pitch for each Part of the edited Performance
[PERFORM] Performance selection [EDIT] Part selection [F4] TONE [SF1] TUNE Detune ................................................ Page 176
In the Song mode/Pattern mode
Shifting the note up or down for each Part of the current Song/Pattern
[SONG] or [PATTERN] Song/Pattern selection [MIXING] [EDIT] Part selection [F4] TONE [SF1] TUNE NoteShift ......... Page 191
Finely adjusting the pitch for each Part of the current Song/Pattern
[SONG] or [PATTERN] Song/Pattern selection [MIXING] [EDIT] Part selection [F4] TONE [SF1] TUNE Detune ....... Page 191
In the Master mode
Shifting the keyboard octave up or down for each zone of the edited Master
[MASTER] Master selection [F2] MEMORY ZoneSwitch = on [EDIT] Zone selection [F2] NOTE Octave ...................... Page 216
Finely adjusting the keyboard pitch for each zone of the edited Master
[MASTER] Master selection [F2] MEMORY ZoneSwitch = on [EDIT] Zone selection [F2] NOTE Transpose .................. Page 216
Application Index
12
Owner’s Manual
Connecting to a computer/external MIDI instrument
Determining which connector (MIDI, USB TO HOST) is used for MIDI input/output
[UTILITY] [F5] MIDI [SF4] OTHER MIDI IN/OUT ................................................................................................................................Page 210
Using the sounds of the MO for Song playback from a MIDI sequencer...................................................................................................Page 110
Setting whether or not Bulk Dump data can be received
[UTILITY] [F5] MIDI [SF2] SWITCH RcvBulk = on/protect .................................................................................................................Page 209
Sounding only the external MIDI tone generator and turning the internal tone generator off
[UTILITY] [F5] MIDI [SF2] SWITCH LocalCtrl = off ............................................................................................................................Page 209
Synchronizing with an external MIDI instrument/computer
Using the MO as a MIDI master
[UTILITY] [F5] MIDI [SF3] SYNC MIDI Sync = internal, ClockOut = on, Seqctrl = out ...................................................................Page 210
Using the MO as a MIDI slave
[UTILITY] [F5] MIDI [SF3] SYNC MIDI Sync = MIDI, ClockOut = off, Seqctrl = in .............................................................................Page 210
Using the MO as a MTC slave
[UTILITY] [F5] MIDI [SF3] SYNC MIDI Sync = MTC, ClockOut = off, Seqctrl = in .............................................................................Page 210
Disabling synchronization with the external MIDI instrument/computer
Maintaining normal playback on an external MIDI sequencer, even when starting/stopping Song/Pattern playback on the MO
[UTILITY] [F5] MIDI [SF3] SYNC MIDI Sync = internal, Seqctrl = off ................................................................................... ...........Page 210
Maintaining normal Song/Pattern playback on the MO, even when starting/stopping playback on an external MIDI sequencer
[UTILITY] [F5] MIDI [SF3] SYNC Seqctrl = off ...................................................................................................................... ...........Page 210
Synchronizing the LFO wave speed of the Voice with an external MIDI instrument/computer
[UTILITY] [F5] MIDI [SF3] SYNC MIDI Sync = MIDI ..........................................................................................................................Page 210
[VOICE] Normal Voice selection [EDIT] [COMMON] [F5] LFO [SF1] WAVE TempoSync = on ...........................................Page 156
Setting which MIDI events will be transmitted or recognized via the MIDI and USB TO HOST connectors
[SONG] or [PATTERN] [UTILITY] [F3] SEQ [SF2] FILTER ..................................................................................................................Page 207
Setting the MIDI transmit channel
Setting the MIDI transmit channel of the keyboard in the Voice mode/Performance mode
[UTILITY] [F5] MIDI [SF1] CH KBDTransCh .......................................................................................................................................Page 209
Setting the MIDI transmit channel and port for each track of a Song/Pattern
[SONG] or [PATTERN] Song/Pattern selection [F3] TRACK [SF1] CHANNEL ...................................................................................Page 178
Setting the MIDI transmit channel of Arpeggio playback
[UTILITY] [F3] VOICE [SF3] ARP CH TransmitCh ..............................................................................................................................Page 206
Setting the MIDI receive channel
Setting the MIDI receive channel of the keyboard in the Voice mode/Performance mode
[UTILITY] [F5] MIDI [SF1] CH BasicRcvCh ........................................................................................................................................Page 209
Setting the MIDI receive channel for each part of a Song/Pattern
[SONG] or [PATTERN]
Song/Pattern selection
[MIXING]
[EDIT]
Part selection
[F1] VOICE
[SF2] MODE
ReceiveCh
.............Page 191
Setting parameters for Program Change transmission/recognition
Enabling or disabling the sending of Bank Select and Program Change messages, when selecting a Voice or Performance
[UTILITY] [F5] MIDI [SF2] SWITCH BankSel, PgmChange ................................................................................................................Page 209
Enabling or disabling selection of MO Voices/Performances from an external MIDI device
[UTILITY] [F5] MIDI [SF2] SWITCH BankSel, PgmChange ................................................................................................................Page 209
[SONG] or [PATTERN] Song/Pattern selection [MIXING] [EDIT] Part selection [F5] RCV SW BankSel, PgmChange .........Page 192
Setting related parameters so that the MIDI messages produced by the Song/Pattern playback will not be transmitted via MIDI
[SONG] or [PATTERN] [UTILITY] [F3] SEQ [SF2] FILTER ...............................................................................................................Page 207
Setting whether each track playback sounds the internal tone generator or an external tone generator
[SONG] or [PATTERN] Song/Pattern selection [F3] TRACK [SF2] OUT SW .....................................................................................Page 179
Other tips
Loading the specified file on the USB storage device automatically when the power is turned on.......................................................Page 102
Setting the Mode set automatically when the power is turned on
[UTILITY] [F1] GENERAL [SF4] OTHER PowerOnMode ....................................................................................................................Page 206
Table of Contents
13
Owner’s Manual
Introduction ...............................................................6
Accessories...............................................................6
Main Features............................................................7
How to use this manual .............................................8
Application Index................................................... 9
The Controls & Connectors 14
Front Panel ..............................................................14
Rear Panel...............................................................18
Setting up and Playing 20
Power supply...........................................................20
Playing the keyboard ..............................................22
Modes .....................................................................24
Basic instructions ....................................................25
Resetting the User Memory to the Initial Factory
Settings ...................................................................26
Basic Operation 27
Modes .....................................................................27
About data storage to USB storage devices ..........30
Functions and Sub-Functions .................................33
Selecting a Program................................................33
Moving the Cursor and Setting Parameters ............35
About the editing functions .....................................36
Confirmation Message ............................................37
Information Display .................................................37
Note (Key) settings..................................................37
Naming....................................................................38
Quick Guide 40
Playing the MO..................................................... 40
Voice Play mode .....................................................40
Performance Play mode..........................................44
Using the Arpeggio feature.....................................48
Using the Controllers on the MO.............................50
Editing a Program................................................ 53
Editing a Voice ........................................................53
Editing a Performance.............................................63
Using the Controllers—Advanced Course ........ 69
Controllers supported by the MO............................69
Creating a Song on the MO................................. 73
Playing the Demo Songs/Patterns...........................73
Creating a Pattern ...................................................76
Creating a Song ......................................................87
Connecting the MO to external devices ...........103
Connections ......................................................... 103
Using as a Multi-timbral Tone Generator for your
DAW/sequencer ................................................... 110
Using the MO with computer software ................. 112
Creating Your Original Program Set
(Master mode) .....................................................122
Basic Structure 128
Internal Structure (System Overview)................... 128
Internal Memory and File Management................ 148
Reference 151
Voice mode........................................................... 151
Performance mode............................................... 171
Song mode ........................................................... 178
Pattern mode ........................................................ 196
Mixing Voice mode............................................... 203
Utility mode........................................................... 205
File mode.............................................................. 211
Master mode......................................................... 215
Appendix 219
Information Displays............................................. 219
Display Messages ................................................ 221
About MIDI............................................................ 223
Troubleshooting.................................................... 227
Specifications ....................................................... 231
Index..................................................................... 232
Table of Contents
Front Panel
14
Owner’s Manual
The Controls & Connectors
Front Panel
ASSIGN A
PAN
CUTOFF
SWING
LOW
ASSIGN B
REVERB
RESONANCE
GATE TIME
LOW MID
ASSIGN 1
CHORUS
ATTA CK
VELOCITY
HIGH MID
ASSIGN 2
TEMPO
RELEASE
UNIT MULTIPLY
HIGH
DAW REMOTE PAGE SELECT
PAN SEND
TONE
ARP FX
OCTAVE
MASTER
VOLUME
ZONE 1 ZONE 2 ZONE 3 ZONE 4
EQ
DOWN
MASTER
EFFECT
VOICE PERFORM MASTER
SONG PATTERN MIXING
FA
V
DAW
REMOTE
EDIT
COMPARE SCENE STORE
FILE
JOB
UTILITY
DEMO
STORE
LOCATE
REC
F1 F2 F3 F4 F5 F6
12
EFFECT
BYPASS
UP
ASSIGN
MEF
SF1
SCENE
SF2 SF3 SF4 SF5 INFORMATION
EFFECT ARPEGGIO
MODE
SEQ TRANSPORT
ARPEGGIO
ON OFF
DEC NO INC YES
EXIT ENTER
EXECUTE
PHONES OUTPUT DIGITAL OUT
FOOT
CONTROLLER
FOOT
SWITCH
L MONO R
MIDI TO HOST TO DEVICE
IN OUT THRU
USB
C1 D1 E1 F1 G1 A1 B1 C2 C3 C4
SET LOCATE
C
O
ASSIGN A
PAN
CUTOFF
SWING
LOW
ASSIGN B
REVERB
RESONANCE
GATE TIME
LOW MID
ASSIGN 1
CHORUS
ATTA CK
VELOCITY
HIGH MID
ASSIGN 2
TEMPO
RELEASE
UNIT MULTIPLY
HIGH
DAW REMOTE PAGE SELECT
PAN SEND
TONE
ARP FX
MASTER
VOLUME
ZONE 1 ZONE 2 ZONE 3 ZONE 4
EQ
MASTER
EFFECT
LOCATE
REC
12
EFFECT
BYPASS
ASSIGN
MEF
EFFECT ARPEGGIO
SEQ TRANSPORT
ARPEGGIO
ON OFF
F1
SCENE
PHONES OUTPUT DIGITAL OUT
L MONO
FOOT
CONTROLLER
FOOT
SWITCH
R
C0 D0B-1A-1 E0 F0 G0 A0 B0 C1 C2 C3
MIDI
TO HOST TO DEVICE
IN OUT THRU
USB
1
1
34
34
5 7
9)
6
%^ &™ £
2
#
$
$
º*(
!
¡
@
9)
8
5
6
^
7
!
MO6
n When both of the [OCTAVE] buttons are turned off, each key corresponds to the note name shown in the
illustrations. Refer to this illustration when setting parameters having note name values, such as Note Limit.
n When [UTILITY] [F1] GENERAL [SF2] KBD Octave is set to “0,” each key corresponds to the note name shown in the
illustrations. Refer to this illustration when setting a note name of a parameter like Note Limit.
MO8
The Controls
& Connectors
Front Panel
15
Owner’s Manual
PRE 1
A. PIANOFAVORITES
PRE 2
KEYBOARD
PRE 3
ORGAN
PRE 4 USER 1
BASS
USER 2
STRINGS
GM
BRASS
CATEGORY
SEARCH
TRACK
SELECT
DRUM
KITS
SOLO
SECTION
MUTE
E
GUITAR
PLUCKED
REED PIPE
ABCDEFGH
12345678
910111213141516
SYN LEAD SYN PAD
CHOIR
SYN COMP
DRUM
PERCUSSION
SE MUSICAL FX COMBI
CHROMATIC
PERCUSSION
ELEMENT PERF. PART ZONE
DC IN STANDBY
ON
C5 C6
COMMON
VOICE PERFORM MASTER
SONG PATTERN MIXING
PRE 1
A. PIANOFAVORITES
PRE 2
KEYBOARD
PRE 3
ORGAN
PRE 4 USER 1
BASS
USER 2
STRINGS
GM
BRASS
DAW
REMOTE
CATEGORY
SEARCH
TRACK
SELECT
DRUM
KITS
SOLO
SECTION
MUTE
EDIT
COMPARE SCENE STORE
SET LOCATE
COMMON
FILE
JOB
UTILITY
DEMO
STORE
F1 F2 F3 F4 F5 F6
SF1 SF2 SF3 SF4 SF5 INFORMATION
MODE
DEC NO INC YES
EXIT ENTER
EXECUTE
GUITAR
PLUCKED
REED PIPE
ABCDEFGH
12345678
910111213141516
SYN LEAD SYN PAD
CHOIR
SYN COMP
DRUM
PERCUSSION
SE MUSICAL FX COMBI
CHROMATIC
PERCUSSION
ELEMENT PERF. PART ZONE
C4 C5 C6 C7
DC IN STANDBY
ON
ª
§
ª
#
@8
&™ ¡ §£%
º* (
¢
¢
Front Panel
16
Owner’s Manual
The Controls
& Connectors
1 Keyboard
The MO6 features a 61-key keyboard, while the MO8 has
88 keys.
All are equipped with an initial touch feature. With initial
touch, the instrument senses how strongly or softly you
play the keys, and uses that playing strength to affect the
sound in various ways, depending on the selected voice.
2 OCTAVE [UP] and [DOWN] buttons Page 29
Use these buttons to change the note range of the
keyboard. To restore the normal octave setting, press both
buttons simultaneously.
n Because of its extended keyboard, the MO8 does not have
OCTAVE buttons.
3 Pitch bend wheel Page 50
Controls the pitch bend effect. You can also assign other
functions to this controller.
4 Modulation wheel Page 50
Controls the modulation effect. You can also assign other
functions to this controller.
5 [MASTER VOLUME] slider
Adjusts the volume of the overall sound, as output from the
rear-panel OUTPUT L/MONO and R jacks as well as the
PHONES jack.
6 Four Knob Control Function buttons and four
Knobs Page 51
These four highly versatile knobs let you adjust various
aspects or parameters of the current Voice. Use the Knob
Control Function buttons to change the parameter set for
the knobs. The corresponding LED lights to indicate which
group of parameters are active.
7 Control slider Page 52
These sliders control the volume of four elements which
make up a Normal Voice in the Voice mode, the volume of
four parts in the Performance mode, the volume of four
parts including the current part in the Song mode/Pattern
mode, and the volume of four zones in the Master mode.
n If all of the Control sliders are set to the minimum, you may not
hear any sound from the instrument, even when playing the
keyboard or a Song/Pattern. If this is the case, raise all the
sliders to a suitable level.
n The [MASTER VOLUME] slider adjusts the output level from
this instrument. On the other hand, the Control sliders adjust
the MIDI volume value for the corresponding element or part.
8 DAW REMOTE button Page 113
The Remote mode lets you control sequencer software on
your computer from the panel controls of the instrument.
Turn the [DAW REMOTE] button on to enter the Remote
mode.
9 [MASTER EFFECT] button and
[EFFECT BYPASS] button Page 140
The extensive effect section of the instrument provides
Insertion effects (three sets, with two effect units per set),
System effects (Reverb and Chorus), and Master effects.
The effects can be applied to the keyboard-played voices
and to Song/Pattern playback. These buttons enable you
to turn the corresponding Effect blocks (as printed on the
panel) on or off with a single touch.
n From the following display, you can select the specific
effect(s) to be bypassed when using the [EFFECT
BYPASS] button. [UTILITY] [F1] GENERAL [SF3] EF
BYPS display
) [ARPEGGIO ON/OFF] button Page 48
Press this button to enable or disable playback of the
Arpeggio for each Voice, Performance, Song, or Pattern. If
the Arpeggio Switch of the selected part is set to off in the
Performance/Song/Pattern mode, however, pressing this
button has no effect.
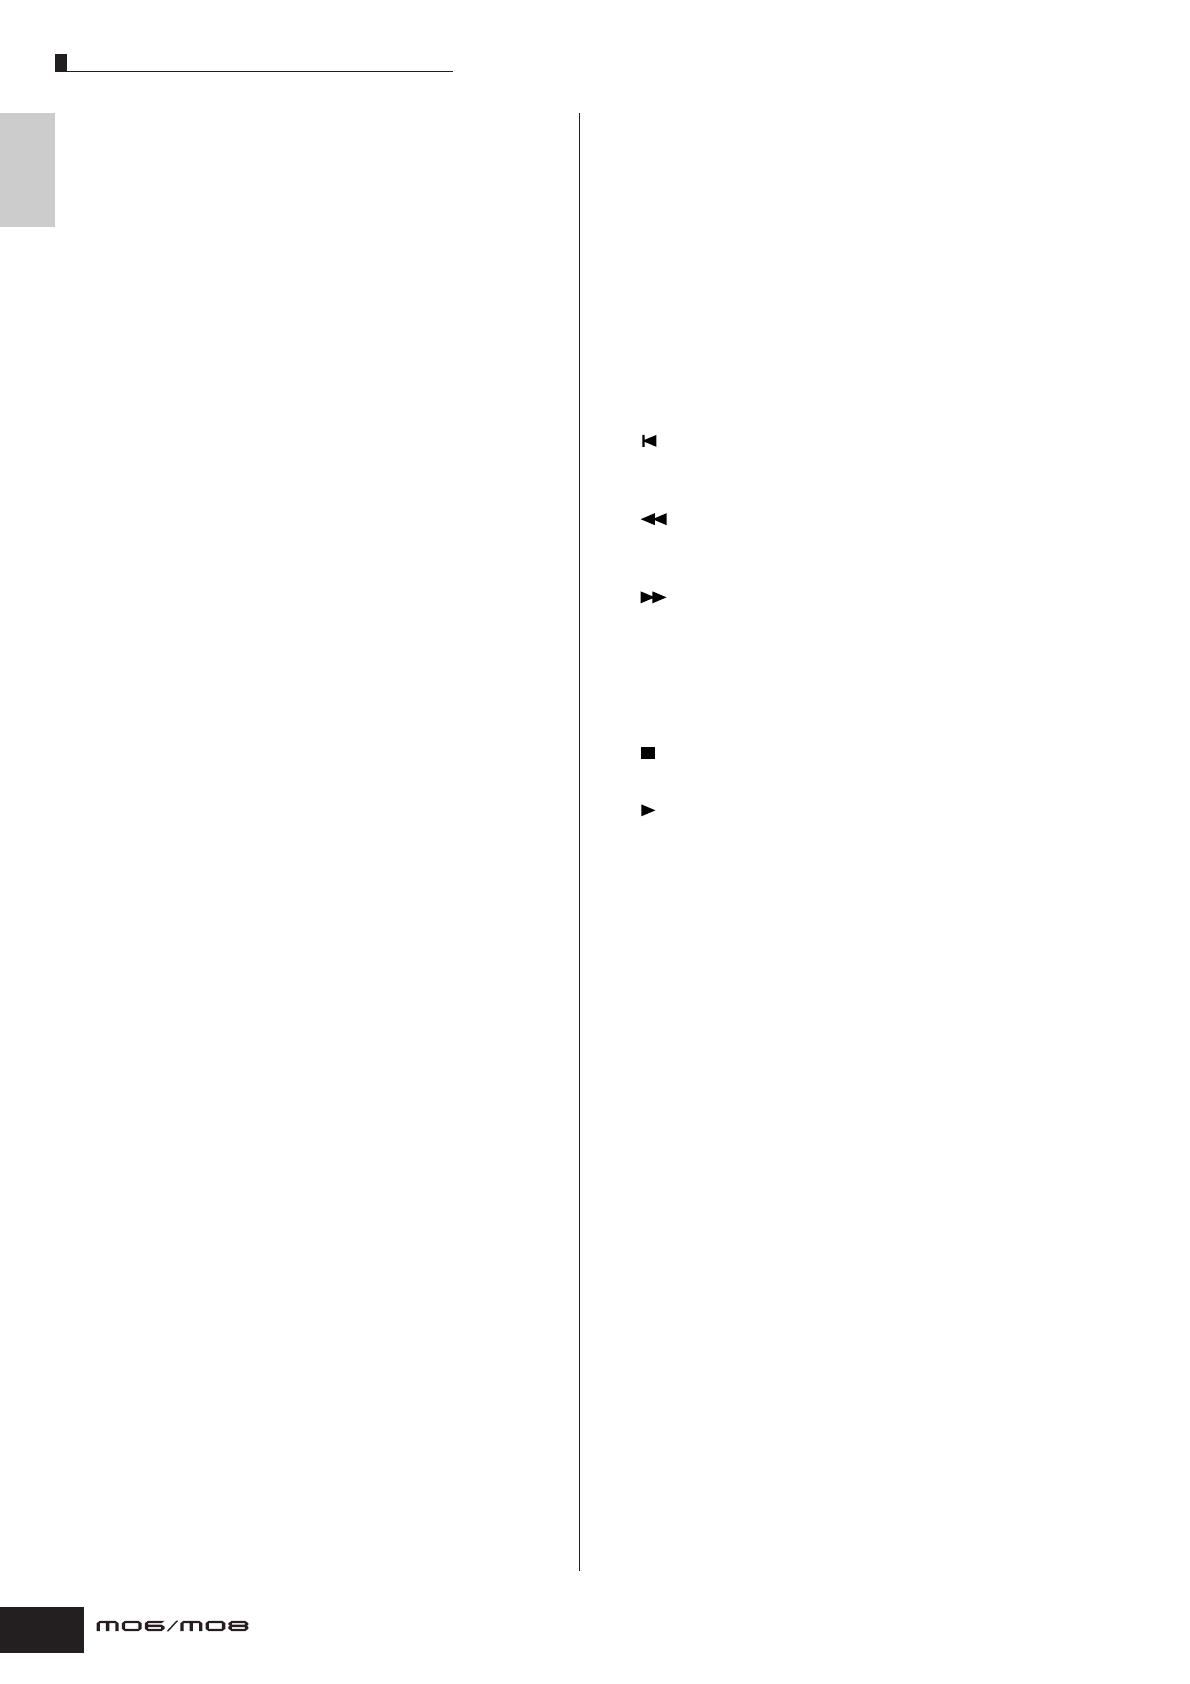
! SEQ TRANSPORT buttons
These buttons control recording and playback of the Song/
Pattern sequence data.
[] (Top) button
Instantly returns to the beginning of the current Song or
Pattern (i.e., the first beat of the first measure).
[] (Reverse) button
Press briefly to move back one measure at a time, or hold
to continuously rewind.
[] (Forward) button
Press briefly to move forward one measure at a time, or
hold to continuously fast-forward.
[REC] (Record) button
Press this to enable recording (Song or Pattern phrase).
(The indicator lights.)
[] (Stop) button
Press to stop recording or playback.
[] (Play) button
Press to start playback from the current point in the Song
or Pattern. During recording and playback, the indicator
flashes at the current tempo.
@ MODE buttons Page 24
These buttons select the operating modes (e.g., Voice
mode).
# LCD Display
The large backlit LCD displays the parameters and values
related to the currently selected operation or mode.
$ LCD Contrast Control Page 21
Use this control to set the LCD display for optimum
legibility.
% [F1] – [F6] (Function) buttons Page 33
These buttons located directly below the LCD display call
up the corresponding functions indicated in the display. In
the display hierarchy, these functions [F] rank just below
the modes.
^ [SF1] – [SF5] (Sub Function) buttons Page 33
These buttons located directly below the LCD display call
up the corresponding sub functions indicated in the
display. In the display hierarchy, these sub functions [SF]
rank just below the functions [F].
These buttons can be also used to store/recall the
Arpeggio type in each Play mode and Song/Pattern
Record mode. They can be also used to store/recall the
Song Scene (page 89) in the Song Play and Song Record
modes.
Front Panel
17
Owner’s Manual
The Controls
& Connectors
& [INFORMATION] button Page 37
For calling up a special “help” feature that shows
information about the currently selected mode. You can go
back to the previous display by pressing this button again
or pressing any other button.
Depending on the selected display, this button may be
used to call up a window for inputting characters, for
inputting numbers, for selecting note lengths, or for
selecting keys or note names (page 35).
* Data dial Page 35
For editing the currently selected parameter. To increase
the value, turn the dial right (clockwise); to decrease the
value, turn the dial left (counter-clockwise). If a parameter
with a wide value range is selected, you can change the
value in broader strokes by quickly turning the dial.
( [INC/YES] button Page 35
For increasing the value of the currently selected
parameter. Also use it to actually execute a Job or a Store
operation.
º [DEC/NO] button Page 35
For decreasing the value of the currently selected
parameter. Also use it to cancel a Job or a Store operation.
n You can also use the [INC/YES] and [DEC/NO] buttons to
quickly move through parameter values in 10-unit jumps,
especially those with large ranges. Simply hold down one of
the buttons (of the direction you want to jump), and
simultaneously press the other. For example, to jump in the
positive direction, hold down the [INC/YES] button and press
[DEC/NO].
¡ Cursor buttons Page 35
The cursor buttons move the “cursor” around the LCD
display screen, highlighting and selecting the various
parameters.
[EXIT] button Page 28
The menus and displays of this synthesizer are organized
according to a hierarchical structure.
Press this button to exit from the current display and return
to the previous level in the hierarchy.
£ [ENTER] button
Use this button to execute a Job or a Store operation. Also
use this button to actually enter a number when selecting a
Memory or Bank for Voice or Performance. In the File
mode, use this button to go to the next lowest level in the
selected directory.
¢ Bank buttons Page 40
Each button selects a Voice or Performance Bank.
When the [CATEGORY SEARCH] button is turned on,
these buttons can be used to select the desired category
(printed below each button). When the [SECTION] button
is turned on in the Pattern mode, these buttons are used to
select the desired section.
Group [A] – [H] buttons Page 41
Each button selects a Voice or Performance Group.
When the [CATEGORY SEARCH] button is turned on,
these buttons can be used to select the desired category
(printed below each button). When the [SECTION] button
is turned on in the Pattern mode, these buttons are used to
select the desired section.
§ Number [1] – [16] buttons
Use of these buttons differs depending on the on/off status
of the [TRACK SELECT] and [MUTE] buttons.
[CATEGORY SEARCH] button Page 42
When this button is turned on, the Bank buttons and the
Group buttons can be used to select the Voice/
Performance category.
[SECTION] button Page 73
When this button is turned on in the Pattern mode, the
Group [A] – [H] buttons can be used to select Pattern
Sections A – H and the [PRE1] – [–] buttons of the Bank
buttons can be used to select Pattern Sections I – P.
ª [TRACK SELECT] button Page 76
Tur ning this button on in the Song/Pattern mode enables
the Number [1] – [16] buttons for selecting corresponding
Song/Pattern tracks. The on/off status of this button affects
the Number [1] – [16] buttons in different ways, depending
on the selected mode. (See § “Number [1] – [16] buttons”
above.)
[MUTE] button Page 74
Tur ning this button on in the Song/Pattern mode enables
the Number [1] – [16] buttons for muting corresponding
Song/Pattern tracks.
Press one of the Number [1] – [16] buttons while holding
this button to solo the corresponding track of the current
selected Song/Pattern.
The on/off status of this button affects the Number [1] –
[16] buttons in different ways, depending on the selected
mode. (See § “Number [1] – [16] buttons” above.)
Functions of the Number [1] – [16] buttons
When [TRACK
SELECT] is on
When [MUTE]
is on
When both
[TRACK SELECT]
[MUTE] are off
Voice Play mode
Keyboard
transmit channel
setting
Voice selection,
according to Groups
A – H
Voice Edit mode
Element selection (1 – 4) and
Element Mute setting (9 – 12)
Performance
Play mode
Keyboard
transmit channel
setting
Performance part
Mute setting
(1 – 4)
Performance or
Voice selection
(if cursor is located
at Voice name),
according to Groups
A – H
Performance
Edit mode
Performance part
selection (1 – 4)
Master Play
mode
Keyboard transmit
channel setting
(when memorizing
the Voice mode or
Performance
mode to the
current Master) or
Song/Pattern track
selection (when
memorizing the
Song mode or
Pattern mode to
the current
Master)
Master selection,
according to Groups
A – H
Master Edit
mode
Zone selection
(1 – 4)
——
Song/Pattern
Play mode
Song/Pattern
track selection
Song/Pattern
track Mute
setting
Song/Pattern
selection, according
to Groups A – H
Song/Pattern
Mixing mode
Song/Pattern part
selection
Song/Pattern part
Mute setting
Mixing Voice
Edit mode
Element selection (1 – 4) and
Element Mute setting (9 – 12)
Rear Panel
18
Owner’s Manual
The Controls
& Connectors
Rear Panel
1 STANDBY/ON switch Page 20
Press to turn power ON or OFF.
2 DC IN terminal Page 20
Connect the AC adaptor to this terminal.
Do not attempt to use an AC adaptor other than the Yamaha PA-5D or an
equivalent recommended by Yamaha. The use of an incompatible
adaptor may cause irreparable damage to the MO, and may even pose a
serious shock hazard!
ALWAYS UNPLUG THE AC ADAPTOR FROM THE AC POWER OUTLET
WHEN THE MO IS NOT IN USE.
3 Cable clip
Wrap the DC output cable of the adaptor around the cable
clip (as shown below) to prevent accidental unplugging of
the cable during operation.
4 USB connectors
This instrument is equipped with two types of USB
connectors on the rear panel—USB TO HOST and USB TO
DEVICE. The USB TO HOST connector is used to connect
this instrument to the computer via the USB cable. The
USB connection between the instrument and the computer
can only be used for transfer of MIDI data. No audio data
can be transferred via USB. The USB TO DEVICE
connector is used to connect this instrument to a USB
storage device (hard disk drive, CD-ROM drive, MO drive,
flash disk, etc.) via the USB cable. This lets you save the
data created on this instrument to the external USB
storage device and load the data from the external USB
storage device to the instrument. Save/Load operations
can be performed in the File mode.
n For details about USB, see page 31.
5 MIDI IN/OUT/THRU connectors Page 104
MIDI IN is for receiving control or performance data from
another MIDI device, such as an external sequencer.
MIDI THRU is simply for redirecting any received MIDI
data (via MIDI IN) to connected devices, allowing
convenient chaining of additional MIDI instruments.
MIDI OUT is for transmitting all control, performance
and playback data from the MO to another MIDI device,
such as an external sequencer.
TO DEVICE TO HOST
MIDI
THRU OUT IN
USB
DC IN
STANDBY
ON
DC IN
STANDBY
ON
1
4 5
1 32
32
MO6
MO8
WARNING
DC IN
STANDBY
ON
USB
USB is an abbreviation for Universal Serial Bus. It is a serial
interface for connecting a computer with peripheral
devices, and enables much faster data transfer compared
to conventional serial port connections.
Rear Panel
19
Owner’s Manual
The Controls
& Connectors
6 FOOT SWITCH jack Page 69
For connection of optional FC4 or FC5 Footswitch.
7 FOOT CONTROLLER jack Page 69
For connection of an optional foot controller (FC7, etc.).
The FOOT CONTROLLER jack lets you continuously
control one of various different assignable functions—such
as volume, tone, pitch, or other aspects of the sound.
8 OUTPUT L/MONO and R jacks Page 20
Line level audio signals are output via these phone jacks.
For monophonic output, use just the L/MONO jack.
9 PHONES jack Page 20
For connection to a pair of stereo headphones.
) DIGITAL OUT connector Page 103
Use this connector to input or output digital signals over
coaxial (RCA-pin) cable. The format is S/PDIF, normally
used for CD and DAT players. The digital signal output is
44.1kHz/24-bit.
DIGITAL OUT
FOOT
CONTROLLER
FOOT
SWITCH
PHONESOUTPUT
R
L MONO
MIDI
THRU OUT IN
USB
TO DEVICE TO HOST
DIGITAL OUT
FOOT
CONTROLLER
FOOT
SWITCH
PHONESOUTPUT
RL MONO
6 7 ) 98
4567
98)
Setting up
and Playing
Power supply
20
Owner’s Manual
Setting up and Playing
Power supply
Power supply connections
Before you connect the power adapter, make sure that the MO [STANDBY/ON] switch is set to STANDBY
(Off).
1 Connect the plug of the power adapter PA-5D to the DC IN terminal on the rear panel of the MO.
2 Plug in the AC cable to an appropriate AC outlet.
n Follow this procedure in reverse order to disconnect the power adapter.
Be sure to use the included adapter. Using an AC adapter other than the PA-5D may cause damage to the MO, and may even
pose a serious electrical shock hazard.
Connect the adapter to an AC outlet of the specified voltage.
Even when the [STANDBY/ON] switch is in the STANDBY position, a small amount of electricity is still flowing to the unit. When
you do not plan to use the MO for an extended period of time, be sure to unplug the AC power adapter from the AC outlet.
Connecting the speakers or pair of headphones
Since the MO has no built-in speakers, you will need to monitor the sound of the instrument by using
external equipment. Connect a set of headphones, powered speakers, or other playback equipment as
required.
DC IN
STANDBY
ON
Rear panel
1
AC cable
Power adapter
PA-5D
2 To electrical outlet
WARNING
CAUTION
MO
Powered speaker (Left)
Powered speaker (Right)
Headphones
OUTPUT L/MONO
OUTPUT R
PHONES
1 / 1

Yamaha MO6 Bruksanvisning

Kategori
Trummor
Typ
Bruksanvisning
Denna manual är också lämplig för