Calex SMART GULVLAMPE RGB Bruksanvisning
- Typ
- Bruksanvisning

A
EN - Assembling
1. Connect the aluminum grooved frames with the connectors.
2. Connect the LED strip light, peel o the paper cover and gently press the
LED strip light into the groove. This works best when the frame is in an
upright position.
3. Press the cover into place
4. Press the end-cap into place
5. Connect both support tubes to the bottom stand and secure these with the
supplied hex key and screws.
6. Plug the floor lamp in to a wall socket.
7. See Manual C1 to connect the floor lamp to the Calex Smart app.
8. Remote control instructions:
8.1 On / o switches
8.2 Timer presets
8.3 Increase / decrease brightness in static RGB and
white light mode
8.4 Increase / decrease speed in RGB dynamic mode
8.5 White light switch
8.6 RGB light switch
8.7 Mode key
8.8 RGB Static Color
8. 9 Music Mode
When the brightness is dimmed, the battery needs to be replaced.
Battery type (not included): 2x AAA 1.5 V
Calex Smart app
Please refer to manual C1 to connect the floor lamp to the app.
NL - Montage
1. Verbind de aluminium gegroefde frames met de connectoren.
2. Sluit de LED-stripverlichting aan, verwijder de papieren afdekking en druk
de LED-stripverlichting voorzichtig in de groef. Dit werkt het beste als het
frame rechtop staat.
3. Druk het deksel op zijn plaats
4. Druk de eindkap op zijn plaats
5. Verbind beide steunbuizen met de onderste standaard en zet deze vast
met de meegeleverde inbussleutel en schroeven.
6. Steek de staande lamp in een stopcontact.
7. Zie Handleiding C1 om de vloerlamp te verbinden met de Calex Smart app.
8. Afstandsbediening instructies:
8.1 Aan/uit schakelaars
8.2 Timervoorinstellingen
8.3 Helderheid verhogen/verlagen in statische RGB- en witlichtmodus
8.4 Snelheid verhogen/verlagen in dynamische RGB-modus
8.5 Witlichtschakelaar
8.6 RGB-lichtschakelaar
8.7 Modustoets
8.8 Statische RGB-kleur
8. 9 Muziekmodus
Wanneer de helderheid is gedimd, moet de batterij worden vervangen.
Batterijtype (niet inbegrepen): 2x AAA 1,5 V
Calex Smart-app
Raadpleeg handleiding C1 om de vloerlamp met de app te verbinden.
FR - Assemblage
1. Connectez les cadres rainurés en aluminium avec les connecteurs.
2. Connectez la bande lumineuse LED, retirez le couvercle en papier et
appuyez doucement sur la bande lumineuse LED dans la rainure. Cela
fonctionne mieux lorsque le cadre est en position verticale.
3. Appuyez sur le couvercle en place
4. Appuyez sur l'embout en place
5. Connectez les deux tubes de support au support inférieur et fixez-les avec
la clé hexagonale et les vis fournies.
6. Branchez le lampadaire sur une prise murale.
7. Voir le manuel C1 pour connecter le lampadaire à l'application Calex Smart.
8. Instructions de contrôle à distance :
8.1 Interrupteurs marche/arrêt
8.2 Préréglages de la minuterie
8.3 Augmenter / diminuer la luminosité en mode RVB statique et lumière
blanche
8.4 Augmenter / diminuer la vitesse en mode dynamique RVB
8.5 Interrupteur de lumière blanche
8.6 Interrupteur d'éclairage RVB
8.7 Touche mode
8.8 Couleur statique RVB
8. 9 Mode Musique
Lorsque la luminosité diminue, la batterie doit être remplacée.
Type de pile (non inclus) : 2x AAA 1,5 V
Application Calex Smart
Veuillez vous référer au manuel C1 pour connecter le lampadaire à l'application.
DE - Montage
1. Verbinden Sie die Aluminium-Rillenrahmen mit den Verbindern.
2. Schließen Sie das LED-Streifenlicht an, ziehen Sie die Papierabdeckung ab
und drücken Sie das LED-Streifenlicht vorsichtig in die Nut. Dies
funktioniert am besten, wenn sich der Rahmen in einer aufrechten Position
befindet.
3. Drücken Sie die Abdeckung fest
4. Drücken Sie die Endkappe fest
5. Verbinden Sie beide Stützrohre mit dem unteren Ständer und sichern Sie
diese mit dem mitgelieferten Inbusschlüssel und Schrauben.
6. Stecken Sie die Stehlampe in eine Steckdose.
7. Siehe Handbuch C1, um die Stehleuchte mit der Calex Smart App zu
verbinden.
8. Anweisungen zur Fernbedienung:
8.1 Ein-/Ausschalter
8.2 Timer-Voreinstellungen
8.3 Helligkeit im statischen RGB- und Weißlichtmodus erhöhen/verringern
8.4 Geschwindigkeit im RGB-Dynamikmodus erhöhen/verringern
8.5 Weißlichtschalter
8.6 RGB-Lichtschalter
8.7 Modustaste
8.8 Statische RGB-Farbe
8. 9 Musikmodus
Wenn die Helligkeit gedimmt wird, muss die Batterie ersetzt werden.
Batterietyp (nicht im Lieferumfang enthalten): 2x AAA 1,5 V
Calex Smart-App
Bitte beachten Sie das Handbuch C1, um die Stehleuchte mit der App zu verbinden.
PL - Montaż
1. Połącz aluminiowe ramy rowkowane ze złączami.
2. Podłącz lampkę paska LED, zdejmij papierową osłonę i delikatnie wciśnij
lampkę paska LED w rowek. Działa to najlepiej, gdy rama jest w pozycji
pionowej.
3. Wciśnij pokrywę na miejsce
4. Wciśnij zaślepkę na miejsce
5. Podłącz obie rurki podtrzymujące do dolnej podstawy i zabezpiecz je
dostarczonym kluczem sześciokątnym i śrubami.
6. Podłącz lampę podłogową do gniazdka ściennego.
7. Zobacz instrukcję C1, aby podłączyć lampę podłogową do aplikacji Calex
Smart.
8. Instrukcje zdalnego sterowania:
8.1 Włącznik / wyłącznik
8.2 Ustawienia timera
8.3 Zwiększ/zmniejsz jasność w trybie statycznego RGB i białego światła
8.4 Zwiększanie / zmniejszanie prędkości w trybie dynamicznym RGB
8.5 Przełącznik światła białego
8.6 włącznik światła RGB
8.7 Klawisz trybu
8.8 Statyczny kolor RGB
8.9 Tryb muzyczny
Gdy jasność jest przyciemniona, bateria wymaga wymiany.
Typ baterii (brak w zestawie): 2x AAA 1,5 V
Calex Smart app
Aby podłączyć lampę podłogową do aplikacji, zapoznaj się z instrukcją C1.
CS - Sestavování
1. Spojte hliníkové drážkované rámy s konektory.
2. Připojte LED páskové světlo, odlepte papírový kryt a jemně zatlačte LED
páskové světlo do drážky. To funguje nejlépe, když je rám ve vzpřímené
poloze.
3. Zatlačte kryt na místo
4. Zatlačte koncovku na místo
5. Připojte obě nosné trubky ke spodnímu stojanu a zajistěte je dodaným
šestihranným klíčem a šrouby.
6. Zapojte stojací lampu do zásuvky ve zdi.
7. Podle příručky C1 připojte stojací lampu k aplikaci Calex Smart.
8. Pokyny pro dálkové ovládání:
8.1 Vypínače
8.2 Předvolby časovače
8.3 Zvýšení / snížení jasu v režimu statického RGB a bílého světla
8.4 Zvýšení / snížení rychlosti v dynamickém režimu RGB
8.5 Přepínač bílého světla
8.6 Přepínač světel RGB
8.7 Tlačítko režimu
8.8 RGB statická barva
8.9 Režim hudby
Když je jas ztlumený, je třeba vyměnit baterii.
Typ baterie (není součástí dodávky): 2x AAA 1,5 V.
Aplikace Calex Smart
Pro připojení podlahové lampy k aplikaci viz příručka C1.
EN - This manual, A, contains descriptions of all necessary steps for assembling and installing this product. Refer
to the icons in the supplementary manual, B, to see which of the following points apply to this product:
NL - Deze handleiding, A, bevat beschrijvingen van alle noodzakelijke stappen voor het monteren en installeren
van dit product. Raadpleeg de pictogrammen in de aanvullende handleiding, B, om te zien welke van de volgende
punten van toepassing zijn op dit product:
DE - Dieses Handbuch A, enthält Beschreibungen aller erforderlichen Schritte zum Zusammenbau und zur
Installation dieses Produkts. Beziehen Sie sich auf die Symbole im Zusatzhandbuch B, um zu sehen, welche der
folgenden Punkte für dieses Produkt gelten:
FR - Ce manuel, A, contient des descriptions de toutes les étapes nécessaires à l'assemblage et à l'installation de
ce produit. Reportez-vous aux icônes du manuel supplémentaire, B, pour voir lequel des points suivants
s'applique à ce produit:
PL - Niniejsza instrukcja, A, zawiera opisy wszystkich kroków niezbędnych do montażu i instalacji tego produktu.
Zapoznaj się z ikonami w dodatkowej instrukcji, B, aby zobaczyć, które z poniższych punktów dotyczą tego
produktu:
CS - Tato příručka A, obsahuje popis všech kroků nezbytných pro sestavení a instalaci tohoto produktu. Podle
ikon v doplňkové příručce B, zjistíte, které z následujících bodů se vztahují na tento produkt:
IT - Questo manuale, A, contiene le descrizioni di tutti i passaggi necessari per l'assemblaggio e l'installazione di
questo prodotto. Fare riferimento alle icone nel manuale supplementare, B, per vedere quale dei seguenti punti si
applica a questo prodotto:
SK - Táto príručka A, obsahuje popis všetkých krokov potrebných na zostavenie a inštaláciu tohto produktu. Na
ikonách v doplnkovej príručke B, sa dozviete, ktoré z nasledujúcich bodov sa na tento výrobok vzťahujú:
ES - Este manual, A, contiene descripciones de todos los pasos necesarios para ensamblar e instalar este
producto. Consulte los iconos del manual complementario, B, para ver cuál de los siguientes puntos se aplica a
este producto:
PT - Este manual, A, contém descrições de todas as etapas necessárias para a montagem e instalação deste
produto. Consulte os ícones no manual suplementar, B, para ver quais dos seguintes pontos se aplicam a este
produto:
RO - Acest manual, A, conține descrieri ale tuturor etapelor necesare pentru asamblarea și instalarea acestui
produs. Consultați pictogramele din manualul suplimentar, B, pentru a vedea care dintre următoarele puncte se
aplică acestui produs:
NO - Denne håndboken, A, inneholder beskrivelser av alle nødvendige trinn for å montere og installere dette
produktet. Se ikonene i tilleggshåndboken B, for å se hvilke av de følgende punktene som gjelder for dette
produktet:
SV - Denna handbok, A, innehåller beskrivningar av alla nödvändiga steg för montering och installation av denna
produkt. Se ikonerna i tilläggshandboken B, för att se vilken av följande punkter som gäller för denna produkt:
FI - Tämä käsikirja A, sisältää kuvaukset kaikista tarvittavista vaiheista tämän tuotteen kokoamiseen ja
asentamiseen. Katso lisäoppaan B, kuvakkeista, mitkä seuraavista kohdista koskevat tätä tuotetta:
DA - Denne manual, A, indeholder beskrivelser af alle nødvendige trin til samling og installation af dette produkt.
Se ikonerne i den supplerende manual, B, for at se, hvilke af følgende punkter der gælder for dette produkt:
02, 04, 05, 07, 09, 10, 11, 16, 26 (Type Y), 31, 33,
34, 35, 36, 37
IT - Assemblaggio
1. Collegare i telai scanalati in alluminio con i connettori.
2. Collegare la striscia luminosa a LED, staccare il coperchio di carta e
premere delicatamente la striscia luminosa a LED nella scanalatura.
Funziona meglio quando il telaio è in posizione verticale.
3. Premere il coperchio in posizione
4. Premere il cappuccio in posizione
5. Collegare entrambi i tubi di supporto al supporto inferiore e fissarli con la
chiave esagonale e le viti in dotazione.
6. Collegare la lampada da terra a una presa a muro.
7. Consultare il Manuale C1 per collegare la lampada da terra all'app Calex
Smart.
8. Istruzioni per il telecomando:
8.1 Interruttori di accensione/spegnimento
8.2 Preimpostazioni timer
8.3 Aumenta/diminuisci la luminosità in modalità RGB statica e luce
bianca
8.4 Aumenta/diminuisci la velocità in modalità dinamica RGB
8.5 Interruttore luce bianca
8.6 Interruttore della luce RGB
8.7 Tasto modalità
8.8 Colore statico RGB
8.9 Modalità musica
Quando la luminosità è ridotta, è necessario sostituire la batteria.
Tipo di batteria (non inclusa): 2x AAA 1,5 V
App Calex Smart
Fare riferimento al manuale C1 per collegare la lampada da terra all'app.
SK - Zostavenie
1. Spojte hliníkové drážkované rámy s konektormi.
2. Pripojte svetlo LED pásika, odlepte papierový kryt a jemne zatlačte svetlo
LED pásika do drážky. Toto funguje najlepšie, keď je rám vo vzpriamenej
polohe.
3. Zatlačte kryt na miesto
4. Zatlačte koncový kryt na miesto
5. Pripojte obe nosné trubice k spodnému stojanu a zaistite ich dodaným
šesťhranným kľúčom a skrutkami.
6. Zapojte podlahové svietidlo do zásuvky v stene.
7. Pripojenie stojacej lampy k aplikácii Calex Smart nájdete v príručke C1.
8. Pokyny na diaľkové ovládanie:
8.1 Vypínače
8.2 Predvoľby časovača
8.3 Zvýšenie / zníženie jasu v režime statického RGB a bieleho svetla
8.4 Zvýšenie / zníženie rýchlosti v dynamickom režime RGB
8.5 Spínač bieleho svetla
8.6 Prepínač svetla RGB
8.7 Tlačidlo režimu
8.8 RGB statická farba
8.9 Režim hudby
Keď je jas stlmený, je potrebné vymeniť batériu.
Typ batérie (nie je súčasťou dodávky): 2x AAA 1,5 V.
Aplikácia Calex Smart
Pripojenie stojacej lampy k aplikácii nájdete v príručke C1.
RO - Asamblare
1. Conectați cadrele canelate din aluminiu cu conectorii.
2. Conectați lumina cu bandă LED, desprindeți capacul de hârtie și apăsați
ușor lumina cu bandă LED în canelură. Acest lucru funcționează cel mai
bine atunci când cadrul este în poziție verticală.
3. Apăsați capacul în poziție
4. Apăsați capacul în poziție
5. Conectați ambele tuburi de sprijin la suportul inferior și fixați-le cu cheia
hexagonală și șuruburile furnizate.
6. Conectați lampa de podea la o priză de perete.
7. Consultați Manualul C1 pentru a conecta veioza la aplicația Calex Smart.
8. Instrucțiuni de control de la distanță:
8.1 Comutatoare de pornire / oprire
8.2 Presetări ale temporizatorului
8.3 Măriți / micșorați luminozitatea în modul static RGB și lumină albă
8.4 Măriți / micșorați viteza în modul dinamic RGB
8.5 Comutator de lumină albă
8.6 Comutator de lumină RGB
8.7 Tasta de mod
8.8 RGB Static Color
8.9 Mod muzică
Când luminozitatea este estompată, bateria trebuie înlocuită.
Tipul bateriei (nu este inclus): 2x AAA 1,5 V
Aplicația Calex Smart
Vă rugăm să consultați manualul C1 pentru a conecta lampa de podea la
aplicație.
ES - Montaje
1. Conecte los marcos ranurados de aluminio con los conectores.
2. Conecte la tira de luz LED, retire la cubierta de papel y presione
suavemente la tira de luz LED en la ranura. Esto funciona mejor cuando el
marco está en posición vertical.
3. Presione la tapa en su lugar
4. Presione la tapa del extremo en su lugar
5. Conecte ambos tubos de soporte al soporte inferior y asegúrelos con la
llave hexagonal y los tornillos suministrados.
6. Enchufe la lámpara de pie a un enchufe de pared.
7. Consulte el Manual C1 para conectar la lámpara de pie a la aplicación Calex
Smart.
8. Instrucciones de control remoto:
8.1 Interruptores de encendido / apagado
8.2 Preajustes del temporizador
8.3 Aumentar / disminuir el brillo en RGB estático y modo de luz blanca
8.4 Aumentar / disminuir la velocidad en modo dinámico RGB
8.5 Interruptor de luz blanca
8.6 Interruptor de luz RGB
8.7 Tecla de modo
8.8 Color estático RGB
8.9 Modo Música
Cuando se atenúa el brillo, es necesario reemplazar la batería.
Tipo de batería (no incluida): 2x AAA 1,5 V
Aplicación Calex Smart
Consulte el manual C1 para conectar la lámpara de pie a la aplicación.
PT - Montagem
1. Conecte as estruturas ranhuradas de alumínio com os conectores.
2. Conecte a fita de LED, retire a tampa de papel e pressione suavemente a
fita de LED na ranhura. Isso funciona melhor quando o quadro está na
posição vertical.
3. Pressione a tampa no lugar
4. Pressione a tampa final no lugar
5. Conecte os dois tubos de suporte ao pedestal inferior e prenda-os com a
chave sextavada e os parafusos fornecidos.
6. Conecte a luminária de chão a uma tomada de parede.
7. Consulte o Manual C1 para conectar a luminária de chão ao aplicativo Calex
Smart.
8. Instruções de controle remoto:
8.1 Chaves liga / desliga
8.2 predefinições de temporizador
8.3 Aumentar / diminuir o brilho em RGB estático e modo de luz branca
8.4 Aumentar / diminuir a velocidade no modo dinâmico RGB
8.5 Interruptor de luz branca
8.6 interruptor de luz RGB
8.7 Tecla de modo
8.8 RGB Static Color
8.9 Modo de música
Quando o brilho está diminuído, a bateria precisa ser substituída.
Tipo de bateria (não incluída): 2x AAA 1,5 V
Calex Smart app
Consulte o manual C1 para conectar a luminária de chão ao aplicativo.
NO - Montering
1. Koble rammene i aluminium med kontaktene.
2. Koble til LED -stripelyset, ta av papirdekselet og trykk forsiktig LED
-stripelampen inn i sporet. Dette fungerer best når rammen er i oppreist
posisjon.
3. Trykk dekselet på plass
4. Trykk endehetten på plass
5. Koble begge støtterørene til bunnstativet og fest dem med den
medfølgende sekskantnøkkelen og skruene.
6. Koble gulvlampen til en veggkontakt.
7. Se håndbok C1 for å koble gulvlampen til Calex Smart -appen.
8. Fjernkontrollinstruksjoner:
8.1 Av / på -brytere
8.2 Timer forhåndsinnstillinger
8.3 Øk / senk lysstyrken i statisk RGB og hvitt lys
8.4 Øk / senk hastigheten i dynamisk RGB -modus
8.5 Bryter for hvitt lys
8.6 RGB lysbryter
8.7 Modustast
8.8 RGB statisk farge
8.9 Musikkmodus
Når lysstyrken er dempet, må batteriet byttes ut.
Batteritype (ikke inkludert): 2x AAA 1,5 V
Calex Smart -app
Se håndbok C1 for å koble gulvlampen til appen.
FI - Kokoaminen
1. Liitä alumiinirunkoiset kehykset liittimiin.
2. Liitä LED -nauhavalo, irrota paperikotelo ja paina LED -nauhan valo
varovasti uraan. Tämä toimii parhaiten, kun kehys on pystyasennossa.
3. Paina kansi paikalleen
4. Paina päätykansi paikalleen
5. Liitä molemmat tukiputket alajalustaan ja kiinnitä ne mukana toimitetulla
kuusiokoloavaimella ja ruuveilla.
6. Kytke lattiavalaisin pistorasiaan.
7. Katso käsikirja C1, kun haluat yhdistää lattiavalaisimen Calex Smart
-sovellukseen.
8. Kaukosäätimen ohjeet:
8.1 Virtakytkimet
8.2 Ajastimen esiasetukset
8.3 Lisää / vähennä kirkkautta staattisessa RGB- ja valkoisessa
valotilassa
8.4 Nopeuden lisääminen / vähentäminen dynaamisessa RGB -tilassa
8.5 Valokytkin
8.6 RGB -valokytkin
8.7 Tilapainike
8.8 RGB -staattinen väri
8.9 Musiikkitila
Kun kirkkaus on himmeä, paristo on vaihdettava.
Paristotyyppi (ei sisälly toimitukseen): 2x AAA 1,5 V
Calex Smart -sovellus
Katso lattiavalaisimen liittäminen sovellukseen käsikirjasta C1.
SV - Montering
1. Anslut aluminiumspårramarna med kontakterna.
2. Anslut LED -remsan, ta bort papperslocket och tryck försiktigt in LED
-remsan i spåret. Detta fungerar bäst när ramen är i upprätt läge.
3. Tryck på locket på plats
4. Tryck på ändlocket på plats
5. Anslut båda stödrören till bottenstället och säkra dem med den
medföljande insexnyckeln och skruvarna.
6. Anslut golvlampan till ett vägguttag.
7. Se handbok C1 för att ansluta golvlampan till Calex Smart -appen.
8. Fjärrkontroll instruktioner:
8.1 På / av -omkopplare
8.2 Timer förinställningar
8.3 Öka / minska ljusstyrkan i statiskt RGB- och vitt ljusläge
8.4 Öka / minska hastigheten i dynamiskt RGB -läge
8.5 Vit ljusbrytare
8.6 RGB -ljusbrytare
8.7 Lägesknapp
8.8 RGB statisk färg
8.9 Musikläge
När ljusstyrkan är nedtonad måste batteriet bytas ut.
Batterityp (ingår ej): 2x AAA 1,5 V
Calex Smart -app
Se manual C1 för att ansluta golvlampan till appen.
DA - Montering
1. Tilslut aluminiumsrammede rammer med stik.
2. Tilslut LED -strimmellyset, fjern papirdækslet, og tryk forsigtigt LED
-strimmellyset ind i rillen. Dette fungerer bedst, når rammen er i oprejst
position.
3. Tryk låget på plads
4. Tryk endehætten på plads
5. Tilslut begge støtterør til bundstativet, og fastgør dem med den
medfølgende sekskantnøgle og skruer.
6. Sæt gulvlampen i en stikkontakt.
7. Se Manual C1 for at tilslutte gulvlampen til Calex Smart -appen.
8. Fjernbetjeningsinstruktioner:
8.1 Tænd / sluk kontakter
8.2 Timer forudindstillinger
8.3 Forøg / formindsk lysstyrken i statisk RGB og hvidt lys
8.4 Forøg / sænk hastigheden i dynamisk RGB -tilstand
8.5 Hvid lyskontakt
8.6 RGB -lysafbryder
8.7 Mode -tast
8.8 RGB statisk farve
8.9 Musiktilstand
Når lysstyrken er dæmpet, skal batteriet udskiftes.
Batteritype (medfølger ikke): 2x AAA 1,5 V
Calex Smart app
Se manual C1 for at tilslutte gulvlampen til appen.
C
M
Y
CM
MY
CY
CMY
K
ai1629462289105_A_(5301000500_Corner lamp)_print.pdf 1 20-8-2021 14:24:49

EN - Assembling
1. Connect the aluminum grooved frames with the connectors.
2. Connect the LED strip light, peel o the paper cover and gently press the
LED strip light into the groove. This works best when the frame is in an
upright position.
3. Press the cover into place
4. Press the end-cap into place
5. Connect both support tubes to the bottom stand and secure these with the
supplied hex key and screws.
6. Plug the floor lamp in to a wall socket.
7. See Manual C1 to connect the floor lamp to the Calex Smart app.
8. Remote control instructions:
8.1 On / o switches
8.2 Timer presets
8.3 Increase / decrease brightness in static RGB and
white light mode
8.4 Increase / decrease speed in RGB dynamic mode
8.5 White light switch
8.6 RGB light switch
8.7 Mode key
8.8 RGB Static Color
8. 9 Music Mode
When the brightness is dimmed, the battery needs to be replaced.
Battery type (not included): 2x AAA 1.5 V
Calex Smart app
Please refer to manual C1 to connect the floor lamp to the app.
NL - Montage
1. Verbind de aluminium gegroefde frames met de connectoren.
2. Sluit de LED-stripverlichting aan, verwijder de papieren afdekking en druk
de LED-stripverlichting voorzichtig in de groef. Dit werkt het beste als het
frame rechtop staat.
3. Druk het deksel op zijn plaats
4. Druk de eindkap op zijn plaats
5. Verbind beide steunbuizen met de onderste standaard en zet deze vast
met de meegeleverde inbussleutel en schroeven.
6. Steek de staande lamp in een stopcontact.
7. Zie Handleiding C1 om de vloerlamp te verbinden met de Calex Smart app.
8. Afstandsbediening instructies:
8.1 Aan/uit schakelaars
8.2 Timervoorinstellingen
8.3 Helderheid verhogen/verlagen in statische RGB- en witlichtmodus
8.4 Snelheid verhogen/verlagen in dynamische RGB-modus
8.5 Witlichtschakelaar
8.6 RGB-lichtschakelaar
8.7 Modustoets
8.8 Statische RGB-kleur
8. 9 Muziekmodus
Wanneer de helderheid is gedimd, moet de batterij worden vervangen.
Batterijtype (niet inbegrepen): 2x AAA 1,5 V
Calex Smart-app
Raadpleeg handleiding C1 om de vloerlamp met de app te verbinden.
FR - Assemblage
1. Connectez les cadres rainurés en aluminium avec les connecteurs.
2. Connectez la bande lumineuse LED, retirez le couvercle en papier et
appuyez doucement sur la bande lumineuse LED dans la rainure. Cela
fonctionne mieux lorsque le cadre est en position verticale.
3. Appuyez sur le couvercle en place
4. Appuyez sur l'embout en place
5. Connectez les deux tubes de support au support inférieur et fixez-les avec
la clé hexagonale et les vis fournies.
6. Branchez le lampadaire sur une prise murale.
7. Voir le manuel C1 pour connecter le lampadaire à l'application Calex Smart.
8. Instructions de contrôle à distance :
8.1 Interrupteurs marche/arrêt
8.2 Préréglages de la minuterie
8.3 Augmenter / diminuer la luminosité en mode RVB statique et lumière
blanche
8.4 Augmenter / diminuer la vitesse en mode dynamique RVB
8.5 Interrupteur de lumière blanche
8.6 Interrupteur d'éclairage RVB
8.7 Touche mode
8.8 Couleur statique RVB
8. 9 Mode Musique
Lorsque la luminosité diminue, la batterie doit être remplacée.
Type de pile (non inclus) : 2x AAA 1,5 V
Application Calex Smart
Veuillez vous référer au manuel C1 pour connecter le lampadaire à l'application.
DE - Montage
1. Verbinden Sie die Aluminium-Rillenrahmen mit den Verbindern.
2. Schließen Sie das LED-Streifenlicht an, ziehen Sie die Papierabdeckung ab
und drücken Sie das LED-Streifenlicht vorsichtig in die Nut. Dies
funktioniert am besten, wenn sich der Rahmen in einer aufrechten Position
befindet.
3. Drücken Sie die Abdeckung fest
4. Drücken Sie die Endkappe fest
5. Verbinden Sie beide Stützrohre mit dem unteren Ständer und sichern Sie
diese mit dem mitgelieferten Inbusschlüssel und Schrauben.
6. Stecken Sie die Stehlampe in eine Steckdose.
7. Siehe Handbuch C1, um die Stehleuchte mit der Calex Smart App zu
verbinden.
8. Anweisungen zur Fernbedienung:
8.1 Ein-/Ausschalter
8.2 Timer-Voreinstellungen
8.3 Helligkeit im statischen RGB- und Weißlichtmodus erhöhen/verringern
8.4 Geschwindigkeit im RGB-Dynamikmodus erhöhen/verringern
8.5 Weißlichtschalter
8.6 RGB-Lichtschalter
8.7 Modustaste
8.8 Statische RGB-Farbe
8. 9 Musikmodus
Wenn die Helligkeit gedimmt wird, muss die Batterie ersetzt werden.
Batterietyp (nicht im Lieferumfang enthalten): 2x AAA 1,5 V
Calex Smart-App
Bitte beachten Sie das Handbuch C1, um die Stehleuchte mit der App zu verbinden.
PL - Montaż
1. Połącz aluminiowe ramy rowkowane ze złączami.
2. Podłącz lampkę paska LED, zdejmij papierową osłonę i delikatnie wciśnij
lampkę paska LED w rowek. Działa to najlepiej, gdy rama jest w pozycji
pionowej.
3. Wciśnij pokrywę na miejsce
4. Wciśnij zaślepkę na miejsce
5. Podłącz obie rurki podtrzymujące do dolnej podstawy i zabezpiecz je
dostarczonym kluczem sześciokątnym i śrubami.
6. Podłącz lampę podłogową do gniazdka ściennego.
7. Zobacz instrukcję C1, aby podłączyć lampę podłogową do aplikacji Calex
Smart.
8. Instrukcje zdalnego sterowania:
8.1 Włącznik / wyłącznik
8.2 Ustawienia timera
8.3 Zwiększ/zmniejsz jasność w trybie statycznego RGB i białego światła
8.4 Zwiększanie / zmniejszanie prędkości w trybie dynamicznym RGB
8.5 Przełącznik światła białego
8.6 włącznik światła RGB
8.7 Klawisz trybu
8.8 Statyczny kolor RGB
8.9 Tryb muzyczny
Gdy jasność jest przyciemniona, bateria wymaga wymiany.
Typ baterii (brak w zestawie): 2x AAA 1,5 V
Calex Smart app
Aby podłączyć lampę podłogową do aplikacji, zapoznaj się z instrukcją C1.
CS - Sestavování
1. Spojte hliníkové drážkované rámy s konektory.
2. Připojte LED páskové světlo, odlepte papírový kryt a jemně zatlačte LED
páskové světlo do drážky. To funguje nejlépe, když je rám ve vzpřímené
poloze.
3. Zatlačte kryt na místo
4. Zatlačte koncovku na místo
5. Připojte obě nosné trubky ke spodnímu stojanu a zajistěte je dodaným
šestihranným klíčem a šrouby.
6. Zapojte stojací lampu do zásuvky ve zdi.
7. Podle příručky C1 připojte stojací lampu k aplikaci Calex Smart.
8. Pokyny pro dálkové ovládání:
8.1 Vypínače
8.2 Předvolby časovače
8.3 Zvýšení / snížení jasu v režimu statického RGB a bílého světla
8.4 Zvýšení / snížení rychlosti v dynamickém režimu RGB
8.5 Přepínač bílého světla
8.6 Přepínač světel RGB
8.7 Tlačítko režimu
8.8 RGB statická barva
8.9 Režim hudby
Když je jas ztlumený, je třeba vyměnit baterii.
Typ baterie (není součástí dodávky): 2x AAA 1,5 V.
Aplikace Calex Smart
Pro připojení podlahové lampy k aplikaci viz příručka C1.
EN - This manual, A, contains descriptions of all necessary steps for assembling and installing this product. Refer
to the icons in the supplementary manual, B, to see which of the following points apply to this product:
NL - Deze handleiding, A, bevat beschrijvingen van alle noodzakelijke stappen voor het monteren en installeren
van dit product. Raadpleeg de pictogrammen in de aanvullende handleiding, B, om te zien welke van de volgende
punten van toepassing zijn op dit product:
DE - Dieses Handbuch A, enthält Beschreibungen aller erforderlichen Schritte zum Zusammenbau und zur
Installation dieses Produkts. Beziehen Sie sich auf die Symbole im Zusatzhandbuch B, um zu sehen, welche der
folgenden Punkte für dieses Produkt gelten:
FR - Ce manuel, A, contient des descriptions de toutes les étapes nécessaires à l'assemblage et à l'installation de
ce produit. Reportez-vous aux icônes du manuel supplémentaire, B, pour voir lequel des points suivants
s'applique à ce produit:
PL - Niniejsza instrukcja, A, zawiera opisy wszystkich kroków niezbędnych do montażu i instalacji tego produktu.
Zapoznaj się z ikonami w dodatkowej instrukcji, B, aby zobaczyć, które z poniższych punktów dotyczą tego
produktu:
CS - Tato příručka A, obsahuje popis všech kroků nezbytných pro sestavení a instalaci tohoto produktu. Podle
ikon v doplňkové příručce B, zjistíte, které z následujících bodů se vztahují na tento produkt:
IT - Questo manuale, A, contiene le descrizioni di tutti i passaggi necessari per l'assemblaggio e l'installazione di
questo prodotto. Fare riferimento alle icone nel manuale supplementare, B, per vedere quale dei seguenti punti si
applica a questo prodotto:
SK - Táto príručka A, obsahuje popis všetkých krokov potrebných na zostavenie a inštaláciu tohto produktu. Na
ikonách v doplnkovej príručke B, sa dozviete, ktoré z nasledujúcich bodov sa na tento výrobok vzťahujú:
ES - Este manual, A, contiene descripciones de todos los pasos necesarios para ensamblar e instalar este
producto. Consulte los iconos del manual complementario, B, para ver cuál de los siguientes puntos se aplica a
este producto:
PT - Este manual, A, contém descrições de todas as etapas necessárias para a montagem e instalação deste
produto. Consulte os ícones no manual suplementar, B, para ver quais dos seguintes pontos se aplicam a este
produto:
RO - Acest manual, A, conține descrieri ale tuturor etapelor necesare pentru asamblarea și instalarea acestui
produs. Consultați pictogramele din manualul suplimentar, B, pentru a vedea care dintre următoarele puncte se
aplică acestui produs:
NO - Denne håndboken, A, inneholder beskrivelser av alle nødvendige trinn for å montere og installere dette
produktet. Se ikonene i tilleggshåndboken B, for å se hvilke av de følgende punktene som gjelder for dette
produktet:
SV - Denna handbok, A, innehåller beskrivningar av alla nödvändiga steg för montering och installation av denna
produkt. Se ikonerna i tilläggshandboken B, för att se vilken av följande punkter som gäller för denna produkt:
FI - Tämä käsikirja A, sisältää kuvaukset kaikista tarvittavista vaiheista tämän tuotteen kokoamiseen ja
asentamiseen. Katso lisäoppaan B, kuvakkeista, mitkä seuraavista kohdista koskevat tätä tuotetta:
DA - Denne manual, A, indeholder beskrivelser af alle nødvendige trin til samling og installation af dette produkt.
Se ikonerne i den supplerende manual, B, for at se, hvilke af følgende punkter der gælder for dette produkt:
02, 04, 05, 07, 09, 10, 11, 16, 26 (Type Y), 31, 33,
34, 35, 36, 37
IT - Assemblaggio
1. Collegare i telai scanalati in alluminio con i connettori.
2. Collegare la striscia luminosa a LED, staccare il coperchio di carta e
premere delicatamente la striscia luminosa a LED nella scanalatura.
Funziona meglio quando il telaio è in posizione verticale.
3. Premere il coperchio in posizione
4. Premere il cappuccio in posizione
5. Collegare entrambi i tubi di supporto al supporto inferiore e fissarli con la
chiave esagonale e le viti in dotazione.
6. Collegare la lampada da terra a una presa a muro.
7. Consultare il Manuale C1 per collegare la lampada da terra all'app Calex
Smart.
8. Istruzioni per il telecomando:
8.1 Interruttori di accensione/spegnimento
8.2 Preimpostazioni timer
8.3 Aumenta/diminuisci la luminosità in modalità RGB statica e luce
bianca
8.4 Aumenta/diminuisci la velocità in modalità dinamica RGB
8.5 Interruttore luce bianca
8.6 Interruttore della luce RGB
8.7 Tasto modalità
8.8 Colore statico RGB
8.9 Modalità musica
Quando la luminosità è ridotta, è necessario sostituire la batteria.
Tipo di batteria (non inclusa): 2x AAA 1,5 V
App Calex Smart
Fare riferimento al manuale C1 per collegare la lampada da terra all'app.
SK - Zostavenie
1. Spojte hliníkové drážkované rámy s konektormi.
2. Pripojte svetlo LED pásika, odlepte papierový kryt a jemne zatlačte svetlo
LED pásika do drážky. Toto funguje najlepšie, keď je rám vo vzpriamenej
polohe.
3. Zatlačte kryt na miesto
4. Zatlačte koncový kryt na miesto
5. Pripojte obe nosné trubice k spodnému stojanu a zaistite ich dodaným
šesťhranným kľúčom a skrutkami.
6. Zapojte podlahové svietidlo do zásuvky v stene.
7. Pripojenie stojacej lampy k aplikácii Calex Smart nájdete v príručke C1.
8. Pokyny na diaľkové ovládanie:
8.1 Vypínače
8.2 Predvoľby časovača
8.3 Zvýšenie / zníženie jasu v režime statického RGB a bieleho svetla
8.4 Zvýšenie / zníženie rýchlosti v dynamickom režime RGB
8.5 Spínač bieleho svetla
8.6 Prepínač svetla RGB
8.7 Tlačidlo režimu
8.8 RGB statická farba
8.9 Režim hudby
Keď je jas stlmený, je potrebné vymeniť batériu.
Typ batérie (nie je súčasťou dodávky): 2x AAA 1,5 V.
Aplikácia Calex Smart
Pripojenie stojacej lampy k aplikácii nájdete v príručke C1.
RO - Asamblare
1. Conectați cadrele canelate din aluminiu cu conectorii.
2. Conectați lumina cu bandă LED, desprindeți capacul de hârtie și apăsați
ușor lumina cu bandă LED în canelură. Acest lucru funcționează cel mai
bine atunci când cadrul este în poziție verticală.
3. Apăsați capacul în poziție
4. Apăsați capacul în poziție
5. Conectați ambele tuburi de sprijin la suportul inferior și fixați-le cu cheia
hexagonală și șuruburile furnizate.
6. Conectați lampa de podea la o priză de perete.
7. Consultați Manualul C1 pentru a conecta veioza la aplicația Calex Smart.
8. Instrucțiuni de control de la distanță:
8.1 Comutatoare de pornire / oprire
8.2 Presetări ale temporizatorului
8.3 Măriți / micșorați luminozitatea în modul static RGB și lumină albă
8.4 Măriți / micșorați viteza în modul dinamic RGB
8.5 Comutator de lumină albă
8.6 Comutator de lumină RGB
8.7 Tasta de mod
8.8 RGB Static Color
8.9 Mod muzică
Când luminozitatea este estompată, bateria trebuie înlocuită.
Tipul bateriei (nu este inclus): 2x AAA 1,5 V
Aplicația Calex Smart
Vă rugăm să consultați manualul C1 pentru a conecta lampa de podea la
aplicație.
ES - Montaje
1. Conecte los marcos ranurados de aluminio con los conectores.
2. Conecte la tira de luz LED, retire la cubierta de papel y presione
suavemente la tira de luz LED en la ranura. Esto funciona mejor cuando el
marco está en posición vertical.
3. Presione la tapa en su lugar
4. Presione la tapa del extremo en su lugar
5. Conecte ambos tubos de soporte al soporte inferior y asegúrelos con la
llave hexagonal y los tornillos suministrados.
6. Enchufe la lámpara de pie a un enchufe de pared.
7. Consulte el Manual C1 para conectar la lámpara de pie a la aplicación Calex
Smart.
8. Instrucciones de control remoto:
8.1 Interruptores de encendido / apagado
8.2 Preajustes del temporizador
8.3 Aumentar / disminuir el brillo en RGB estático y modo de luz blanca
8.4 Aumentar / disminuir la velocidad en modo dinámico RGB
8.5 Interruptor de luz blanca
8.6 Interruptor de luz RGB
8.7 Tecla de modo
8.8 Color estático RGB
8.9 Modo Música
Cuando se atenúa el brillo, es necesario reemplazar la batería.
Tipo de batería (no incluida): 2x AAA 1,5 V
Aplicación Calex Smart
Consulte el manual C1 para conectar la lámpara de pie a la aplicación.
PT - Montagem
1. Conecte as estruturas ranhuradas de alumínio com os conectores.
2. Conecte a fita de LED, retire a tampa de papel e pressione suavemente a
fita de LED na ranhura. Isso funciona melhor quando o quadro está na
posição vertical.
3. Pressione a tampa no lugar
4. Pressione a tampa final no lugar
5. Conecte os dois tubos de suporte ao pedestal inferior e prenda-os com a
chave sextavada e os parafusos fornecidos.
6. Conecte a luminária de chão a uma tomada de parede.
7. Consulte o Manual C1 para conectar a luminária de chão ao aplicativo Calex
Smart.
8. Instruções de controle remoto:
8.1 Chaves liga / desliga
8.2 predefinições de temporizador
8.3 Aumentar / diminuir o brilho em RGB estático e modo de luz branca
8.4 Aumentar / diminuir a velocidade no modo dinâmico RGB
8.5 Interruptor de luz branca
8.6 interruptor de luz RGB
8.7 Tecla de modo
8.8 RGB Static Color
8.9 Modo de música
Quando o brilho está diminuído, a bateria precisa ser substituída.
Tipo de bateria (não incluída): 2x AAA 1,5 V
Calex Smart app
Consulte o manual C1 para conectar a luminária de chão ao aplicativo.
NO - Montering
1. Koble rammene i aluminium med kontaktene.
2. Koble til LED -stripelyset, ta av papirdekselet og trykk forsiktig LED
-stripelampen inn i sporet. Dette fungerer best når rammen er i oppreist
posisjon.
3. Trykk dekselet på plass
4. Trykk endehetten på plass
5. Koble begge støtterørene til bunnstativet og fest dem med den
medfølgende sekskantnøkkelen og skruene.
6. Koble gulvlampen til en veggkontakt.
7. Se håndbok C1 for å koble gulvlampen til Calex Smart -appen.
8. Fjernkontrollinstruksjoner:
8.1 Av / på -brytere
8.2 Timer forhåndsinnstillinger
8.3 Øk / senk lysstyrken i statisk RGB og hvitt lys
8.4 Øk / senk hastigheten i dynamisk RGB -modus
8.5 Bryter for hvitt lys
8.6 RGB lysbryter
8.7 Modustast
8.8 RGB statisk farge
8.9 Musikkmodus
Når lysstyrken er dempet, må batteriet byttes ut.
Batteritype (ikke inkludert): 2x AAA 1,5 V
Calex Smart -app
Se håndbok C1 for å koble gulvlampen til appen.
FI - Kokoaminen
1. Liitä alumiinirunkoiset kehykset liittimiin.
2. Liitä LED -nauhavalo, irrota paperikotelo ja paina LED -nauhan valo
varovasti uraan. Tämä toimii parhaiten, kun kehys on pystyasennossa.
3. Paina kansi paikalleen
4. Paina päätykansi paikalleen
5. Liitä molemmat tukiputket alajalustaan ja kiinnitä ne mukana toimitetulla
kuusiokoloavaimella ja ruuveilla.
6. Kytke lattiavalaisin pistorasiaan.
7. Katso käsikirja C1, kun haluat yhdistää lattiavalaisimen Calex Smart
-sovellukseen.
8. Kaukosäätimen ohjeet:
8.1 Virtakytkimet
8.2 Ajastimen esiasetukset
8.3 Lisää / vähennä kirkkautta staattisessa RGB- ja valkoisessa
valotilassa
8.4 Nopeuden lisääminen / vähentäminen dynaamisessa RGB -tilassa
8.5 Valokytkin
8.6 RGB -valokytkin
8.7 Tilapainike
8.8 RGB -staattinen väri
8.9 Musiikkitila
Kun kirkkaus on himmeä, paristo on vaihdettava.
Paristotyyppi (ei sisälly toimitukseen): 2x AAA 1,5 V
Calex Smart -sovellus
Katso lattiavalaisimen liittäminen sovellukseen käsikirjasta C1.
SV - Montering
1. Anslut aluminiumspårramarna med kontakterna.
2. Anslut LED -remsan, ta bort papperslocket och tryck försiktigt in LED
-remsan i spåret. Detta fungerar bäst när ramen är i upprätt läge.
3. Tryck på locket på plats
4. Tryck på ändlocket på plats
5. Anslut båda stödrören till bottenstället och säkra dem med den
medföljande insexnyckeln och skruvarna.
6. Anslut golvlampan till ett vägguttag.
7. Se handbok C1 för att ansluta golvlampan till Calex Smart -appen.
8. Fjärrkontroll instruktioner:
8.1 På / av -omkopplare
8.2 Timer förinställningar
8.3 Öka / minska ljusstyrkan i statiskt RGB- och vitt ljusläge
8.4 Öka / minska hastigheten i dynamiskt RGB -läge
8.5 Vit ljusbrytare
8.6 RGB -ljusbrytare
8.7 Lägesknapp
8.8 RGB statisk färg
8.9 Musikläge
När ljusstyrkan är nedtonad måste batteriet bytas ut.
Batterityp (ingår ej): 2x AAA 1,5 V
Calex Smart -app
Se manual C1 för att ansluta golvlampan till appen.
DA - Montering
1. Tilslut aluminiumsrammede rammer med stik.
2. Tilslut LED -strimmellyset, fjern papirdækslet, og tryk forsigtigt LED
-strimmellyset ind i rillen. Dette fungerer bedst, når rammen er i oprejst
position.
3. Tryk låget på plads
4. Tryk endehætten på plads
5. Tilslut begge støtterør til bundstativet, og fastgør dem med den
medfølgende sekskantnøgle og skruer.
6. Sæt gulvlampen i en stikkontakt.
7. Se Manual C1 for at tilslutte gulvlampen til Calex Smart -appen.
8. Fjernbetjeningsinstruktioner:
8.1 Tænd / sluk kontakter
8.2 Timer forudindstillinger
8.3 Forøg / formindsk lysstyrken i statisk RGB og hvidt lys
8.4 Forøg / sænk hastigheden i dynamisk RGB -tilstand
8.5 Hvid lyskontakt
8.6 RGB -lysafbryder
8.7 Mode -tast
8.8 RGB statisk farve
8.9 Musiktilstand
Når lysstyrken er dæmpet, skal batteriet udskiftes.
Batteritype (medfølger ikke): 2x AAA 1,5 V
Calex Smart app
Se manual C1 for at tilslutte gulvlampen til appen.
C
M
Y
CM
MY
CY
CMY
K
ai1629462289105_A_(5301000500_Corner lamp)_print.pdf 2 20-8-2021 14:24:49

12
EN - Assembling
1. Connect the aluminum grooved frames with the connectors.
2. Connect the LED strip light, peel o the paper cover and gently press the
LED strip light into the groove. This works best when the frame is in an
upright position.
3. Press the cover into place
4. Press the end-cap into place
5. Connect both support tubes to the bottom stand and secure these with the
supplied hex key and screws.
6. Plug the floor lamp in to a wall socket.
7. See Manual C1 to connect the floor lamp to the Calex Smart app.
8. Remote control instructions:
8.1 On / o switches
8.2 Timer presets
8.3 Increase / decrease brightness in static RGB and
white light mode
8.4 Increase / decrease speed in RGB dynamic mode
8.5 White light switch
8.6 RGB light switch
8.7 Mode key
8.8 RGB Static Color
8. 9 Music Mode
When the brightness is dimmed, the battery needs to be replaced.
Battery type (not included): 2x AAA 1.5 V
Calex Smart app
Please refer to manual C1 to connect the floor lamp to the app.
NL - Montage
1. Verbind de aluminium gegroefde frames met de connectoren.
2. Sluit de LED-stripverlichting aan, verwijder de papieren afdekking en druk
de LED-stripverlichting voorzichtig in de groef. Dit werkt het beste als het
frame rechtop staat.
3. Druk het deksel op zijn plaats
4. Druk de eindkap op zijn plaats
5. Verbind beide steunbuizen met de onderste standaard en zet deze vast
met de meegeleverde inbussleutel en schroeven.
6. Steek de staande lamp in een stopcontact.
7. Zie Handleiding C1 om de vloerlamp te verbinden met de Calex Smart app.
8. Afstandsbediening instructies:
8.1 Aan/uit schakelaars
8.2 Timervoorinstellingen
8.3 Helderheid verhogen/verlagen in statische RGB- en witlichtmodus
8.4 Snelheid verhogen/verlagen in dynamische RGB-modus
8.5 Witlichtschakelaar
8.6 RGB-lichtschakelaar
8.7 Modustoets
8.8 Statische RGB-kleur
8. 9 Muziekmodus
Wanneer de helderheid is gedimd, moet de batterij worden vervangen.
Batterijtype (niet inbegrepen): 2x AAA 1,5 V
Calex Smart-app
Raadpleeg handleiding C1 om de vloerlamp met de app te verbinden.
FR - Assemblage
1. Connectez les cadres rainurés en aluminium avec les connecteurs.
2. Connectez la bande lumineuse LED, retirez le couvercle en papier et
appuyez doucement sur la bande lumineuse LED dans la rainure. Cela
fonctionne mieux lorsque le cadre est en position verticale.
3. Appuyez sur le couvercle en place
4. Appuyez sur l'embout en place
5. Connectez les deux tubes de support au support inférieur et fixez-les avec
la clé hexagonale et les vis fournies.
6. Branchez le lampadaire sur une prise murale.
7. Voir le manuel C1 pour connecter le lampadaire à l'application Calex Smart.
8. Instructions de contrôle à distance :
8.1 Interrupteurs marche/arrêt
8.2 Préréglages de la minuterie
8.3 Augmenter / diminuer la luminosité en mode RVB statique et lumière
blanche
8.4 Augmenter / diminuer la vitesse en mode dynamique RVB
8.5 Interrupteur de lumière blanche
8.6 Interrupteur d'éclairage RVB
8.7 Touche mode
8.8 Couleur statique RVB
8. 9 Mode Musique
Lorsque la luminosité diminue, la batterie doit être remplacée.
Type de pile (non inclus) : 2x AAA 1,5 V
Application Calex Smart
Veuillez vous référer au manuel C1 pour connecter le lampadaire à l'application.
DE - Montage
1. Verbinden Sie die Aluminium-Rillenrahmen mit den Verbindern.
2. Schließen Sie das LED-Streifenlicht an, ziehen Sie die Papierabdeckung ab
und drücken Sie das LED-Streifenlicht vorsichtig in die Nut. Dies
funktioniert am besten, wenn sich der Rahmen in einer aufrechten Position
befindet.
3. Drücken Sie die Abdeckung fest
4. Drücken Sie die Endkappe fest
5. Verbinden Sie beide Stützrohre mit dem unteren Ständer und sichern Sie
diese mit dem mitgelieferten Inbusschlüssel und Schrauben.
6. Stecken Sie die Stehlampe in eine Steckdose.
7. Siehe Handbuch C1, um die Stehleuchte mit der Calex Smart App zu
verbinden.
8. Anweisungen zur Fernbedienung:
8.1 Ein-/Ausschalter
8.2 Timer-Voreinstellungen
8.3 Helligkeit im statischen RGB- und Weißlichtmodus erhöhen/verringern
8.4 Geschwindigkeit im RGB-Dynamikmodus erhöhen/verringern
8.5 Weißlichtschalter
8.6 RGB-Lichtschalter
8.7 Modustaste
8.8 Statische RGB-Farbe
8. 9 Musikmodus
Wenn die Helligkeit gedimmt wird, muss die Batterie ersetzt werden.
Batterietyp (nicht im Lieferumfang enthalten): 2x AAA 1,5 V
Calex Smart-App
Bitte beachten Sie das Handbuch C1, um die Stehleuchte mit der App zu verbinden.
PL - Montaż
1. Połącz aluminiowe ramy rowkowane ze złączami.
2. Podłącz lampkę paska LED, zdejmij papierową osłonę i delikatnie wciśnij
lampkę paska LED w rowek. Działa to najlepiej, gdy rama jest w pozycji
pionowej.
3. Wciśnij pokrywę na miejsce
4. Wciśnij zaślepkę na miejsce
5. Podłącz obie rurki podtrzymujące do dolnej podstawy i zabezpiecz je
dostarczonym kluczem sześciokątnym i śrubami.
6. Podłącz lampę podłogową do gniazdka ściennego.
7. Zobacz instrukcję C1, aby podłączyć lampę podłogową do aplikacji Calex
Smart.
8. Instrukcje zdalnego sterowania:
8.1 Włącznik / wyłącznik
8.2 Ustawienia timera
8.3 Zwiększ/zmniejsz jasność w trybie statycznego RGB i białego światła
8.4 Zwiększanie / zmniejszanie prędkości w trybie dynamicznym RGB
8.5 Przełącznik światła białego
8.6 włącznik światła RGB
8.7 Klawisz trybu
8.8 Statyczny kolor RGB
8.9 Tryb muzyczny
Gdy jasność jest przyciemniona, bateria wymaga wymiany.
Typ baterii (brak w zestawie): 2x AAA 1,5 V
Calex Smart app
Aby podłączyć lampę podłogową do aplikacji, zapoznaj się z instrukcją C1.
CS - Sestavování
1. Spojte hliníkové drážkované rámy s konektory.
2. Připojte LED páskové světlo, odlepte papírový kryt a jemně zatlačte LED
páskové světlo do drážky. To funguje nejlépe, když je rám ve vzpřímené
poloze.
3. Zatlačte kryt na místo
4. Zatlačte koncovku na místo
5. Připojte obě nosné trubky ke spodnímu stojanu a zajistěte je dodaným
šestihranným klíčem a šrouby.
6. Zapojte stojací lampu do zásuvky ve zdi.
7. Podle příručky C1 připojte stojací lampu k aplikaci Calex Smart.
8. Pokyny pro dálkové ovládání:
8.1 Vypínače
8.2 Předvolby časovače
8.3 Zvýšení / snížení jasu v režimu statického RGB a bílého světla
8.4 Zvýšení / snížení rychlosti v dynamickém režimu RGB
8.5 Přepínač bílého světla
8.6 Přepínač světel RGB
8.7 Tlačítko režimu
8.8 RGB statická barva
8.9 Režim hudby
Když je jas ztlumený, je třeba vyměnit baterii.
Typ baterie (není součástí dodávky): 2x AAA 1,5 V.
Aplikace Calex Smart
Pro připojení podlahové lampy k aplikaci viz příručka C1.
EN - This manual, A, contains descriptions of all necessary steps for assembling and installing this product. Refer
to the icons in the supplementary manual, B, to see which of the following points apply to this product:
NL - Deze handleiding, A, bevat beschrijvingen van alle noodzakelijke stappen voor het monteren en installeren
van dit product. Raadpleeg de pictogrammen in de aanvullende handleiding, B, om te zien welke van de volgende
punten van toepassing zijn op dit product:
DE - Dieses Handbuch A, enthält Beschreibungen aller erforderlichen Schritte zum Zusammenbau und zur
Installation dieses Produkts. Beziehen Sie sich auf die Symbole im Zusatzhandbuch B, um zu sehen, welche der
folgenden Punkte für dieses Produkt gelten:
FR - Ce manuel, A, contient des descriptions de toutes les étapes nécessaires à l'assemblage et à l'installation de
ce produit. Reportez-vous aux icônes du manuel supplémentaire, B, pour voir lequel des points suivants
s'applique à ce produit:
PL - Niniejsza instrukcja, A, zawiera opisy wszystkich kroków niezbędnych do montażu i instalacji tego produktu.
Zapoznaj się z ikonami w dodatkowej instrukcji, B, aby zobaczyć, które z poniższych punktów dotyczą tego
produktu:
CS - Tato příručka A, obsahuje popis všech kroků nezbytných pro sestavení a instalaci tohoto produktu. Podle
ikon v doplňkové příručce B, zjistíte, které z následujících bodů se vztahují na tento produkt:
IT - Questo manuale, A, contiene le descrizioni di tutti i passaggi necessari per l'assemblaggio e l'installazione di
questo prodotto. Fare riferimento alle icone nel manuale supplementare, B, per vedere quale dei seguenti punti si
applica a questo prodotto:
SK - Táto príručka A, obsahuje popis všetkých krokov potrebných na zostavenie a inštaláciu tohto produktu. Na
ikonách v doplnkovej príručke B, sa dozviete, ktoré z nasledujúcich bodov sa na tento výrobok vzťahujú:
ES - Este manual, A, contiene descripciones de todos los pasos necesarios para ensamblar e instalar este
producto. Consulte los iconos del manual complementario, B, para ver cuál de los siguientes puntos se aplica a
este producto:
PT - Este manual, A, contém descrições de todas as etapas necessárias para a montagem e instalação deste
produto. Consulte os ícones no manual suplementar, B, para ver quais dos seguintes pontos se aplicam a este
produto:
RO - Acest manual, A, conține descrieri ale tuturor etapelor necesare pentru asamblarea și instalarea acestui
produs. Consultați pictogramele din manualul suplimentar, B, pentru a vedea care dintre următoarele puncte se
aplică acestui produs:
NO - Denne håndboken, A, inneholder beskrivelser av alle nødvendige trinn for å montere og installere dette
produktet. Se ikonene i tilleggshåndboken B, for å se hvilke av de følgende punktene som gjelder for dette
produktet:
SV - Denna handbok, A, innehåller beskrivningar av alla nödvändiga steg för montering och installation av denna
produkt. Se ikonerna i tilläggshandboken B, för att se vilken av följande punkter som gäller för denna produkt:
FI - Tämä käsikirja A, sisältää kuvaukset kaikista tarvittavista vaiheista tämän tuotteen kokoamiseen ja
asentamiseen. Katso lisäoppaan B, kuvakkeista, mitkä seuraavista kohdista koskevat tätä tuotetta:
DA - Denne manual, A, indeholder beskrivelser af alle nødvendige trin til samling og installation af dette produkt.
Se ikonerne i den supplerende manual, B, for at se, hvilke af følgende punkter der gælder for dette produkt:
02, 04, 05, 07, 09, 10, 11, 16, 26 (Type Y), 31, 33,
34, 35, 36, 37
IT - Assemblaggio
1. Collegare i telai scanalati in alluminio con i connettori.
2. Collegare la striscia luminosa a LED, staccare il coperchio di carta e
premere delicatamente la striscia luminosa a LED nella scanalatura.
Funziona meglio quando il telaio è in posizione verticale.
3. Premere il coperchio in posizione
4. Premere il cappuccio in posizione
5. Collegare entrambi i tubi di supporto al supporto inferiore e fissarli con la
chiave esagonale e le viti in dotazione.
6. Collegare la lampada da terra a una presa a muro.
7. Consultare il Manuale C1 per collegare la lampada da terra all'app Calex
Smart.
8. Istruzioni per il telecomando:
8.1 Interruttori di accensione/spegnimento
8.2 Preimpostazioni timer
8.3 Aumenta/diminuisci la luminosità in modalità RGB statica e luce
bianca
8.4 Aumenta/diminuisci la velocità in modalità dinamica RGB
8.5 Interruttore luce bianca
8.6 Interruttore della luce RGB
8.7 Tasto modalità
8.8 Colore statico RGB
8.9 Modalità musica
Quando la luminosità è ridotta, è necessario sostituire la batteria.
Tipo di batteria (non inclusa): 2x AAA 1,5 V
App Calex Smart
Fare riferimento al manuale C1 per collegare la lampada da terra all'app.
SK - Zostavenie
1. Spojte hliníkové drážkované rámy s konektormi.
2. Pripojte svetlo LED pásika, odlepte papierový kryt a jemne zatlačte svetlo
LED pásika do drážky. Toto funguje najlepšie, keď je rám vo vzpriamenej
polohe.
3. Zatlačte kryt na miesto
4. Zatlačte koncový kryt na miesto
5. Pripojte obe nosné trubice k spodnému stojanu a zaistite ich dodaným
šesťhranným kľúčom a skrutkami.
6. Zapojte podlahové svietidlo do zásuvky v stene.
7. Pripojenie stojacej lampy k aplikácii Calex Smart nájdete v príručke C1.
8. Pokyny na diaľkové ovládanie:
8.1 Vypínače
8.2 Predvoľby časovača
8.3 Zvýšenie / zníženie jasu v režime statického RGB a bieleho svetla
8.4 Zvýšenie / zníženie rýchlosti v dynamickom režime RGB
8.5 Spínač bieleho svetla
8.6 Prepínač svetla RGB
8.7 Tlačidlo režimu
8.8 RGB statická farba
8.9 Režim hudby
Keď je jas stlmený, je potrebné vymeniť batériu.
Typ batérie (nie je súčasťou dodávky): 2x AAA 1,5 V.
Aplikácia Calex Smart
Pripojenie stojacej lampy k aplikácii nájdete v príručke C1.
RO - Asamblare
1. Conectați cadrele canelate din aluminiu cu conectorii.
2. Conectați lumina cu bandă LED, desprindeți capacul de hârtie și apăsați
ușor lumina cu bandă LED în canelură. Acest lucru funcționează cel mai
bine atunci când cadrul este în poziție verticală.
3. Apăsați capacul în poziție
4. Apăsați capacul în poziție
5. Conectați ambele tuburi de sprijin la suportul inferior și fixați-le cu cheia
hexagonală și șuruburile furnizate.
6. Conectați lampa de podea la o priză de perete.
7. Consultați Manualul C1 pentru a conecta veioza la aplicația Calex Smart.
8. Instrucțiuni de control de la distanță:
8.1 Comutatoare de pornire / oprire
8.2 Presetări ale temporizatorului
8.3 Măriți / micșorați luminozitatea în modul static RGB și lumină albă
8.4 Măriți / micșorați viteza în modul dinamic RGB
8.5 Comutator de lumină albă
8.6 Comutator de lumină RGB
8.7 Tasta de mod
8.8 RGB Static Color
8.9 Mod muzică
Când luminozitatea este estompată, bateria trebuie înlocuită.
Tipul bateriei (nu este inclus): 2x AAA 1,5 V
Aplicația Calex Smart
Vă rugăm să consultați manualul C1 pentru a conecta lampa de podea la
aplicație.
ES - Montaje
1. Conecte los marcos ranurados de aluminio con los conectores.
2. Conecte la tira de luz LED, retire la cubierta de papel y presione
suavemente la tira de luz LED en la ranura. Esto funciona mejor cuando el
marco está en posición vertical.
3. Presione la tapa en su lugar
4. Presione la tapa del extremo en su lugar
5. Conecte ambos tubos de soporte al soporte inferior y asegúrelos con la
llave hexagonal y los tornillos suministrados.
6. Enchufe la lámpara de pie a un enchufe de pared.
7. Consulte el Manual C1 para conectar la lámpara de pie a la aplicación Calex
Smart.
8. Instrucciones de control remoto:
8.1 Interruptores de encendido / apagado
8.2 Preajustes del temporizador
8.3 Aumentar / disminuir el brillo en RGB estático y modo de luz blanca
8.4 Aumentar / disminuir la velocidad en modo dinámico RGB
8.5 Interruptor de luz blanca
8.6 Interruptor de luz RGB
8.7 Tecla de modo
8.8 Color estático RGB
8.9 Modo Música
Cuando se atenúa el brillo, es necesario reemplazar la batería.
Tipo de batería (no incluida): 2x AAA 1,5 V
Aplicación Calex Smart
Consulte el manual C1 para conectar la lámpara de pie a la aplicación.
PT - Montagem
1. Conecte as estruturas ranhuradas de alumínio com os conectores.
2. Conecte a fita de LED, retire a tampa de papel e pressione suavemente a
fita de LED na ranhura. Isso funciona melhor quando o quadro está na
posição vertical.
3. Pressione a tampa no lugar
4. Pressione a tampa final no lugar
5. Conecte os dois tubos de suporte ao pedestal inferior e prenda-os com a
chave sextavada e os parafusos fornecidos.
6. Conecte a luminária de chão a uma tomada de parede.
7. Consulte o Manual C1 para conectar a luminária de chão ao aplicativo Calex
Smart.
8. Instruções de controle remoto:
8.1 Chaves liga / desliga
8.2 predefinições de temporizador
8.3 Aumentar / diminuir o brilho em RGB estático e modo de luz branca
8.4 Aumentar / diminuir a velocidade no modo dinâmico RGB
8.5 Interruptor de luz branca
8.6 interruptor de luz RGB
8.7 Tecla de modo
8.8 RGB Static Color
8.9 Modo de música
Quando o brilho está diminuído, a bateria precisa ser substituída.
Tipo de bateria (não incluída): 2x AAA 1,5 V
Calex Smart app
Consulte o manual C1 para conectar a luminária de chão ao aplicativo.
NO - Montering
1. Koble rammene i aluminium med kontaktene.
2. Koble til LED -stripelyset, ta av papirdekselet og trykk forsiktig LED
-stripelampen inn i sporet. Dette fungerer best når rammen er i oppreist
posisjon.
3. Trykk dekselet på plass
4. Trykk endehetten på plass
5. Koble begge støtterørene til bunnstativet og fest dem med den
medfølgende sekskantnøkkelen og skruene.
6. Koble gulvlampen til en veggkontakt.
7. Se håndbok C1 for å koble gulvlampen til Calex Smart -appen.
8. Fjernkontrollinstruksjoner:
8.1 Av / på -brytere
8.2 Timer forhåndsinnstillinger
8.3 Øk / senk lysstyrken i statisk RGB og hvitt lys
8.4 Øk / senk hastigheten i dynamisk RGB -modus
8.5 Bryter for hvitt lys
8.6 RGB lysbryter
8.7 Modustast
8.8 RGB statisk farge
8.9 Musikkmodus
Når lysstyrken er dempet, må batteriet byttes ut.
Batteritype (ikke inkludert): 2x AAA 1,5 V
Calex Smart -app
Se håndbok C1 for å koble gulvlampen til appen.
FI - Kokoaminen
1. Liitä alumiinirunkoiset kehykset liittimiin.
2. Liitä LED -nauhavalo, irrota paperikotelo ja paina LED -nauhan valo
varovasti uraan. Tämä toimii parhaiten, kun kehys on pystyasennossa.
3. Paina kansi paikalleen
4. Paina päätykansi paikalleen
5. Liitä molemmat tukiputket alajalustaan ja kiinnitä ne mukana toimitetulla
kuusiokoloavaimella ja ruuveilla.
6. Kytke lattiavalaisin pistorasiaan.
7. Katso käsikirja C1, kun haluat yhdistää lattiavalaisimen Calex Smart
-sovellukseen.
8. Kaukosäätimen ohjeet:
8.1 Virtakytkimet
8.2 Ajastimen esiasetukset
8.3 Lisää / vähennä kirkkautta staattisessa RGB- ja valkoisessa
valotilassa
8.4 Nopeuden lisääminen / vähentäminen dynaamisessa RGB -tilassa
8.5 Valokytkin
8.6 RGB -valokytkin
8.7 Tilapainike
8.8 RGB -staattinen väri
8.9 Musiikkitila
Kun kirkkaus on himmeä, paristo on vaihdettava.
Paristotyyppi (ei sisälly toimitukseen): 2x AAA 1,5 V
Calex Smart -sovellus
Katso lattiavalaisimen liittäminen sovellukseen käsikirjasta C1.
SV - Montering
1. Anslut aluminiumspårramarna med kontakterna.
2. Anslut LED -remsan, ta bort papperslocket och tryck försiktigt in LED
-remsan i spåret. Detta fungerar bäst när ramen är i upprätt läge.
3. Tryck på locket på plats
4. Tryck på ändlocket på plats
5. Anslut båda stödrören till bottenstället och säkra dem med den
medföljande insexnyckeln och skruvarna.
6. Anslut golvlampan till ett vägguttag.
7. Se handbok C1 för att ansluta golvlampan till Calex Smart -appen.
8. Fjärrkontroll instruktioner:
8.1 På / av -omkopplare
8.2 Timer förinställningar
8.3 Öka / minska ljusstyrkan i statiskt RGB- och vitt ljusläge
8.4 Öka / minska hastigheten i dynamiskt RGB -läge
8.5 Vit ljusbrytare
8.6 RGB -ljusbrytare
8.7 Lägesknapp
8.8 RGB statisk färg
8.9 Musikläge
När ljusstyrkan är nedtonad måste batteriet bytas ut.
Batterityp (ingår ej): 2x AAA 1,5 V
Calex Smart -app
Se manual C1 för att ansluta golvlampan till appen.
DA - Montering
1. Tilslut aluminiumsrammede rammer med stik.
2. Tilslut LED -strimmellyset, fjern papirdækslet, og tryk forsigtigt LED
-strimmellyset ind i rillen. Dette fungerer bedst, når rammen er i oprejst
position.
3. Tryk låget på plads
4. Tryk endehætten på plads
5. Tilslut begge støtterør til bundstativet, og fastgør dem med den
medfølgende sekskantnøgle og skruer.
6. Sæt gulvlampen i en stikkontakt.
7. Se Manual C1 for at tilslutte gulvlampen til Calex Smart -appen.
8. Fjernbetjeningsinstruktioner:
8.1 Tænd / sluk kontakter
8.2 Timer forudindstillinger
8.3 Forøg / formindsk lysstyrken i statisk RGB og hvidt lys
8.4 Forøg / sænk hastigheden i dynamisk RGB -tilstand
8.5 Hvid lyskontakt
8.6 RGB -lysafbryder
8.7 Mode -tast
8.8 RGB statisk farve
8.9 Musiktilstand
Når lysstyrken er dæmpet, skal batteriet udskiftes.
Batteritype (medfølger ikke): 2x AAA 1,5 V
Calex Smart app
Se manual C1 for at tilslutte gulvlampen til appen.
C
M
Y
CM
MY
CY
CMY
K
ai1629462289105_A_(5301000500_Corner lamp)_print.pdf 3 20-8-2021 14:24:49

3
5
6
4
EN - Assembling
1. Connect the aluminum grooved frames with the connectors.
2. Connect the LED strip light, peel o the paper cover and gently press the
LED strip light into the groove. This works best when the frame is in an
upright position.
3. Press the cover into place
4. Press the end-cap into place
5. Connect both support tubes to the bottom stand and secure these with the
supplied hex key and screws.
6. Plug the floor lamp in to a wall socket.
7. See Manual C1 to connect the floor lamp to the Calex Smart app.
8. Remote control instructions:
8.1 On / o switches
8.2 Timer presets
8.3 Increase / decrease brightness in static RGB and
white light mode
8.4 Increase / decrease speed in RGB dynamic mode
8.5 White light switch
8.6 RGB light switch
8.7 Mode key
8.8 RGB Static Color
8. 9 Music Mode
When the brightness is dimmed, the battery needs to be replaced.
Battery type (not included): 2x AAA 1.5 V
Calex Smart app
Please refer to manual C1 to connect the floor lamp to the app.
NL - Montage
1. Verbind de aluminium gegroefde frames met de connectoren.
2. Sluit de LED-stripverlichting aan, verwijder de papieren afdekking en druk
de LED-stripverlichting voorzichtig in de groef. Dit werkt het beste als het
frame rechtop staat.
3. Druk het deksel op zijn plaats
4. Druk de eindkap op zijn plaats
5. Verbind beide steunbuizen met de onderste standaard en zet deze vast
met de meegeleverde inbussleutel en schroeven.
6. Steek de staande lamp in een stopcontact.
7. Zie Handleiding C1 om de vloerlamp te verbinden met de Calex Smart app.
8. Afstandsbediening instructies:
8.1 Aan/uit schakelaars
8.2 Timervoorinstellingen
8.3 Helderheid verhogen/verlagen in statische RGB- en witlichtmodus
8.4 Snelheid verhogen/verlagen in dynamische RGB-modus
8.5 Witlichtschakelaar
8.6 RGB-lichtschakelaar
8.7 Modustoets
8.8 Statische RGB-kleur
8. 9 Muziekmodus
Wanneer de helderheid is gedimd, moet de batterij worden vervangen.
Batterijtype (niet inbegrepen): 2x AAA 1,5 V
Calex Smart-app
Raadpleeg handleiding C1 om de vloerlamp met de app te verbinden.
FR - Assemblage
1. Connectez les cadres rainurés en aluminium avec les connecteurs.
2. Connectez la bande lumineuse LED, retirez le couvercle en papier et
appuyez doucement sur la bande lumineuse LED dans la rainure. Cela
fonctionne mieux lorsque le cadre est en position verticale.
3. Appuyez sur le couvercle en place
4. Appuyez sur l'embout en place
5. Connectez les deux tubes de support au support inférieur et fixez-les avec
la clé hexagonale et les vis fournies.
6. Branchez le lampadaire sur une prise murale.
7. Voir le manuel C1 pour connecter le lampadaire à l'application Calex Smart.
8. Instructions de contrôle à distance :
8.1 Interrupteurs marche/arrêt
8.2 Préréglages de la minuterie
8.3 Augmenter / diminuer la luminosité en mode RVB statique et lumière
blanche
8.4 Augmenter / diminuer la vitesse en mode dynamique RVB
8.5 Interrupteur de lumière blanche
8.6 Interrupteur d'éclairage RVB
8.7 Touche mode
8.8 Couleur statique RVB
8. 9 Mode Musique
Lorsque la luminosité diminue, la batterie doit être remplacée.
Type de pile (non inclus) : 2x AAA 1,5 V
Application Calex Smart
Veuillez vous référer au manuel C1 pour connecter le lampadaire à l'application.
DE - Montage
1. Verbinden Sie die Aluminium-Rillenrahmen mit den Verbindern.
2. Schließen Sie das LED-Streifenlicht an, ziehen Sie die Papierabdeckung ab
und drücken Sie das LED-Streifenlicht vorsichtig in die Nut. Dies
funktioniert am besten, wenn sich der Rahmen in einer aufrechten Position
befindet.
3. Drücken Sie die Abdeckung fest
4. Drücken Sie die Endkappe fest
5. Verbinden Sie beide Stützrohre mit dem unteren Ständer und sichern Sie
diese mit dem mitgelieferten Inbusschlüssel und Schrauben.
6. Stecken Sie die Stehlampe in eine Steckdose.
7. Siehe Handbuch C1, um die Stehleuchte mit der Calex Smart App zu
verbinden.
8. Anweisungen zur Fernbedienung:
8.1 Ein-/Ausschalter
8.2 Timer-Voreinstellungen
8.3 Helligkeit im statischen RGB- und Weißlichtmodus erhöhen/verringern
8.4 Geschwindigkeit im RGB-Dynamikmodus erhöhen/verringern
8.5 Weißlichtschalter
8.6 RGB-Lichtschalter
8.7 Modustaste
8.8 Statische RGB-Farbe
8. 9 Musikmodus
Wenn die Helligkeit gedimmt wird, muss die Batterie ersetzt werden.
Batterietyp (nicht im Lieferumfang enthalten): 2x AAA 1,5 V
Calex Smart-App
Bitte beachten Sie das Handbuch C1, um die Stehleuchte mit der App zu verbinden.
PL - Montaż
1. Połącz aluminiowe ramy rowkowane ze złączami.
2. Podłącz lampkę paska LED, zdejmij papierową osłonę i delikatnie wciśnij
lampkę paska LED w rowek. Działa to najlepiej, gdy rama jest w pozycji
pionowej.
3. Wciśnij pokrywę na miejsce
4. Wciśnij zaślepkę na miejsce
5. Podłącz obie rurki podtrzymujące do dolnej podstawy i zabezpiecz je
dostarczonym kluczem sześciokątnym i śrubami.
6. Podłącz lampę podłogową do gniazdka ściennego.
7. Zobacz instrukcję C1, aby podłączyć lampę podłogową do aplikacji Calex
Smart.
8. Instrukcje zdalnego sterowania:
8.1 Włącznik / wyłącznik
8.2 Ustawienia timera
8.3 Zwiększ/zmniejsz jasność w trybie statycznego RGB i białego światła
8.4 Zwiększanie / zmniejszanie prędkości w trybie dynamicznym RGB
8.5 Przełącznik światła białego
8.6 włącznik światła RGB
8.7 Klawisz trybu
8.8 Statyczny kolor RGB
8.9 Tryb muzyczny
Gdy jasność jest przyciemniona, bateria wymaga wymiany.
Typ baterii (brak w zestawie): 2x AAA 1,5 V
Calex Smart app
Aby podłączyć lampę podłogową do aplikacji, zapoznaj się z instrukcją C1.
CS - Sestavování
1. Spojte hliníkové drážkované rámy s konektory.
2. Připojte LED páskové světlo, odlepte papírový kryt a jemně zatlačte LED
páskové světlo do drážky. To funguje nejlépe, když je rám ve vzpřímené
poloze.
3. Zatlačte kryt na místo
4. Zatlačte koncovku na místo
5. Připojte obě nosné trubky ke spodnímu stojanu a zajistěte je dodaným
šestihranným klíčem a šrouby.
6. Zapojte stojací lampu do zásuvky ve zdi.
7. Podle příručky C1 připojte stojací lampu k aplikaci Calex Smart.
8. Pokyny pro dálkové ovládání:
8.1 Vypínače
8.2 Předvolby časovače
8.3 Zvýšení / snížení jasu v režimu statického RGB a bílého světla
8.4 Zvýšení / snížení rychlosti v dynamickém režimu RGB
8.5 Přepínač bílého světla
8.6 Přepínač světel RGB
8.7 Tlačítko režimu
8.8 RGB statická barva
8.9 Režim hudby
Když je jas ztlumený, je třeba vyměnit baterii.
Typ baterie (není součástí dodávky): 2x AAA 1,5 V.
Aplikace Calex Smart
Pro připojení podlahové lampy k aplikaci viz příručka C1.
IT - Assemblaggio
1. Collegare i telai scanalati in alluminio con i connettori.
2. Collegare la striscia luminosa a LED, staccare il coperchio di carta e
premere delicatamente la striscia luminosa a LED nella scanalatura.
Funziona meglio quando il telaio è in posizione verticale.
3. Premere il coperchio in posizione
4. Premere il cappuccio in posizione
5. Collegare entrambi i tubi di supporto al supporto inferiore e fissarli con la
chiave esagonale e le viti in dotazione.
6. Collegare la lampada da terra a una presa a muro.
7. Consultare il Manuale C1 per collegare la lampada da terra all'app Calex
Smart.
8. Istruzioni per il telecomando:
8.1 Interruttori di accensione/spegnimento
8.2 Preimpostazioni timer
8.3 Aumenta/diminuisci la luminosità in modalità RGB statica e luce
bianca
8.4 Aumenta/diminuisci la velocità in modalità dinamica RGB
8.5 Interruttore luce bianca
8.6 Interruttore della luce RGB
8.7 Tasto modalità
8.8 Colore statico RGB
8.9 Modalità musica
Quando la luminosità è ridotta, è necessario sostituire la batteria.
Tipo di batteria (non inclusa): 2x AAA 1,5 V
App Calex Smart
Fare riferimento al manuale C1 per collegare la lampada da terra all'app.
SK - Zostavenie
1. Spojte hliníkové drážkované rámy s konektormi.
2. Pripojte svetlo LED pásika, odlepte papierový kryt a jemne zatlačte svetlo
LED pásika do drážky. Toto funguje najlepšie, keď je rám vo vzpriamenej
polohe.
3. Zatlačte kryt na miesto
4. Zatlačte koncový kryt na miesto
5. Pripojte obe nosné trubice k spodnému stojanu a zaistite ich dodaným
šesťhranným kľúčom a skrutkami.
6. Zapojte podlahové svietidlo do zásuvky v stene.
7. Pripojenie stojacej lampy k aplikácii Calex Smart nájdete v príručke C1.
8. Pokyny na diaľkové ovládanie:
8.1 Vypínače
8.2 Predvoľby časovača
8.3 Zvýšenie / zníženie jasu v režime statického RGB a bieleho svetla
8.4 Zvýšenie / zníženie rýchlosti v dynamickom režime RGB
8.5 Spínač bieleho svetla
8.6 Prepínač svetla RGB
8.7 Tlačidlo režimu
8.8 RGB statická farba
8.9 Režim hudby
Keď je jas stlmený, je potrebné vymeniť batériu.
Typ batérie (nie je súčasťou dodávky): 2x AAA 1,5 V.
Aplikácia Calex Smart
Pripojenie stojacej lampy k aplikácii nájdete v príručke C1.
RO - Asamblare
1. Conectați cadrele canelate din aluminiu cu conectorii.
2. Conectați lumina cu bandă LED, desprindeți capacul de hârtie și apăsați
ușor lumina cu bandă LED în canelură. Acest lucru funcționează cel mai
bine atunci când cadrul este în poziție verticală.
3. Apăsați capacul în poziție
4. Apăsați capacul în poziție
5. Conectați ambele tuburi de sprijin la suportul inferior și fixați-le cu cheia
hexagonală și șuruburile furnizate.
6. Conectați lampa de podea la o priză de perete.
7. Consultați Manualul C1 pentru a conecta veioza la aplicația Calex Smart.
8. Instrucțiuni de control de la distanță:
8.1 Comutatoare de pornire / oprire
8.2 Presetări ale temporizatorului
8.3 Măriți / micșorați luminozitatea în modul static RGB și lumină albă
8.4 Măriți / micșorați viteza în modul dinamic RGB
8.5 Comutator de lumină albă
8.6 Comutator de lumină RGB
8.7 Tasta de mod
8.8 RGB Static Color
8.9 Mod muzică
Când luminozitatea este estompată, bateria trebuie înlocuită.
Tipul bateriei (nu este inclus): 2x AAA 1,5 V
Aplicația Calex Smart
Vă rugăm să consultați manualul C1 pentru a conecta lampa de podea la
aplicație.
ES - Montaje
1. Conecte los marcos ranurados de aluminio con los conectores.
2. Conecte la tira de luz LED, retire la cubierta de papel y presione
suavemente la tira de luz LED en la ranura. Esto funciona mejor cuando el
marco está en posición vertical.
3. Presione la tapa en su lugar
4. Presione la tapa del extremo en su lugar
5. Conecte ambos tubos de soporte al soporte inferior y asegúrelos con la
llave hexagonal y los tornillos suministrados.
6. Enchufe la lámpara de pie a un enchufe de pared.
7. Consulte el Manual C1 para conectar la lámpara de pie a la aplicación Calex
Smart.
8. Instrucciones de control remoto:
8.1 Interruptores de encendido / apagado
8.2 Preajustes del temporizador
8.3 Aumentar / disminuir el brillo en RGB estático y modo de luz blanca
8.4 Aumentar / disminuir la velocidad en modo dinámico RGB
8.5 Interruptor de luz blanca
8.6 Interruptor de luz RGB
8.7 Tecla de modo
8.8 Color estático RGB
8.9 Modo Música
Cuando se atenúa el brillo, es necesario reemplazar la batería.
Tipo de batería (no incluida): 2x AAA 1,5 V
Aplicación Calex Smart
Consulte el manual C1 para conectar la lámpara de pie a la aplicación.
PT - Montagem
1. Conecte as estruturas ranhuradas de alumínio com os conectores.
2. Conecte a fita de LED, retire a tampa de papel e pressione suavemente a
fita de LED na ranhura. Isso funciona melhor quando o quadro está na
posição vertical.
3. Pressione a tampa no lugar
4. Pressione a tampa final no lugar
5. Conecte os dois tubos de suporte ao pedestal inferior e prenda-os com a
chave sextavada e os parafusos fornecidos.
6. Conecte a luminária de chão a uma tomada de parede.
7. Consulte o Manual C1 para conectar a luminária de chão ao aplicativo Calex
Smart.
8. Instruções de controle remoto:
8.1 Chaves liga / desliga
8.2 predefinições de temporizador
8.3 Aumentar / diminuir o brilho em RGB estático e modo de luz branca
8.4 Aumentar / diminuir a velocidade no modo dinâmico RGB
8.5 Interruptor de luz branca
8.6 interruptor de luz RGB
8.7 Tecla de modo
8.8 RGB Static Color
8.9 Modo de música
Quando o brilho está diminuído, a bateria precisa ser substituída.
Tipo de bateria (não incluída): 2x AAA 1,5 V
Calex Smart app
Consulte o manual C1 para conectar a luminária de chão ao aplicativo.
NO - Montering
1. Koble rammene i aluminium med kontaktene.
2. Koble til LED -stripelyset, ta av papirdekselet og trykk forsiktig LED
-stripelampen inn i sporet. Dette fungerer best når rammen er i oppreist
posisjon.
3. Trykk dekselet på plass
4. Trykk endehetten på plass
5. Koble begge støtterørene til bunnstativet og fest dem med den
medfølgende sekskantnøkkelen og skruene.
6. Koble gulvlampen til en veggkontakt.
7. Se håndbok C1 for å koble gulvlampen til Calex Smart -appen.
8. Fjernkontrollinstruksjoner:
8.1 Av / på -brytere
8.2 Timer forhåndsinnstillinger
8.3 Øk / senk lysstyrken i statisk RGB og hvitt lys
8.4 Øk / senk hastigheten i dynamisk RGB -modus
8.5 Bryter for hvitt lys
8.6 RGB lysbryter
8.7 Modustast
8.8 RGB statisk farge
8.9 Musikkmodus
Når lysstyrken er dempet, må batteriet byttes ut.
Batteritype (ikke inkludert): 2x AAA 1,5 V
Calex Smart -app
Se håndbok C1 for å koble gulvlampen til appen.
FI - Kokoaminen
1. Liitä alumiinirunkoiset kehykset liittimiin.
2. Liitä LED -nauhavalo, irrota paperikotelo ja paina LED -nauhan valo
varovasti uraan. Tämä toimii parhaiten, kun kehys on pystyasennossa.
3. Paina kansi paikalleen
4. Paina päätykansi paikalleen
5. Liitä molemmat tukiputket alajalustaan ja kiinnitä ne mukana toimitetulla
kuusiokoloavaimella ja ruuveilla.
6. Kytke lattiavalaisin pistorasiaan.
7. Katso käsikirja C1, kun haluat yhdistää lattiavalaisimen Calex Smart
-sovellukseen.
8. Kaukosäätimen ohjeet:
8.1 Virtakytkimet
8.2 Ajastimen esiasetukset
8.3 Lisää / vähennä kirkkautta staattisessa RGB- ja valkoisessa
valotilassa
8.4 Nopeuden lisääminen / vähentäminen dynaamisessa RGB -tilassa
8.5 Valokytkin
8.6 RGB -valokytkin
8.7 Tilapainike
8.8 RGB -staattinen väri
8.9 Musiikkitila
Kun kirkkaus on himmeä, paristo on vaihdettava.
Paristotyyppi (ei sisälly toimitukseen): 2x AAA 1,5 V
Calex Smart -sovellus
Katso lattiavalaisimen liittäminen sovellukseen käsikirjasta C1.
SV - Montering
1. Anslut aluminiumspårramarna med kontakterna.
2. Anslut LED -remsan, ta bort papperslocket och tryck försiktigt in LED
-remsan i spåret. Detta fungerar bäst när ramen är i upprätt läge.
3. Tryck på locket på plats
4. Tryck på ändlocket på plats
5. Anslut båda stödrören till bottenstället och säkra dem med den
medföljande insexnyckeln och skruvarna.
6. Anslut golvlampan till ett vägguttag.
7. Se handbok C1 för att ansluta golvlampan till Calex Smart -appen.
8. Fjärrkontroll instruktioner:
8.1 På / av -omkopplare
8.2 Timer förinställningar
8.3 Öka / minska ljusstyrkan i statiskt RGB- och vitt ljusläge
8.4 Öka / minska hastigheten i dynamiskt RGB -läge
8.5 Vit ljusbrytare
8.6 RGB -ljusbrytare
8.7 Lägesknapp
8.8 RGB statisk färg
8.9 Musikläge
När ljusstyrkan är nedtonad måste batteriet bytas ut.
Batterityp (ingår ej): 2x AAA 1,5 V
Calex Smart -app
Se manual C1 för att ansluta golvlampan till appen.
DA - Montering
1. Tilslut aluminiumsrammede rammer med stik.
2. Tilslut LED -strimmellyset, fjern papirdækslet, og tryk forsigtigt LED
-strimmellyset ind i rillen. Dette fungerer bedst, når rammen er i oprejst
position.
3. Tryk låget på plads
4. Tryk endehætten på plads
5. Tilslut begge støtterør til bundstativet, og fastgør dem med den
medfølgende sekskantnøgle og skruer.
6. Sæt gulvlampen i en stikkontakt.
7. Se Manual C1 for at tilslutte gulvlampen til Calex Smart -appen.
8. Fjernbetjeningsinstruktioner:
8.1 Tænd / sluk kontakter
8.2 Timer forudindstillinger
8.3 Forøg / formindsk lysstyrken i statisk RGB og hvidt lys
8.4 Forøg / sænk hastigheden i dynamisk RGB -tilstand
8.5 Hvid lyskontakt
8.6 RGB -lysafbryder
8.7 Mode -tast
8.8 RGB statisk farve
8.9 Musiktilstand
Når lysstyrken er dæmpet, skal batteriet udskiftes.
Batteritype (medfølger ikke): 2x AAA 1,5 V
Calex Smart app
Se manual C1 for at tilslutte gulvlampen til appen.
C
M
Y
CM
MY
CY
CMY
K
ai1629462289105_A_(5301000500_Corner lamp)_print.pdf 4 20-8-2021 14:24:50

EN - Assembling
1. Connect the aluminum grooved frames with the connectors.
2. Connect the LED strip light, peel o the paper cover and gently press the
LED strip light into the groove. This works best when the frame is in an
upright position.
3. Press the cover into place
4. Press the end-cap into place
5. Connect both support tubes to the bottom stand and secure these with the
supplied hex key and screws.
6. Plug the floor lamp in to a wall socket.
7. See Manual C1 to connect the floor lamp to the Calex Smart app.
8. Remote control instructions:
8.1 On / o switches
8.2 Timer presets
8.3 Increase / decrease brightness in static RGB and
white light mode
8.4 Increase / decrease speed in RGB dynamic mode
8.5 White light switch
8.6 RGB light switch
8.7 Mode key
8.8 RGB Static Color
8. 9 Music Mode
When the brightness is dimmed, the battery needs to be replaced.
Battery type (not included): 2x AAA 1.5 V
Calex Smart app
Please refer to manual C1 to connect the floor lamp to the app.
NL - Montage
1. Verbind de aluminium gegroefde frames met de connectoren.
2. Sluit de LED-stripverlichting aan, verwijder de papieren afdekking en druk
de LED-stripverlichting voorzichtig in de groef. Dit werkt het beste als het
frame rechtop staat.
3. Druk het deksel op zijn plaats
4. Druk de eindkap op zijn plaats
5. Verbind beide steunbuizen met de onderste standaard en zet deze vast
met de meegeleverde inbussleutel en schroeven.
6. Steek de staande lamp in een stopcontact.
7. Zie Handleiding C1 om de vloerlamp te verbinden met de Calex Smart app.
8. Afstandsbediening instructies:
8.1 Aan/uit schakelaars
8.2 Timervoorinstellingen
8.3 Helderheid verhogen/verlagen in statische RGB- en witlichtmodus
8.4 Snelheid verhogen/verlagen in dynamische RGB-modus
8.5 Witlichtschakelaar
8.6 RGB-lichtschakelaar
8.7 Modustoets
8.8 Statische RGB-kleur
8. 9 Muziekmodus
Wanneer de helderheid is gedimd, moet de batterij worden vervangen.
Batterijtype (niet inbegrepen): 2x AAA 1,5 V
Calex Smart-app
Raadpleeg handleiding C1 om de vloerlamp met de app te verbinden.
FR - Assemblage
1. Connectez les cadres rainurés en aluminium avec les connecteurs.
2. Connectez la bande lumineuse LED, retirez le couvercle en papier et
appuyez doucement sur la bande lumineuse LED dans la rainure. Cela
fonctionne mieux lorsque le cadre est en position verticale.
3. Appuyez sur le couvercle en place
4. Appuyez sur l'embout en place
5. Connectez les deux tubes de support au support inférieur et fixez-les avec
la clé hexagonale et les vis fournies.
6. Branchez le lampadaire sur une prise murale.
7. Voir le manuel C1 pour connecter le lampadaire à l'application Calex Smart.
8. Instructions de contrôle à distance :
8.1 Interrupteurs marche/arrêt
8.2 Préréglages de la minuterie
8.3 Augmenter / diminuer la luminosité en mode RVB statique et lumière
blanche
8.4 Augmenter / diminuer la vitesse en mode dynamique RVB
8.5 Interrupteur de lumière blanche
8.6 Interrupteur d'éclairage RVB
8.7 Touche mode
8.8 Couleur statique RVB
8. 9 Mode Musique
Lorsque la luminosité diminue, la batterie doit être remplacée.
Type de pile (non inclus) : 2x AAA 1,5 V
Application Calex Smart
Veuillez vous référer au manuel C1 pour connecter le lampadaire à l'application.
DE - Montage
1. Verbinden Sie die Aluminium-Rillenrahmen mit den Verbindern.
2. Schließen Sie das LED-Streifenlicht an, ziehen Sie die Papierabdeckung ab
und drücken Sie das LED-Streifenlicht vorsichtig in die Nut. Dies
funktioniert am besten, wenn sich der Rahmen in einer aufrechten Position
befindet.
3. Drücken Sie die Abdeckung fest
4. Drücken Sie die Endkappe fest
5. Verbinden Sie beide Stützrohre mit dem unteren Ständer und sichern Sie
diese mit dem mitgelieferten Inbusschlüssel und Schrauben.
6. Stecken Sie die Stehlampe in eine Steckdose.
7. Siehe Handbuch C1, um die Stehleuchte mit der Calex Smart App zu
verbinden.
8. Anweisungen zur Fernbedienung:
8.1 Ein-/Ausschalter
8.2 Timer-Voreinstellungen
8.3 Helligkeit im statischen RGB- und Weißlichtmodus erhöhen/verringern
8.4 Geschwindigkeit im RGB-Dynamikmodus erhöhen/verringern
8.5 Weißlichtschalter
8.6 RGB-Lichtschalter
8.7 Modustaste
8.8 Statische RGB-Farbe
8. 9 Musikmodus
Wenn die Helligkeit gedimmt wird, muss die Batterie ersetzt werden.
Batterietyp (nicht im Lieferumfang enthalten): 2x AAA 1,5 V
Calex Smart-App
Bitte beachten Sie das Handbuch C1, um die Stehleuchte mit der App zu verbinden.
PL - Montaż
1. Połącz aluminiowe ramy rowkowane ze złączami.
2. Podłącz lampkę paska LED, zdejmij papierową osłonę i delikatnie wciśnij
lampkę paska LED w rowek. Działa to najlepiej, gdy rama jest w pozycji
pionowej.
3. Wciśnij pokrywę na miejsce
4. Wciśnij zaślepkę na miejsce
5. Podłącz obie rurki podtrzymujące do dolnej podstawy i zabezpiecz je
dostarczonym kluczem sześciokątnym i śrubami.
6. Podłącz lampę podłogową do gniazdka ściennego.
7. Zobacz instrukcję C1, aby podłączyć lampę podłogową do aplikacji Calex
Smart.
8. Instrukcje zdalnego sterowania:
8.1 Włącznik / wyłącznik
8.2 Ustawienia timera
8.3 Zwiększ/zmniejsz jasność w trybie statycznego RGB i białego światła
8.4 Zwiększanie / zmniejszanie prędkości w trybie dynamicznym RGB
8.5 Przełącznik światła białego
8.6 włącznik światła RGB
8.7 Klawisz trybu
8.8 Statyczny kolor RGB
8.9 Tryb muzyczny
Gdy jasność jest przyciemniona, bateria wymaga wymiany.
Typ baterii (brak w zestawie): 2x AAA 1,5 V
Calex Smart app
Aby podłączyć lampę podłogową do aplikacji, zapoznaj się z instrukcją C1.
CS - Sestavování
1. Spojte hliníkové drážkované rámy s konektory.
2. Připojte LED páskové světlo, odlepte papírový kryt a jemně zatlačte LED
páskové světlo do drážky. To funguje nejlépe, když je rám ve vzpřímené
poloze.
3. Zatlačte kryt na místo
4. Zatlačte koncovku na místo
5. Připojte obě nosné trubky ke spodnímu stojanu a zajistěte je dodaným
šestihranným klíčem a šrouby.
6. Zapojte stojací lampu do zásuvky ve zdi.
7. Podle příručky C1 připojte stojací lampu k aplikaci Calex Smart.
8. Pokyny pro dálkové ovládání:
8.1 Vypínače
8.2 Předvolby časovače
8.3 Zvýšení / snížení jasu v režimu statického RGB a bílého světla
8.4 Zvýšení / snížení rychlosti v dynamickém režimu RGB
8.5 Přepínač bílého světla
8.6 Přepínač světel RGB
8.7 Tlačítko režimu
8.8 RGB statická barva
8.9 Režim hudby
Když je jas ztlumený, je třeba vyměnit baterii.
Typ baterie (není součástí dodávky): 2x AAA 1,5 V.
Aplikace Calex Smart
Pro připojení podlahové lampy k aplikaci viz příručka C1.
8.1
8.2
8.3
8.3
8.4 8.5
8.6 8.7
8.8
8.9
IT - Assemblaggio
1. Collegare i telai scanalati in alluminio con i connettori.
2. Collegare la striscia luminosa a LED, staccare il coperchio di carta e
premere delicatamente la striscia luminosa a LED nella scanalatura.
Funziona meglio quando il telaio è in posizione verticale.
3. Premere il coperchio in posizione
4. Premere il cappuccio in posizione
5. Collegare entrambi i tubi di supporto al supporto inferiore e fissarli con la
chiave esagonale e le viti in dotazione.
6. Collegare la lampada da terra a una presa a muro.
7. Consultare il Manuale C1 per collegare la lampada da terra all'app Calex
Smart.
8. Istruzioni per il telecomando:
8.1 Interruttori di accensione/spegnimento
8.2 Preimpostazioni timer
8.3 Aumenta/diminuisci la luminosità in modalità RGB statica e luce
bianca
8.4 Aumenta/diminuisci la velocità in modalità dinamica RGB
8.5 Interruttore luce bianca
8.6 Interruttore della luce RGB
8.7 Tasto modalità
8.8 Colore statico RGB
8.9 Modalità musica
Quando la luminosità è ridotta, è necessario sostituire la batteria.
Tipo di batteria (non inclusa): 2x AAA 1,5 V
App Calex Smart
Fare riferimento al manuale C1 per collegare la lampada da terra all'app.
SK - Zostavenie
1. Spojte hliníkové drážkované rámy s konektormi.
2. Pripojte svetlo LED pásika, odlepte papierový kryt a jemne zatlačte svetlo
LED pásika do drážky. Toto funguje najlepšie, keď je rám vo vzpriamenej
polohe.
3. Zatlačte kryt na miesto
4. Zatlačte koncový kryt na miesto
5. Pripojte obe nosné trubice k spodnému stojanu a zaistite ich dodaným
šesťhranným kľúčom a skrutkami.
6. Zapojte podlahové svietidlo do zásuvky v stene.
7. Pripojenie stojacej lampy k aplikácii Calex Smart nájdete v príručke C1.
8. Pokyny na diaľkové ovládanie:
8.1 Vypínače
8.2 Predvoľby časovača
8.3 Zvýšenie / zníženie jasu v režime statického RGB a bieleho svetla
8.4 Zvýšenie / zníženie rýchlosti v dynamickom režime RGB
8.5 Spínač bieleho svetla
8.6 Prepínač svetla RGB
8.7 Tlačidlo režimu
8.8 RGB statická farba
8.9 Režim hudby
Keď je jas stlmený, je potrebné vymeniť batériu.
Typ batérie (nie je súčasťou dodávky): 2x AAA 1,5 V.
Aplikácia Calex Smart
Pripojenie stojacej lampy k aplikácii nájdete v príručke C1.
RO - Asamblare
1. Conectați cadrele canelate din aluminiu cu conectorii.
2. Conectați lumina cu bandă LED, desprindeți capacul de hârtie și apăsați
ușor lumina cu bandă LED în canelură. Acest lucru funcționează cel mai
bine atunci când cadrul este în poziție verticală.
3. Apăsați capacul în poziție
4. Apăsați capacul în poziție
5. Conectați ambele tuburi de sprijin la suportul inferior și fixați-le cu cheia
hexagonală și șuruburile furnizate.
6. Conectați lampa de podea la o priză de perete.
7. Consultați Manualul C1 pentru a conecta veioza la aplicația Calex Smart.
8. Instrucțiuni de control de la distanță:
8.1 Comutatoare de pornire / oprire
8.2 Presetări ale temporizatorului
8.3 Măriți / micșorați luminozitatea în modul static RGB și lumină albă
8.4 Măriți / micșorați viteza în modul dinamic RGB
8.5 Comutator de lumină albă
8.6 Comutator de lumină RGB
8.7 Tasta de mod
8.8 RGB Static Color
8.9 Mod muzică
Când luminozitatea este estompată, bateria trebuie înlocuită.
Tipul bateriei (nu este inclus): 2x AAA 1,5 V
Aplicația Calex Smart
Vă rugăm să consultați manualul C1 pentru a conecta lampa de podea la
aplicație.
ES - Montaje
1. Conecte los marcos ranurados de aluminio con los conectores.
2. Conecte la tira de luz LED, retire la cubierta de papel y presione
suavemente la tira de luz LED en la ranura. Esto funciona mejor cuando el
marco está en posición vertical.
3. Presione la tapa en su lugar
4. Presione la tapa del extremo en su lugar
5. Conecte ambos tubos de soporte al soporte inferior y asegúrelos con la
llave hexagonal y los tornillos suministrados.
6. Enchufe la lámpara de pie a un enchufe de pared.
7. Consulte el Manual C1 para conectar la lámpara de pie a la aplicación Calex
Smart.
8. Instrucciones de control remoto:
8.1 Interruptores de encendido / apagado
8.2 Preajustes del temporizador
8.3 Aumentar / disminuir el brillo en RGB estático y modo de luz blanca
8.4 Aumentar / disminuir la velocidad en modo dinámico RGB
8.5 Interruptor de luz blanca
8.6 Interruptor de luz RGB
8.7 Tecla de modo
8.8 Color estático RGB
8.9 Modo Música
Cuando se atenúa el brillo, es necesario reemplazar la batería.
Tipo de batería (no incluida): 2x AAA 1,5 V
Aplicación Calex Smart
Consulte el manual C1 para conectar la lámpara de pie a la aplicación.
PT - Montagem
1. Conecte as estruturas ranhuradas de alumínio com os conectores.
2. Conecte a fita de LED, retire a tampa de papel e pressione suavemente a
fita de LED na ranhura. Isso funciona melhor quando o quadro está na
posição vertical.
3. Pressione a tampa no lugar
4. Pressione a tampa final no lugar
5. Conecte os dois tubos de suporte ao pedestal inferior e prenda-os com a
chave sextavada e os parafusos fornecidos.
6. Conecte a luminária de chão a uma tomada de parede.
7. Consulte o Manual C1 para conectar a luminária de chão ao aplicativo Calex
Smart.
8. Instruções de controle remoto:
8.1 Chaves liga / desliga
8.2 predefinições de temporizador
8.3 Aumentar / diminuir o brilho em RGB estático e modo de luz branca
8.4 Aumentar / diminuir a velocidade no modo dinâmico RGB
8.5 Interruptor de luz branca
8.6 interruptor de luz RGB
8.7 Tecla de modo
8.8 RGB Static Color
8.9 Modo de música
Quando o brilho está diminuído, a bateria precisa ser substituída.
Tipo de bateria (não incluída): 2x AAA 1,5 V
Calex Smart app
Consulte o manual C1 para conectar a luminária de chão ao aplicativo.
NO - Montering
1. Koble rammene i aluminium med kontaktene.
2. Koble til LED -stripelyset, ta av papirdekselet og trykk forsiktig LED
-stripelampen inn i sporet. Dette fungerer best når rammen er i oppreist
posisjon.
3. Trykk dekselet på plass
4. Trykk endehetten på plass
5. Koble begge støtterørene til bunnstativet og fest dem med den
medfølgende sekskantnøkkelen og skruene.
6. Koble gulvlampen til en veggkontakt.
7. Se håndbok C1 for å koble gulvlampen til Calex Smart -appen.
8. Fjernkontrollinstruksjoner:
8.1 Av / på -brytere
8.2 Timer forhåndsinnstillinger
8.3 Øk / senk lysstyrken i statisk RGB og hvitt lys
8.4 Øk / senk hastigheten i dynamisk RGB -modus
8.5 Bryter for hvitt lys
8.6 RGB lysbryter
8.7 Modustast
8.8 RGB statisk farge
8.9 Musikkmodus
Når lysstyrken er dempet, må batteriet byttes ut.
Batteritype (ikke inkludert): 2x AAA 1,5 V
Calex Smart -app
Se håndbok C1 for å koble gulvlampen til appen.
FI - Kokoaminen
1. Liitä alumiinirunkoiset kehykset liittimiin.
2. Liitä LED -nauhavalo, irrota paperikotelo ja paina LED -nauhan valo
varovasti uraan. Tämä toimii parhaiten, kun kehys on pystyasennossa.
3. Paina kansi paikalleen
4. Paina päätykansi paikalleen
5. Liitä molemmat tukiputket alajalustaan ja kiinnitä ne mukana toimitetulla
kuusiokoloavaimella ja ruuveilla.
6. Kytke lattiavalaisin pistorasiaan.
7. Katso käsikirja C1, kun haluat yhdistää lattiavalaisimen Calex Smart
-sovellukseen.
8. Kaukosäätimen ohjeet:
8.1 Virtakytkimet
8.2 Ajastimen esiasetukset
8.3 Lisää / vähennä kirkkautta staattisessa RGB- ja valkoisessa
valotilassa
8.4 Nopeuden lisääminen / vähentäminen dynaamisessa RGB -tilassa
8.5 Valokytkin
8.6 RGB -valokytkin
8.7 Tilapainike
8.8 RGB -staattinen väri
8.9 Musiikkitila
Kun kirkkaus on himmeä, paristo on vaihdettava.
Paristotyyppi (ei sisälly toimitukseen): 2x AAA 1,5 V
Calex Smart -sovellus
Katso lattiavalaisimen liittäminen sovellukseen käsikirjasta C1.
SV - Montering
1. Anslut aluminiumspårramarna med kontakterna.
2. Anslut LED -remsan, ta bort papperslocket och tryck försiktigt in LED
-remsan i spåret. Detta fungerar bäst när ramen är i upprätt läge.
3. Tryck på locket på plats
4. Tryck på ändlocket på plats
5. Anslut båda stödrören till bottenstället och säkra dem med den
medföljande insexnyckeln och skruvarna.
6. Anslut golvlampan till ett vägguttag.
7. Se handbok C1 för att ansluta golvlampan till Calex Smart -appen.
8. Fjärrkontroll instruktioner:
8.1 På / av -omkopplare
8.2 Timer förinställningar
8.3 Öka / minska ljusstyrkan i statiskt RGB- och vitt ljusläge
8.4 Öka / minska hastigheten i dynamiskt RGB -läge
8.5 Vit ljusbrytare
8.6 RGB -ljusbrytare
8.7 Lägesknapp
8.8 RGB statisk färg
8.9 Musikläge
När ljusstyrkan är nedtonad måste batteriet bytas ut.
Batterityp (ingår ej): 2x AAA 1,5 V
Calex Smart -app
Se manual C1 för att ansluta golvlampan till appen.
DA - Montering
1. Tilslut aluminiumsrammede rammer med stik.
2. Tilslut LED -strimmellyset, fjern papirdækslet, og tryk forsigtigt LED
-strimmellyset ind i rillen. Dette fungerer bedst, når rammen er i oprejst
position.
3. Tryk låget på plads
4. Tryk endehætten på plads
5. Tilslut begge støtterør til bundstativet, og fastgør dem med den
medfølgende sekskantnøgle og skruer.
6. Sæt gulvlampen i en stikkontakt.
7. Se Manual C1 for at tilslutte gulvlampen til Calex Smart -appen.
8. Fjernbetjeningsinstruktioner:
8.1 Tænd / sluk kontakter
8.2 Timer forudindstillinger
8.3 Forøg / formindsk lysstyrken i statisk RGB og hvidt lys
8.4 Forøg / sænk hastigheden i dynamisk RGB -tilstand
8.5 Hvid lyskontakt
8.6 RGB -lysafbryder
8.7 Mode -tast
8.8 RGB statisk farve
8.9 Musiktilstand
Når lysstyrken er dæmpet, skal batteriet udskiftes.
Batteritype (medfølger ikke): 2x AAA 1,5 V
Calex Smart app
Se manual C1 for at tilslutte gulvlampen til appen.
C
M
Y
CM
MY
CY
CMY
K
ai1629462289105_A_(5301000500_Corner lamp)_print.pdf 5 20-8-2021 14:24:50

EN - Assembling
1. Connect the aluminum grooved frames with the connectors.
2. Connect the LED strip light, peel o the paper cover and gently press the
LED strip light into the groove. This works best when the frame is in an
upright position.
3. Press the cover into place
4. Press the end-cap into place
5. Connect both support tubes to the bottom stand and secure these with the
supplied hex key and screws.
6. Plug the floor lamp in to a wall socket.
7. See Manual C1 to connect the floor lamp to the Calex Smart app.
8. Remote control instructions:
8.1 On / o switches
8.2 Timer presets
8.3 Increase / decrease brightness in static RGB and
white light mode
8.4 Increase / decrease speed in RGB dynamic mode
8.5 White light switch
8.6 RGB light switch
8.7 Mode key
8.8 RGB Static Color
8. 9 Music Mode
When the brightness is dimmed, the battery needs to be replaced.
Battery type (not included): 2x AAA 1.5 V
Calex Smart app
Please refer to manual C1 to connect the floor lamp to the app.
NL - Montage
1. Verbind de aluminium gegroefde frames met de connectoren.
2. Sluit de LED-stripverlichting aan, verwijder de papieren afdekking en druk
de LED-stripverlichting voorzichtig in de groef. Dit werkt het beste als het
frame rechtop staat.
3. Druk het deksel op zijn plaats
4. Druk de eindkap op zijn plaats
5. Verbind beide steunbuizen met de onderste standaard en zet deze vast
met de meegeleverde inbussleutel en schroeven.
6. Steek de staande lamp in een stopcontact.
7. Zie Handleiding C1 om de vloerlamp te verbinden met de Calex Smart app.
8. Afstandsbediening instructies:
8.1 Aan/uit schakelaars
8.2 Timervoorinstellingen
8.3 Helderheid verhogen/verlagen in statische RGB- en witlichtmodus
8.4 Snelheid verhogen/verlagen in dynamische RGB-modus
8.5 Witlichtschakelaar
8.6 RGB-lichtschakelaar
8.7 Modustoets
8.8 Statische RGB-kleur
8. 9 Muziekmodus
Wanneer de helderheid is gedimd, moet de batterij worden vervangen.
Batterijtype (niet inbegrepen): 2x AAA 1,5 V
Calex Smart-app
Raadpleeg handleiding C1 om de vloerlamp met de app te verbinden.
FR - Assemblage
1. Connectez les cadres rainurés en aluminium avec les connecteurs.
2. Connectez la bande lumineuse LED, retirez le couvercle en papier et
appuyez doucement sur la bande lumineuse LED dans la rainure. Cela
fonctionne mieux lorsque le cadre est en position verticale.
3. Appuyez sur le couvercle en place
4. Appuyez sur l'embout en place
5. Connectez les deux tubes de support au support inférieur et fixez-les avec
la clé hexagonale et les vis fournies.
6. Branchez le lampadaire sur une prise murale.
7. Voir le manuel C1 pour connecter le lampadaire à l'application Calex Smart.
8. Instructions de contrôle à distance :
8.1 Interrupteurs marche/arrêt
8.2 Préréglages de la minuterie
8.3 Augmenter / diminuer la luminosité en mode RVB statique et lumière
blanche
8.4 Augmenter / diminuer la vitesse en mode dynamique RVB
8.5 Interrupteur de lumière blanche
8.6 Interrupteur d'éclairage RVB
8.7 Touche mode
8.8 Couleur statique RVB
8. 9 Mode Musique
Lorsque la luminosité diminue, la batterie doit être remplacée.
Type de pile (non inclus) : 2x AAA 1,5 V
Application Calex Smart
Veuillez vous référer au manuel C1 pour connecter le lampadaire à l'application.
DE - Montage
1. Verbinden Sie die Aluminium-Rillenrahmen mit den Verbindern.
2. Schließen Sie das LED-Streifenlicht an, ziehen Sie die Papierabdeckung ab
und drücken Sie das LED-Streifenlicht vorsichtig in die Nut. Dies
funktioniert am besten, wenn sich der Rahmen in einer aufrechten Position
befindet.
3. Drücken Sie die Abdeckung fest
4. Drücken Sie die Endkappe fest
5. Verbinden Sie beide Stützrohre mit dem unteren Ständer und sichern Sie
diese mit dem mitgelieferten Inbusschlüssel und Schrauben.
6. Stecken Sie die Stehlampe in eine Steckdose.
7. Siehe Handbuch C1, um die Stehleuchte mit der Calex Smart App zu
verbinden.
8. Anweisungen zur Fernbedienung:
8.1 Ein-/Ausschalter
8.2 Timer-Voreinstellungen
8.3 Helligkeit im statischen RGB- und Weißlichtmodus erhöhen/verringern
8.4 Geschwindigkeit im RGB-Dynamikmodus erhöhen/verringern
8.5 Weißlichtschalter
8.6 RGB-Lichtschalter
8.7 Modustaste
8.8 Statische RGB-Farbe
8. 9 Musikmodus
Wenn die Helligkeit gedimmt wird, muss die Batterie ersetzt werden.
Batterietyp (nicht im Lieferumfang enthalten): 2x AAA 1,5 V
Calex Smart-App
Bitte beachten Sie das Handbuch C1, um die Stehleuchte mit der App zu verbinden.
PL - Montaż
1. Połącz aluminiowe ramy rowkowane ze złączami.
2. Podłącz lampkę paska LED, zdejmij papierową osłonę i delikatnie wciśnij
lampkę paska LED w rowek. Działa to najlepiej, gdy rama jest w pozycji
pionowej.
3. Wciśnij pokrywę na miejsce
4. Wciśnij zaślepkę na miejsce
5. Podłącz obie rurki podtrzymujące do dolnej podstawy i zabezpiecz je
dostarczonym kluczem sześciokątnym i śrubami.
6. Podłącz lampę podłogową do gniazdka ściennego.
7. Zobacz instrukcję C1, aby podłączyć lampę podłogową do aplikacji Calex
Smart.
8. Instrukcje zdalnego sterowania:
8.1 Włącznik / wyłącznik
8.2 Ustawienia timera
8.3 Zwiększ/zmniejsz jasność w trybie statycznego RGB i białego światła
8.4 Zwiększanie / zmniejszanie prędkości w trybie dynamicznym RGB
8.5 Przełącznik światła białego
8.6 włącznik światła RGB
8.7 Klawisz trybu
8.8 Statyczny kolor RGB
8.9 Tryb muzyczny
Gdy jasność jest przyciemniona, bateria wymaga wymiany.
Typ baterii (brak w zestawie): 2x AAA 1,5 V
Calex Smart app
Aby podłączyć lampę podłogową do aplikacji, zapoznaj się z instrukcją C1.
CS - Sestavování
1. Spojte hliníkové drážkované rámy s konektory.
2. Připojte LED páskové světlo, odlepte papírový kryt a jemně zatlačte LED
páskové světlo do drážky. To funguje nejlépe, když je rám ve vzpřímené
poloze.
3. Zatlačte kryt na místo
4. Zatlačte koncovku na místo
5. Připojte obě nosné trubky ke spodnímu stojanu a zajistěte je dodaným
šestihranným klíčem a šrouby.
6. Zapojte stojací lampu do zásuvky ve zdi.
7. Podle příručky C1 připojte stojací lampu k aplikaci Calex Smart.
8. Pokyny pro dálkové ovládání:
8.1 Vypínače
8.2 Předvolby časovače
8.3 Zvýšení / snížení jasu v režimu statického RGB a bílého světla
8.4 Zvýšení / snížení rychlosti v dynamickém režimu RGB
8.5 Přepínač bílého světla
8.6 Přepínač světel RGB
8.7 Tlačítko režimu
8.8 RGB statická barva
8.9 Režim hudby
Když je jas ztlumený, je třeba vyměnit baterii.
Typ baterie (není součástí dodávky): 2x AAA 1,5 V.
Aplikace Calex Smart
Pro připojení podlahové lampy k aplikaci viz příručka C1.
IT - Assemblaggio
1. Collegare i telai scanalati in alluminio con i connettori.
2. Collegare la striscia luminosa a LED, staccare il coperchio di carta e
premere delicatamente la striscia luminosa a LED nella scanalatura.
Funziona meglio quando il telaio è in posizione verticale.
3. Premere il coperchio in posizione
4. Premere il cappuccio in posizione
5. Collegare entrambi i tubi di supporto al supporto inferiore e fissarli con la
chiave esagonale e le viti in dotazione.
6. Collegare la lampada da terra a una presa a muro.
7. Consultare il Manuale C1 per collegare la lampada da terra all'app Calex
Smart.
8. Istruzioni per il telecomando:
8.1 Interruttori di accensione/spegnimento
8.2 Preimpostazioni timer
8.3 Aumenta/diminuisci la luminosità in modalità RGB statica e luce
bianca
8.4 Aumenta/diminuisci la velocità in modalità dinamica RGB
8.5 Interruttore luce bianca
8.6 Interruttore della luce RGB
8.7 Tasto modalità
8.8 Colore statico RGB
8.9 Modalità musica
Quando la luminosità è ridotta, è necessario sostituire la batteria.
Tipo di batteria (non inclusa): 2x AAA 1,5 V
App Calex Smart
Fare riferimento al manuale C1 per collegare la lampada da terra all'app.
SK - Zostavenie
1. Spojte hliníkové drážkované rámy s konektormi.
2. Pripojte svetlo LED pásika, odlepte papierový kryt a jemne zatlačte svetlo
LED pásika do drážky. Toto funguje najlepšie, keď je rám vo vzpriamenej
polohe.
3. Zatlačte kryt na miesto
4. Zatlačte koncový kryt na miesto
5. Pripojte obe nosné trubice k spodnému stojanu a zaistite ich dodaným
šesťhranným kľúčom a skrutkami.
6. Zapojte podlahové svietidlo do zásuvky v stene.
7. Pripojenie stojacej lampy k aplikácii Calex Smart nájdete v príručke C1.
8. Pokyny na diaľkové ovládanie:
8.1 Vypínače
8.2 Predvoľby časovača
8.3 Zvýšenie / zníženie jasu v režime statického RGB a bieleho svetla
8.4 Zvýšenie / zníženie rýchlosti v dynamickom režime RGB
8.5 Spínač bieleho svetla
8.6 Prepínač svetla RGB
8.7 Tlačidlo režimu
8.8 RGB statická farba
8.9 Režim hudby
Keď je jas stlmený, je potrebné vymeniť batériu.
Typ batérie (nie je súčasťou dodávky): 2x AAA 1,5 V.
Aplikácia Calex Smart
Pripojenie stojacej lampy k aplikácii nájdete v príručke C1.
RO - Asamblare
1. Conectați cadrele canelate din aluminiu cu conectorii.
2. Conectați lumina cu bandă LED, desprindeți capacul de hârtie și apăsați
ușor lumina cu bandă LED în canelură. Acest lucru funcționează cel mai
bine atunci când cadrul este în poziție verticală.
3. Apăsați capacul în poziție
4. Apăsați capacul în poziție
5. Conectați ambele tuburi de sprijin la suportul inferior și fixați-le cu cheia
hexagonală și șuruburile furnizate.
6. Conectați lampa de podea la o priză de perete.
7. Consultați Manualul C1 pentru a conecta veioza la aplicația Calex Smart.
8. Instrucțiuni de control de la distanță:
8.1 Comutatoare de pornire / oprire
8.2 Presetări ale temporizatorului
8.3 Măriți / micșorați luminozitatea în modul static RGB și lumină albă
8.4 Măriți / micșorați viteza în modul dinamic RGB
8.5 Comutator de lumină albă
8.6 Comutator de lumină RGB
8.7 Tasta de mod
8.8 RGB Static Color
8.9 Mod muzică
Când luminozitatea este estompată, bateria trebuie înlocuită.
Tipul bateriei (nu este inclus): 2x AAA 1,5 V
Aplicația Calex Smart
Vă rugăm să consultați manualul C1 pentru a conecta lampa de podea la
aplicație.
ES - Montaje
1. Conecte los marcos ranurados de aluminio con los conectores.
2. Conecte la tira de luz LED, retire la cubierta de papel y presione
suavemente la tira de luz LED en la ranura. Esto funciona mejor cuando el
marco está en posición vertical.
3. Presione la tapa en su lugar
4. Presione la tapa del extremo en su lugar
5. Conecte ambos tubos de soporte al soporte inferior y asegúrelos con la
llave hexagonal y los tornillos suministrados.
6. Enchufe la lámpara de pie a un enchufe de pared.
7. Consulte el Manual C1 para conectar la lámpara de pie a la aplicación Calex
Smart.
8. Instrucciones de control remoto:
8.1 Interruptores de encendido / apagado
8.2 Preajustes del temporizador
8.3 Aumentar / disminuir el brillo en RGB estático y modo de luz blanca
8.4 Aumentar / disminuir la velocidad en modo dinámico RGB
8.5 Interruptor de luz blanca
8.6 Interruptor de luz RGB
8.7 Tecla de modo
8.8 Color estático RGB
8.9 Modo Música
Cuando se atenúa el brillo, es necesario reemplazar la batería.
Tipo de batería (no incluida): 2x AAA 1,5 V
Aplicación Calex Smart
Consulte el manual C1 para conectar la lámpara de pie a la aplicación.
PT - Montagem
1. Conecte as estruturas ranhuradas de alumínio com os conectores.
2. Conecte a fita de LED, retire a tampa de papel e pressione suavemente a
fita de LED na ranhura. Isso funciona melhor quando o quadro está na
posição vertical.
3. Pressione a tampa no lugar
4. Pressione a tampa final no lugar
5. Conecte os dois tubos de suporte ao pedestal inferior e prenda-os com a
chave sextavada e os parafusos fornecidos.
6. Conecte a luminária de chão a uma tomada de parede.
7. Consulte o Manual C1 para conectar a luminária de chão ao aplicativo Calex
Smart.
8. Instruções de controle remoto:
8.1 Chaves liga / desliga
8.2 predefinições de temporizador
8.3 Aumentar / diminuir o brilho em RGB estático e modo de luz branca
8.4 Aumentar / diminuir a velocidade no modo dinâmico RGB
8.5 Interruptor de luz branca
8.6 interruptor de luz RGB
8.7 Tecla de modo
8.8 RGB Static Color
8.9 Modo de música
Quando o brilho está diminuído, a bateria precisa ser substituída.
Tipo de bateria (não incluída): 2x AAA 1,5 V
Calex Smart app
Consulte o manual C1 para conectar a luminária de chão ao aplicativo.
NO - Montering
1. Koble rammene i aluminium med kontaktene.
2. Koble til LED -stripelyset, ta av papirdekselet og trykk forsiktig LED
-stripelampen inn i sporet. Dette fungerer best når rammen er i oppreist
posisjon.
3. Trykk dekselet på plass
4. Trykk endehetten på plass
5. Koble begge støtterørene til bunnstativet og fest dem med den
medfølgende sekskantnøkkelen og skruene.
6. Koble gulvlampen til en veggkontakt.
7. Se håndbok C1 for å koble gulvlampen til Calex Smart -appen.
8. Fjernkontrollinstruksjoner:
8.1 Av / på -brytere
8.2 Timer forhåndsinnstillinger
8.3 Øk / senk lysstyrken i statisk RGB og hvitt lys
8.4 Øk / senk hastigheten i dynamisk RGB -modus
8.5 Bryter for hvitt lys
8.6 RGB lysbryter
8.7 Modustast
8.8 RGB statisk farge
8.9 Musikkmodus
Når lysstyrken er dempet, må batteriet byttes ut.
Batteritype (ikke inkludert): 2x AAA 1,5 V
Calex Smart -app
Se håndbok C1 for å koble gulvlampen til appen.
FI - Kokoaminen
1. Liitä alumiinirunkoiset kehykset liittimiin.
2. Liitä LED -nauhavalo, irrota paperikotelo ja paina LED -nauhan valo
varovasti uraan. Tämä toimii parhaiten, kun kehys on pystyasennossa.
3. Paina kansi paikalleen
4. Paina päätykansi paikalleen
5. Liitä molemmat tukiputket alajalustaan ja kiinnitä ne mukana toimitetulla
kuusiokoloavaimella ja ruuveilla.
6. Kytke lattiavalaisin pistorasiaan.
7. Katso käsikirja C1, kun haluat yhdistää lattiavalaisimen Calex Smart
-sovellukseen.
8. Kaukosäätimen ohjeet:
8.1 Virtakytkimet
8.2 Ajastimen esiasetukset
8.3 Lisää / vähennä kirkkautta staattisessa RGB- ja valkoisessa
valotilassa
8.4 Nopeuden lisääminen / vähentäminen dynaamisessa RGB -tilassa
8.5 Valokytkin
8.6 RGB -valokytkin
8.7 Tilapainike
8.8 RGB -staattinen väri
8.9 Musiikkitila
Kun kirkkaus on himmeä, paristo on vaihdettava.
Paristotyyppi (ei sisälly toimitukseen): 2x AAA 1,5 V
Calex Smart -sovellus
Katso lattiavalaisimen liittäminen sovellukseen käsikirjasta C1.
SV - Montering
1. Anslut aluminiumspårramarna med kontakterna.
2. Anslut LED -remsan, ta bort papperslocket och tryck försiktigt in LED
-remsan i spåret. Detta fungerar bäst när ramen är i upprätt läge.
3. Tryck på locket på plats
4. Tryck på ändlocket på plats
5. Anslut båda stödrören till bottenstället och säkra dem med den
medföljande insexnyckeln och skruvarna.
6. Anslut golvlampan till ett vägguttag.
7. Se handbok C1 för att ansluta golvlampan till Calex Smart -appen.
8. Fjärrkontroll instruktioner:
8.1 På / av -omkopplare
8.2 Timer förinställningar
8.3 Öka / minska ljusstyrkan i statiskt RGB- och vitt ljusläge
8.4 Öka / minska hastigheten i dynamiskt RGB -läge
8.5 Vit ljusbrytare
8.6 RGB -ljusbrytare
8.7 Lägesknapp
8.8 RGB statisk färg
8.9 Musikläge
När ljusstyrkan är nedtonad måste batteriet bytas ut.
Batterityp (ingår ej): 2x AAA 1,5 V
Calex Smart -app
Se manual C1 för att ansluta golvlampan till appen.
DA - Montering
1. Tilslut aluminiumsrammede rammer med stik.
2. Tilslut LED -strimmellyset, fjern papirdækslet, og tryk forsigtigt LED
-strimmellyset ind i rillen. Dette fungerer bedst, når rammen er i oprejst
position.
3. Tryk låget på plads
4. Tryk endehætten på plads
5. Tilslut begge støtterør til bundstativet, og fastgør dem med den
medfølgende sekskantnøgle og skruer.
6. Sæt gulvlampen i en stikkontakt.
7. Se Manual C1 for at tilslutte gulvlampen til Calex Smart -appen.
8. Fjernbetjeningsinstruktioner:
8.1 Tænd / sluk kontakter
8.2 Timer forudindstillinger
8.3 Forøg / formindsk lysstyrken i statisk RGB og hvidt lys
8.4 Forøg / sænk hastigheden i dynamisk RGB -tilstand
8.5 Hvid lyskontakt
8.6 RGB -lysafbryder
8.7 Mode -tast
8.8 RGB statisk farve
8.9 Musiktilstand
Når lysstyrken er dæmpet, skal batteriet udskiftes.
Batteritype (medfølger ikke): 2x AAA 1,5 V
Calex Smart app
Se manual C1 for at tilslutte gulvlampen til appen.
C
M
Y
CM
MY
CY
CMY
K
ai1629462289105_A_(5301000500_Corner lamp)_print.pdf 6 20-8-2021 14:24:50

EN - Assembling
1. Connect the aluminum grooved frames with the connectors.
2. Connect the LED strip light, peel o the paper cover and gently press the
LED strip light into the groove. This works best when the frame is in an
upright position.
3. Press the cover into place
4. Press the end-cap into place
5. Connect both support tubes to the bottom stand and secure these with the
supplied hex key and screws.
6. Plug the floor lamp in to a wall socket.
7. See Manual C1 to connect the floor lamp to the Calex Smart app.
8. Remote control instructions:
8.1 On / o switches
8.2 Timer presets
8.3 Increase / decrease brightness in static RGB and
white light mode
8.4 Increase / decrease speed in RGB dynamic mode
8.5 White light switch
8.6 RGB light switch
8.7 Mode key
8.8 RGB Static Color
8. 9 Music Mode
When the brightness is dimmed, the battery needs to be replaced.
Battery type (not included): 2x AAA 1.5 V
Calex Smart app
Please refer to manual C1 to connect the floor lamp to the app.
NL - Montage
1. Verbind de aluminium gegroefde frames met de connectoren.
2. Sluit de LED-stripverlichting aan, verwijder de papieren afdekking en druk
de LED-stripverlichting voorzichtig in de groef. Dit werkt het beste als het
frame rechtop staat.
3. Druk het deksel op zijn plaats
4. Druk de eindkap op zijn plaats
5. Verbind beide steunbuizen met de onderste standaard en zet deze vast
met de meegeleverde inbussleutel en schroeven.
6. Steek de staande lamp in een stopcontact.
7. Zie Handleiding C1 om de vloerlamp te verbinden met de Calex Smart app.
8. Afstandsbediening instructies:
8.1 Aan/uit schakelaars
8.2 Timervoorinstellingen
8.3 Helderheid verhogen/verlagen in statische RGB- en witlichtmodus
8.4 Snelheid verhogen/verlagen in dynamische RGB-modus
8.5 Witlichtschakelaar
8.6 RGB-lichtschakelaar
8.7 Modustoets
8.8 Statische RGB-kleur
8. 9 Muziekmodus
Wanneer de helderheid is gedimd, moet de batterij worden vervangen.
Batterijtype (niet inbegrepen): 2x AAA 1,5 V
Calex Smart-app
Raadpleeg handleiding C1 om de vloerlamp met de app te verbinden.
FR - Assemblage
1. Connectez les cadres rainurés en aluminium avec les connecteurs.
2. Connectez la bande lumineuse LED, retirez le couvercle en papier et
appuyez doucement sur la bande lumineuse LED dans la rainure. Cela
fonctionne mieux lorsque le cadre est en position verticale.
3. Appuyez sur le couvercle en place
4. Appuyez sur l'embout en place
5. Connectez les deux tubes de support au support inférieur et fixez-les avec
la clé hexagonale et les vis fournies.
6. Branchez le lampadaire sur une prise murale.
7. Voir le manuel C1 pour connecter le lampadaire à l'application Calex Smart.
8. Instructions de contrôle à distance :
8.1 Interrupteurs marche/arrêt
8.2 Préréglages de la minuterie
8.3 Augmenter / diminuer la luminosité en mode RVB statique et lumière
blanche
8.4 Augmenter / diminuer la vitesse en mode dynamique RVB
8.5 Interrupteur de lumière blanche
8.6 Interrupteur d'éclairage RVB
8.7 Touche mode
8.8 Couleur statique RVB
8. 9 Mode Musique
Lorsque la luminosité diminue, la batterie doit être remplacée.
Type de pile (non inclus) : 2x AAA 1,5 V
Application Calex Smart
Veuillez vous référer au manuel C1 pour connecter le lampadaire à l'application.
DE - Montage
1. Verbinden Sie die Aluminium-Rillenrahmen mit den Verbindern.
2. Schließen Sie das LED-Streifenlicht an, ziehen Sie die Papierabdeckung ab
und drücken Sie das LED-Streifenlicht vorsichtig in die Nut. Dies
funktioniert am besten, wenn sich der Rahmen in einer aufrechten Position
befindet.
3. Drücken Sie die Abdeckung fest
4. Drücken Sie die Endkappe fest
5. Verbinden Sie beide Stützrohre mit dem unteren Ständer und sichern Sie
diese mit dem mitgelieferten Inbusschlüssel und Schrauben.
6. Stecken Sie die Stehlampe in eine Steckdose.
7. Siehe Handbuch C1, um die Stehleuchte mit der Calex Smart App zu
verbinden.
8. Anweisungen zur Fernbedienung:
8.1 Ein-/Ausschalter
8.2 Timer-Voreinstellungen
8.3 Helligkeit im statischen RGB- und Weißlichtmodus erhöhen/verringern
8.4 Geschwindigkeit im RGB-Dynamikmodus erhöhen/verringern
8.5 Weißlichtschalter
8.6 RGB-Lichtschalter
8.7 Modustaste
8.8 Statische RGB-Farbe
8. 9 Musikmodus
Wenn die Helligkeit gedimmt wird, muss die Batterie ersetzt werden.
Batterietyp (nicht im Lieferumfang enthalten): 2x AAA 1,5 V
Calex Smart-App
Bitte beachten Sie das Handbuch C1, um die Stehleuchte mit der App zu verbinden.
PL - Montaż
1. Połącz aluminiowe ramy rowkowane ze złączami.
2. Podłącz lampkę paska LED, zdejmij papierową osłonę i delikatnie wciśnij
lampkę paska LED w rowek. Działa to najlepiej, gdy rama jest w pozycji
pionowej.
3. Wciśnij pokrywę na miejsce
4. Wciśnij zaślepkę na miejsce
5. Podłącz obie rurki podtrzymujące do dolnej podstawy i zabezpiecz je
dostarczonym kluczem sześciokątnym i śrubami.
6. Podłącz lampę podłogową do gniazdka ściennego.
7. Zobacz instrukcję C1, aby podłączyć lampę podłogową do aplikacji Calex
Smart.
8. Instrukcje zdalnego sterowania:
8.1 Włącznik / wyłącznik
8.2 Ustawienia timera
8.3 Zwiększ/zmniejsz jasność w trybie statycznego RGB i białego światła
8.4 Zwiększanie / zmniejszanie prędkości w trybie dynamicznym RGB
8.5 Przełącznik światła białego
8.6 włącznik światła RGB
8.7 Klawisz trybu
8.8 Statyczny kolor RGB
8.9 Tryb muzyczny
Gdy jasność jest przyciemniona, bateria wymaga wymiany.
Typ baterii (brak w zestawie): 2x AAA 1,5 V
Calex Smart app
Aby podłączyć lampę podłogową do aplikacji, zapoznaj się z instrukcją C1.
CS - Sestavování
1. Spojte hliníkové drážkované rámy s konektory.
2. Připojte LED páskové světlo, odlepte papírový kryt a jemně zatlačte LED
páskové světlo do drážky. To funguje nejlépe, když je rám ve vzpřímené
poloze.
3. Zatlačte kryt na místo
4. Zatlačte koncovku na místo
5. Připojte obě nosné trubky ke spodnímu stojanu a zajistěte je dodaným
šestihranným klíčem a šrouby.
6. Zapojte stojací lampu do zásuvky ve zdi.
7. Podle příručky C1 připojte stojací lampu k aplikaci Calex Smart.
8. Pokyny pro dálkové ovládání:
8.1 Vypínače
8.2 Předvolby časovače
8.3 Zvýšení / snížení jasu v režimu statického RGB a bílého světla
8.4 Zvýšení / snížení rychlosti v dynamickém režimu RGB
8.5 Přepínač bílého světla
8.6 Přepínač světel RGB
8.7 Tlačítko režimu
8.8 RGB statická barva
8.9 Režim hudby
Když je jas ztlumený, je třeba vyměnit baterii.
Typ baterie (není součástí dodávky): 2x AAA 1,5 V.
Aplikace Calex Smart
Pro připojení podlahové lampy k aplikaci viz příručka C1.
IT - Assemblaggio
1. Collegare i telai scanalati in alluminio con i connettori.
2. Collegare la striscia luminosa a LED, staccare il coperchio di carta e
premere delicatamente la striscia luminosa a LED nella scanalatura.
Funziona meglio quando il telaio è in posizione verticale.
3. Premere il coperchio in posizione
4. Premere il cappuccio in posizione
5. Collegare entrambi i tubi di supporto al supporto inferiore e fissarli con la
chiave esagonale e le viti in dotazione.
6. Collegare la lampada da terra a una presa a muro.
7. Consultare il Manuale C1 per collegare la lampada da terra all'app Calex
Smart.
8. Istruzioni per il telecomando:
8.1 Interruttori di accensione/spegnimento
8.2 Preimpostazioni timer
8.3 Aumenta/diminuisci la luminosità in modalità RGB statica e luce
bianca
8.4 Aumenta/diminuisci la velocità in modalità dinamica RGB
8.5 Interruttore luce bianca
8.6 Interruttore della luce RGB
8.7 Tasto modalità
8.8 Colore statico RGB
8.9 Modalità musica
Quando la luminosità è ridotta, è necessario sostituire la batteria.
Tipo di batteria (non inclusa): 2x AAA 1,5 V
App Calex Smart
Fare riferimento al manuale C1 per collegare la lampada da terra all'app.
SK - Zostavenie
1. Spojte hliníkové drážkované rámy s konektormi.
2. Pripojte svetlo LED pásika, odlepte papierový kryt a jemne zatlačte svetlo
LED pásika do drážky. Toto funguje najlepšie, keď je rám vo vzpriamenej
polohe.
3. Zatlačte kryt na miesto
4. Zatlačte koncový kryt na miesto
5. Pripojte obe nosné trubice k spodnému stojanu a zaistite ich dodaným
šesťhranným kľúčom a skrutkami.
6. Zapojte podlahové svietidlo do zásuvky v stene.
7. Pripojenie stojacej lampy k aplikácii Calex Smart nájdete v príručke C1.
8. Pokyny na diaľkové ovládanie:
8.1 Vypínače
8.2 Predvoľby časovača
8.3 Zvýšenie / zníženie jasu v režime statického RGB a bieleho svetla
8.4 Zvýšenie / zníženie rýchlosti v dynamickom režime RGB
8.5 Spínač bieleho svetla
8.6 Prepínač svetla RGB
8.7 Tlačidlo režimu
8.8 RGB statická farba
8.9 Režim hudby
Keď je jas stlmený, je potrebné vymeniť batériu.
Typ batérie (nie je súčasťou dodávky): 2x AAA 1,5 V.
Aplikácia Calex Smart
Pripojenie stojacej lampy k aplikácii nájdete v príručke C1.
RO - Asamblare
1. Conectați cadrele canelate din aluminiu cu conectorii.
2. Conectați lumina cu bandă LED, desprindeți capacul de hârtie și apăsați
ușor lumina cu bandă LED în canelură. Acest lucru funcționează cel mai
bine atunci când cadrul este în poziție verticală.
3. Apăsați capacul în poziție
4. Apăsați capacul în poziție
5. Conectați ambele tuburi de sprijin la suportul inferior și fixați-le cu cheia
hexagonală și șuruburile furnizate.
6. Conectați lampa de podea la o priză de perete.
7. Consultați Manualul C1 pentru a conecta veioza la aplicația Calex Smart.
8. Instrucțiuni de control de la distanță:
8.1 Comutatoare de pornire / oprire
8.2 Presetări ale temporizatorului
8.3 Măriți / micșorați luminozitatea în modul static RGB și lumină albă
8.4 Măriți / micșorați viteza în modul dinamic RGB
8.5 Comutator de lumină albă
8.6 Comutator de lumină RGB
8.7 Tasta de mod
8.8 RGB Static Color
8.9 Mod muzică
Când luminozitatea este estompată, bateria trebuie înlocuită.
Tipul bateriei (nu este inclus): 2x AAA 1,5 V
Aplicația Calex Smart
Vă rugăm să consultați manualul C1 pentru a conecta lampa de podea la
aplicație.
ES - Montaje
1. Conecte los marcos ranurados de aluminio con los conectores.
2. Conecte la tira de luz LED, retire la cubierta de papel y presione
suavemente la tira de luz LED en la ranura. Esto funciona mejor cuando el
marco está en posición vertical.
3. Presione la tapa en su lugar
4. Presione la tapa del extremo en su lugar
5. Conecte ambos tubos de soporte al soporte inferior y asegúrelos con la
llave hexagonal y los tornillos suministrados.
6. Enchufe la lámpara de pie a un enchufe de pared.
7. Consulte el Manual C1 para conectar la lámpara de pie a la aplicación Calex
Smart.
8. Instrucciones de control remoto:
8.1 Interruptores de encendido / apagado
8.2 Preajustes del temporizador
8.3 Aumentar / disminuir el brillo en RGB estático y modo de luz blanca
8.4 Aumentar / disminuir la velocidad en modo dinámico RGB
8.5 Interruptor de luz blanca
8.6 Interruptor de luz RGB
8.7 Tecla de modo
8.8 Color estático RGB
8.9 Modo Música
Cuando se atenúa el brillo, es necesario reemplazar la batería.
Tipo de batería (no incluida): 2x AAA 1,5 V
Aplicación Calex Smart
Consulte el manual C1 para conectar la lámpara de pie a la aplicación.
PT - Montagem
1. Conecte as estruturas ranhuradas de alumínio com os conectores.
2. Conecte a fita de LED, retire a tampa de papel e pressione suavemente a
fita de LED na ranhura. Isso funciona melhor quando o quadro está na
posição vertical.
3. Pressione a tampa no lugar
4. Pressione a tampa final no lugar
5. Conecte os dois tubos de suporte ao pedestal inferior e prenda-os com a
chave sextavada e os parafusos fornecidos.
6. Conecte a luminária de chão a uma tomada de parede.
7. Consulte o Manual C1 para conectar a luminária de chão ao aplicativo Calex
Smart.
8. Instruções de controle remoto:
8.1 Chaves liga / desliga
8.2 predefinições de temporizador
8.3 Aumentar / diminuir o brilho em RGB estático e modo de luz branca
8.4 Aumentar / diminuir a velocidade no modo dinâmico RGB
8.5 Interruptor de luz branca
8.6 interruptor de luz RGB
8.7 Tecla de modo
8.8 RGB Static Color
8.9 Modo de música
Quando o brilho está diminuído, a bateria precisa ser substituída.
Tipo de bateria (não incluída): 2x AAA 1,5 V
Calex Smart app
Consulte o manual C1 para conectar a luminária de chão ao aplicativo.
NO - Montering
1. Koble rammene i aluminium med kontaktene.
2. Koble til LED -stripelyset, ta av papirdekselet og trykk forsiktig LED
-stripelampen inn i sporet. Dette fungerer best når rammen er i oppreist
posisjon.
3. Trykk dekselet på plass
4. Trykk endehetten på plass
5. Koble begge støtterørene til bunnstativet og fest dem med den
medfølgende sekskantnøkkelen og skruene.
6. Koble gulvlampen til en veggkontakt.
7. Se håndbok C1 for å koble gulvlampen til Calex Smart -appen.
8. Fjernkontrollinstruksjoner:
8.1 Av / på -brytere
8.2 Timer forhåndsinnstillinger
8.3 Øk / senk lysstyrken i statisk RGB og hvitt lys
8.4 Øk / senk hastigheten i dynamisk RGB -modus
8.5 Bryter for hvitt lys
8.6 RGB lysbryter
8.7 Modustast
8.8 RGB statisk farge
8.9 Musikkmodus
Når lysstyrken er dempet, må batteriet byttes ut.
Batteritype (ikke inkludert): 2x AAA 1,5 V
Calex Smart -app
Se håndbok C1 for å koble gulvlampen til appen.
FI - Kokoaminen
1. Liitä alumiinirunkoiset kehykset liittimiin.
2. Liitä LED -nauhavalo, irrota paperikotelo ja paina LED -nauhan valo
varovasti uraan. Tämä toimii parhaiten, kun kehys on pystyasennossa.
3. Paina kansi paikalleen
4. Paina päätykansi paikalleen
5. Liitä molemmat tukiputket alajalustaan ja kiinnitä ne mukana toimitetulla
kuusiokoloavaimella ja ruuveilla.
6. Kytke lattiavalaisin pistorasiaan.
7. Katso käsikirja C1, kun haluat yhdistää lattiavalaisimen Calex Smart
-sovellukseen.
8. Kaukosäätimen ohjeet:
8.1 Virtakytkimet
8.2 Ajastimen esiasetukset
8.3 Lisää / vähennä kirkkautta staattisessa RGB- ja valkoisessa
valotilassa
8.4 Nopeuden lisääminen / vähentäminen dynaamisessa RGB -tilassa
8.5 Valokytkin
8.6 RGB -valokytkin
8.7 Tilapainike
8.8 RGB -staattinen väri
8.9 Musiikkitila
Kun kirkkaus on himmeä, paristo on vaihdettava.
Paristotyyppi (ei sisälly toimitukseen): 2x AAA 1,5 V
Calex Smart -sovellus
Katso lattiavalaisimen liittäminen sovellukseen käsikirjasta C1.
SV - Montering
1. Anslut aluminiumspårramarna med kontakterna.
2. Anslut LED -remsan, ta bort papperslocket och tryck försiktigt in LED
-remsan i spåret. Detta fungerar bäst när ramen är i upprätt läge.
3. Tryck på locket på plats
4. Tryck på ändlocket på plats
5. Anslut båda stödrören till bottenstället och säkra dem med den
medföljande insexnyckeln och skruvarna.
6. Anslut golvlampan till ett vägguttag.
7. Se handbok C1 för att ansluta golvlampan till Calex Smart -appen.
8. Fjärrkontroll instruktioner:
8.1 På / av -omkopplare
8.2 Timer förinställningar
8.3 Öka / minska ljusstyrkan i statiskt RGB- och vitt ljusläge
8.4 Öka / minska hastigheten i dynamiskt RGB -läge
8.5 Vit ljusbrytare
8.6 RGB -ljusbrytare
8.7 Lägesknapp
8.8 RGB statisk färg
8.9 Musikläge
När ljusstyrkan är nedtonad måste batteriet bytas ut.
Batterityp (ingår ej): 2x AAA 1,5 V
Calex Smart -app
Se manual C1 för att ansluta golvlampan till appen.
DA - Montering
1. Tilslut aluminiumsrammede rammer med stik.
2. Tilslut LED -strimmellyset, fjern papirdækslet, og tryk forsigtigt LED
-strimmellyset ind i rillen. Dette fungerer bedst, når rammen er i oprejst
position.
3. Tryk låget på plads
4. Tryk endehætten på plads
5. Tilslut begge støtterør til bundstativet, og fastgør dem med den
medfølgende sekskantnøgle og skruer.
6. Sæt gulvlampen i en stikkontakt.
7. Se Manual C1 for at tilslutte gulvlampen til Calex Smart -appen.
8. Fjernbetjeningsinstruktioner:
8.1 Tænd / sluk kontakter
8.2 Timer forudindstillinger
8.3 Forøg / formindsk lysstyrken i statisk RGB og hvidt lys
8.4 Forøg / sænk hastigheden i dynamisk RGB -tilstand
8.5 Hvid lyskontakt
8.6 RGB -lysafbryder
8.7 Mode -tast
8.8 RGB statisk farve
8.9 Musiktilstand
Når lysstyrken er dæmpet, skal batteriet udskiftes.
Batteritype (medfølger ikke): 2x AAA 1,5 V
Calex Smart app
Se manual C1 for at tilslutte gulvlampen til appen.
C
M
Y
CM
MY
CY
CMY
K
ai1629462289105_A_(5301000500_Corner lamp)_print.pdf 7 20-8-2021 14:24:50

EN - Assembling
1. Connect the aluminum grooved frames with the connectors.
2. Connect the LED strip light, peel o the paper cover and gently press the
LED strip light into the groove. This works best when the frame is in an
upright position.
3. Press the cover into place
4. Press the end-cap into place
5. Connect both support tubes to the bottom stand and secure these with the
supplied hex key and screws.
6. Plug the floor lamp in to a wall socket.
7. See Manual C1 to connect the floor lamp to the Calex Smart app.
8. Remote control instructions:
8.1 On / o switches
8.2 Timer presets
8.3 Increase / decrease brightness in static RGB and
white light mode
8.4 Increase / decrease speed in RGB dynamic mode
8.5 White light switch
8.6 RGB light switch
8.7 Mode key
8.8 RGB Static Color
8. 9 Music Mode
When the brightness is dimmed, the battery needs to be replaced.
Battery type (not included): 2x AAA 1.5 V
Calex Smart app
Please refer to manual C1 to connect the floor lamp to the app.
NL - Montage
1. Verbind de aluminium gegroefde frames met de connectoren.
2. Sluit de LED-stripverlichting aan, verwijder de papieren afdekking en druk
de LED-stripverlichting voorzichtig in de groef. Dit werkt het beste als het
frame rechtop staat.
3. Druk het deksel op zijn plaats
4. Druk de eindkap op zijn plaats
5. Verbind beide steunbuizen met de onderste standaard en zet deze vast
met de meegeleverde inbussleutel en schroeven.
6. Steek de staande lamp in een stopcontact.
7. Zie Handleiding C1 om de vloerlamp te verbinden met de Calex Smart app.
8. Afstandsbediening instructies:
8.1 Aan/uit schakelaars
8.2 Timervoorinstellingen
8.3 Helderheid verhogen/verlagen in statische RGB- en witlichtmodus
8.4 Snelheid verhogen/verlagen in dynamische RGB-modus
8.5 Witlichtschakelaar
8.6 RGB-lichtschakelaar
8.7 Modustoets
8.8 Statische RGB-kleur
8. 9 Muziekmodus
Wanneer de helderheid is gedimd, moet de batterij worden vervangen.
Batterijtype (niet inbegrepen): 2x AAA 1,5 V
Calex Smart-app
Raadpleeg handleiding C1 om de vloerlamp met de app te verbinden.
FR - Assemblage
1. Connectez les cadres rainurés en aluminium avec les connecteurs.
2. Connectez la bande lumineuse LED, retirez le couvercle en papier et
appuyez doucement sur la bande lumineuse LED dans la rainure. Cela
fonctionne mieux lorsque le cadre est en position verticale.
3. Appuyez sur le couvercle en place
4. Appuyez sur l'embout en place
5. Connectez les deux tubes de support au support inférieur et fixez-les avec
la clé hexagonale et les vis fournies.
6. Branchez le lampadaire sur une prise murale.
7. Voir le manuel C1 pour connecter le lampadaire à l'application Calex Smart.
8. Instructions de contrôle à distance :
8.1 Interrupteurs marche/arrêt
8.2 Préréglages de la minuterie
8.3 Augmenter / diminuer la luminosité en mode RVB statique et lumière
blanche
8.4 Augmenter / diminuer la vitesse en mode dynamique RVB
8.5 Interrupteur de lumière blanche
8.6 Interrupteur d'éclairage RVB
8.7 Touche mode
8.8 Couleur statique RVB
8. 9 Mode Musique
Lorsque la luminosité diminue, la batterie doit être remplacée.
Type de pile (non inclus) : 2x AAA 1,5 V
Application Calex Smart
Veuillez vous référer au manuel C1 pour connecter le lampadaire à l'application.
DE - Montage
1. Verbinden Sie die Aluminium-Rillenrahmen mit den Verbindern.
2. Schließen Sie das LED-Streifenlicht an, ziehen Sie die Papierabdeckung ab
und drücken Sie das LED-Streifenlicht vorsichtig in die Nut. Dies
funktioniert am besten, wenn sich der Rahmen in einer aufrechten Position
befindet.
3. Drücken Sie die Abdeckung fest
4. Drücken Sie die Endkappe fest
5. Verbinden Sie beide Stützrohre mit dem unteren Ständer und sichern Sie
diese mit dem mitgelieferten Inbusschlüssel und Schrauben.
6. Stecken Sie die Stehlampe in eine Steckdose.
7. Siehe Handbuch C1, um die Stehleuchte mit der Calex Smart App zu
verbinden.
8. Anweisungen zur Fernbedienung:
8.1 Ein-/Ausschalter
8.2 Timer-Voreinstellungen
8.3 Helligkeit im statischen RGB- und Weißlichtmodus erhöhen/verringern
8.4 Geschwindigkeit im RGB-Dynamikmodus erhöhen/verringern
8.5 Weißlichtschalter
8.6 RGB-Lichtschalter
8.7 Modustaste
8.8 Statische RGB-Farbe
8. 9 Musikmodus
Wenn die Helligkeit gedimmt wird, muss die Batterie ersetzt werden.
Batterietyp (nicht im Lieferumfang enthalten): 2x AAA 1,5 V
Calex Smart-App
Bitte beachten Sie das Handbuch C1, um die Stehleuchte mit der App zu verbinden.
PL - Montaż
1. Połącz aluminiowe ramy rowkowane ze złączami.
2. Podłącz lampkę paska LED, zdejmij papierową osłonę i delikatnie wciśnij
lampkę paska LED w rowek. Działa to najlepiej, gdy rama jest w pozycji
pionowej.
3. Wciśnij pokrywę na miejsce
4. Wciśnij zaślepkę na miejsce
5. Podłącz obie rurki podtrzymujące do dolnej podstawy i zabezpiecz je
dostarczonym kluczem sześciokątnym i śrubami.
6. Podłącz lampę podłogową do gniazdka ściennego.
7. Zobacz instrukcję C1, aby podłączyć lampę podłogową do aplikacji Calex
Smart.
8. Instrukcje zdalnego sterowania:
8.1 Włącznik / wyłącznik
8.2 Ustawienia timera
8.3 Zwiększ/zmniejsz jasność w trybie statycznego RGB i białego światła
8.4 Zwiększanie / zmniejszanie prędkości w trybie dynamicznym RGB
8.5 Przełącznik światła białego
8.6 włącznik światła RGB
8.7 Klawisz trybu
8.8 Statyczny kolor RGB
8.9 Tryb muzyczny
Gdy jasność jest przyciemniona, bateria wymaga wymiany.
Typ baterii (brak w zestawie): 2x AAA 1,5 V
Calex Smart app
Aby podłączyć lampę podłogową do aplikacji, zapoznaj się z instrukcją C1.
CS - Sestavování
1. Spojte hliníkové drážkované rámy s konektory.
2. Připojte LED páskové světlo, odlepte papírový kryt a jemně zatlačte LED
páskové světlo do drážky. To funguje nejlépe, když je rám ve vzpřímené
poloze.
3. Zatlačte kryt na místo
4. Zatlačte koncovku na místo
5. Připojte obě nosné trubky ke spodnímu stojanu a zajistěte je dodaným
šestihranným klíčem a šrouby.
6. Zapojte stojací lampu do zásuvky ve zdi.
7. Podle příručky C1 připojte stojací lampu k aplikaci Calex Smart.
8. Pokyny pro dálkové ovládání:
8.1 Vypínače
8.2 Předvolby časovače
8.3 Zvýšení / snížení jasu v režimu statického RGB a bílého světla
8.4 Zvýšení / snížení rychlosti v dynamickém režimu RGB
8.5 Přepínač bílého světla
8.6 Přepínač světel RGB
8.7 Tlačítko režimu
8.8 RGB statická barva
8.9 Režim hudby
Když je jas ztlumený, je třeba vyměnit baterii.
Typ baterie (není součástí dodávky): 2x AAA 1,5 V.
Aplikace Calex Smart
Pro připojení podlahové lampy k aplikaci viz příručka C1.
IT - Assemblaggio
1. Collegare i telai scanalati in alluminio con i connettori.
2. Collegare la striscia luminosa a LED, staccare il coperchio di carta e
premere delicatamente la striscia luminosa a LED nella scanalatura.
Funziona meglio quando il telaio è in posizione verticale.
3. Premere il coperchio in posizione
4. Premere il cappuccio in posizione
5. Collegare entrambi i tubi di supporto al supporto inferiore e fissarli con la
chiave esagonale e le viti in dotazione.
6. Collegare la lampada da terra a una presa a muro.
7. Consultare il Manuale C1 per collegare la lampada da terra all'app Calex
Smart.
8. Istruzioni per il telecomando:
8.1 Interruttori di accensione/spegnimento
8.2 Preimpostazioni timer
8.3 Aumenta/diminuisci la luminosità in modalità RGB statica e luce
bianca
8.4 Aumenta/diminuisci la velocità in modalità dinamica RGB
8.5 Interruttore luce bianca
8.6 Interruttore della luce RGB
8.7 Tasto modalità
8.8 Colore statico RGB
8.9 Modalità musica
Quando la luminosità è ridotta, è necessario sostituire la batteria.
Tipo di batteria (non inclusa): 2x AAA 1,5 V
App Calex Smart
Fare riferimento al manuale C1 per collegare la lampada da terra all'app.
SK - Zostavenie
1. Spojte hliníkové drážkované rámy s konektormi.
2. Pripojte svetlo LED pásika, odlepte papierový kryt a jemne zatlačte svetlo
LED pásika do drážky. Toto funguje najlepšie, keď je rám vo vzpriamenej
polohe.
3. Zatlačte kryt na miesto
4. Zatlačte koncový kryt na miesto
5. Pripojte obe nosné trubice k spodnému stojanu a zaistite ich dodaným
šesťhranným kľúčom a skrutkami.
6. Zapojte podlahové svietidlo do zásuvky v stene.
7. Pripojenie stojacej lampy k aplikácii Calex Smart nájdete v príručke C1.
8. Pokyny na diaľkové ovládanie:
8.1 Vypínače
8.2 Predvoľby časovača
8.3 Zvýšenie / zníženie jasu v režime statického RGB a bieleho svetla
8.4 Zvýšenie / zníženie rýchlosti v dynamickom režime RGB
8.5 Spínač bieleho svetla
8.6 Prepínač svetla RGB
8.7 Tlačidlo režimu
8.8 RGB statická farba
8.9 Režim hudby
Keď je jas stlmený, je potrebné vymeniť batériu.
Typ batérie (nie je súčasťou dodávky): 2x AAA 1,5 V.
Aplikácia Calex Smart
Pripojenie stojacej lampy k aplikácii nájdete v príručke C1.
RO - Asamblare
1. Conectați cadrele canelate din aluminiu cu conectorii.
2. Conectați lumina cu bandă LED, desprindeți capacul de hârtie și apăsați
ușor lumina cu bandă LED în canelură. Acest lucru funcționează cel mai
bine atunci când cadrul este în poziție verticală.
3. Apăsați capacul în poziție
4. Apăsați capacul în poziție
5. Conectați ambele tuburi de sprijin la suportul inferior și fixați-le cu cheia
hexagonală și șuruburile furnizate.
6. Conectați lampa de podea la o priză de perete.
7. Consultați Manualul C1 pentru a conecta veioza la aplicația Calex Smart.
8. Instrucțiuni de control de la distanță:
8.1 Comutatoare de pornire / oprire
8.2 Presetări ale temporizatorului
8.3 Măriți / micșorați luminozitatea în modul static RGB și lumină albă
8.4 Măriți / micșorați viteza în modul dinamic RGB
8.5 Comutator de lumină albă
8.6 Comutator de lumină RGB
8.7 Tasta de mod
8.8 RGB Static Color
8.9 Mod muzică
Când luminozitatea este estompată, bateria trebuie înlocuită.
Tipul bateriei (nu este inclus): 2x AAA 1,5 V
Aplicația Calex Smart
Vă rugăm să consultați manualul C1 pentru a conecta lampa de podea la
aplicație.
ES - Montaje
1. Conecte los marcos ranurados de aluminio con los conectores.
2. Conecte la tira de luz LED, retire la cubierta de papel y presione
suavemente la tira de luz LED en la ranura. Esto funciona mejor cuando el
marco está en posición vertical.
3. Presione la tapa en su lugar
4. Presione la tapa del extremo en su lugar
5. Conecte ambos tubos de soporte al soporte inferior y asegúrelos con la
llave hexagonal y los tornillos suministrados.
6. Enchufe la lámpara de pie a un enchufe de pared.
7. Consulte el Manual C1 para conectar la lámpara de pie a la aplicación Calex
Smart.
8. Instrucciones de control remoto:
8.1 Interruptores de encendido / apagado
8.2 Preajustes del temporizador
8.3 Aumentar / disminuir el brillo en RGB estático y modo de luz blanca
8.4 Aumentar / disminuir la velocidad en modo dinámico RGB
8.5 Interruptor de luz blanca
8.6 Interruptor de luz RGB
8.7 Tecla de modo
8.8 Color estático RGB
8.9 Modo Música
Cuando se atenúa el brillo, es necesario reemplazar la batería.
Tipo de batería (no incluida): 2x AAA 1,5 V
Aplicación Calex Smart
Consulte el manual C1 para conectar la lámpara de pie a la aplicación.
PT - Montagem
1. Conecte as estruturas ranhuradas de alumínio com os conectores.
2. Conecte a fita de LED, retire a tampa de papel e pressione suavemente a
fita de LED na ranhura. Isso funciona melhor quando o quadro está na
posição vertical.
3. Pressione a tampa no lugar
4. Pressione a tampa final no lugar
5. Conecte os dois tubos de suporte ao pedestal inferior e prenda-os com a
chave sextavada e os parafusos fornecidos.
6. Conecte a luminária de chão a uma tomada de parede.
7. Consulte o Manual C1 para conectar a luminária de chão ao aplicativo Calex
Smart.
8. Instruções de controle remoto:
8.1 Chaves liga / desliga
8.2 predefinições de temporizador
8.3 Aumentar / diminuir o brilho em RGB estático e modo de luz branca
8.4 Aumentar / diminuir a velocidade no modo dinâmico RGB
8.5 Interruptor de luz branca
8.6 interruptor de luz RGB
8.7 Tecla de modo
8.8 RGB Static Color
8.9 Modo de música
Quando o brilho está diminuído, a bateria precisa ser substituída.
Tipo de bateria (não incluída): 2x AAA 1,5 V
Calex Smart app
Consulte o manual C1 para conectar a luminária de chão ao aplicativo.
NO - Montering
1. Koble rammene i aluminium med kontaktene.
2. Koble til LED -stripelyset, ta av papirdekselet og trykk forsiktig LED
-stripelampen inn i sporet. Dette fungerer best når rammen er i oppreist
posisjon.
3. Trykk dekselet på plass
4. Trykk endehetten på plass
5. Koble begge støtterørene til bunnstativet og fest dem med den
medfølgende sekskantnøkkelen og skruene.
6. Koble gulvlampen til en veggkontakt.
7. Se håndbok C1 for å koble gulvlampen til Calex Smart -appen.
8. Fjernkontrollinstruksjoner:
8.1 Av / på -brytere
8.2 Timer forhåndsinnstillinger
8.3 Øk / senk lysstyrken i statisk RGB og hvitt lys
8.4 Øk / senk hastigheten i dynamisk RGB -modus
8.5 Bryter for hvitt lys
8.6 RGB lysbryter
8.7 Modustast
8.8 RGB statisk farge
8.9 Musikkmodus
Når lysstyrken er dempet, må batteriet byttes ut.
Batteritype (ikke inkludert): 2x AAA 1,5 V
Calex Smart -app
Se håndbok C1 for å koble gulvlampen til appen.
FI - Kokoaminen
1. Liitä alumiinirunkoiset kehykset liittimiin.
2. Liitä LED -nauhavalo, irrota paperikotelo ja paina LED -nauhan valo
varovasti uraan. Tämä toimii parhaiten, kun kehys on pystyasennossa.
3. Paina kansi paikalleen
4. Paina päätykansi paikalleen
5. Liitä molemmat tukiputket alajalustaan ja kiinnitä ne mukana toimitetulla
kuusiokoloavaimella ja ruuveilla.
6. Kytke lattiavalaisin pistorasiaan.
7. Katso käsikirja C1, kun haluat yhdistää lattiavalaisimen Calex Smart
-sovellukseen.
8. Kaukosäätimen ohjeet:
8.1 Virtakytkimet
8.2 Ajastimen esiasetukset
8.3 Lisää / vähennä kirkkautta staattisessa RGB- ja valkoisessa
valotilassa
8.4 Nopeuden lisääminen / vähentäminen dynaamisessa RGB -tilassa
8.5 Valokytkin
8.6 RGB -valokytkin
8.7 Tilapainike
8.8 RGB -staattinen väri
8.9 Musiikkitila
Kun kirkkaus on himmeä, paristo on vaihdettava.
Paristotyyppi (ei sisälly toimitukseen): 2x AAA 1,5 V
Calex Smart -sovellus
Katso lattiavalaisimen liittäminen sovellukseen käsikirjasta C1.
SV - Montering
1. Anslut aluminiumspårramarna med kontakterna.
2. Anslut LED -remsan, ta bort papperslocket och tryck försiktigt in LED
-remsan i spåret. Detta fungerar bäst när ramen är i upprätt läge.
3. Tryck på locket på plats
4. Tryck på ändlocket på plats
5. Anslut båda stödrören till bottenstället och säkra dem med den
medföljande insexnyckeln och skruvarna.
6. Anslut golvlampan till ett vägguttag.
7. Se handbok C1 för att ansluta golvlampan till Calex Smart -appen.
8. Fjärrkontroll instruktioner:
8.1 På / av -omkopplare
8.2 Timer förinställningar
8.3 Öka / minska ljusstyrkan i statiskt RGB- och vitt ljusläge
8.4 Öka / minska hastigheten i dynamiskt RGB -läge
8.5 Vit ljusbrytare
8.6 RGB -ljusbrytare
8.7 Lägesknapp
8.8 RGB statisk färg
8.9 Musikläge
När ljusstyrkan är nedtonad måste batteriet bytas ut.
Batterityp (ingår ej): 2x AAA 1,5 V
Calex Smart -app
Se manual C1 för att ansluta golvlampan till appen.
DA - Montering
1. Tilslut aluminiumsrammede rammer med stik.
2. Tilslut LED -strimmellyset, fjern papirdækslet, og tryk forsigtigt LED
-strimmellyset ind i rillen. Dette fungerer bedst, når rammen er i oprejst
position.
3. Tryk låget på plads
4. Tryk endehætten på plads
5. Tilslut begge støtterør til bundstativet, og fastgør dem med den
medfølgende sekskantnøgle og skruer.
6. Sæt gulvlampen i en stikkontakt.
7. Se Manual C1 for at tilslutte gulvlampen til Calex Smart -appen.
8. Fjernbetjeningsinstruktioner:
8.1 Tænd / sluk kontakter
8.2 Timer forudindstillinger
8.3 Forøg / formindsk lysstyrken i statisk RGB og hvidt lys
8.4 Forøg / sænk hastigheden i dynamisk RGB -tilstand
8.5 Hvid lyskontakt
8.6 RGB -lysafbryder
8.7 Mode -tast
8.8 RGB statisk farve
8.9 Musiktilstand
Når lysstyrken er dæmpet, skal batteriet udskiftes.
Batteritype (medfølger ikke): 2x AAA 1,5 V
Calex Smart app
Se manual C1 for at tilslutte gulvlampen til appen.
C
M
Y
CM
MY
CY
CMY
K
ai1629462289105_A_(5301000500_Corner lamp)_print.pdf 8 20-8-2021 14:24:50

EN - Assembling
1. Connect the aluminum grooved frames with the connectors.
2. Connect the LED strip light, peel o the paper cover and gently press the
LED strip light into the groove. This works best when the frame is in an
upright position.
3. Press the cover into place
4. Press the end-cap into place
5. Connect both support tubes to the bottom stand and secure these with the
supplied hex key and screws.
6. Plug the floor lamp in to a wall socket.
7. See Manual C1 to connect the floor lamp to the Calex Smart app.
8. Remote control instructions:
8.1 On / o switches
8.2 Timer presets
8.3 Increase / decrease brightness in static RGB and
white light mode
8.4 Increase / decrease speed in RGB dynamic mode
8.5 White light switch
8.6 RGB light switch
8.7 Mode key
8.8 RGB Static Color
8. 9 Music Mode
When the brightness is dimmed, the battery needs to be replaced.
Battery type (not included): 2x AAA 1.5 V
Calex Smart app
Please refer to manual C1 to connect the floor lamp to the app.
NL - Montage
1. Verbind de aluminium gegroefde frames met de connectoren.
2. Sluit de LED-stripverlichting aan, verwijder de papieren afdekking en druk
de LED-stripverlichting voorzichtig in de groef. Dit werkt het beste als het
frame rechtop staat.
3. Druk het deksel op zijn plaats
4. Druk de eindkap op zijn plaats
5. Verbind beide steunbuizen met de onderste standaard en zet deze vast
met de meegeleverde inbussleutel en schroeven.
6. Steek de staande lamp in een stopcontact.
7. Zie Handleiding C1 om de vloerlamp te verbinden met de Calex Smart app.
8. Afstandsbediening instructies:
8.1 Aan/uit schakelaars
8.2 Timervoorinstellingen
8.3 Helderheid verhogen/verlagen in statische RGB- en witlichtmodus
8.4 Snelheid verhogen/verlagen in dynamische RGB-modus
8.5 Witlichtschakelaar
8.6 RGB-lichtschakelaar
8.7 Modustoets
8.8 Statische RGB-kleur
8. 9 Muziekmodus
Wanneer de helderheid is gedimd, moet de batterij worden vervangen.
Batterijtype (niet inbegrepen): 2x AAA 1,5 V
Calex Smart-app
Raadpleeg handleiding C1 om de vloerlamp met de app te verbinden.
FR - Assemblage
1. Connectez les cadres rainurés en aluminium avec les connecteurs.
2. Connectez la bande lumineuse LED, retirez le couvercle en papier et
appuyez doucement sur la bande lumineuse LED dans la rainure. Cela
fonctionne mieux lorsque le cadre est en position verticale.
3. Appuyez sur le couvercle en place
4. Appuyez sur l'embout en place
5. Connectez les deux tubes de support au support inférieur et fixez-les avec
la clé hexagonale et les vis fournies.
6. Branchez le lampadaire sur une prise murale.
7. Voir le manuel C1 pour connecter le lampadaire à l'application Calex Smart.
8. Instructions de contrôle à distance :
8.1 Interrupteurs marche/arrêt
8.2 Préréglages de la minuterie
8.3 Augmenter / diminuer la luminosité en mode RVB statique et lumière
blanche
8.4 Augmenter / diminuer la vitesse en mode dynamique RVB
8.5 Interrupteur de lumière blanche
8.6 Interrupteur d'éclairage RVB
8.7 Touche mode
8.8 Couleur statique RVB
8. 9 Mode Musique
Lorsque la luminosité diminue, la batterie doit être remplacée.
Type de pile (non inclus) : 2x AAA 1,5 V
Application Calex Smart
Veuillez vous référer au manuel C1 pour connecter le lampadaire à l'application.
DE - Montage
1. Verbinden Sie die Aluminium-Rillenrahmen mit den Verbindern.
2. Schließen Sie das LED-Streifenlicht an, ziehen Sie die Papierabdeckung ab
und drücken Sie das LED-Streifenlicht vorsichtig in die Nut. Dies
funktioniert am besten, wenn sich der Rahmen in einer aufrechten Position
befindet.
3. Drücken Sie die Abdeckung fest
4. Drücken Sie die Endkappe fest
5. Verbinden Sie beide Stützrohre mit dem unteren Ständer und sichern Sie
diese mit dem mitgelieferten Inbusschlüssel und Schrauben.
6. Stecken Sie die Stehlampe in eine Steckdose.
7. Siehe Handbuch C1, um die Stehleuchte mit der Calex Smart App zu
verbinden.
8. Anweisungen zur Fernbedienung:
8.1 Ein-/Ausschalter
8.2 Timer-Voreinstellungen
8.3 Helligkeit im statischen RGB- und Weißlichtmodus erhöhen/verringern
8.4 Geschwindigkeit im RGB-Dynamikmodus erhöhen/verringern
8.5 Weißlichtschalter
8.6 RGB-Lichtschalter
8.7 Modustaste
8.8 Statische RGB-Farbe
8. 9 Musikmodus
Wenn die Helligkeit gedimmt wird, muss die Batterie ersetzt werden.
Batterietyp (nicht im Lieferumfang enthalten): 2x AAA 1,5 V
Calex Smart-App
Bitte beachten Sie das Handbuch C1, um die Stehleuchte mit der App zu verbinden.
PL - Montaż
1. Połącz aluminiowe ramy rowkowane ze złączami.
2. Podłącz lampkę paska LED, zdejmij papierową osłonę i delikatnie wciśnij
lampkę paska LED w rowek. Działa to najlepiej, gdy rama jest w pozycji
pionowej.
3. Wciśnij pokrywę na miejsce
4. Wciśnij zaślepkę na miejsce
5. Podłącz obie rurki podtrzymujące do dolnej podstawy i zabezpiecz je
dostarczonym kluczem sześciokątnym i śrubami.
6. Podłącz lampę podłogową do gniazdka ściennego.
7. Zobacz instrukcję C1, aby podłączyć lampę podłogową do aplikacji Calex
Smart.
8. Instrukcje zdalnego sterowania:
8.1 Włącznik / wyłącznik
8.2 Ustawienia timera
8.3 Zwiększ/zmniejsz jasność w trybie statycznego RGB i białego światła
8.4 Zwiększanie / zmniejszanie prędkości w trybie dynamicznym RGB
8.5 Przełącznik światła białego
8.6 włącznik światła RGB
8.7 Klawisz trybu
8.8 Statyczny kolor RGB
8.9 Tryb muzyczny
Gdy jasność jest przyciemniona, bateria wymaga wymiany.
Typ baterii (brak w zestawie): 2x AAA 1,5 V
Calex Smart app
Aby podłączyć lampę podłogową do aplikacji, zapoznaj się z instrukcją C1.
CS - Sestavování
1. Spojte hliníkové drážkované rámy s konektory.
2. Připojte LED páskové světlo, odlepte papírový kryt a jemně zatlačte LED
páskové světlo do drážky. To funguje nejlépe, když je rám ve vzpřímené
poloze.
3. Zatlačte kryt na místo
4. Zatlačte koncovku na místo
5. Připojte obě nosné trubky ke spodnímu stojanu a zajistěte je dodaným
šestihranným klíčem a šrouby.
6. Zapojte stojací lampu do zásuvky ve zdi.
7. Podle příručky C1 připojte stojací lampu k aplikaci Calex Smart.
8. Pokyny pro dálkové ovládání:
8.1 Vypínače
8.2 Předvolby časovače
8.3 Zvýšení / snížení jasu v režimu statického RGB a bílého světla
8.4 Zvýšení / snížení rychlosti v dynamickém režimu RGB
8.5 Přepínač bílého světla
8.6 Přepínač světel RGB
8.7 Tlačítko režimu
8.8 RGB statická barva
8.9 Režim hudby
Když je jas ztlumený, je třeba vyměnit baterii.
Typ baterie (není součástí dodávky): 2x AAA 1,5 V.
Aplikace Calex Smart
Pro připojení podlahové lampy k aplikaci viz příručka C1.
IT - Assemblaggio
1. Collegare i telai scanalati in alluminio con i connettori.
2. Collegare la striscia luminosa a LED, staccare il coperchio di carta e
premere delicatamente la striscia luminosa a LED nella scanalatura.
Funziona meglio quando il telaio è in posizione verticale.
3. Premere il coperchio in posizione
4. Premere il cappuccio in posizione
5. Collegare entrambi i tubi di supporto al supporto inferiore e fissarli con la
chiave esagonale e le viti in dotazione.
6. Collegare la lampada da terra a una presa a muro.
7. Consultare il Manuale C1 per collegare la lampada da terra all'app Calex
Smart.
8. Istruzioni per il telecomando:
8.1 Interruttori di accensione/spegnimento
8.2 Preimpostazioni timer
8.3 Aumenta/diminuisci la luminosità in modalità RGB statica e luce
bianca
8.4 Aumenta/diminuisci la velocità in modalità dinamica RGB
8.5 Interruttore luce bianca
8.6 Interruttore della luce RGB
8.7 Tasto modalità
8.8 Colore statico RGB
8.9 Modalità musica
Quando la luminosità è ridotta, è necessario sostituire la batteria.
Tipo di batteria (non inclusa): 2x AAA 1,5 V
App Calex Smart
Fare riferimento al manuale C1 per collegare la lampada da terra all'app.
SK - Zostavenie
1. Spojte hliníkové drážkované rámy s konektormi.
2. Pripojte svetlo LED pásika, odlepte papierový kryt a jemne zatlačte svetlo
LED pásika do drážky. Toto funguje najlepšie, keď je rám vo vzpriamenej
polohe.
3. Zatlačte kryt na miesto
4. Zatlačte koncový kryt na miesto
5. Pripojte obe nosné trubice k spodnému stojanu a zaistite ich dodaným
šesťhranným kľúčom a skrutkami.
6. Zapojte podlahové svietidlo do zásuvky v stene.
7. Pripojenie stojacej lampy k aplikácii Calex Smart nájdete v príručke C1.
8. Pokyny na diaľkové ovládanie:
8.1 Vypínače
8.2 Predvoľby časovača
8.3 Zvýšenie / zníženie jasu v režime statického RGB a bieleho svetla
8.4 Zvýšenie / zníženie rýchlosti v dynamickom režime RGB
8.5 Spínač bieleho svetla
8.6 Prepínač svetla RGB
8.7 Tlačidlo režimu
8.8 RGB statická farba
8.9 Režim hudby
Keď je jas stlmený, je potrebné vymeniť batériu.
Typ batérie (nie je súčasťou dodávky): 2x AAA 1,5 V.
Aplikácia Calex Smart
Pripojenie stojacej lampy k aplikácii nájdete v príručke C1.
RO - Asamblare
1. Conectați cadrele canelate din aluminiu cu conectorii.
2. Conectați lumina cu bandă LED, desprindeți capacul de hârtie și apăsați
ușor lumina cu bandă LED în canelură. Acest lucru funcționează cel mai
bine atunci când cadrul este în poziție verticală.
3. Apăsați capacul în poziție
4. Apăsați capacul în poziție
5. Conectați ambele tuburi de sprijin la suportul inferior și fixați-le cu cheia
hexagonală și șuruburile furnizate.
6. Conectați lampa de podea la o priză de perete.
7. Consultați Manualul C1 pentru a conecta veioza la aplicația Calex Smart.
8. Instrucțiuni de control de la distanță:
8.1 Comutatoare de pornire / oprire
8.2 Presetări ale temporizatorului
8.3 Măriți / micșorați luminozitatea în modul static RGB și lumină albă
8.4 Măriți / micșorați viteza în modul dinamic RGB
8.5 Comutator de lumină albă
8.6 Comutator de lumină RGB
8.7 Tasta de mod
8.8 RGB Static Color
8.9 Mod muzică
Când luminozitatea este estompată, bateria trebuie înlocuită.
Tipul bateriei (nu este inclus): 2x AAA 1,5 V
Aplicația Calex Smart
Vă rugăm să consultați manualul C1 pentru a conecta lampa de podea la
aplicație.
ES - Montaje
1. Conecte los marcos ranurados de aluminio con los conectores.
2. Conecte la tira de luz LED, retire la cubierta de papel y presione
suavemente la tira de luz LED en la ranura. Esto funciona mejor cuando el
marco está en posición vertical.
3. Presione la tapa en su lugar
4. Presione la tapa del extremo en su lugar
5. Conecte ambos tubos de soporte al soporte inferior y asegúrelos con la
llave hexagonal y los tornillos suministrados.
6. Enchufe la lámpara de pie a un enchufe de pared.
7. Consulte el Manual C1 para conectar la lámpara de pie a la aplicación Calex
Smart.
8. Instrucciones de control remoto:
8.1 Interruptores de encendido / apagado
8.2 Preajustes del temporizador
8.3 Aumentar / disminuir el brillo en RGB estático y modo de luz blanca
8.4 Aumentar / disminuir la velocidad en modo dinámico RGB
8.5 Interruptor de luz blanca
8.6 Interruptor de luz RGB
8.7 Tecla de modo
8.8 Color estático RGB
8.9 Modo Música
Cuando se atenúa el brillo, es necesario reemplazar la batería.
Tipo de batería (no incluida): 2x AAA 1,5 V
Aplicación Calex Smart
Consulte el manual C1 para conectar la lámpara de pie a la aplicación.
PT - Montagem
1. Conecte as estruturas ranhuradas de alumínio com os conectores.
2. Conecte a fita de LED, retire a tampa de papel e pressione suavemente a
fita de LED na ranhura. Isso funciona melhor quando o quadro está na
posição vertical.
3. Pressione a tampa no lugar
4. Pressione a tampa final no lugar
5. Conecte os dois tubos de suporte ao pedestal inferior e prenda-os com a
chave sextavada e os parafusos fornecidos.
6. Conecte a luminária de chão a uma tomada de parede.
7. Consulte o Manual C1 para conectar a luminária de chão ao aplicativo Calex
Smart.
8. Instruções de controle remoto:
8.1 Chaves liga / desliga
8.2 predefinições de temporizador
8.3 Aumentar / diminuir o brilho em RGB estático e modo de luz branca
8.4 Aumentar / diminuir a velocidade no modo dinâmico RGB
8.5 Interruptor de luz branca
8.6 interruptor de luz RGB
8.7 Tecla de modo
8.8 RGB Static Color
8.9 Modo de música
Quando o brilho está diminuído, a bateria precisa ser substituída.
Tipo de bateria (não incluída): 2x AAA 1,5 V
Calex Smart app
Consulte o manual C1 para conectar a luminária de chão ao aplicativo.
NO - Montering
1. Koble rammene i aluminium med kontaktene.
2. Koble til LED -stripelyset, ta av papirdekselet og trykk forsiktig LED
-stripelampen inn i sporet. Dette fungerer best når rammen er i oppreist
posisjon.
3. Trykk dekselet på plass
4. Trykk endehetten på plass
5. Koble begge støtterørene til bunnstativet og fest dem med den
medfølgende sekskantnøkkelen og skruene.
6. Koble gulvlampen til en veggkontakt.
7. Se håndbok C1 for å koble gulvlampen til Calex Smart -appen.
8. Fjernkontrollinstruksjoner:
8.1 Av / på -brytere
8.2 Timer forhåndsinnstillinger
8.3 Øk / senk lysstyrken i statisk RGB og hvitt lys
8.4 Øk / senk hastigheten i dynamisk RGB -modus
8.5 Bryter for hvitt lys
8.6 RGB lysbryter
8.7 Modustast
8.8 RGB statisk farge
8.9 Musikkmodus
Når lysstyrken er dempet, må batteriet byttes ut.
Batteritype (ikke inkludert): 2x AAA 1,5 V
Calex Smart -app
Se håndbok C1 for å koble gulvlampen til appen.
FI - Kokoaminen
1. Liitä alumiinirunkoiset kehykset liittimiin.
2. Liitä LED -nauhavalo, irrota paperikotelo ja paina LED -nauhan valo
varovasti uraan. Tämä toimii parhaiten, kun kehys on pystyasennossa.
3. Paina kansi paikalleen
4. Paina päätykansi paikalleen
5. Liitä molemmat tukiputket alajalustaan ja kiinnitä ne mukana toimitetulla
kuusiokoloavaimella ja ruuveilla.
6. Kytke lattiavalaisin pistorasiaan.
7. Katso käsikirja C1, kun haluat yhdistää lattiavalaisimen Calex Smart
-sovellukseen.
8. Kaukosäätimen ohjeet:
8.1 Virtakytkimet
8.2 Ajastimen esiasetukset
8.3 Lisää / vähennä kirkkautta staattisessa RGB- ja valkoisessa
valotilassa
8.4 Nopeuden lisääminen / vähentäminen dynaamisessa RGB -tilassa
8.5 Valokytkin
8.6 RGB -valokytkin
8.7 Tilapainike
8.8 RGB -staattinen väri
8.9 Musiikkitila
Kun kirkkaus on himmeä, paristo on vaihdettava.
Paristotyyppi (ei sisälly toimitukseen): 2x AAA 1,5 V
Calex Smart -sovellus
Katso lattiavalaisimen liittäminen sovellukseen käsikirjasta C1.
SV - Montering
1. Anslut aluminiumspårramarna med kontakterna.
2. Anslut LED -remsan, ta bort papperslocket och tryck försiktigt in LED
-remsan i spåret. Detta fungerar bäst när ramen är i upprätt läge.
3. Tryck på locket på plats
4. Tryck på ändlocket på plats
5. Anslut båda stödrören till bottenstället och säkra dem med den
medföljande insexnyckeln och skruvarna.
6. Anslut golvlampan till ett vägguttag.
7. Se handbok C1 för att ansluta golvlampan till Calex Smart -appen.
8. Fjärrkontroll instruktioner:
8.1 På / av -omkopplare
8.2 Timer förinställningar
8.3 Öka / minska ljusstyrkan i statiskt RGB- och vitt ljusläge
8.4 Öka / minska hastigheten i dynamiskt RGB -läge
8.5 Vit ljusbrytare
8.6 RGB -ljusbrytare
8.7 Lägesknapp
8.8 RGB statisk färg
8.9 Musikläge
När ljusstyrkan är nedtonad måste batteriet bytas ut.
Batterityp (ingår ej): 2x AAA 1,5 V
Calex Smart -app
Se manual C1 för att ansluta golvlampan till appen.
DA - Montering
1. Tilslut aluminiumsrammede rammer med stik.
2. Tilslut LED -strimmellyset, fjern papirdækslet, og tryk forsigtigt LED
-strimmellyset ind i rillen. Dette fungerer bedst, når rammen er i oprejst
position.
3. Tryk låget på plads
4. Tryk endehætten på plads
5. Tilslut begge støtterør til bundstativet, og fastgør dem med den
medfølgende sekskantnøgle og skruer.
6. Sæt gulvlampen i en stikkontakt.
7. Se Manual C1 for at tilslutte gulvlampen til Calex Smart -appen.
8. Fjernbetjeningsinstruktioner:
8.1 Tænd / sluk kontakter
8.2 Timer forudindstillinger
8.3 Forøg / formindsk lysstyrken i statisk RGB og hvidt lys
8.4 Forøg / sænk hastigheden i dynamisk RGB -tilstand
8.5 Hvid lyskontakt
8.6 RGB -lysafbryder
8.7 Mode -tast
8.8 RGB statisk farve
8.9 Musiktilstand
Når lysstyrken er dæmpet, skal batteriet udskiftes.
Batteritype (medfølger ikke): 2x AAA 1,5 V
Calex Smart app
Se manual C1 for at tilslutte gulvlampen til appen.
C
M
Y
CM
MY
CY
CMY
K
ai1629462289105_A_(5301000500_Corner lamp)_print.pdf 9 20-8-2021 14:24:50

EN - Assembling
1. Connect the aluminum grooved frames with the connectors.
2. Connect the LED strip light, peel o the paper cover and gently press the
LED strip light into the groove. This works best when the frame is in an
upright position.
3. Press the cover into place
4. Press the end-cap into place
5. Connect both support tubes to the bottom stand and secure these with the
supplied hex key and screws.
6. Plug the floor lamp in to a wall socket.
7. See Manual C1 to connect the floor lamp to the Calex Smart app.
8. Remote control instructions:
8.1 On / o switches
8.2 Timer presets
8.3 Increase / decrease brightness in static RGB and
white light mode
8.4 Increase / decrease speed in RGB dynamic mode
8.5 White light switch
8.6 RGB light switch
8.7 Mode key
8.8 RGB Static Color
8. 9 Music Mode
When the brightness is dimmed, the battery needs to be replaced.
Battery type (not included): 2x AAA 1.5 V
Calex Smart app
Please refer to manual C1 to connect the floor lamp to the app.
NL - Montage
1. Verbind de aluminium gegroefde frames met de connectoren.
2. Sluit de LED-stripverlichting aan, verwijder de papieren afdekking en druk
de LED-stripverlichting voorzichtig in de groef. Dit werkt het beste als het
frame rechtop staat.
3. Druk het deksel op zijn plaats
4. Druk de eindkap op zijn plaats
5. Verbind beide steunbuizen met de onderste standaard en zet deze vast
met de meegeleverde inbussleutel en schroeven.
6. Steek de staande lamp in een stopcontact.
7. Zie Handleiding C1 om de vloerlamp te verbinden met de Calex Smart app.
8. Afstandsbediening instructies:
8.1 Aan/uit schakelaars
8.2 Timervoorinstellingen
8.3 Helderheid verhogen/verlagen in statische RGB- en witlichtmodus
8.4 Snelheid verhogen/verlagen in dynamische RGB-modus
8.5 Witlichtschakelaar
8.6 RGB-lichtschakelaar
8.7 Modustoets
8.8 Statische RGB-kleur
8. 9 Muziekmodus
Wanneer de helderheid is gedimd, moet de batterij worden vervangen.
Batterijtype (niet inbegrepen): 2x AAA 1,5 V
Calex Smart-app
Raadpleeg handleiding C1 om de vloerlamp met de app te verbinden.
FR - Assemblage
1. Connectez les cadres rainurés en aluminium avec les connecteurs.
2. Connectez la bande lumineuse LED, retirez le couvercle en papier et
appuyez doucement sur la bande lumineuse LED dans la rainure. Cela
fonctionne mieux lorsque le cadre est en position verticale.
3. Appuyez sur le couvercle en place
4. Appuyez sur l'embout en place
5. Connectez les deux tubes de support au support inférieur et fixez-les avec
la clé hexagonale et les vis fournies.
6. Branchez le lampadaire sur une prise murale.
7. Voir le manuel C1 pour connecter le lampadaire à l'application Calex Smart.
8. Instructions de contrôle à distance :
8.1 Interrupteurs marche/arrêt
8.2 Préréglages de la minuterie
8.3 Augmenter / diminuer la luminosité en mode RVB statique et lumière
blanche
8.4 Augmenter / diminuer la vitesse en mode dynamique RVB
8.5 Interrupteur de lumière blanche
8.6 Interrupteur d'éclairage RVB
8.7 Touche mode
8.8 Couleur statique RVB
8. 9 Mode Musique
Lorsque la luminosité diminue, la batterie doit être remplacée.
Type de pile (non inclus) : 2x AAA 1,5 V
Application Calex Smart
Veuillez vous référer au manuel C1 pour connecter le lampadaire à l'application.
DE - Montage
1. Verbinden Sie die Aluminium-Rillenrahmen mit den Verbindern.
2. Schließen Sie das LED-Streifenlicht an, ziehen Sie die Papierabdeckung ab
und drücken Sie das LED-Streifenlicht vorsichtig in die Nut. Dies
funktioniert am besten, wenn sich der Rahmen in einer aufrechten Position
befindet.
3. Drücken Sie die Abdeckung fest
4. Drücken Sie die Endkappe fest
5. Verbinden Sie beide Stützrohre mit dem unteren Ständer und sichern Sie
diese mit dem mitgelieferten Inbusschlüssel und Schrauben.
6. Stecken Sie die Stehlampe in eine Steckdose.
7. Siehe Handbuch C1, um die Stehleuchte mit der Calex Smart App zu
verbinden.
8. Anweisungen zur Fernbedienung:
8.1 Ein-/Ausschalter
8.2 Timer-Voreinstellungen
8.3 Helligkeit im statischen RGB- und Weißlichtmodus erhöhen/verringern
8.4 Geschwindigkeit im RGB-Dynamikmodus erhöhen/verringern
8.5 Weißlichtschalter
8.6 RGB-Lichtschalter
8.7 Modustaste
8.8 Statische RGB-Farbe
8. 9 Musikmodus
Wenn die Helligkeit gedimmt wird, muss die Batterie ersetzt werden.
Batterietyp (nicht im Lieferumfang enthalten): 2x AAA 1,5 V
Calex Smart-App
Bitte beachten Sie das Handbuch C1, um die Stehleuchte mit der App zu verbinden.
PL - Montaż
1. Połącz aluminiowe ramy rowkowane ze złączami.
2. Podłącz lampkę paska LED, zdejmij papierową osłonę i delikatnie wciśnij
lampkę paska LED w rowek. Działa to najlepiej, gdy rama jest w pozycji
pionowej.
3. Wciśnij pokrywę na miejsce
4. Wciśnij zaślepkę na miejsce
5. Podłącz obie rurki podtrzymujące do dolnej podstawy i zabezpiecz je
dostarczonym kluczem sześciokątnym i śrubami.
6. Podłącz lampę podłogową do gniazdka ściennego.
7. Zobacz instrukcję C1, aby podłączyć lampę podłogową do aplikacji Calex
Smart.
8. Instrukcje zdalnego sterowania:
8.1 Włącznik / wyłącznik
8.2 Ustawienia timera
8.3 Zwiększ/zmniejsz jasność w trybie statycznego RGB i białego światła
8.4 Zwiększanie / zmniejszanie prędkości w trybie dynamicznym RGB
8.5 Przełącznik światła białego
8.6 włącznik światła RGB
8.7 Klawisz trybu
8.8 Statyczny kolor RGB
8.9 Tryb muzyczny
Gdy jasność jest przyciemniona, bateria wymaga wymiany.
Typ baterii (brak w zestawie): 2x AAA 1,5 V
Calex Smart app
Aby podłączyć lampę podłogową do aplikacji, zapoznaj się z instrukcją C1.
CS - Sestavování
1. Spojte hliníkové drážkované rámy s konektory.
2. Připojte LED páskové světlo, odlepte papírový kryt a jemně zatlačte LED
páskové světlo do drážky. To funguje nejlépe, když je rám ve vzpřímené
poloze.
3. Zatlačte kryt na místo
4. Zatlačte koncovku na místo
5. Připojte obě nosné trubky ke spodnímu stojanu a zajistěte je dodaným
šestihranným klíčem a šrouby.
6. Zapojte stojací lampu do zásuvky ve zdi.
7. Podle příručky C1 připojte stojací lampu k aplikaci Calex Smart.
8. Pokyny pro dálkové ovládání:
8.1 Vypínače
8.2 Předvolby časovače
8.3 Zvýšení / snížení jasu v režimu statického RGB a bílého světla
8.4 Zvýšení / snížení rychlosti v dynamickém režimu RGB
8.5 Přepínač bílého světla
8.6 Přepínač světel RGB
8.7 Tlačítko režimu
8.8 RGB statická barva
8.9 Režim hudby
Když je jas ztlumený, je třeba vyměnit baterii.
Typ baterie (není součástí dodávky): 2x AAA 1,5 V.
Aplikace Calex Smart
Pro připojení podlahové lampy k aplikaci viz příručka C1.
IT - Assemblaggio
1. Collegare i telai scanalati in alluminio con i connettori.
2. Collegare la striscia luminosa a LED, staccare il coperchio di carta e
premere delicatamente la striscia luminosa a LED nella scanalatura.
Funziona meglio quando il telaio è in posizione verticale.
3. Premere il coperchio in posizione
4. Premere il cappuccio in posizione
5. Collegare entrambi i tubi di supporto al supporto inferiore e fissarli con la
chiave esagonale e le viti in dotazione.
6. Collegare la lampada da terra a una presa a muro.
7. Consultare il Manuale C1 per collegare la lampada da terra all'app Calex
Smart.
8. Istruzioni per il telecomando:
8.1 Interruttori di accensione/spegnimento
8.2 Preimpostazioni timer
8.3 Aumenta/diminuisci la luminosità in modalità RGB statica e luce
bianca
8.4 Aumenta/diminuisci la velocità in modalità dinamica RGB
8.5 Interruttore luce bianca
8.6 Interruttore della luce RGB
8.7 Tasto modalità
8.8 Colore statico RGB
8.9 Modalità musica
Quando la luminosità è ridotta, è necessario sostituire la batteria.
Tipo di batteria (non inclusa): 2x AAA 1,5 V
App Calex Smart
Fare riferimento al manuale C1 per collegare la lampada da terra all'app.
SK - Zostavenie
1. Spojte hliníkové drážkované rámy s konektormi.
2. Pripojte svetlo LED pásika, odlepte papierový kryt a jemne zatlačte svetlo
LED pásika do drážky. Toto funguje najlepšie, keď je rám vo vzpriamenej
polohe.
3. Zatlačte kryt na miesto
4. Zatlačte koncový kryt na miesto
5. Pripojte obe nosné trubice k spodnému stojanu a zaistite ich dodaným
šesťhranným kľúčom a skrutkami.
6. Zapojte podlahové svietidlo do zásuvky v stene.
7. Pripojenie stojacej lampy k aplikácii Calex Smart nájdete v príručke C1.
8. Pokyny na diaľkové ovládanie:
8.1 Vypínače
8.2 Predvoľby časovača
8.3 Zvýšenie / zníženie jasu v režime statického RGB a bieleho svetla
8.4 Zvýšenie / zníženie rýchlosti v dynamickom režime RGB
8.5 Spínač bieleho svetla
8.6 Prepínač svetla RGB
8.7 Tlačidlo režimu
8.8 RGB statická farba
8.9 Režim hudby
Keď je jas stlmený, je potrebné vymeniť batériu.
Typ batérie (nie je súčasťou dodávky): 2x AAA 1,5 V.
Aplikácia Calex Smart
Pripojenie stojacej lampy k aplikácii nájdete v príručke C1.
RO - Asamblare
1. Conectați cadrele canelate din aluminiu cu conectorii.
2. Conectați lumina cu bandă LED, desprindeți capacul de hârtie și apăsați
ușor lumina cu bandă LED în canelură. Acest lucru funcționează cel mai
bine atunci când cadrul este în poziție verticală.
3. Apăsați capacul în poziție
4. Apăsați capacul în poziție
5. Conectați ambele tuburi de sprijin la suportul inferior și fixați-le cu cheia
hexagonală și șuruburile furnizate.
6. Conectați lampa de podea la o priză de perete.
7. Consultați Manualul C1 pentru a conecta veioza la aplicația Calex Smart.
8. Instrucțiuni de control de la distanță:
8.1 Comutatoare de pornire / oprire
8.2 Presetări ale temporizatorului
8.3 Măriți / micșorați luminozitatea în modul static RGB și lumină albă
8.4 Măriți / micșorați viteza în modul dinamic RGB
8.5 Comutator de lumină albă
8.6 Comutator de lumină RGB
8.7 Tasta de mod
8.8 RGB Static Color
8.9 Mod muzică
Când luminozitatea este estompată, bateria trebuie înlocuită.
Tipul bateriei (nu este inclus): 2x AAA 1,5 V
Aplicația Calex Smart
Vă rugăm să consultați manualul C1 pentru a conecta lampa de podea la
aplicație.
ES - Montaje
1. Conecte los marcos ranurados de aluminio con los conectores.
2. Conecte la tira de luz LED, retire la cubierta de papel y presione
suavemente la tira de luz LED en la ranura. Esto funciona mejor cuando el
marco está en posición vertical.
3. Presione la tapa en su lugar
4. Presione la tapa del extremo en su lugar
5. Conecte ambos tubos de soporte al soporte inferior y asegúrelos con la
llave hexagonal y los tornillos suministrados.
6. Enchufe la lámpara de pie a un enchufe de pared.
7. Consulte el Manual C1 para conectar la lámpara de pie a la aplicación Calex
Smart.
8. Instrucciones de control remoto:
8.1 Interruptores de encendido / apagado
8.2 Preajustes del temporizador
8.3 Aumentar / disminuir el brillo en RGB estático y modo de luz blanca
8.4 Aumentar / disminuir la velocidad en modo dinámico RGB
8.5 Interruptor de luz blanca
8.6 Interruptor de luz RGB
8.7 Tecla de modo
8.8 Color estático RGB
8.9 Modo Música
Cuando se atenúa el brillo, es necesario reemplazar la batería.
Tipo de batería (no incluida): 2x AAA 1,5 V
Aplicación Calex Smart
Consulte el manual C1 para conectar la lámpara de pie a la aplicación.
PT - Montagem
1. Conecte as estruturas ranhuradas de alumínio com os conectores.
2. Conecte a fita de LED, retire a tampa de papel e pressione suavemente a
fita de LED na ranhura. Isso funciona melhor quando o quadro está na
posição vertical.
3. Pressione a tampa no lugar
4. Pressione a tampa final no lugar
5. Conecte os dois tubos de suporte ao pedestal inferior e prenda-os com a
chave sextavada e os parafusos fornecidos.
6. Conecte a luminária de chão a uma tomada de parede.
7. Consulte o Manual C1 para conectar a luminária de chão ao aplicativo Calex
Smart.
8. Instruções de controle remoto:
8.1 Chaves liga / desliga
8.2 predefinições de temporizador
8.3 Aumentar / diminuir o brilho em RGB estático e modo de luz branca
8.4 Aumentar / diminuir a velocidade no modo dinâmico RGB
8.5 Interruptor de luz branca
8.6 interruptor de luz RGB
8.7 Tecla de modo
8.8 RGB Static Color
8.9 Modo de música
Quando o brilho está diminuído, a bateria precisa ser substituída.
Tipo de bateria (não incluída): 2x AAA 1,5 V
Calex Smart app
Consulte o manual C1 para conectar a luminária de chão ao aplicativo.
NO - Montering
1. Koble rammene i aluminium med kontaktene.
2. Koble til LED -stripelyset, ta av papirdekselet og trykk forsiktig LED
-stripelampen inn i sporet. Dette fungerer best når rammen er i oppreist
posisjon.
3. Trykk dekselet på plass
4. Trykk endehetten på plass
5. Koble begge støtterørene til bunnstativet og fest dem med den
medfølgende sekskantnøkkelen og skruene.
6. Koble gulvlampen til en veggkontakt.
7. Se håndbok C1 for å koble gulvlampen til Calex Smart -appen.
8. Fjernkontrollinstruksjoner:
8.1 Av / på -brytere
8.2 Timer forhåndsinnstillinger
8.3 Øk / senk lysstyrken i statisk RGB og hvitt lys
8.4 Øk / senk hastigheten i dynamisk RGB -modus
8.5 Bryter for hvitt lys
8.6 RGB lysbryter
8.7 Modustast
8.8 RGB statisk farge
8.9 Musikkmodus
Når lysstyrken er dempet, må batteriet byttes ut.
Batteritype (ikke inkludert): 2x AAA 1,5 V
Calex Smart -app
Se håndbok C1 for å koble gulvlampen til appen.
FI - Kokoaminen
1. Liitä alumiinirunkoiset kehykset liittimiin.
2. Liitä LED -nauhavalo, irrota paperikotelo ja paina LED -nauhan valo
varovasti uraan. Tämä toimii parhaiten, kun kehys on pystyasennossa.
3. Paina kansi paikalleen
4. Paina päätykansi paikalleen
5. Liitä molemmat tukiputket alajalustaan ja kiinnitä ne mukana toimitetulla
kuusiokoloavaimella ja ruuveilla.
6. Kytke lattiavalaisin pistorasiaan.
7. Katso käsikirja C1, kun haluat yhdistää lattiavalaisimen Calex Smart
-sovellukseen.
8. Kaukosäätimen ohjeet:
8.1 Virtakytkimet
8.2 Ajastimen esiasetukset
8.3 Lisää / vähennä kirkkautta staattisessa RGB- ja valkoisessa
valotilassa
8.4 Nopeuden lisääminen / vähentäminen dynaamisessa RGB -tilassa
8.5 Valokytkin
8.6 RGB -valokytkin
8.7 Tilapainike
8.8 RGB -staattinen väri
8.9 Musiikkitila
Kun kirkkaus on himmeä, paristo on vaihdettava.
Paristotyyppi (ei sisälly toimitukseen): 2x AAA 1,5 V
Calex Smart -sovellus
Katso lattiavalaisimen liittäminen sovellukseen käsikirjasta C1.
SV - Montering
1. Anslut aluminiumspårramarna med kontakterna.
2. Anslut LED -remsan, ta bort papperslocket och tryck försiktigt in LED
-remsan i spåret. Detta fungerar bäst när ramen är i upprätt läge.
3. Tryck på locket på plats
4. Tryck på ändlocket på plats
5. Anslut båda stödrören till bottenstället och säkra dem med den
medföljande insexnyckeln och skruvarna.
6. Anslut golvlampan till ett vägguttag.
7. Se handbok C1 för att ansluta golvlampan till Calex Smart -appen.
8. Fjärrkontroll instruktioner:
8.1 På / av -omkopplare
8.2 Timer förinställningar
8.3 Öka / minska ljusstyrkan i statiskt RGB- och vitt ljusläge
8.4 Öka / minska hastigheten i dynamiskt RGB -läge
8.5 Vit ljusbrytare
8.6 RGB -ljusbrytare
8.7 Lägesknapp
8.8 RGB statisk färg
8.9 Musikläge
När ljusstyrkan är nedtonad måste batteriet bytas ut.
Batterityp (ingår ej): 2x AAA 1,5 V
Calex Smart -app
Se manual C1 för att ansluta golvlampan till appen.
DA - Montering
1. Tilslut aluminiumsrammede rammer med stik.
2. Tilslut LED -strimmellyset, fjern papirdækslet, og tryk forsigtigt LED
-strimmellyset ind i rillen. Dette fungerer bedst, når rammen er i oprejst
position.
3. Tryk låget på plads
4. Tryk endehætten på plads
5. Tilslut begge støtterør til bundstativet, og fastgør dem med den
medfølgende sekskantnøgle og skruer.
6. Sæt gulvlampen i en stikkontakt.
7. Se Manual C1 for at tilslutte gulvlampen til Calex Smart -appen.
8. Fjernbetjeningsinstruktioner:
8.1 Tænd / sluk kontakter
8.2 Timer forudindstillinger
8.3 Forøg / formindsk lysstyrken i statisk RGB og hvidt lys
8.4 Forøg / sænk hastigheden i dynamisk RGB -tilstand
8.5 Hvid lyskontakt
8.6 RGB -lysafbryder
8.7 Mode -tast
8.8 RGB statisk farve
8.9 Musiktilstand
Når lysstyrken er dæmpet, skal batteriet udskiftes.
Batteritype (medfølger ikke): 2x AAA 1,5 V
Calex Smart app
Se manual C1 for at tilslutte gulvlampen til appen.
C
M
Y
CM
MY
CY
CMY
K
ai1629462289105_A_(5301000500_Corner lamp)_print.pdf 10 20-8-2021 14:24:50

EN - Assembling
1. Connect the aluminum grooved frames with the connectors.
2. Connect the LED strip light, peel o the paper cover and gently press the
LED strip light into the groove. This works best when the frame is in an
upright position.
3. Press the cover into place
4. Press the end-cap into place
5. Connect both support tubes to the bottom stand and secure these with the
supplied hex key and screws.
6. Plug the floor lamp in to a wall socket.
7. See Manual C1 to connect the floor lamp to the Calex Smart app.
8. Remote control instructions:
8.1 On / o switches
8.2 Timer presets
8.3 Increase / decrease brightness in static RGB and
white light mode
8.4 Increase / decrease speed in RGB dynamic mode
8.5 White light switch
8.6 RGB light switch
8.7 Mode key
8.8 RGB Static Color
8. 9 Music Mode
When the brightness is dimmed, the battery needs to be replaced.
Battery type (not included): 2x AAA 1.5 V
Calex Smart app
Please refer to manual C1 to connect the floor lamp to the app.
NL - Montage
1. Verbind de aluminium gegroefde frames met de connectoren.
2. Sluit de LED-stripverlichting aan, verwijder de papieren afdekking en druk
de LED-stripverlichting voorzichtig in de groef. Dit werkt het beste als het
frame rechtop staat.
3. Druk het deksel op zijn plaats
4. Druk de eindkap op zijn plaats
5. Verbind beide steunbuizen met de onderste standaard en zet deze vast
met de meegeleverde inbussleutel en schroeven.
6. Steek de staande lamp in een stopcontact.
7. Zie Handleiding C1 om de vloerlamp te verbinden met de Calex Smart app.
8. Afstandsbediening instructies:
8.1 Aan/uit schakelaars
8.2 Timervoorinstellingen
8.3 Helderheid verhogen/verlagen in statische RGB- en witlichtmodus
8.4 Snelheid verhogen/verlagen in dynamische RGB-modus
8.5 Witlichtschakelaar
8.6 RGB-lichtschakelaar
8.7 Modustoets
8.8 Statische RGB-kleur
8. 9 Muziekmodus
Wanneer de helderheid is gedimd, moet de batterij worden vervangen.
Batterijtype (niet inbegrepen): 2x AAA 1,5 V
Calex Smart-app
Raadpleeg handleiding C1 om de vloerlamp met de app te verbinden.
FR - Assemblage
1. Connectez les cadres rainurés en aluminium avec les connecteurs.
2. Connectez la bande lumineuse LED, retirez le couvercle en papier et
appuyez doucement sur la bande lumineuse LED dans la rainure. Cela
fonctionne mieux lorsque le cadre est en position verticale.
3. Appuyez sur le couvercle en place
4. Appuyez sur l'embout en place
5. Connectez les deux tubes de support au support inférieur et fixez-les avec
la clé hexagonale et les vis fournies.
6. Branchez le lampadaire sur une prise murale.
7. Voir le manuel C1 pour connecter le lampadaire à l'application Calex Smart.
8. Instructions de contrôle à distance :
8.1 Interrupteurs marche/arrêt
8.2 Préréglages de la minuterie
8.3 Augmenter / diminuer la luminosité en mode RVB statique et lumière
blanche
8.4 Augmenter / diminuer la vitesse en mode dynamique RVB
8.5 Interrupteur de lumière blanche
8.6 Interrupteur d'éclairage RVB
8.7 Touche mode
8.8 Couleur statique RVB
8. 9 Mode Musique
Lorsque la luminosité diminue, la batterie doit être remplacée.
Type de pile (non inclus) : 2x AAA 1,5 V
Application Calex Smart
Veuillez vous référer au manuel C1 pour connecter le lampadaire à l'application.
DE - Montage
1. Verbinden Sie die Aluminium-Rillenrahmen mit den Verbindern.
2. Schließen Sie das LED-Streifenlicht an, ziehen Sie die Papierabdeckung ab
und drücken Sie das LED-Streifenlicht vorsichtig in die Nut. Dies
funktioniert am besten, wenn sich der Rahmen in einer aufrechten Position
befindet.
3. Drücken Sie die Abdeckung fest
4. Drücken Sie die Endkappe fest
5. Verbinden Sie beide Stützrohre mit dem unteren Ständer und sichern Sie
diese mit dem mitgelieferten Inbusschlüssel und Schrauben.
6. Stecken Sie die Stehlampe in eine Steckdose.
7. Siehe Handbuch C1, um die Stehleuchte mit der Calex Smart App zu
verbinden.
8. Anweisungen zur Fernbedienung:
8.1 Ein-/Ausschalter
8.2 Timer-Voreinstellungen
8.3 Helligkeit im statischen RGB- und Weißlichtmodus erhöhen/verringern
8.4 Geschwindigkeit im RGB-Dynamikmodus erhöhen/verringern
8.5 Weißlichtschalter
8.6 RGB-Lichtschalter
8.7 Modustaste
8.8 Statische RGB-Farbe
8. 9 Musikmodus
Wenn die Helligkeit gedimmt wird, muss die Batterie ersetzt werden.
Batterietyp (nicht im Lieferumfang enthalten): 2x AAA 1,5 V
Calex Smart-App
Bitte beachten Sie das Handbuch C1, um die Stehleuchte mit der App zu verbinden.
PL - Montaż
1. Połącz aluminiowe ramy rowkowane ze złączami.
2. Podłącz lampkę paska LED, zdejmij papierową osłonę i delikatnie wciśnij
lampkę paska LED w rowek. Działa to najlepiej, gdy rama jest w pozycji
pionowej.
3. Wciśnij pokrywę na miejsce
4. Wciśnij zaślepkę na miejsce
5. Podłącz obie rurki podtrzymujące do dolnej podstawy i zabezpiecz je
dostarczonym kluczem sześciokątnym i śrubami.
6. Podłącz lampę podłogową do gniazdka ściennego.
7. Zobacz instrukcję C1, aby podłączyć lampę podłogową do aplikacji Calex
Smart.
8. Instrukcje zdalnego sterowania:
8.1 Włącznik / wyłącznik
8.2 Ustawienia timera
8.3 Zwiększ/zmniejsz jasność w trybie statycznego RGB i białego światła
8.4 Zwiększanie / zmniejszanie prędkości w trybie dynamicznym RGB
8.5 Przełącznik światła białego
8.6 włącznik światła RGB
8.7 Klawisz trybu
8.8 Statyczny kolor RGB
8.9 Tryb muzyczny
Gdy jasność jest przyciemniona, bateria wymaga wymiany.
Typ baterii (brak w zestawie): 2x AAA 1,5 V
Calex Smart app
Aby podłączyć lampę podłogową do aplikacji, zapoznaj się z instrukcją C1.
CS - Sestavování
1. Spojte hliníkové drážkované rámy s konektory.
2. Připojte LED páskové světlo, odlepte papírový kryt a jemně zatlačte LED
páskové světlo do drážky. To funguje nejlépe, když je rám ve vzpřímené
poloze.
3. Zatlačte kryt na místo
4. Zatlačte koncovku na místo
5. Připojte obě nosné trubky ke spodnímu stojanu a zajistěte je dodaným
šestihranným klíčem a šrouby.
6. Zapojte stojací lampu do zásuvky ve zdi.
7. Podle příručky C1 připojte stojací lampu k aplikaci Calex Smart.
8. Pokyny pro dálkové ovládání:
8.1 Vypínače
8.2 Předvolby časovače
8.3 Zvýšení / snížení jasu v režimu statického RGB a bílého světla
8.4 Zvýšení / snížení rychlosti v dynamickém režimu RGB
8.5 Přepínač bílého světla
8.6 Přepínač světel RGB
8.7 Tlačítko režimu
8.8 RGB statická barva
8.9 Režim hudby
Když je jas ztlumený, je třeba vyměnit baterii.
Typ baterie (není součástí dodávky): 2x AAA 1,5 V.
Aplikace Calex Smart
Pro připojení podlahové lampy k aplikaci viz příručka C1.
IT - Assemblaggio
1. Collegare i telai scanalati in alluminio con i connettori.
2. Collegare la striscia luminosa a LED, staccare il coperchio di carta e
premere delicatamente la striscia luminosa a LED nella scanalatura.
Funziona meglio quando il telaio è in posizione verticale.
3. Premere il coperchio in posizione
4. Premere il cappuccio in posizione
5. Collegare entrambi i tubi di supporto al supporto inferiore e fissarli con la
chiave esagonale e le viti in dotazione.
6. Collegare la lampada da terra a una presa a muro.
7. Consultare il Manuale C1 per collegare la lampada da terra all'app Calex
Smart.
8. Istruzioni per il telecomando:
8.1 Interruttori di accensione/spegnimento
8.2 Preimpostazioni timer
8.3 Aumenta/diminuisci la luminosità in modalità RGB statica e luce
bianca
8.4 Aumenta/diminuisci la velocità in modalità dinamica RGB
8.5 Interruttore luce bianca
8.6 Interruttore della luce RGB
8.7 Tasto modalità
8.8 Colore statico RGB
8.9 Modalità musica
Quando la luminosità è ridotta, è necessario sostituire la batteria.
Tipo di batteria (non inclusa): 2x AAA 1,5 V
App Calex Smart
Fare riferimento al manuale C1 per collegare la lampada da terra all'app.
SK - Zostavenie
1. Spojte hliníkové drážkované rámy s konektormi.
2. Pripojte svetlo LED pásika, odlepte papierový kryt a jemne zatlačte svetlo
LED pásika do drážky. Toto funguje najlepšie, keď je rám vo vzpriamenej
polohe.
3. Zatlačte kryt na miesto
4. Zatlačte koncový kryt na miesto
5. Pripojte obe nosné trubice k spodnému stojanu a zaistite ich dodaným
šesťhranným kľúčom a skrutkami.
6. Zapojte podlahové svietidlo do zásuvky v stene.
7. Pripojenie stojacej lampy k aplikácii Calex Smart nájdete v príručke C1.
8. Pokyny na diaľkové ovládanie:
8.1 Vypínače
8.2 Predvoľby časovača
8.3 Zvýšenie / zníženie jasu v režime statického RGB a bieleho svetla
8.4 Zvýšenie / zníženie rýchlosti v dynamickom režime RGB
8.5 Spínač bieleho svetla
8.6 Prepínač svetla RGB
8.7 Tlačidlo režimu
8.8 RGB statická farba
8.9 Režim hudby
Keď je jas stlmený, je potrebné vymeniť batériu.
Typ batérie (nie je súčasťou dodávky): 2x AAA 1,5 V.
Aplikácia Calex Smart
Pripojenie stojacej lampy k aplikácii nájdete v príručke C1.
RO - Asamblare
1. Conectați cadrele canelate din aluminiu cu conectorii.
2. Conectați lumina cu bandă LED, desprindeți capacul de hârtie și apăsați
ușor lumina cu bandă LED în canelură. Acest lucru funcționează cel mai
bine atunci când cadrul este în poziție verticală.
3. Apăsați capacul în poziție
4. Apăsați capacul în poziție
5. Conectați ambele tuburi de sprijin la suportul inferior și fixați-le cu cheia
hexagonală și șuruburile furnizate.
6. Conectați lampa de podea la o priză de perete.
7. Consultați Manualul C1 pentru a conecta veioza la aplicația Calex Smart.
8. Instrucțiuni de control de la distanță:
8.1 Comutatoare de pornire / oprire
8.2 Presetări ale temporizatorului
8.3 Măriți / micșorați luminozitatea în modul static RGB și lumină albă
8.4 Măriți / micșorați viteza în modul dinamic RGB
8.5 Comutator de lumină albă
8.6 Comutator de lumină RGB
8.7 Tasta de mod
8.8 RGB Static Color
8.9 Mod muzică
Când luminozitatea este estompată, bateria trebuie înlocuită.
Tipul bateriei (nu este inclus): 2x AAA 1,5 V
Aplicația Calex Smart
Vă rugăm să consultați manualul C1 pentru a conecta lampa de podea la
aplicație.
ES - Montaje
1. Conecte los marcos ranurados de aluminio con los conectores.
2. Conecte la tira de luz LED, retire la cubierta de papel y presione
suavemente la tira de luz LED en la ranura. Esto funciona mejor cuando el
marco está en posición vertical.
3. Presione la tapa en su lugar
4. Presione la tapa del extremo en su lugar
5. Conecte ambos tubos de soporte al soporte inferior y asegúrelos con la
llave hexagonal y los tornillos suministrados.
6. Enchufe la lámpara de pie a un enchufe de pared.
7. Consulte el Manual C1 para conectar la lámpara de pie a la aplicación Calex
Smart.
8. Instrucciones de control remoto:
8.1 Interruptores de encendido / apagado
8.2 Preajustes del temporizador
8.3 Aumentar / disminuir el brillo en RGB estático y modo de luz blanca
8.4 Aumentar / disminuir la velocidad en modo dinámico RGB
8.5 Interruptor de luz blanca
8.6 Interruptor de luz RGB
8.7 Tecla de modo
8.8 Color estático RGB
8.9 Modo Música
Cuando se atenúa el brillo, es necesario reemplazar la batería.
Tipo de batería (no incluida): 2x AAA 1,5 V
Aplicación Calex Smart
Consulte el manual C1 para conectar la lámpara de pie a la aplicación.
PT - Montagem
1. Conecte as estruturas ranhuradas de alumínio com os conectores.
2. Conecte a fita de LED, retire a tampa de papel e pressione suavemente a
fita de LED na ranhura. Isso funciona melhor quando o quadro está na
posição vertical.
3. Pressione a tampa no lugar
4. Pressione a tampa final no lugar
5. Conecte os dois tubos de suporte ao pedestal inferior e prenda-os com a
chave sextavada e os parafusos fornecidos.
6. Conecte a luminária de chão a uma tomada de parede.
7. Consulte o Manual C1 para conectar a luminária de chão ao aplicativo Calex
Smart.
8. Instruções de controle remoto:
8.1 Chaves liga / desliga
8.2 predefinições de temporizador
8.3 Aumentar / diminuir o brilho em RGB estático e modo de luz branca
8.4 Aumentar / diminuir a velocidade no modo dinâmico RGB
8.5 Interruptor de luz branca
8.6 interruptor de luz RGB
8.7 Tecla de modo
8.8 RGB Static Color
8.9 Modo de música
Quando o brilho está diminuído, a bateria precisa ser substituída.
Tipo de bateria (não incluída): 2x AAA 1,5 V
Calex Smart app
Consulte o manual C1 para conectar a luminária de chão ao aplicativo.
NO - Montering
1. Koble rammene i aluminium med kontaktene.
2. Koble til LED -stripelyset, ta av papirdekselet og trykk forsiktig LED
-stripelampen inn i sporet. Dette fungerer best når rammen er i oppreist
posisjon.
3. Trykk dekselet på plass
4. Trykk endehetten på plass
5. Koble begge støtterørene til bunnstativet og fest dem med den
medfølgende sekskantnøkkelen og skruene.
6. Koble gulvlampen til en veggkontakt.
7. Se håndbok C1 for å koble gulvlampen til Calex Smart -appen.
8. Fjernkontrollinstruksjoner:
8.1 Av / på -brytere
8.2 Timer forhåndsinnstillinger
8.3 Øk / senk lysstyrken i statisk RGB og hvitt lys
8.4 Øk / senk hastigheten i dynamisk RGB -modus
8.5 Bryter for hvitt lys
8.6 RGB lysbryter
8.7 Modustast
8.8 RGB statisk farge
8.9 Musikkmodus
Når lysstyrken er dempet, må batteriet byttes ut.
Batteritype (ikke inkludert): 2x AAA 1,5 V
Calex Smart -app
Se håndbok C1 for å koble gulvlampen til appen.
FI - Kokoaminen
1. Liitä alumiinirunkoiset kehykset liittimiin.
2. Liitä LED -nauhavalo, irrota paperikotelo ja paina LED -nauhan valo
varovasti uraan. Tämä toimii parhaiten, kun kehys on pystyasennossa.
3. Paina kansi paikalleen
4. Paina päätykansi paikalleen
5. Liitä molemmat tukiputket alajalustaan ja kiinnitä ne mukana toimitetulla
kuusiokoloavaimella ja ruuveilla.
6. Kytke lattiavalaisin pistorasiaan.
7. Katso käsikirja C1, kun haluat yhdistää lattiavalaisimen Calex Smart
-sovellukseen.
8. Kaukosäätimen ohjeet:
8.1 Virtakytkimet
8.2 Ajastimen esiasetukset
8.3 Lisää / vähennä kirkkautta staattisessa RGB- ja valkoisessa
valotilassa
8.4 Nopeuden lisääminen / vähentäminen dynaamisessa RGB -tilassa
8.5 Valokytkin
8.6 RGB -valokytkin
8.7 Tilapainike
8.8 RGB -staattinen väri
8.9 Musiikkitila
Kun kirkkaus on himmeä, paristo on vaihdettava.
Paristotyyppi (ei sisälly toimitukseen): 2x AAA 1,5 V
Calex Smart -sovellus
Katso lattiavalaisimen liittäminen sovellukseen käsikirjasta C1.
SV - Montering
1. Anslut aluminiumspårramarna med kontakterna.
2. Anslut LED -remsan, ta bort papperslocket och tryck försiktigt in LED
-remsan i spåret. Detta fungerar bäst när ramen är i upprätt läge.
3. Tryck på locket på plats
4. Tryck på ändlocket på plats
5. Anslut båda stödrören till bottenstället och säkra dem med den
medföljande insexnyckeln och skruvarna.
6. Anslut golvlampan till ett vägguttag.
7. Se handbok C1 för att ansluta golvlampan till Calex Smart -appen.
8. Fjärrkontroll instruktioner:
8.1 På / av -omkopplare
8.2 Timer förinställningar
8.3 Öka / minska ljusstyrkan i statiskt RGB- och vitt ljusläge
8.4 Öka / minska hastigheten i dynamiskt RGB -läge
8.5 Vit ljusbrytare
8.6 RGB -ljusbrytare
8.7 Lägesknapp
8.8 RGB statisk färg
8.9 Musikläge
När ljusstyrkan är nedtonad måste batteriet bytas ut.
Batterityp (ingår ej): 2x AAA 1,5 V
Calex Smart -app
Se manual C1 för att ansluta golvlampan till appen.
DA - Montering
1. Tilslut aluminiumsrammede rammer med stik.
2. Tilslut LED -strimmellyset, fjern papirdækslet, og tryk forsigtigt LED
-strimmellyset ind i rillen. Dette fungerer bedst, når rammen er i oprejst
position.
3. Tryk låget på plads
4. Tryk endehætten på plads
5. Tilslut begge støtterør til bundstativet, og fastgør dem med den
medfølgende sekskantnøgle og skruer.
6. Sæt gulvlampen i en stikkontakt.
7. Se Manual C1 for at tilslutte gulvlampen til Calex Smart -appen.
8. Fjernbetjeningsinstruktioner:
8.1 Tænd / sluk kontakter
8.2 Timer forudindstillinger
8.3 Forøg / formindsk lysstyrken i statisk RGB og hvidt lys
8.4 Forøg / sænk hastigheden i dynamisk RGB -tilstand
8.5 Hvid lyskontakt
8.6 RGB -lysafbryder
8.7 Mode -tast
8.8 RGB statisk farve
8.9 Musiktilstand
Når lysstyrken er dæmpet, skal batteriet udskiftes.
Batteritype (medfølger ikke): 2x AAA 1,5 V
Calex Smart app
Se manual C1 for at tilslutte gulvlampen til appen.
C
M
Y
CM
MY
CY
CMY
K
ai1629462289105_A_(5301000500_Corner lamp)_print.pdf 11 20-8-2021 14:24:50

EN - Assembling
1. Connect the aluminum grooved frames with the connectors.
2. Connect the LED strip light, peel o the paper cover and gently press the
LED strip light into the groove. This works best when the frame is in an
upright position.
3. Press the cover into place
4. Press the end-cap into place
5. Connect both support tubes to the bottom stand and secure these with the
supplied hex key and screws.
6. Plug the floor lamp in to a wall socket.
7. See Manual C1 to connect the floor lamp to the Calex Smart app.
8. Remote control instructions:
8.1 On / o switches
8.2 Timer presets
8.3 Increase / decrease brightness in static RGB and
white light mode
8.4 Increase / decrease speed in RGB dynamic mode
8.5 White light switch
8.6 RGB light switch
8.7 Mode key
8.8 RGB Static Color
8. 9 Music Mode
When the brightness is dimmed, the battery needs to be replaced.
Battery type (not included): 2x AAA 1.5 V
Calex Smart app
Please refer to manual C1 to connect the floor lamp to the app.
NL - Montage
1. Verbind de aluminium gegroefde frames met de connectoren.
2. Sluit de LED-stripverlichting aan, verwijder de papieren afdekking en druk
de LED-stripverlichting voorzichtig in de groef. Dit werkt het beste als het
frame rechtop staat.
3. Druk het deksel op zijn plaats
4. Druk de eindkap op zijn plaats
5. Verbind beide steunbuizen met de onderste standaard en zet deze vast
met de meegeleverde inbussleutel en schroeven.
6. Steek de staande lamp in een stopcontact.
7. Zie Handleiding C1 om de vloerlamp te verbinden met de Calex Smart app.
8. Afstandsbediening instructies:
8.1 Aan/uit schakelaars
8.2 Timervoorinstellingen
8.3 Helderheid verhogen/verlagen in statische RGB- en witlichtmodus
8.4 Snelheid verhogen/verlagen in dynamische RGB-modus
8.5 Witlichtschakelaar
8.6 RGB-lichtschakelaar
8.7 Modustoets
8.8 Statische RGB-kleur
8. 9 Muziekmodus
Wanneer de helderheid is gedimd, moet de batterij worden vervangen.
Batterijtype (niet inbegrepen): 2x AAA 1,5 V
Calex Smart-app
Raadpleeg handleiding C1 om de vloerlamp met de app te verbinden.
FR - Assemblage
1. Connectez les cadres rainurés en aluminium avec les connecteurs.
2. Connectez la bande lumineuse LED, retirez le couvercle en papier et
appuyez doucement sur la bande lumineuse LED dans la rainure. Cela
fonctionne mieux lorsque le cadre est en position verticale.
3. Appuyez sur le couvercle en place
4. Appuyez sur l'embout en place
5. Connectez les deux tubes de support au support inférieur et fixez-les avec
la clé hexagonale et les vis fournies.
6. Branchez le lampadaire sur une prise murale.
7. Voir le manuel C1 pour connecter le lampadaire à l'application Calex Smart.
8. Instructions de contrôle à distance :
8.1 Interrupteurs marche/arrêt
8.2 Préréglages de la minuterie
8.3 Augmenter / diminuer la luminosité en mode RVB statique et lumière
blanche
8.4 Augmenter / diminuer la vitesse en mode dynamique RVB
8.5 Interrupteur de lumière blanche
8.6 Interrupteur d'éclairage RVB
8.7 Touche mode
8.8 Couleur statique RVB
8. 9 Mode Musique
Lorsque la luminosité diminue, la batterie doit être remplacée.
Type de pile (non inclus) : 2x AAA 1,5 V
Application Calex Smart
Veuillez vous référer au manuel C1 pour connecter le lampadaire à l'application.
DE - Montage
1. Verbinden Sie die Aluminium-Rillenrahmen mit den Verbindern.
2. Schließen Sie das LED-Streifenlicht an, ziehen Sie die Papierabdeckung ab
und drücken Sie das LED-Streifenlicht vorsichtig in die Nut. Dies
funktioniert am besten, wenn sich der Rahmen in einer aufrechten Position
befindet.
3. Drücken Sie die Abdeckung fest
4. Drücken Sie die Endkappe fest
5. Verbinden Sie beide Stützrohre mit dem unteren Ständer und sichern Sie
diese mit dem mitgelieferten Inbusschlüssel und Schrauben.
6. Stecken Sie die Stehlampe in eine Steckdose.
7. Siehe Handbuch C1, um die Stehleuchte mit der Calex Smart App zu
verbinden.
8. Anweisungen zur Fernbedienung:
8.1 Ein-/Ausschalter
8.2 Timer-Voreinstellungen
8.3 Helligkeit im statischen RGB- und Weißlichtmodus erhöhen/verringern
8.4 Geschwindigkeit im RGB-Dynamikmodus erhöhen/verringern
8.5 Weißlichtschalter
8.6 RGB-Lichtschalter
8.7 Modustaste
8.8 Statische RGB-Farbe
8. 9 Musikmodus
Wenn die Helligkeit gedimmt wird, muss die Batterie ersetzt werden.
Batterietyp (nicht im Lieferumfang enthalten): 2x AAA 1,5 V
Calex Smart-App
Bitte beachten Sie das Handbuch C1, um die Stehleuchte mit der App zu verbinden.
PL - Montaż
1. Połącz aluminiowe ramy rowkowane ze złączami.
2. Podłącz lampkę paska LED, zdejmij papierową osłonę i delikatnie wciśnij
lampkę paska LED w rowek. Działa to najlepiej, gdy rama jest w pozycji
pionowej.
3. Wciśnij pokrywę na miejsce
4. Wciśnij zaślepkę na miejsce
5. Podłącz obie rurki podtrzymujące do dolnej podstawy i zabezpiecz je
dostarczonym kluczem sześciokątnym i śrubami.
6. Podłącz lampę podłogową do gniazdka ściennego.
7. Zobacz instrukcję C1, aby podłączyć lampę podłogową do aplikacji Calex
Smart.
8. Instrukcje zdalnego sterowania:
8.1 Włącznik / wyłącznik
8.2 Ustawienia timera
8.3 Zwiększ/zmniejsz jasność w trybie statycznego RGB i białego światła
8.4 Zwiększanie / zmniejszanie prędkości w trybie dynamicznym RGB
8.5 Przełącznik światła białego
8.6 włącznik światła RGB
8.7 Klawisz trybu
8.8 Statyczny kolor RGB
8.9 Tryb muzyczny
Gdy jasność jest przyciemniona, bateria wymaga wymiany.
Typ baterii (brak w zestawie): 2x AAA 1,5 V
Calex Smart app
Aby podłączyć lampę podłogową do aplikacji, zapoznaj się z instrukcją C1.
CS - Sestavování
1. Spojte hliníkové drážkované rámy s konektory.
2. Připojte LED páskové světlo, odlepte papírový kryt a jemně zatlačte LED
páskové světlo do drážky. To funguje nejlépe, když je rám ve vzpřímené
poloze.
3. Zatlačte kryt na místo
4. Zatlačte koncovku na místo
5. Připojte obě nosné trubky ke spodnímu stojanu a zajistěte je dodaným
šestihranným klíčem a šrouby.
6. Zapojte stojací lampu do zásuvky ve zdi.
7. Podle příručky C1 připojte stojací lampu k aplikaci Calex Smart.
8. Pokyny pro dálkové ovládání:
8.1 Vypínače
8.2 Předvolby časovače
8.3 Zvýšení / snížení jasu v režimu statického RGB a bílého světla
8.4 Zvýšení / snížení rychlosti v dynamickém režimu RGB
8.5 Přepínač bílého světla
8.6 Přepínač světel RGB
8.7 Tlačítko režimu
8.8 RGB statická barva
8.9 Režim hudby
Když je jas ztlumený, je třeba vyměnit baterii.
Typ baterie (není součástí dodávky): 2x AAA 1,5 V.
Aplikace Calex Smart
Pro připojení podlahové lampy k aplikaci viz příručka C1.
IT - Assemblaggio
1. Collegare i telai scanalati in alluminio con i connettori.
2. Collegare la striscia luminosa a LED, staccare il coperchio di carta e
premere delicatamente la striscia luminosa a LED nella scanalatura.
Funziona meglio quando il telaio è in posizione verticale.
3. Premere il coperchio in posizione
4. Premere il cappuccio in posizione
5. Collegare entrambi i tubi di supporto al supporto inferiore e fissarli con la
chiave esagonale e le viti in dotazione.
6. Collegare la lampada da terra a una presa a muro.
7. Consultare il Manuale C1 per collegare la lampada da terra all'app Calex
Smart.
8. Istruzioni per il telecomando:
8.1 Interruttori di accensione/spegnimento
8.2 Preimpostazioni timer
8.3 Aumenta/diminuisci la luminosità in modalità RGB statica e luce
bianca
8.4 Aumenta/diminuisci la velocità in modalità dinamica RGB
8.5 Interruttore luce bianca
8.6 Interruttore della luce RGB
8.7 Tasto modalità
8.8 Colore statico RGB
8.9 Modalità musica
Quando la luminosità è ridotta, è necessario sostituire la batteria.
Tipo di batteria (non inclusa): 2x AAA 1,5 V
App Calex Smart
Fare riferimento al manuale C1 per collegare la lampada da terra all'app.
SK - Zostavenie
1. Spojte hliníkové drážkované rámy s konektormi.
2. Pripojte svetlo LED pásika, odlepte papierový kryt a jemne zatlačte svetlo
LED pásika do drážky. Toto funguje najlepšie, keď je rám vo vzpriamenej
polohe.
3. Zatlačte kryt na miesto
4. Zatlačte koncový kryt na miesto
5. Pripojte obe nosné trubice k spodnému stojanu a zaistite ich dodaným
šesťhranným kľúčom a skrutkami.
6. Zapojte podlahové svietidlo do zásuvky v stene.
7. Pripojenie stojacej lampy k aplikácii Calex Smart nájdete v príručke C1.
8. Pokyny na diaľkové ovládanie:
8.1 Vypínače
8.2 Predvoľby časovača
8.3 Zvýšenie / zníženie jasu v režime statického RGB a bieleho svetla
8.4 Zvýšenie / zníženie rýchlosti v dynamickom režime RGB
8.5 Spínač bieleho svetla
8.6 Prepínač svetla RGB
8.7 Tlačidlo režimu
8.8 RGB statická farba
8.9 Režim hudby
Keď je jas stlmený, je potrebné vymeniť batériu.
Typ batérie (nie je súčasťou dodávky): 2x AAA 1,5 V.
Aplikácia Calex Smart
Pripojenie stojacej lampy k aplikácii nájdete v príručke C1.
RO - Asamblare
1. Conectați cadrele canelate din aluminiu cu conectorii.
2. Conectați lumina cu bandă LED, desprindeți capacul de hârtie și apăsați
ușor lumina cu bandă LED în canelură. Acest lucru funcționează cel mai
bine atunci când cadrul este în poziție verticală.
3. Apăsați capacul în poziție
4. Apăsați capacul în poziție
5. Conectați ambele tuburi de sprijin la suportul inferior și fixați-le cu cheia
hexagonală și șuruburile furnizate.
6. Conectați lampa de podea la o priză de perete.
7. Consultați Manualul C1 pentru a conecta veioza la aplicația Calex Smart.
8. Instrucțiuni de control de la distanță:
8.1 Comutatoare de pornire / oprire
8.2 Presetări ale temporizatorului
8.3 Măriți / micșorați luminozitatea în modul static RGB și lumină albă
8.4 Măriți / micșorați viteza în modul dinamic RGB
8.5 Comutator de lumină albă
8.6 Comutator de lumină RGB
8.7 Tasta de mod
8.8 RGB Static Color
8.9 Mod muzică
Când luminozitatea este estompată, bateria trebuie înlocuită.
Tipul bateriei (nu este inclus): 2x AAA 1,5 V
Aplicația Calex Smart
Vă rugăm să consultați manualul C1 pentru a conecta lampa de podea la
aplicație.
ES - Montaje
1. Conecte los marcos ranurados de aluminio con los conectores.
2. Conecte la tira de luz LED, retire la cubierta de papel y presione
suavemente la tira de luz LED en la ranura. Esto funciona mejor cuando el
marco está en posición vertical.
3. Presione la tapa en su lugar
4. Presione la tapa del extremo en su lugar
5. Conecte ambos tubos de soporte al soporte inferior y asegúrelos con la
llave hexagonal y los tornillos suministrados.
6. Enchufe la lámpara de pie a un enchufe de pared.
7. Consulte el Manual C1 para conectar la lámpara de pie a la aplicación Calex
Smart.
8. Instrucciones de control remoto:
8.1 Interruptores de encendido / apagado
8.2 Preajustes del temporizador
8.3 Aumentar / disminuir el brillo en RGB estático y modo de luz blanca
8.4 Aumentar / disminuir la velocidad en modo dinámico RGB
8.5 Interruptor de luz blanca
8.6 Interruptor de luz RGB
8.7 Tecla de modo
8.8 Color estático RGB
8.9 Modo Música
Cuando se atenúa el brillo, es necesario reemplazar la batería.
Tipo de batería (no incluida): 2x AAA 1,5 V
Aplicación Calex Smart
Consulte el manual C1 para conectar la lámpara de pie a la aplicación.
PT - Montagem
1. Conecte as estruturas ranhuradas de alumínio com os conectores.
2. Conecte a fita de LED, retire a tampa de papel e pressione suavemente a
fita de LED na ranhura. Isso funciona melhor quando o quadro está na
posição vertical.
3. Pressione a tampa no lugar
4. Pressione a tampa final no lugar
5. Conecte os dois tubos de suporte ao pedestal inferior e prenda-os com a
chave sextavada e os parafusos fornecidos.
6. Conecte a luminária de chão a uma tomada de parede.
7. Consulte o Manual C1 para conectar a luminária de chão ao aplicativo Calex
Smart.
8. Instruções de controle remoto:
8.1 Chaves liga / desliga
8.2 predefinições de temporizador
8.3 Aumentar / diminuir o brilho em RGB estático e modo de luz branca
8.4 Aumentar / diminuir a velocidade no modo dinâmico RGB
8.5 Interruptor de luz branca
8.6 interruptor de luz RGB
8.7 Tecla de modo
8.8 RGB Static Color
8.9 Modo de música
Quando o brilho está diminuído, a bateria precisa ser substituída.
Tipo de bateria (não incluída): 2x AAA 1,5 V
Calex Smart app
Consulte o manual C1 para conectar a luminária de chão ao aplicativo.
NO - Montering
1. Koble rammene i aluminium med kontaktene.
2. Koble til LED -stripelyset, ta av papirdekselet og trykk forsiktig LED
-stripelampen inn i sporet. Dette fungerer best når rammen er i oppreist
posisjon.
3. Trykk dekselet på plass
4. Trykk endehetten på plass
5. Koble begge støtterørene til bunnstativet og fest dem med den
medfølgende sekskantnøkkelen og skruene.
6. Koble gulvlampen til en veggkontakt.
7. Se håndbok C1 for å koble gulvlampen til Calex Smart -appen.
8. Fjernkontrollinstruksjoner:
8.1 Av / på -brytere
8.2 Timer forhåndsinnstillinger
8.3 Øk / senk lysstyrken i statisk RGB og hvitt lys
8.4 Øk / senk hastigheten i dynamisk RGB -modus
8.5 Bryter for hvitt lys
8.6 RGB lysbryter
8.7 Modustast
8.8 RGB statisk farge
8.9 Musikkmodus
Når lysstyrken er dempet, må batteriet byttes ut.
Batteritype (ikke inkludert): 2x AAA 1,5 V
Calex Smart -app
Se håndbok C1 for å koble gulvlampen til appen.
FI - Kokoaminen
1. Liitä alumiinirunkoiset kehykset liittimiin.
2. Liitä LED -nauhavalo, irrota paperikotelo ja paina LED -nauhan valo
varovasti uraan. Tämä toimii parhaiten, kun kehys on pystyasennossa.
3. Paina kansi paikalleen
4. Paina päätykansi paikalleen
5. Liitä molemmat tukiputket alajalustaan ja kiinnitä ne mukana toimitetulla
kuusiokoloavaimella ja ruuveilla.
6. Kytke lattiavalaisin pistorasiaan.
7. Katso käsikirja C1, kun haluat yhdistää lattiavalaisimen Calex Smart
-sovellukseen.
8. Kaukosäätimen ohjeet:
8.1 Virtakytkimet
8.2 Ajastimen esiasetukset
8.3 Lisää / vähennä kirkkautta staattisessa RGB- ja valkoisessa
valotilassa
8.4 Nopeuden lisääminen / vähentäminen dynaamisessa RGB -tilassa
8.5 Valokytkin
8.6 RGB -valokytkin
8.7 Tilapainike
8.8 RGB -staattinen väri
8.9 Musiikkitila
Kun kirkkaus on himmeä, paristo on vaihdettava.
Paristotyyppi (ei sisälly toimitukseen): 2x AAA 1,5 V
Calex Smart -sovellus
Katso lattiavalaisimen liittäminen sovellukseen käsikirjasta C1.
SV - Montering
1. Anslut aluminiumspårramarna med kontakterna.
2. Anslut LED -remsan, ta bort papperslocket och tryck försiktigt in LED
-remsan i spåret. Detta fungerar bäst när ramen är i upprätt läge.
3. Tryck på locket på plats
4. Tryck på ändlocket på plats
5. Anslut båda stödrören till bottenstället och säkra dem med den
medföljande insexnyckeln och skruvarna.
6. Anslut golvlampan till ett vägguttag.
7. Se handbok C1 för att ansluta golvlampan till Calex Smart -appen.
8. Fjärrkontroll instruktioner:
8.1 På / av -omkopplare
8.2 Timer förinställningar
8.3 Öka / minska ljusstyrkan i statiskt RGB- och vitt ljusläge
8.4 Öka / minska hastigheten i dynamiskt RGB -läge
8.5 Vit ljusbrytare
8.6 RGB -ljusbrytare
8.7 Lägesknapp
8.8 RGB statisk färg
8.9 Musikläge
När ljusstyrkan är nedtonad måste batteriet bytas ut.
Batterityp (ingår ej): 2x AAA 1,5 V
Calex Smart -app
Se manual C1 för att ansluta golvlampan till appen.
DA - Montering
1. Tilslut aluminiumsrammede rammer med stik.
2. Tilslut LED -strimmellyset, fjern papirdækslet, og tryk forsigtigt LED
-strimmellyset ind i rillen. Dette fungerer bedst, når rammen er i oprejst
position.
3. Tryk låget på plads
4. Tryk endehætten på plads
5. Tilslut begge støtterør til bundstativet, og fastgør dem med den
medfølgende sekskantnøgle og skruer.
6. Sæt gulvlampen i en stikkontakt.
7. Se Manual C1 for at tilslutte gulvlampen til Calex Smart -appen.
8. Fjernbetjeningsinstruktioner:
8.1 Tænd / sluk kontakter
8.2 Timer forudindstillinger
8.3 Forøg / formindsk lysstyrken i statisk RGB og hvidt lys
8.4 Forøg / sænk hastigheden i dynamisk RGB -tilstand
8.5 Hvid lyskontakt
8.6 RGB -lysafbryder
8.7 Mode -tast
8.8 RGB statisk farve
8.9 Musiktilstand
Når lysstyrken er dæmpet, skal batteriet udskiftes.
Batteritype (medfølger ikke): 2x AAA 1,5 V
Calex Smart app
Se manual C1 for at tilslutte gulvlampen til appen.
C
M
Y
CM
MY
CY
CMY
K
ai1629462289105_A_(5301000500_Corner lamp)_print.pdf 12 20-8-2021 14:24:50

EN - Assembling
1. Connect the aluminum grooved frames with the connectors.
2. Connect the LED strip light, peel o the paper cover and gently press the
LED strip light into the groove. This works best when the frame is in an
upright position.
3. Press the cover into place
4. Press the end-cap into place
5. Connect both support tubes to the bottom stand and secure these with the
supplied hex key and screws.
6. Plug the floor lamp in to a wall socket.
7. See Manual C1 to connect the floor lamp to the Calex Smart app.
8. Remote control instructions:
8.1 On / o switches
8.2 Timer presets
8.3 Increase / decrease brightness in static RGB and
white light mode
8.4 Increase / decrease speed in RGB dynamic mode
8.5 White light switch
8.6 RGB light switch
8.7 Mode key
8.8 RGB Static Color
8. 9 Music Mode
When the brightness is dimmed, the battery needs to be replaced.
Battery type (not included): 2x AAA 1.5 V
Calex Smart app
Please refer to manual C1 to connect the floor lamp to the app.
NL - Montage
1. Verbind de aluminium gegroefde frames met de connectoren.
2. Sluit de LED-stripverlichting aan, verwijder de papieren afdekking en druk
de LED-stripverlichting voorzichtig in de groef. Dit werkt het beste als het
frame rechtop staat.
3. Druk het deksel op zijn plaats
4. Druk de eindkap op zijn plaats
5. Verbind beide steunbuizen met de onderste standaard en zet deze vast
met de meegeleverde inbussleutel en schroeven.
6. Steek de staande lamp in een stopcontact.
7. Zie Handleiding C1 om de vloerlamp te verbinden met de Calex Smart app.
8. Afstandsbediening instructies:
8.1 Aan/uit schakelaars
8.2 Timervoorinstellingen
8.3 Helderheid verhogen/verlagen in statische RGB- en witlichtmodus
8.4 Snelheid verhogen/verlagen in dynamische RGB-modus
8.5 Witlichtschakelaar
8.6 RGB-lichtschakelaar
8.7 Modustoets
8.8 Statische RGB-kleur
8. 9 Muziekmodus
Wanneer de helderheid is gedimd, moet de batterij worden vervangen.
Batterijtype (niet inbegrepen): 2x AAA 1,5 V
Calex Smart-app
Raadpleeg handleiding C1 om de vloerlamp met de app te verbinden.
FR - Assemblage
1. Connectez les cadres rainurés en aluminium avec les connecteurs.
2. Connectez la bande lumineuse LED, retirez le couvercle en papier et
appuyez doucement sur la bande lumineuse LED dans la rainure. Cela
fonctionne mieux lorsque le cadre est en position verticale.
3. Appuyez sur le couvercle en place
4. Appuyez sur l'embout en place
5. Connectez les deux tubes de support au support inférieur et fixez-les avec
la clé hexagonale et les vis fournies.
6. Branchez le lampadaire sur une prise murale.
7. Voir le manuel C1 pour connecter le lampadaire à l'application Calex Smart.
8. Instructions de contrôle à distance :
8.1 Interrupteurs marche/arrêt
8.2 Préréglages de la minuterie
8.3 Augmenter / diminuer la luminosité en mode RVB statique et lumière
blanche
8.4 Augmenter / diminuer la vitesse en mode dynamique RVB
8.5 Interrupteur de lumière blanche
8.6 Interrupteur d'éclairage RVB
8.7 Touche mode
8.8 Couleur statique RVB
8. 9 Mode Musique
Lorsque la luminosité diminue, la batterie doit être remplacée.
Type de pile (non inclus) : 2x AAA 1,5 V
Application Calex Smart
Veuillez vous référer au manuel C1 pour connecter le lampadaire à l'application.
DE - Montage
1. Verbinden Sie die Aluminium-Rillenrahmen mit den Verbindern.
2. Schließen Sie das LED-Streifenlicht an, ziehen Sie die Papierabdeckung ab
und drücken Sie das LED-Streifenlicht vorsichtig in die Nut. Dies
funktioniert am besten, wenn sich der Rahmen in einer aufrechten Position
befindet.
3. Drücken Sie die Abdeckung fest
4. Drücken Sie die Endkappe fest
5. Verbinden Sie beide Stützrohre mit dem unteren Ständer und sichern Sie
diese mit dem mitgelieferten Inbusschlüssel und Schrauben.
6. Stecken Sie die Stehlampe in eine Steckdose.
7. Siehe Handbuch C1, um die Stehleuchte mit der Calex Smart App zu
verbinden.
8. Anweisungen zur Fernbedienung:
8.1 Ein-/Ausschalter
8.2 Timer-Voreinstellungen
8.3 Helligkeit im statischen RGB- und Weißlichtmodus erhöhen/verringern
8.4 Geschwindigkeit im RGB-Dynamikmodus erhöhen/verringern
8.5 Weißlichtschalter
8.6 RGB-Lichtschalter
8.7 Modustaste
8.8 Statische RGB-Farbe
8. 9 Musikmodus
Wenn die Helligkeit gedimmt wird, muss die Batterie ersetzt werden.
Batterietyp (nicht im Lieferumfang enthalten): 2x AAA 1,5 V
Calex Smart-App
Bitte beachten Sie das Handbuch C1, um die Stehleuchte mit der App zu verbinden.
PL - Montaż
1. Połącz aluminiowe ramy rowkowane ze złączami.
2. Podłącz lampkę paska LED, zdejmij papierową osłonę i delikatnie wciśnij
lampkę paska LED w rowek. Działa to najlepiej, gdy rama jest w pozycji
pionowej.
3. Wciśnij pokrywę na miejsce
4. Wciśnij zaślepkę na miejsce
5. Podłącz obie rurki podtrzymujące do dolnej podstawy i zabezpiecz je
dostarczonym kluczem sześciokątnym i śrubami.
6. Podłącz lampę podłogową do gniazdka ściennego.
7. Zobacz instrukcję C1, aby podłączyć lampę podłogową do aplikacji Calex
Smart.
8. Instrukcje zdalnego sterowania:
8.1 Włącznik / wyłącznik
8.2 Ustawienia timera
8.3 Zwiększ/zmniejsz jasność w trybie statycznego RGB i białego światła
8.4 Zwiększanie / zmniejszanie prędkości w trybie dynamicznym RGB
8.5 Przełącznik światła białego
8.6 włącznik światła RGB
8.7 Klawisz trybu
8.8 Statyczny kolor RGB
8.9 Tryb muzyczny
Gdy jasność jest przyciemniona, bateria wymaga wymiany.
Typ baterii (brak w zestawie): 2x AAA 1,5 V
Calex Smart app
Aby podłączyć lampę podłogową do aplikacji, zapoznaj się z instrukcją C1.
CS - Sestavování
1. Spojte hliníkové drážkované rámy s konektory.
2. Připojte LED páskové světlo, odlepte papírový kryt a jemně zatlačte LED
páskové světlo do drážky. To funguje nejlépe, když je rám ve vzpřímené
poloze.
3. Zatlačte kryt na místo
4. Zatlačte koncovku na místo
5. Připojte obě nosné trubky ke spodnímu stojanu a zajistěte je dodaným
šestihranným klíčem a šrouby.
6. Zapojte stojací lampu do zásuvky ve zdi.
7. Podle příručky C1 připojte stojací lampu k aplikaci Calex Smart.
8. Pokyny pro dálkové ovládání:
8.1 Vypínače
8.2 Předvolby časovače
8.3 Zvýšení / snížení jasu v režimu statického RGB a bílého světla
8.4 Zvýšení / snížení rychlosti v dynamickém režimu RGB
8.5 Přepínač bílého světla
8.6 Přepínač světel RGB
8.7 Tlačítko režimu
8.8 RGB statická barva
8.9 Režim hudby
Když je jas ztlumený, je třeba vyměnit baterii.
Typ baterie (není součástí dodávky): 2x AAA 1,5 V.
Aplikace Calex Smart
Pro připojení podlahové lampy k aplikaci viz příručka C1.
IT - Assemblaggio
1. Collegare i telai scanalati in alluminio con i connettori.
2. Collegare la striscia luminosa a LED, staccare il coperchio di carta e
premere delicatamente la striscia luminosa a LED nella scanalatura.
Funziona meglio quando il telaio è in posizione verticale.
3. Premere il coperchio in posizione
4. Premere il cappuccio in posizione
5. Collegare entrambi i tubi di supporto al supporto inferiore e fissarli con la
chiave esagonale e le viti in dotazione.
6. Collegare la lampada da terra a una presa a muro.
7. Consultare il Manuale C1 per collegare la lampada da terra all'app Calex
Smart.
8. Istruzioni per il telecomando:
8.1 Interruttori di accensione/spegnimento
8.2 Preimpostazioni timer
8.3 Aumenta/diminuisci la luminosità in modalità RGB statica e luce
bianca
8.4 Aumenta/diminuisci la velocità in modalità dinamica RGB
8.5 Interruttore luce bianca
8.6 Interruttore della luce RGB
8.7 Tasto modalità
8.8 Colore statico RGB
8.9 Modalità musica
Quando la luminosità è ridotta, è necessario sostituire la batteria.
Tipo di batteria (non inclusa): 2x AAA 1,5 V
App Calex Smart
Fare riferimento al manuale C1 per collegare la lampada da terra all'app.
SK - Zostavenie
1. Spojte hliníkové drážkované rámy s konektormi.
2. Pripojte svetlo LED pásika, odlepte papierový kryt a jemne zatlačte svetlo
LED pásika do drážky. Toto funguje najlepšie, keď je rám vo vzpriamenej
polohe.
3. Zatlačte kryt na miesto
4. Zatlačte koncový kryt na miesto
5. Pripojte obe nosné trubice k spodnému stojanu a zaistite ich dodaným
šesťhranným kľúčom a skrutkami.
6. Zapojte podlahové svietidlo do zásuvky v stene.
7. Pripojenie stojacej lampy k aplikácii Calex Smart nájdete v príručke C1.
8. Pokyny na diaľkové ovládanie:
8.1 Vypínače
8.2 Predvoľby časovača
8.3 Zvýšenie / zníženie jasu v režime statického RGB a bieleho svetla
8.4 Zvýšenie / zníženie rýchlosti v dynamickom režime RGB
8.5 Spínač bieleho svetla
8.6 Prepínač svetla RGB
8.7 Tlačidlo režimu
8.8 RGB statická farba
8.9 Režim hudby
Keď je jas stlmený, je potrebné vymeniť batériu.
Typ batérie (nie je súčasťou dodávky): 2x AAA 1,5 V.
Aplikácia Calex Smart
Pripojenie stojacej lampy k aplikácii nájdete v príručke C1.
RO - Asamblare
1. Conectați cadrele canelate din aluminiu cu conectorii.
2. Conectați lumina cu bandă LED, desprindeți capacul de hârtie și apăsați
ușor lumina cu bandă LED în canelură. Acest lucru funcționează cel mai
bine atunci când cadrul este în poziție verticală.
3. Apăsați capacul în poziție
4. Apăsați capacul în poziție
5. Conectați ambele tuburi de sprijin la suportul inferior și fixați-le cu cheia
hexagonală și șuruburile furnizate.
6. Conectați lampa de podea la o priză de perete.
7. Consultați Manualul C1 pentru a conecta veioza la aplicația Calex Smart.
8. Instrucțiuni de control de la distanță:
8.1 Comutatoare de pornire / oprire
8.2 Presetări ale temporizatorului
8.3 Măriți / micșorați luminozitatea în modul static RGB și lumină albă
8.4 Măriți / micșorați viteza în modul dinamic RGB
8.5 Comutator de lumină albă
8.6 Comutator de lumină RGB
8.7 Tasta de mod
8.8 RGB Static Color
8.9 Mod muzică
Când luminozitatea este estompată, bateria trebuie înlocuită.
Tipul bateriei (nu este inclus): 2x AAA 1,5 V
Aplicația Calex Smart
Vă rugăm să consultați manualul C1 pentru a conecta lampa de podea la
aplicație.
ES - Montaje
1. Conecte los marcos ranurados de aluminio con los conectores.
2. Conecte la tira de luz LED, retire la cubierta de papel y presione
suavemente la tira de luz LED en la ranura. Esto funciona mejor cuando el
marco está en posición vertical.
3. Presione la tapa en su lugar
4. Presione la tapa del extremo en su lugar
5. Conecte ambos tubos de soporte al soporte inferior y asegúrelos con la
llave hexagonal y los tornillos suministrados.
6. Enchufe la lámpara de pie a un enchufe de pared.
7. Consulte el Manual C1 para conectar la lámpara de pie a la aplicación Calex
Smart.
8. Instrucciones de control remoto:
8.1 Interruptores de encendido / apagado
8.2 Preajustes del temporizador
8.3 Aumentar / disminuir el brillo en RGB estático y modo de luz blanca
8.4 Aumentar / disminuir la velocidad en modo dinámico RGB
8.5 Interruptor de luz blanca
8.6 Interruptor de luz RGB
8.7 Tecla de modo
8.8 Color estático RGB
8.9 Modo Música
Cuando se atenúa el brillo, es necesario reemplazar la batería.
Tipo de batería (no incluida): 2x AAA 1,5 V
Aplicación Calex Smart
Consulte el manual C1 para conectar la lámpara de pie a la aplicación.
PT - Montagem
1. Conecte as estruturas ranhuradas de alumínio com os conectores.
2. Conecte a fita de LED, retire a tampa de papel e pressione suavemente a
fita de LED na ranhura. Isso funciona melhor quando o quadro está na
posição vertical.
3. Pressione a tampa no lugar
4. Pressione a tampa final no lugar
5. Conecte os dois tubos de suporte ao pedestal inferior e prenda-os com a
chave sextavada e os parafusos fornecidos.
6. Conecte a luminária de chão a uma tomada de parede.
7. Consulte o Manual C1 para conectar a luminária de chão ao aplicativo Calex
Smart.
8. Instruções de controle remoto:
8.1 Chaves liga / desliga
8.2 predefinições de temporizador
8.3 Aumentar / diminuir o brilho em RGB estático e modo de luz branca
8.4 Aumentar / diminuir a velocidade no modo dinâmico RGB
8.5 Interruptor de luz branca
8.6 interruptor de luz RGB
8.7 Tecla de modo
8.8 RGB Static Color
8.9 Modo de música
Quando o brilho está diminuído, a bateria precisa ser substituída.
Tipo de bateria (não incluída): 2x AAA 1,5 V
Calex Smart app
Consulte o manual C1 para conectar a luminária de chão ao aplicativo.
NO - Montering
1. Koble rammene i aluminium med kontaktene.
2. Koble til LED -stripelyset, ta av papirdekselet og trykk forsiktig LED
-stripelampen inn i sporet. Dette fungerer best når rammen er i oppreist
posisjon.
3. Trykk dekselet på plass
4. Trykk endehetten på plass
5. Koble begge støtterørene til bunnstativet og fest dem med den
medfølgende sekskantnøkkelen og skruene.
6. Koble gulvlampen til en veggkontakt.
7. Se håndbok C1 for å koble gulvlampen til Calex Smart -appen.
8. Fjernkontrollinstruksjoner:
8.1 Av / på -brytere
8.2 Timer forhåndsinnstillinger
8.3 Øk / senk lysstyrken i statisk RGB og hvitt lys
8.4 Øk / senk hastigheten i dynamisk RGB -modus
8.5 Bryter for hvitt lys
8.6 RGB lysbryter
8.7 Modustast
8.8 RGB statisk farge
8.9 Musikkmodus
Når lysstyrken er dempet, må batteriet byttes ut.
Batteritype (ikke inkludert): 2x AAA 1,5 V
Calex Smart -app
Se håndbok C1 for å koble gulvlampen til appen.
FI - Kokoaminen
1. Liitä alumiinirunkoiset kehykset liittimiin.
2. Liitä LED -nauhavalo, irrota paperikotelo ja paina LED -nauhan valo
varovasti uraan. Tämä toimii parhaiten, kun kehys on pystyasennossa.
3. Paina kansi paikalleen
4. Paina päätykansi paikalleen
5. Liitä molemmat tukiputket alajalustaan ja kiinnitä ne mukana toimitetulla
kuusiokoloavaimella ja ruuveilla.
6. Kytke lattiavalaisin pistorasiaan.
7. Katso käsikirja C1, kun haluat yhdistää lattiavalaisimen Calex Smart
-sovellukseen.
8. Kaukosäätimen ohjeet:
8.1 Virtakytkimet
8.2 Ajastimen esiasetukset
8.3 Lisää / vähennä kirkkautta staattisessa RGB- ja valkoisessa
valotilassa
8.4 Nopeuden lisääminen / vähentäminen dynaamisessa RGB -tilassa
8.5 Valokytkin
8.6 RGB -valokytkin
8.7 Tilapainike
8.8 RGB -staattinen väri
8.9 Musiikkitila
Kun kirkkaus on himmeä, paristo on vaihdettava.
Paristotyyppi (ei sisälly toimitukseen): 2x AAA 1,5 V
Calex Smart -sovellus
Katso lattiavalaisimen liittäminen sovellukseen käsikirjasta C1.
SV - Montering
1. Anslut aluminiumspårramarna med kontakterna.
2. Anslut LED -remsan, ta bort papperslocket och tryck försiktigt in LED
-remsan i spåret. Detta fungerar bäst när ramen är i upprätt läge.
3. Tryck på locket på plats
4. Tryck på ändlocket på plats
5. Anslut båda stödrören till bottenstället och säkra dem med den
medföljande insexnyckeln och skruvarna.
6. Anslut golvlampan till ett vägguttag.
7. Se handbok C1 för att ansluta golvlampan till Calex Smart -appen.
8. Fjärrkontroll instruktioner:
8.1 På / av -omkopplare
8.2 Timer förinställningar
8.3 Öka / minska ljusstyrkan i statiskt RGB- och vitt ljusläge
8.4 Öka / minska hastigheten i dynamiskt RGB -läge
8.5 Vit ljusbrytare
8.6 RGB -ljusbrytare
8.7 Lägesknapp
8.8 RGB statisk färg
8.9 Musikläge
När ljusstyrkan är nedtonad måste batteriet bytas ut.
Batterityp (ingår ej): 2x AAA 1,5 V
Calex Smart -app
Se manual C1 för att ansluta golvlampan till appen.
DA - Montering
1. Tilslut aluminiumsrammede rammer med stik.
2. Tilslut LED -strimmellyset, fjern papirdækslet, og tryk forsigtigt LED
-strimmellyset ind i rillen. Dette fungerer bedst, når rammen er i oprejst
position.
3. Tryk låget på plads
4. Tryk endehætten på plads
5. Tilslut begge støtterør til bundstativet, og fastgør dem med den
medfølgende sekskantnøgle og skruer.
6. Sæt gulvlampen i en stikkontakt.
7. Se Manual C1 for at tilslutte gulvlampen til Calex Smart -appen.
8. Fjernbetjeningsinstruktioner:
8.1 Tænd / sluk kontakter
8.2 Timer forudindstillinger
8.3 Forøg / formindsk lysstyrken i statisk RGB og hvidt lys
8.4 Forøg / sænk hastigheden i dynamisk RGB -tilstand
8.5 Hvid lyskontakt
8.6 RGB -lysafbryder
8.7 Mode -tast
8.8 RGB statisk farve
8.9 Musiktilstand
Når lysstyrken er dæmpet, skal batteriet udskiftes.
Batteritype (medfølger ikke): 2x AAA 1,5 V
Calex Smart app
Se manual C1 for at tilslutte gulvlampen til appen.
C
M
Y
CM
MY
CY
CMY
K
ai1629462289105_A_(5301000500_Corner lamp)_print.pdf 13 20-8-2021 14:24:51

B

MAX.
... W
IP20
(IP23)(IP44)
(IP65)
TYPE
XYZ
1009
11 12 13 14
8-10 mm
15
IP...
16 17
06
3332 34
07 08
18
M
19 20
... °C
21 22 23 24 25
26 30
31
27 28 29
This manual, B, contains descriptions of all parameters, specifications and relevant icons in
accordance with international standards and safety regulations. However, these do not always apply
to the product you purchased. Refer to the icons in the supplementary manual, A, to see which of the
following points apply to this product.
c Conformity with all relevant EU Directive requirements
Safety: if applicable: only use this device for intended purpose; do not use this device if damaged or
defective. If this product is damaged, especially if the cable or fitting is damaged, this product must
be shut down immediately. In this case, replacement is required; before replacing, turn o power and
let device cool to avoid electrical shock or burn. To disconnect voltage, turn o power.
The adapter (if applicable) must be installed near the device, not connected to any other adapter, and
easily accessible. Products may only be used in combination with the original adapter.
This product should only be opened by an authorized technician when maintenance is required. Never
carry out repairs yourself.
w
Removal of your product. This product is made of high quality materials and parts that can be recycled. If
you see this symbol on your product, it means that the product is covered by EU Directive 2002/96 / EC.
Ask your own local government about the way in which electrical and electronic products are collected
separately in your region. When disposing of old products, observe local legislation and do not dispose
of these products in the normal household waste. Properly disposing of old products will prevent
adverse eects on the environment and public health.
Always turn o the power before starting any installation, maintenance, or repair. If applicable, before
you start, make sure that there is no voltage on the product when you start the assembly. The best
way to do this is to disconnect the power from the mains until the moment installation, repairs or the
assembly is complete. If in doubt, consult a qualified electrician or the store where you purchased the
product. Make sure that you always install the product according to the relevant regulations.
According to some regulations, electrical products must only be installed by a qualified electrician.
01 before installing this product, check which plugs and screws are best suited for the intended
surface;
02 do not connect the product to a power supply while it is still in the package;
03 do not connect the product to a power supply while it is wound onto a reel;
04 do not use the product when covered or recessed into a surface;
05 do not open this product.
06 Safety Class I:
this product must to be connected to an earthed socket;
the luminaire is equipped
with a ground terminal and must therefore be earthed; connect the ground wire (yellow green
vein) to the 1-marked terminal.
07 Safety Class II: This product is double insulated and does not need to be connected to an earthed
socket.
08 Safety Class III: this product is only suitable for very low safety voltage (e.g. 12V)
09 Intended use: only indoors
10 The luminaire must not be covered with insulating material.
11 The luminaire is not suitable for installation in the bathroom, at least not in the indicated area
12 The luminaire in only suitable for wall mounting
13 The luminaire is only suitable for ceiling mounting
14 The luminaire is suitable for wall and ceiling mounting
15 Strip the wire as indicated in the icon
16 IP20: This product is intended for use in dry spaces indoors
IP23: Rain resistant
IP44 : Splash proof. The product is protected against the intrusion of solid objects greater than 1
mm in size and water spray from any direction.
IP54: Protected from limited dust ingress, protected from water spray from any direction.
IP65: The product is dustproof and protected from water jets. The luminaire cannot be used if the
housing is broken.
17 This luminaire is (IP20) for components in the ceiling and (IP21) (IP23) (IP44) (IP65) for
components under the ceiling, provided that this luminaire is installed correctly.
18 If the protective glass is damaged, it must be replaced immediately.
19
Always respect the minimum distance between the light source and the illuminated materials as
indicated in the icon
01 02 03 04 05
36 37
35
20 Max. ... W: Use only lamps of the correct type and never exceed the maximum indicated wattage.
21 Use a heat-resistant cable to connect the luminaire to the mains
22 This luminaire is only suitable for lamps with built-in protection or ‘low pressure’ lamps. An extra
protective glass is not required.
23 The luminaire is equipped with a built-in fuse. If the luminaire does not work after replacing the
lamp, this fuse must be replaced. If the fixed connection wiring of the installation can be touched,
this may only be done by a qualified electrician.
24 This luminaire is suitable for top-mirror lamps
25 The luminaire is only suitable for fixed mounting and must therefore not be connected to a power
source by means of a connecting cord.
26 Type X: If the external flexible cable or cord of this fixture is damaged, it will be replaced by a
special cord or cord exclusively available from the manufacturer or its service agent.
Type Y: If the external flexible cable or cord of this luminaire is damaged, it should only be
replaced by the manufacturer or its service agent or a similarly qualified person in order to avoid
a hazard.
Type Z: the external flexible cable or cord of this luminaire cannot be replaced; If the cord is
damaged, the fixture will be destroyed.
27 Note that no electrical or other wires in the ceiling or wall are touched during the installation of
this luminaire.
28
Electrical installation wires must never be clamped or twisted (twisted) between the luminaire and the
mounting surface.
29 This product is dimmable and compatible with a TRIAC dimmer.
30 This product uses LED technology and is only suitable for it.
31 The light source of this luminaire is not replaceable; when the end of the service life has been
reached, the entire luminaire must be replaced.
32 Replaceable (LED only) light source by a professional
33
This product must not be covered by objects. Keep this product away from sharp edges, oils and
heat.
34
Never use this product in an area where there is a risk of explosion or near flammable substances
or gases.
35
If this product is passed on to third parties, manuals must be included.
36
Keep this product out of the reach of children.
37
Turn o the product when you leave the room.
Warranty: Any changes and/or modifications to the product will void the warranty. We cannot
accept any liability for damage caused by incorrect use of the product.
Disclaimer: Designs and specifications might be subjected to change without notice. All logos,
brands and used product references are trademarks or registered trademarks of their respective
holders and hereby recognized as such.

EN
This manual, B, contains descriptions of all parameters, specifications and relevant icons in
accordance with international standards and safety regulations. However, these do not always apply
to the product you purchased. Refer to the icons in the supplementary manual, A, to see which of the
following points apply to this product.
c Conformity with all relevant EU Directive requirements
Safety: if applicable: only use this device for intended purpose; do not use this device if damaged or
defective. If this product is damaged, especially if the cable or fitting is damaged, this product must
be shut down immediately. In this case, replacement is required; before replacing, turn o power and
let device cool to avoid electrical shock or burn. To disconnect voltage, turn o power.
The adapter (if applicable) must be installed near the device, not connected to any other adapter, and
easily accessible. Products may only be used in combination with the original adapter.
This product should only be opened by an authorized technician when maintenance is required. Never
carry out repairs yourself.
w
Removal of your product. This product is made of high quality materials and parts that can be recycled. If
you see this symbol on your product, it means that the product is covered by EU Directive 2002/96 / EC.
Ask your own local government about the way in which electrical and electronic products are collected
separately in your region. When disposing of old products, observe local legislation and do not dispose
of these products in the normal household waste. Properly disposing of old products will prevent
adverse eects on the environment and public health.
Always turn o the power before starting any installation, maintenance, or repair. If applicable, before
you start, make sure that there is no voltage on the product when you start the assembly. The best
way to do this is to disconnect the power from the mains until the moment installation, repairs or the
assembly is complete. If in doubt, consult a qualified electrician or the store where you purchased the
product. Make sure that you always install the product according to the relevant regulations.
According to some regulations, electrical products must only be installed by a qualified electrician.
01 before installing this product, check which plugs and screws are best suited for the intended
surface;
02 do not connect the product to a power supply while it is still in the package;
03 do not connect the product to a power supply while it is wound onto a reel;
04 do not use the product when covered or recessed into a surface;
05 do not open this product.
06 Safety Class I:
this product must to be connected to an earthed socket;
the luminaire is equipped
with a ground terminal and must therefore be earthed; connect the ground wire (yellow green
vein) to the 1-marked terminal.
07 Safety Class II: This product is double insulated and does not need to be connected to an earthed
socket.
08 Safety Class III: this product is only suitable for very low safety voltage (e.g. 12V)
09 Intended use: only indoors
10 The luminaire must not be covered with insulating material.
11 The luminaire is not suitable for installation in the bathroom, at least not in the indicated area
12 The luminaire in only suitable for wall mounting
13 The luminaire is only suitable for ceiling mounting
14 The luminaire is suitable for wall and ceiling mounting
15 Strip the wire as indicated in the icon
16 IP20: This product is intended for use in dry spaces indoors
IP23: Rain resistant
IP44 : Splash proof. The product is protected against the intrusion of solid objects greater than 1
mm in size and water spray from any direction.
IP54: Protected from limited dust ingress, protected from water spray from any direction.
IP65: The product is dustproof and protected from water jets. The luminaire cannot be used if the
housing is broken.
17 This luminaire is (IP20) for components in the ceiling and (IP21) (IP23) (IP44) (IP65) for
components under the ceiling, provided that this luminaire is installed correctly.
18 If the protective glass is damaged, it must be replaced immediately.
19
Always respect the minimum distance between the light source and the illuminated materials as
indicated in the icon
20 Max. ... W: Use only lamps of the correct type and never exceed the maximum indicated wattage.
21 Use a heat-resistant cable to connect the luminaire to the mains
22 This luminaire is only suitable for lamps with built-in protection or ‘low pressure’ lamps. An extra
protective glass is not required.
23 The luminaire is equipped with a built-in fuse. If the luminaire does not work after replacing the
lamp, this fuse must be replaced. If the fixed connection wiring of the installation can be touched,
this may only be done by a qualified electrician.
24 This luminaire is suitable for top-mirror lamps
25 The luminaire is only suitable for fixed mounting and must therefore not be connected to a power
source by means of a connecting cord.
26 Type X: If the external flexible cable or cord of this fixture is damaged, it will be replaced by a
special cord or cord exclusively available from the manufacturer or its service agent.
Type Y: If the external flexible cable or cord of this luminaire is damaged, it should only be
replaced by the manufacturer or its service agent or a similarly qualified person in order to avoid
a hazard.
Type Z: the external flexible cable or cord of this luminaire cannot be replaced; If the cord is
damaged, the fixture will be destroyed.
27 Note that no electrical or other wires in the ceiling or wall are touched during the installation of
this luminaire.
28
Electrical installation wires must never be clamped or twisted (twisted) between the luminaire and the
mounting surface.
29 This product is dimmable and compatible with a TRIAC dimmer.
30 This product uses LED technology and is only suitable for it.
31 The light source of this luminaire is not replaceable; when the end of the service life has been
reached, the entire luminaire must be replaced.
32 Replaceable (LED only) light source by a professional
33
This product must not be covered by objects. Keep this product away from sharp edges, oils and
heat.
34
Never use this product in an area where there is a risk of explosion or near flammable substances
or gases.
35
If this product is passed on to third parties, manuals must be included.
36
Keep this product out of the reach of children.
37
Turn o the product when you leave the room.
Warranty: Any changes and/or modifications to the product will void the warranty. We cannot
accept any liability for damage caused by incorrect use of the product.
Disclaimer: Designs and specifications might be subjected to change without notice. All logos,
brands and used product references are trademarks or registered trademarks of their respective
holders and hereby recognized as such.

This manual, B, contains descriptions of all parameters, specifications and relevant icons in
accordance with international standards and safety regulations. However, these do not always apply
to the product you purchased. Refer to the icons in the supplementary manual, A, to see which of the
following points apply to this product.
c Conformity with all relevant EU Directive requirements
Safety: if applicable: only use this device for intended purpose; do not use this device if damaged or
defective. If this product is damaged, especially if the cable or fitting is damaged, this product must
be shut down immediately. In this case, replacement is required; before replacing, turn o power and
let device cool to avoid electrical shock or burn. To disconnect voltage, turn o power.
The adapter (if applicable) must be installed near the device, not connected to any other adapter, and
easily accessible. Products may only be used in combination with the original adapter.
This product should only be opened by an authorized technician when maintenance is required. Never
carry out repairs yourself.
w
Removal of your product. This product is made of high quality materials and parts that can be recycled. If
you see this symbol on your product, it means that the product is covered by EU Directive 2002/96 / EC.
Ask your own local government about the way in which electrical and electronic products are collected
separately in your region. When disposing of old products, observe local legislation and do not dispose
of these products in the normal household waste. Properly disposing of old products will prevent
adverse eects on the environment and public health.
Always turn o the power before starting any installation, maintenance, or repair. If applicable, before
you start, make sure that there is no voltage on the product when you start the assembly. The best
way to do this is to disconnect the power from the mains until the moment installation, repairs or the
assembly is complete. If in doubt, consult a qualified electrician or the store where you purchased the
product. Make sure that you always install the product according to the relevant regulations.
According to some regulations, electrical products must only be installed by a qualified electrician.
01 before installing this product, check which plugs and screws are best suited for the intended
surface;
02 do not connect the product to a power supply while it is still in the package;
03 do not connect the product to a power supply while it is wound onto a reel;
04 do not use the product when covered or recessed into a surface;
05 do not open this product.
06 Safety Class I:
this product must to be connected to an earthed socket;
the luminaire is equipped
with a ground terminal and must therefore be earthed; connect the ground wire (yellow green
vein) to the 1-marked terminal.
07 Safety Class II: This product is double insulated and does not need to be connected to an earthed
socket.
08 Safety Class III: this product is only suitable for very low safety voltage (e.g. 12V)
09 Intended use: only indoors
10 The luminaire must not be covered with insulating material.
11 The luminaire is not suitable for installation in the bathroom, at least not in the indicated area
12 The luminaire in only suitable for wall mounting
13 The luminaire is only suitable for ceiling mounting
14 The luminaire is suitable for wall and ceiling mounting
15 Strip the wire as indicated in the icon
16 IP20: This product is intended for use in dry spaces indoors
IP23: Rain resistant
IP44 : Splash proof. The product is protected against the intrusion of solid objects greater than 1
mm in size and water spray from any direction.
IP54: Protected from limited dust ingress, protected from water spray from any direction.
IP65: The product is dustproof and protected from water jets. The luminaire cannot be used if the
housing is broken.
17 This luminaire is (IP20) for components in the ceiling and (IP21) (IP23) (IP44) (IP65) for
components under the ceiling, provided that this luminaire is installed correctly.
18 If the protective glass is damaged, it must be replaced immediately.
19
Always respect the minimum distance between the light source and the illuminated materials as
indicated in the icon
Deze handleiding, B, bevat beschrijvingen van alle parameters, specificaties en relevante
pictogrammen in overeenstemming met internationale normen en veiligheidsvoorschriften. Deze zijn
echter niet altijd van toepassing op het product dat u heeft gekocht. Raadpleeg de pictogrammen in
de aanvullende handleiding, A, om te zien welke van de volgende punten van toepassing zijn op dit
product.
c Conformiteit met alle vereisten van EU-richtlijnen
Veiligheid: indien van toepassing: gebruik dit apparaat alleen waarvoor het bedoeld is; Gebruik dit
apparaat niet als het beschadigd of defect is. Als dit product is beschadigd, vooral als de kabel of
fitting is beschadigd, moet dit product onmiddellijk worden uitgeschakeld. In dit geval is vervanging
vereist; Schakel het apparaat uit en laat het apparaat afkoelen voordat u het vervangt om elektrische
schokken of brandwonden te voorkomen. Schakel de stroom uit om de spanning los te koppelen.
De adapter (indien van toepassing) moet in de buurt van het apparaat worden geïnstalleerd, niet op
een andere adapter worden aangesloten en moet gemakkelijk toegankelijk zijn. Producten mogen
alleen gebruikt worden in combinatie met de originele adapter. Dit product mag alleen worden geopend
door een geautoriseerde technicus wanneer onderhoud vereist is. Voer nooit zelf reparaties uit.
w
Verwijdering van uw product. Dit product is gemaakt van hoogwaardige materialen en onderdelen
die kunnen worden gerecycled. Als u dit symbool op uw product ziet, betekent dit dat het product valt
onder EU-richtlijn 2002/96 / EG. Vraag uw eigen gemeente naar de manier waarop elektrische en
elektronische producten in uw regio gescheiden worden ingezameld. Neem bij het afvoeren van oude
producten de lokale wetgeving in acht en gooi deze producten niet bij het normale huisvuil. Door oude
producten op de juiste manier af te voeren, worden nadelige gevolgen voor het milieu en de
volksgezondheid voorkomen.
Schakel altijd de stroom uit voordat u met installatie, onderhoud of reparatie begint. Controleer,
indien van toepassing, voordat u begint, of er geen spanning op het product staat wanneer u met de
montage begint. De beste manier om dit te doen, is door de stroom van het lichtnet los te koppelen tot
het moment dat de installatie, reparatie of montage is voltooid. Raadpleeg bij twijfel een
gekwalificeerde elektricien of de winkel waar u het product heeft gekocht. Zorg ervoor dat u het
product altijd installeert volgens de relevante voorschriften. Volgens sommige voorschriften mogen
elektrische producten alleen worden geïnstalleerd door een gekwalificeerde elektricien.
01 controleer voordat u dit product installeert welke pluggen en schroeven het meest geschikt zijn
voor het beoogde oppervlak;
02 sluit het product niet aan op een stopcontact terwijl het nog in de verpakking zit;
03 sluit het product niet aan op een stopcontact terwijl het op een haspel is gewikkeld;
04 gebruik het product niet afgedekt of verzonken in een oppervlak;
05 open dit product niet.
06 Veiligheidsklasse I: dit product moet worden aangesloten op een geaard stopcontact; het
armatuur is voorzien van een aardklem en moet daarom worden geaard; sluit de aardingsdraad
(geelgroene ader) aan op de 1-gemarkeerde klem.
07 Veiligheidsklasse II: Dit product is dubbel geïsoleerd en hoeft niet op een geaard stopcontact te
worden aangesloten.
08 Veiligheidsklasse III: dit product is alleen geschikt voor zeer lage veiligheidsspanning (bijv.12 V)
09 Beoogd gebruik: alleen binnen
10 Het armatuur mag niet bedekt zijn met isolatiemateriaal.
11 Het armatuur is niet geschikt voor installatie in de badkamer, althans niet in de aangegeven ruimte
12 Het armatuur is alleen geschikt voor wandmontage
13 Het armatuur is alleen geschikt voor plafondmontage
14 Het armatuur is geschikt voor wand- en plafondmontage
15 Strip de draad zoals aangegeven in het pictogram
16 IP20: Dit product is bedoeld voor gebruik in droge ruimtes binnenshuis
IP23: Regenbestendig
IP44: spatwaterdicht. Het product is beschermd tegen het binnendringen van vaste voorwerpen
groter dan 1 mm en tegen waterspatten vanuit elke richting.
IP54: Beschermd tegen beperkt binnendringen van stof, beschermd tegen waterspatten vanuit
elke richting.
IP65: Het product is stofdicht en beschermd tegen waterstralen. De armatuur kan niet worden
gebruikt als de behuizing kapot is.
20 Max. ... W: Use only lamps of the correct type and never exceed the maximum indicated wattage.
21 Use a heat-resistant cable to connect the luminaire to the mains
22 This luminaire is only suitable for lamps with built-in protection or ‘low pressure’ lamps. An extra
protective glass is not required.
23 The luminaire is equipped with a built-in fuse. If the luminaire does not work after replacing the
lamp, this fuse must be replaced. If the fixed connection wiring of the installation can be touched,
this may only be done by a qualified electrician.
24 This luminaire is suitable for top-mirror lamps
25 The luminaire is only suitable for fixed mounting and must therefore not be connected to a power
source by means of a connecting cord.
26 Type X: If the external flexible cable or cord of this fixture is damaged, it will be replaced by a
special cord or cord exclusively available from the manufacturer or its service agent.
Type Y: If the external flexible cable or cord of this luminaire is damaged, it should only be
replaced by the manufacturer or its service agent or a similarly qualified person in order to avoid
a hazard.
Type Z: the external flexible cable or cord of this luminaire cannot be replaced; If the cord is
damaged, the fixture will be destroyed.
27 Note that no electrical or other wires in the ceiling or wall are touched during the installation of
this luminaire.
28
Electrical installation wires must never be clamped or twisted (twisted) between the luminaire and the
mounting surface.
29 This product is dimmable and compatible with a TRIAC dimmer.
30 This product uses LED technology and is only suitable for it.
31 The light source of this luminaire is not replaceable; when the end of the service life has been
reached, the entire luminaire must be replaced.
32 Replaceable (LED only) light source by a professional
33
This product must not be covered by objects. Keep this product away from sharp edges, oils and
heat.
34
Never use this product in an area where there is a risk of explosion or near flammable substances
or gases.
35
If this product is passed on to third parties, manuals must be included.
36
Keep this product out of the reach of children.
37
Turn o the product when you leave the room.
Warranty: Any changes and/or modifications to the product will void the warranty. We cannot
accept any liability for damage caused by incorrect use of the product.
Disclaimer: Designs and specifications might be subjected to change without notice. All logos,
brands and used product references are trademarks or registered trademarks of their respective
holders and hereby recognized as such.
17 Dit armatuur is (IP20) voor componenten in het plafond en (IP21) (IP23) (IP44) (IP65) voor
componenten onder het plafond, mits deze armatuur correct is geïnstalleerd.
18 Als het beschermglas is beschadigd, moet het onmiddellijk worden vervangen.
19 Respecteer altijd de minimale afstand tussen de lichtbron en de verlichte materialen zoals
aangegeven in het pictogram
20 Max. ... W: Gebruik alleen lampen van het juiste type en overschrijd nooit het maximaal
aangegeven wattage.
21 Gebruik een hittebestendige kabel om de armatuur op het lichtnet aan te sluiten
22 Dit armatuur is alleen geschikt voor lampen met ingebouwde bescherming of ‘lagedruk’ lampen.
Een extra beschermglas is niet nodig.
23 Het armatuur is voorzien van een ingebouwde zekering. Als de armatuur niet werkt na het
vervangen van de lamp, moet deze zekering worden vervangen. Als de vaste aansluitbedrading
van de installatie kan worden aangeraakt, mag dit alleen worden gedaan door een
gekwalificeerde elektricien.
24 Dit armatuur is geschikt voor kopspiegellampen
25 Het armatuur is alleen geschikt voor vaste montage en mag dus niet met een aansluitsnoer op
een stroombron worden aangesloten.
26 Type X: Vervangen door een speciaal snoer of snoer dat uitsluitend verkrijgbaar is bij de
fabrikant of diens servicevertegenwoordiger.
Type Y: Als de externe flexibele kabel of het snoer van deze armatuur is beschadigd, mag deze
alleen worden vervangen door de fabrikant of zijn serviceagent of een vergelijkbaar
gekwalificeerd persoon om gevaar te voorkomen.
Type Z: de externe flexibele kabel of snoer van deze armatuur kan niet worden vervangen; Als
het snoer beschadigd is, gaat het armatuur kapot.
27 Merk op dat er geen elektrische of andere draden in het plafond of de muur worden aangeraakt
tijdens de installatie van deze armatuur.
28 Elektrische installatiedraden mogen nooit worden geklemd of getwist (getwist) tussen de
armatuur en het montageoppervlak.
29 Dit product is dimbaar en compatibel met een TRIAC-dimmer.
30 Dit product maakt gebruik van led-technologie en is er alleen voor geschikt.
31 De lichtbron van dit armatuur is niet vervangbaar; wanneer het einde van de levensduur is
bereikt, moet de hele armatuur worden vervangen.
32 Vervangbare (alleen LED) lichtbron door een professional
33 Dit product mag niet worden afgedekt door voorwerpen. Houd dit product uit de buurt van
scherpe randen, olie en hitte.
34 Gebruik dit product nooit in een ruimte met explosiegevaar of in de buurt van brandbare stoen
of gassen.
35 Als dit product aan derden wordt doorgegeven, moeten handleidingen worden bijgevoegd.
36 Bewaar dit product buiten het bereik van kinderen.
37 Schakel het product uit als u de kamer verlaat.
Garantie: Elke verandering en / of aanpassing aan het product maakt de garantie ongeldig. Voor
schade ontstaan door verkeerd gebruik van het product kunnen wij geen aansprakelijkheid
aanvaarden.
Disclaimer: Ontwerpen en specificaties kunnen zonder voorafgaande kennisgeving worden
gewijzigd. Alle logo's, merken en gebruikte productreferenties zijn handelsmerken of geregistreerde
handelsmerken van hun respectievelijke houders en worden hierbij als zodanig erkend.

NL
This manual, B, contains descriptions of all parameters, specifications and relevant icons in
accordance with international standards and safety regulations. However, these do not always apply
to the product you purchased. Refer to the icons in the supplementary manual, A, to see which of the
following points apply to this product.
c Conformity with all relevant EU Directive requirements
Safety: if applicable: only use this device for intended purpose; do not use this device if damaged or
defective. If this product is damaged, especially if the cable or fitting is damaged, this product must
be shut down immediately. In this case, replacement is required; before replacing, turn o power and
let device cool to avoid electrical shock or burn. To disconnect voltage, turn o power.
The adapter (if applicable) must be installed near the device, not connected to any other adapter, and
easily accessible. Products may only be used in combination with the original adapter.
This product should only be opened by an authorized technician when maintenance is required. Never
carry out repairs yourself.
w
Removal of your product. This product is made of high quality materials and parts that can be recycled. If
you see this symbol on your product, it means that the product is covered by EU Directive 2002/96 / EC.
Ask your own local government about the way in which electrical and electronic products are collected
separately in your region. When disposing of old products, observe local legislation and do not dispose
of these products in the normal household waste. Properly disposing of old products will prevent
adverse eects on the environment and public health.
Always turn o the power before starting any installation, maintenance, or repair. If applicable, before
you start, make sure that there is no voltage on the product when you start the assembly. The best
way to do this is to disconnect the power from the mains until the moment installation, repairs or the
assembly is complete. If in doubt, consult a qualified electrician or the store where you purchased the
product. Make sure that you always install the product according to the relevant regulations.
According to some regulations, electrical products must only be installed by a qualified electrician.
01 before installing this product, check which plugs and screws are best suited for the intended
surface;
02 do not connect the product to a power supply while it is still in the package;
03 do not connect the product to a power supply while it is wound onto a reel;
04 do not use the product when covered or recessed into a surface;
05 do not open this product.
06 Safety Class I:
this product must to be connected to an earthed socket;
the luminaire is equipped
with a ground terminal and must therefore be earthed; connect the ground wire (yellow green
vein) to the 1-marked terminal.
07 Safety Class II: This product is double insulated and does not need to be connected to an earthed
socket.
08 Safety Class III: this product is only suitable for very low safety voltage (e.g. 12V)
09 Intended use: only indoors
10 The luminaire must not be covered with insulating material.
11 The luminaire is not suitable for installation in the bathroom, at least not in the indicated area
12 The luminaire in only suitable for wall mounting
13 The luminaire is only suitable for ceiling mounting
14 The luminaire is suitable for wall and ceiling mounting
15 Strip the wire as indicated in the icon
16 IP20: This product is intended for use in dry spaces indoors
IP23: Rain resistant
IP44 : Splash proof. The product is protected against the intrusion of solid objects greater than 1
mm in size and water spray from any direction.
IP54: Protected from limited dust ingress, protected from water spray from any direction.
IP65: The product is dustproof and protected from water jets. The luminaire cannot be used if the
housing is broken.
17 This luminaire is (IP20) for components in the ceiling and (IP21) (IP23) (IP44) (IP65) for
components under the ceiling, provided that this luminaire is installed correctly.
18 If the protective glass is damaged, it must be replaced immediately.
19
Always respect the minimum distance between the light source and the illuminated materials as
indicated in the icon
Deze handleiding, B, bevat beschrijvingen van alle parameters, specificaties en relevante
pictogrammen in overeenstemming met internationale normen en veiligheidsvoorschriften. Deze zijn
echter niet altijd van toepassing op het product dat u heeft gekocht. Raadpleeg de pictogrammen in
de aanvullende handleiding, A, om te zien welke van de volgende punten van toepassing zijn op dit
product.
c Conformiteit met alle vereisten van EU-richtlijnen
Veiligheid: indien van toepassing: gebruik dit apparaat alleen waarvoor het bedoeld is; Gebruik dit
apparaat niet als het beschadigd of defect is. Als dit product is beschadigd, vooral als de kabel of
fitting is beschadigd, moet dit product onmiddellijk worden uitgeschakeld. In dit geval is vervanging
vereist; Schakel het apparaat uit en laat het apparaat afkoelen voordat u het vervangt om elektrische
schokken of brandwonden te voorkomen. Schakel de stroom uit om de spanning los te koppelen.
De adapter (indien van toepassing) moet in de buurt van het apparaat worden geïnstalleerd, niet op
een andere adapter worden aangesloten en moet gemakkelijk toegankelijk zijn. Producten mogen
alleen gebruikt worden in combinatie met de originele adapter. Dit product mag alleen worden geopend
door een geautoriseerde technicus wanneer onderhoud vereist is. Voer nooit zelf reparaties uit.
w
Verwijdering van uw product. Dit product is gemaakt van hoogwaardige materialen en onderdelen
die kunnen worden gerecycled. Als u dit symbool op uw product ziet, betekent dit dat het product valt
onder EU-richtlijn 2002/96 / EG. Vraag uw eigen gemeente naar de manier waarop elektrische en
elektronische producten in uw regio gescheiden worden ingezameld. Neem bij het afvoeren van oude
producten de lokale wetgeving in acht en gooi deze producten niet bij het normale huisvuil. Door oude
producten op de juiste manier af te voeren, worden nadelige gevolgen voor het milieu en de
volksgezondheid voorkomen.
Schakel altijd de stroom uit voordat u met installatie, onderhoud of reparatie begint. Controleer,
indien van toepassing, voordat u begint, of er geen spanning op het product staat wanneer u met de
montage begint. De beste manier om dit te doen, is door de stroom van het lichtnet los te koppelen tot
het moment dat de installatie, reparatie of montage is voltooid. Raadpleeg bij twijfel een
gekwalificeerde elektricien of de winkel waar u het product heeft gekocht. Zorg ervoor dat u het
product altijd installeert volgens de relevante voorschriften. Volgens sommige voorschriften mogen
elektrische producten alleen worden geïnstalleerd door een gekwalificeerde elektricien.
01 controleer voordat u dit product installeert welke pluggen en schroeven het meest geschikt zijn
voor het beoogde oppervlak;
02 sluit het product niet aan op een stopcontact terwijl het nog in de verpakking zit;
03 sluit het product niet aan op een stopcontact terwijl het op een haspel is gewikkeld;
04 gebruik het product niet afgedekt of verzonken in een oppervlak;
05 open dit product niet.
06 Veiligheidsklasse I: dit product moet worden aangesloten op een geaard stopcontact; het
armatuur is voorzien van een aardklem en moet daarom worden geaard; sluit de aardingsdraad
(geelgroene ader) aan op de 1-gemarkeerde klem.
07 Veiligheidsklasse II: Dit product is dubbel geïsoleerd en hoeft niet op een geaard stopcontact te
worden aangesloten.
08 Veiligheidsklasse III: dit product is alleen geschikt voor zeer lage veiligheidsspanning (bijv.12 V)
09 Beoogd gebruik: alleen binnen
10 Het armatuur mag niet bedekt zijn met isolatiemateriaal.
11 Het armatuur is niet geschikt voor installatie in de badkamer, althans niet in de aangegeven ruimte
12 Het armatuur is alleen geschikt voor wandmontage
13 Het armatuur is alleen geschikt voor plafondmontage
14 Het armatuur is geschikt voor wand- en plafondmontage
15 Strip de draad zoals aangegeven in het pictogram
16 IP20: Dit product is bedoeld voor gebruik in droge ruimtes binnenshuis
IP23: Regenbestendig
IP44: spatwaterdicht. Het product is beschermd tegen het binnendringen van vaste voorwerpen
groter dan 1 mm en tegen waterspatten vanuit elke richting.
IP54: Beschermd tegen beperkt binnendringen van stof, beschermd tegen waterspatten vanuit
elke richting.
IP65: Het product is stofdicht en beschermd tegen waterstralen. De armatuur kan niet worden
gebruikt als de behuizing kapot is.
20 Max. ... W: Use only lamps of the correct type and never exceed the maximum indicated wattage.
21 Use a heat-resistant cable to connect the luminaire to the mains
22 This luminaire is only suitable for lamps with built-in protection or ‘low pressure’ lamps. An extra
protective glass is not required.
23 The luminaire is equipped with a built-in fuse. If the luminaire does not work after replacing the
lamp, this fuse must be replaced. If the fixed connection wiring of the installation can be touched,
this may only be done by a qualified electrician.
24 This luminaire is suitable for top-mirror lamps
25 The luminaire is only suitable for fixed mounting and must therefore not be connected to a power
source by means of a connecting cord.
26 Type X: If the external flexible cable or cord of this fixture is damaged, it will be replaced by a
special cord or cord exclusively available from the manufacturer or its service agent.
Type Y: If the external flexible cable or cord of this luminaire is damaged, it should only be
replaced by the manufacturer or its service agent or a similarly qualified person in order to avoid
a hazard.
Type Z: the external flexible cable or cord of this luminaire cannot be replaced; If the cord is
damaged, the fixture will be destroyed.
27 Note that no electrical or other wires in the ceiling or wall are touched during the installation of
this luminaire.
28
Electrical installation wires must never be clamped or twisted (twisted) between the luminaire and the
mounting surface.
29 This product is dimmable and compatible with a TRIAC dimmer.
30 This product uses LED technology and is only suitable for it.
31 The light source of this luminaire is not replaceable; when the end of the service life has been
reached, the entire luminaire must be replaced.
32 Replaceable (LED only) light source by a professional
33
This product must not be covered by objects. Keep this product away from sharp edges, oils and
heat.
34
Never use this product in an area where there is a risk of explosion or near flammable substances
or gases.
35
If this product is passed on to third parties, manuals must be included.
36
Keep this product out of the reach of children.
37
Turn o the product when you leave the room.
Warranty: Any changes and/or modifications to the product will void the warranty. We cannot
accept any liability for damage caused by incorrect use of the product.
Disclaimer: Designs and specifications might be subjected to change without notice. All logos,
brands and used product references are trademarks or registered trademarks of their respective
holders and hereby recognized as such.
17 Dit armatuur is (IP20) voor componenten in het plafond en (IP21) (IP23) (IP44) (IP65) voor
componenten onder het plafond, mits deze armatuur correct is geïnstalleerd.
18 Als het beschermglas is beschadigd, moet het onmiddellijk worden vervangen.
19 Respecteer altijd de minimale afstand tussen de lichtbron en de verlichte materialen zoals
aangegeven in het pictogram
20 Max. ... W: Gebruik alleen lampen van het juiste type en overschrijd nooit het maximaal
aangegeven wattage.
21 Gebruik een hittebestendige kabel om de armatuur op het lichtnet aan te sluiten
22 Dit armatuur is alleen geschikt voor lampen met ingebouwde bescherming of ‘lagedruk’ lampen.
Een extra beschermglas is niet nodig.
23 Het armatuur is voorzien van een ingebouwde zekering. Als de armatuur niet werkt na het
vervangen van de lamp, moet deze zekering worden vervangen. Als de vaste aansluitbedrading
van de installatie kan worden aangeraakt, mag dit alleen worden gedaan door een
gekwalificeerde elektricien.
24 Dit armatuur is geschikt voor kopspiegellampen
25 Het armatuur is alleen geschikt voor vaste montage en mag dus niet met een aansluitsnoer op
een stroombron worden aangesloten.
26 Type X: Vervangen door een speciaal snoer of snoer dat uitsluitend verkrijgbaar is bij de
fabrikant of diens servicevertegenwoordiger.
Type Y: Als de externe flexibele kabel of het snoer van deze armatuur is beschadigd, mag deze
alleen worden vervangen door de fabrikant of zijn serviceagent of een vergelijkbaar
gekwalificeerd persoon om gevaar te voorkomen.
Type Z: de externe flexibele kabel of snoer van deze armatuur kan niet worden vervangen; Als
het snoer beschadigd is, gaat het armatuur kapot.
27 Merk op dat er geen elektrische of andere draden in het plafond of de muur worden aangeraakt
tijdens de installatie van deze armatuur.
28 Elektrische installatiedraden mogen nooit worden geklemd of getwist (getwist) tussen de
armatuur en het montageoppervlak.
29 Dit product is dimbaar en compatibel met een TRIAC-dimmer.
30 Dit product maakt gebruik van led-technologie en is er alleen voor geschikt.
31 De lichtbron van dit armatuur is niet vervangbaar; wanneer het einde van de levensduur is
bereikt, moet de hele armatuur worden vervangen.
32 Vervangbare (alleen LED) lichtbron door een professional
33 Dit product mag niet worden afgedekt door voorwerpen. Houd dit product uit de buurt van
scherpe randen, olie en hitte.
34 Gebruik dit product nooit in een ruimte met explosiegevaar of in de buurt van brandbare stoen
of gassen.
35 Als dit product aan derden wordt doorgegeven, moeten handleidingen worden bijgevoegd.
36 Bewaar dit product buiten het bereik van kinderen.
37 Schakel het product uit als u de kamer verlaat.
Garantie: Elke verandering en / of aanpassing aan het product maakt de garantie ongeldig. Voor
schade ontstaan door verkeerd gebruik van het product kunnen wij geen aansprakelijkheid
aanvaarden.
Disclaimer: Ontwerpen en specificaties kunnen zonder voorafgaande kennisgeving worden
gewijzigd. Alle logo's, merken en gebruikte productreferenties zijn handelsmerken of geregistreerde
handelsmerken van hun respectievelijke houders en worden hierbij als zodanig erkend.

Ce manuel, B, contient des descriptions de tous les paramètres, spécifications et icônes pertinentes
conformément aux normes internationales et aux réglementations de sécurité. Cependant, ceux-ci ne
s'appliquent pas toujours au produit que vous avez acheté. Reportez-vous aux icônes du manuel
supplémentaire, A, pour voir lequel des points suivants s'applique à ce produit.
c Conformité avec toutes les exigences des directives européennes applicables
Sécurité: le cas échéant: n'utilisez cet appareil que pour l'usage prévu; n'utilisez pas cet appareil s'il
est endommagé ou défectueux. Si ce produit est endommagé, en particulier si le câble ou le raccord
est endommagé, ce produit doit être arrêté immédiatement. Dans ce cas, un remplacement est
nécessaire; avant de le remplacer, mettez l'appareil hors tension et laissez l'appareil refroidir pour
éviter les chocs électriques ou les brûlures. Pour déconnecter la tension, coupez l'alimentation.
L'adaptateur (le cas échéant) doit être installé à proximité de l'appareil, non connecté à un autre
adaptateur et facilement accessible. Les produits ne peuvent être utilisés qu'en combinaison avec
l'adaptateur d'origine. Ce produit ne doit être ouvert que par un technicien agréé lorsqu'une
maintenance est nécessaire. N'eectuez jamais de réparations vous-même.
w
Retrait de votre produit. Ce produit est composé de matériaux et de pièces de haute qualité qui
peuvent être recyclés. Si vous voyez ce symbole sur votre produit, cela signifie que le produit est
couvert par la directive européenne 2002/96 / CE. Renseignez-vous auprès de votre propre
administration locale sur la manière dont les produits électriques et électroniques sont collectés
séparément dans votre région. Lors de la mise au rebut d'anciens produits, respectez la législation
locale et ne jetez pas ces produits avec les ordures ménagères. Éliminer correctement les anciens
produits évitera les eets néfastes sur l'environnement et la santé publique.
Coupez toujours l'alimentation avant de commencer toute installation, maintenance ou réparation. Le
cas échéant, avant de commencer, assurez-vous qu'il n'y a pas de tension sur le produit lorsque vous
démarrez l'assemblage. La meilleure façon de le faire est de débrancher l'alimentation du secteur
jusqu'à ce que l'installation, les réparations ou l'assemblage soient terminés.
En cas de doute, consultez un électricien qualifié ou le magasin où vous avez acheté le produit.
Assurez-vous que vous installez toujours le produit conformément aux réglementations en vigueur.
Selon certaines réglementations, les produits électriques ne doivent être installés que par un
électricien qualifié.
01 avant d'installer ce produit, vérifiez les chevilles et les vis qui conviennent le mieux à la surface prévue;
02 ne connectez pas le produit à une alimentation tant qu'il est encore dans l'emballage;
03 ne connectez pas le produit à une alimentation lorsqu'il est enroulé sur une bobine;
04 ne pas utiliser le produit lorsqu'il est couvert ou encastré dans une surface;
05 n'ouvrez pas ce produit.
06 Classe de sécurité I: ce produit doit être connecté à une prise de terre; le luminaire est équipé
d'une borne de terre et doit donc être mis à la terre; connectez le fil de terre (veine vert jaune) à la
borne marquée 1.
07 Classe de sécurité II: Ce produit est à double isolation et n'a pas besoin d'être connecté à une
prise de terre.
08
Classe de sécurité III: ce produit ne convient que pour une tension de sécurité très basse (par exemple 12V)
09 Utilisation conforme: uniquement à l'intérieur
10 Le luminaire ne doit pas être recouvert de matériau isolant.
11 Le luminaire ne convient pas pour une installation dans la salle de bain, du moins pas dans la zone
indiquée
12 Le luminaire ne convient que pour un montage mural
13 Le luminaire ne convient que pour un montage au plafond
14 Le luminaire convient au montage mural et au plafond
15 Dénudez le fil comme indiqué dans l'icône
16 IP20: Ce produit est destiné à être utilisé dans des espaces secs à l'intérieur
IP23: résistant à la pluie
IP44: résistant aux éclaboussures. Le produit est protégé contre l'intrusion d'objets solides d'une
taille supérieure à 1 mm et les projections d'eau dans toutes les directions.
IP54: Protégé contre la pénétration de poussière limitée, protégé contre les projections d'eau de
toutes les directions.
IP65: Le produit est étanche à la poussière et protégé des jets d'eau. Le luminaire ne peut pas
être utilisé si le boîtier est cassé.
Deze handleiding, B, bevat beschrijvingen van alle parameters, specificaties en relevante
pictogrammen in overeenstemming met internationale normen en veiligheidsvoorschriften. Deze zijn
echter niet altijd van toepassing op het product dat u heeft gekocht. Raadpleeg de pictogrammen in
de aanvullende handleiding, A, om te zien welke van de volgende punten van toepassing zijn op dit
product.
c Conformiteit met alle vereisten van EU-richtlijnen
Veiligheid: indien van toepassing: gebruik dit apparaat alleen waarvoor het bedoeld is; Gebruik dit
apparaat niet als het beschadigd of defect is. Als dit product is beschadigd, vooral als de kabel of
fitting is beschadigd, moet dit product onmiddellijk worden uitgeschakeld. In dit geval is vervanging
vereist; Schakel het apparaat uit en laat het apparaat afkoelen voordat u het vervangt om elektrische
schokken of brandwonden te voorkomen. Schakel de stroom uit om de spanning los te koppelen.
De adapter (indien van toepassing) moet in de buurt van het apparaat worden geïnstalleerd, niet op
een andere adapter worden aangesloten en moet gemakkelijk toegankelijk zijn. Producten mogen
alleen gebruikt worden in combinatie met de originele adapter. Dit product mag alleen worden geopend
door een geautoriseerde technicus wanneer onderhoud vereist is. Voer nooit zelf reparaties uit.
w
Verwijdering van uw product. Dit product is gemaakt van hoogwaardige materialen en onderdelen
die kunnen worden gerecycled. Als u dit symbool op uw product ziet, betekent dit dat het product valt
onder EU-richtlijn 2002/96 / EG. Vraag uw eigen gemeente naar de manier waarop elektrische en
elektronische producten in uw regio gescheiden worden ingezameld. Neem bij het afvoeren van oude
producten de lokale wetgeving in acht en gooi deze producten niet bij het normale huisvuil. Door oude
producten op de juiste manier af te voeren, worden nadelige gevolgen voor het milieu en de
volksgezondheid voorkomen.
Schakel altijd de stroom uit voordat u met installatie, onderhoud of reparatie begint. Controleer,
indien van toepassing, voordat u begint, of er geen spanning op het product staat wanneer u met de
montage begint. De beste manier om dit te doen, is door de stroom van het lichtnet los te koppelen tot
het moment dat de installatie, reparatie of montage is voltooid. Raadpleeg bij twijfel een
gekwalificeerde elektricien of de winkel waar u het product heeft gekocht. Zorg ervoor dat u het
product altijd installeert volgens de relevante voorschriften. Volgens sommige voorschriften mogen
elektrische producten alleen worden geïnstalleerd door een gekwalificeerde elektricien.
01 controleer voordat u dit product installeert welke pluggen en schroeven het meest geschikt zijn
voor het beoogde oppervlak;
02 sluit het product niet aan op een stopcontact terwijl het nog in de verpakking zit;
03 sluit het product niet aan op een stopcontact terwijl het op een haspel is gewikkeld;
04 gebruik het product niet afgedekt of verzonken in een oppervlak;
05 open dit product niet.
06 Veiligheidsklasse I: dit product moet worden aangesloten op een geaard stopcontact; het
armatuur is voorzien van een aardklem en moet daarom worden geaard; sluit de aardingsdraad
(geelgroene ader) aan op de 1-gemarkeerde klem.
07 Veiligheidsklasse II: Dit product is dubbel geïsoleerd en hoeft niet op een geaard stopcontact te
worden aangesloten.
08 Veiligheidsklasse III: dit product is alleen geschikt voor zeer lage veiligheidsspanning (bijv.12 V)
09 Beoogd gebruik: alleen binnen
10 Het armatuur mag niet bedekt zijn met isolatiemateriaal.
11 Het armatuur is niet geschikt voor installatie in de badkamer, althans niet in de aangegeven ruimte
12 Het armatuur is alleen geschikt voor wandmontage
13 Het armatuur is alleen geschikt voor plafondmontage
14 Het armatuur is geschikt voor wand- en plafondmontage
15 Strip de draad zoals aangegeven in het pictogram
16 IP20: Dit product is bedoeld voor gebruik in droge ruimtes binnenshuis
IP23: Regenbestendig
IP44: spatwaterdicht. Het product is beschermd tegen het binnendringen van vaste voorwerpen
groter dan 1 mm en tegen waterspatten vanuit elke richting.
IP54: Beschermd tegen beperkt binnendringen van stof, beschermd tegen waterspatten vanuit
elke richting.
IP65: Het product is stofdicht en beschermd tegen waterstralen. De armatuur kan niet worden
gebruikt als de behuizing kapot is.
17 Dit armatuur is (IP20) voor componenten in het plafond en (IP21) (IP23) (IP44) (IP65) voor
componenten onder het plafond, mits deze armatuur correct is geïnstalleerd.
18 Als het beschermglas is beschadigd, moet het onmiddellijk worden vervangen.
19 Respecteer altijd de minimale afstand tussen de lichtbron en de verlichte materialen zoals
aangegeven in het pictogram
20 Max. ... W: Gebruik alleen lampen van het juiste type en overschrijd nooit het maximaal
aangegeven wattage.
21 Gebruik een hittebestendige kabel om de armatuur op het lichtnet aan te sluiten
22 Dit armatuur is alleen geschikt voor lampen met ingebouwde bescherming of ‘lagedruk’ lampen.
Een extra beschermglas is niet nodig.
23 Het armatuur is voorzien van een ingebouwde zekering. Als de armatuur niet werkt na het
vervangen van de lamp, moet deze zekering worden vervangen. Als de vaste aansluitbedrading
van de installatie kan worden aangeraakt, mag dit alleen worden gedaan door een
gekwalificeerde elektricien.
24 Dit armatuur is geschikt voor kopspiegellampen
25 Het armatuur is alleen geschikt voor vaste montage en mag dus niet met een aansluitsnoer op
een stroombron worden aangesloten.
26 Type X: Vervangen door een speciaal snoer of snoer dat uitsluitend verkrijgbaar is bij de
fabrikant of diens servicevertegenwoordiger.
Type Y: Als de externe flexibele kabel of het snoer van deze armatuur is beschadigd, mag deze
alleen worden vervangen door de fabrikant of zijn serviceagent of een vergelijkbaar
gekwalificeerd persoon om gevaar te voorkomen.
Type Z: de externe flexibele kabel of snoer van deze armatuur kan niet worden vervangen; Als
het snoer beschadigd is, gaat het armatuur kapot.
27 Merk op dat er geen elektrische of andere draden in het plafond of de muur worden aangeraakt
tijdens de installatie van deze armatuur.
28 Elektrische installatiedraden mogen nooit worden geklemd of getwist (getwist) tussen de
armatuur en het montageoppervlak.
29 Dit product is dimbaar en compatibel met een TRIAC-dimmer.
30 Dit product maakt gebruik van led-technologie en is er alleen voor geschikt.
31 De lichtbron van dit armatuur is niet vervangbaar; wanneer het einde van de levensduur is
bereikt, moet de hele armatuur worden vervangen.
32 Vervangbare (alleen LED) lichtbron door een professional
33 Dit product mag niet worden afgedekt door voorwerpen. Houd dit product uit de buurt van
scherpe randen, olie en hitte.
34 Gebruik dit product nooit in een ruimte met explosiegevaar of in de buurt van brandbare stoen
of gassen.
35 Als dit product aan derden wordt doorgegeven, moeten handleidingen worden bijgevoegd.
36 Bewaar dit product buiten het bereik van kinderen.
37 Schakel het product uit als u de kamer verlaat.
Garantie: Elke verandering en / of aanpassing aan het product maakt de garantie ongeldig. Voor
schade ontstaan door verkeerd gebruik van het product kunnen wij geen aansprakelijkheid
aanvaarden.
Disclaimer: Ontwerpen en specificaties kunnen zonder voorafgaande kennisgeving worden
gewijzigd. Alle logo's, merken en gebruikte productreferenties zijn handelsmerken of geregistreerde
handelsmerken van hun respectievelijke houders en worden hierbij als zodanig erkend.
17 Ce luminaire est (IP20) pour les composants dans le plafond et (IP21) (IP23) (IP44) (IP65) pour les
composants sous le plafond, à condition que ce luminaire soit installé correctement.
18 Si le verre de protection est endommagé, il doit être remplacé immédiatement.
19 Respectez toujours la distance minimale entre la source lumineuse et les matériaux éclairés
comme indiqué dans l'icône
20 max. ... W: N'utilisez que des lampes du type correct et ne dépassez jamais la puissance maximale
indiquée.
21 Utilisez un câble résistant à la chaleur pour connecter le luminaire au secteur
22 Ce luminaire convient uniquement aux lampes avec protection intégrée ou aux lampes «basse
pression». Un verre de protection supplémentaire n'est pas nécessaire.
23 Le luminaire est équipé d'un fusible intégré. Si le luminaire ne fonctionne pas après avoir
remplacé la lampe, ce fusible doit être remplacé. Si le câblage de connexion fixe de l'installation
peut être touché, cela ne peut être fait que par un électricien qualifié.
24 Ce luminaire convient aux lampes à miroir supérieur
25 Le luminaire convient uniquement pour un montage fixe et ne doit donc pas être connecté à une
source d'alimentation au moyen d'un cordon de raccordement.
26 Type X: remplacé par un cordon spécial ou un cordon exclusivement disponible auprès du
fabricant ou de son agent de service.
Type Y: Si le câble ou le cordon flexible externe de ce luminaire est endommagé, il ne doit être
remplacé que par le fabricant ou son agent de service ou une personne de qualification similaire
afin d'éviter un danger.
Type Z: le câble ou le cordon flexible externe de ce luminaire ne peut pas être remplacé; Si le
cordon est endommagé, l'appareil sera détruit.
27 Notez qu'aucun fil électrique ou autre dans le plafond ou le mur n'est touché pendant
l'installation de ce luminaire.
28 Les fils de l'installation électrique ne doivent jamais être serrés ou tordus (torsadés) entre le
luminaire et la surface de montage.
29 Ce produit est dimmable et compatible avec un variateur TRIAC.
30 Ce produit utilise la technologie LED et ne convient qu'à elle.
31 La source lumineuse de ce luminaire n'est pas remplaçable; lorsque la fin de la durée de vie est
atteinte, tout le luminaire doit être remplacé.
32 Source lumineuse remplaçable (LED uniquement) par un professionnel
33 Ce produit ne doit pas être couvert par des objets. Gardez ce produit à l'écart des arêtes vives,
des huiles et de la chaleur.
34 N'utilisez jamais ce produit dans une zone présentant un risque d'explosion ou à proximité de
substances ou de gaz inflammables.
35 Si ce produit est cédé à des tiers, des manuels doivent être inclus.
36 Conservez ce produit hors de la portée des enfants.
37 Éteignez le produit lorsque vous quittez la pièce.
Garantie: Tout changement et / ou modification du produit annulera la garantie. Nous déclinons toute
responsabilité pour les dommages causés par une mauvaise utilisation du produit.
Avis de non-responsabilité: les conceptions et les spécifications peuvent être soumises à des
modifications sans préavis. Tous les logos, marques et références de produits utilisés sont des
marques de commerce ou des marques déposées de leurs détenteurs respectifs et reconnus par les
présentes comme tels.

FR
Ce manuel, B, contient des descriptions de tous les paramètres, spécifications et icônes pertinentes
conformément aux normes internationales et aux réglementations de sécurité. Cependant, ceux-ci ne
s'appliquent pas toujours au produit que vous avez acheté. Reportez-vous aux icônes du manuel
supplémentaire, A, pour voir lequel des points suivants s'applique à ce produit.
c Conformité avec toutes les exigences des directives européennes applicables
Sécurité: le cas échéant: n'utilisez cet appareil que pour l'usage prévu; n'utilisez pas cet appareil s'il
est endommagé ou défectueux. Si ce produit est endommagé, en particulier si le câble ou le raccord
est endommagé, ce produit doit être arrêté immédiatement. Dans ce cas, un remplacement est
nécessaire; avant de le remplacer, mettez l'appareil hors tension et laissez l'appareil refroidir pour
éviter les chocs électriques ou les brûlures. Pour déconnecter la tension, coupez l'alimentation.
L'adaptateur (le cas échéant) doit être installé à proximité de l'appareil, non connecté à un autre
adaptateur et facilement accessible. Les produits ne peuvent être utilisés qu'en combinaison avec
l'adaptateur d'origine. Ce produit ne doit être ouvert que par un technicien agréé lorsqu'une
maintenance est nécessaire. N'eectuez jamais de réparations vous-même.
w
Retrait de votre produit. Ce produit est composé de matériaux et de pièces de haute qualité qui
peuvent être recyclés. Si vous voyez ce symbole sur votre produit, cela signifie que le produit est
couvert par la directive européenne 2002/96 / CE. Renseignez-vous auprès de votre propre
administration locale sur la manière dont les produits électriques et électroniques sont collectés
séparément dans votre région. Lors de la mise au rebut d'anciens produits, respectez la législation
locale et ne jetez pas ces produits avec les ordures ménagères. Éliminer correctement les anciens
produits évitera les eets néfastes sur l'environnement et la santé publique.
Coupez toujours l'alimentation avant de commencer toute installation, maintenance ou réparation. Le
cas échéant, avant de commencer, assurez-vous qu'il n'y a pas de tension sur le produit lorsque vous
démarrez l'assemblage. La meilleure façon de le faire est de débrancher l'alimentation du secteur
jusqu'à ce que l'installation, les réparations ou l'assemblage soient terminés.
En cas de doute, consultez un électricien qualifié ou le magasin où vous avez acheté le produit.
Assurez-vous que vous installez toujours le produit conformément aux réglementations en vigueur.
Selon certaines réglementations, les produits électriques ne doivent être installés que par un
électricien qualifié.
01 avant d'installer ce produit, vérifiez les chevilles et les vis qui conviennent le mieux à la surface prévue;
02 ne connectez pas le produit à une alimentation tant qu'il est encore dans l'emballage;
03 ne connectez pas le produit à une alimentation lorsqu'il est enroulé sur une bobine;
04 ne pas utiliser le produit lorsqu'il est couvert ou encastré dans une surface;
05 n'ouvrez pas ce produit.
06 Classe de sécurité I: ce produit doit être connecté à une prise de terre; le luminaire est équipé
d'une borne de terre et doit donc être mis à la terre; connectez le fil de terre (veine vert jaune) à la
borne marquée 1.
07 Classe de sécurité II: Ce produit est à double isolation et n'a pas besoin d'être connecté à une
prise de terre.
08
Classe de sécurité III: ce produit ne convient que pour une tension de sécurité très basse (par exemple 12V)
09 Utilisation conforme: uniquement à l'intérieur
10 Le luminaire ne doit pas être recouvert de matériau isolant.
11 Le luminaire ne convient pas pour une installation dans la salle de bain, du moins pas dans la zone
indiquée
12 Le luminaire ne convient que pour un montage mural
13 Le luminaire ne convient que pour un montage au plafond
14 Le luminaire convient au montage mural et au plafond
15 Dénudez le fil comme indiqué dans l'icône
16 IP20: Ce produit est destiné à être utilisé dans des espaces secs à l'intérieur
IP23: résistant à la pluie
IP44: résistant aux éclaboussures. Le produit est protégé contre l'intrusion d'objets solides d'une
taille supérieure à 1 mm et les projections d'eau dans toutes les directions.
IP54: Protégé contre la pénétration de poussière limitée, protégé contre les projections d'eau de
toutes les directions.
IP65: Le produit est étanche à la poussière et protégé des jets d'eau. Le luminaire ne peut pas
être utilisé si le boîtier est cassé.
Deze handleiding, B, bevat beschrijvingen van alle parameters, specificaties en relevante
pictogrammen in overeenstemming met internationale normen en veiligheidsvoorschriften. Deze zijn
echter niet altijd van toepassing op het product dat u heeft gekocht. Raadpleeg de pictogrammen in
de aanvullende handleiding, A, om te zien welke van de volgende punten van toepassing zijn op dit
product.
c Conformiteit met alle vereisten van EU-richtlijnen
Veiligheid: indien van toepassing: gebruik dit apparaat alleen waarvoor het bedoeld is; Gebruik dit
apparaat niet als het beschadigd of defect is. Als dit product is beschadigd, vooral als de kabel of
fitting is beschadigd, moet dit product onmiddellijk worden uitgeschakeld. In dit geval is vervanging
vereist; Schakel het apparaat uit en laat het apparaat afkoelen voordat u het vervangt om elektrische
schokken of brandwonden te voorkomen. Schakel de stroom uit om de spanning los te koppelen.
De adapter (indien van toepassing) moet in de buurt van het apparaat worden geïnstalleerd, niet op
een andere adapter worden aangesloten en moet gemakkelijk toegankelijk zijn. Producten mogen
alleen gebruikt worden in combinatie met de originele adapter. Dit product mag alleen worden geopend
door een geautoriseerde technicus wanneer onderhoud vereist is. Voer nooit zelf reparaties uit.
w
Verwijdering van uw product. Dit product is gemaakt van hoogwaardige materialen en onderdelen
die kunnen worden gerecycled. Als u dit symbool op uw product ziet, betekent dit dat het product valt
onder EU-richtlijn 2002/96 / EG. Vraag uw eigen gemeente naar de manier waarop elektrische en
elektronische producten in uw regio gescheiden worden ingezameld. Neem bij het afvoeren van oude
producten de lokale wetgeving in acht en gooi deze producten niet bij het normale huisvuil. Door oude
producten op de juiste manier af te voeren, worden nadelige gevolgen voor het milieu en de
volksgezondheid voorkomen.
Schakel altijd de stroom uit voordat u met installatie, onderhoud of reparatie begint. Controleer,
indien van toepassing, voordat u begint, of er geen spanning op het product staat wanneer u met de
montage begint. De beste manier om dit te doen, is door de stroom van het lichtnet los te koppelen tot
het moment dat de installatie, reparatie of montage is voltooid. Raadpleeg bij twijfel een
gekwalificeerde elektricien of de winkel waar u het product heeft gekocht. Zorg ervoor dat u het
product altijd installeert volgens de relevante voorschriften. Volgens sommige voorschriften mogen
elektrische producten alleen worden geïnstalleerd door een gekwalificeerde elektricien.
01 controleer voordat u dit product installeert welke pluggen en schroeven het meest geschikt zijn
voor het beoogde oppervlak;
02 sluit het product niet aan op een stopcontact terwijl het nog in de verpakking zit;
03 sluit het product niet aan op een stopcontact terwijl het op een haspel is gewikkeld;
04 gebruik het product niet afgedekt of verzonken in een oppervlak;
05 open dit product niet.
06 Veiligheidsklasse I: dit product moet worden aangesloten op een geaard stopcontact; het
armatuur is voorzien van een aardklem en moet daarom worden geaard; sluit de aardingsdraad
(geelgroene ader) aan op de 1-gemarkeerde klem.
07 Veiligheidsklasse II: Dit product is dubbel geïsoleerd en hoeft niet op een geaard stopcontact te
worden aangesloten.
08 Veiligheidsklasse III: dit product is alleen geschikt voor zeer lage veiligheidsspanning (bijv.12 V)
09 Beoogd gebruik: alleen binnen
10 Het armatuur mag niet bedekt zijn met isolatiemateriaal.
11 Het armatuur is niet geschikt voor installatie in de badkamer, althans niet in de aangegeven ruimte
12 Het armatuur is alleen geschikt voor wandmontage
13 Het armatuur is alleen geschikt voor plafondmontage
14 Het armatuur is geschikt voor wand- en plafondmontage
15 Strip de draad zoals aangegeven in het pictogram
16 IP20: Dit product is bedoeld voor gebruik in droge ruimtes binnenshuis
IP23: Regenbestendig
IP44: spatwaterdicht. Het product is beschermd tegen het binnendringen van vaste voorwerpen
groter dan 1 mm en tegen waterspatten vanuit elke richting.
IP54: Beschermd tegen beperkt binnendringen van stof, beschermd tegen waterspatten vanuit
elke richting.
IP65: Het product is stofdicht en beschermd tegen waterstralen. De armatuur kan niet worden
gebruikt als de behuizing kapot is.
17 Ce luminaire est (IP20) pour les composants dans le plafond et (IP21) (IP23) (IP44) (IP65) pour les
composants sous le plafond, à condition que ce luminaire soit installé correctement.
18 Si le verre de protection est endommagé, il doit être remplacé immédiatement.
19 Respectez toujours la distance minimale entre la source lumineuse et les matériaux éclairés
comme indiqué dans l'icône
20 max. ... W: N'utilisez que des lampes du type correct et ne dépassez jamais la puissance maximale
indiquée.
21 Utilisez un câble résistant à la chaleur pour connecter le luminaire au secteur
22 Ce luminaire convient uniquement aux lampes avec protection intégrée ou aux lampes «basse
pression». Un verre de protection supplémentaire n'est pas nécessaire.
23 Le luminaire est équipé d'un fusible intégré. Si le luminaire ne fonctionne pas après avoir
remplacé la lampe, ce fusible doit être remplacé. Si le câblage de connexion fixe de l'installation
peut être touché, cela ne peut être fait que par un électricien qualifié.
24 Ce luminaire convient aux lampes à miroir supérieur
25 Le luminaire convient uniquement pour un montage fixe et ne doit donc pas être connecté à une
source d'alimentation au moyen d'un cordon de raccordement.
26 Type X: remplacé par un cordon spécial ou un cordon exclusivement disponible auprès du
fabricant ou de son agent de service.
Type Y: Si le câble ou le cordon flexible externe de ce luminaire est endommagé, il ne doit être
remplacé que par le fabricant ou son agent de service ou une personne de qualification similaire
afin d'éviter un danger.
Type Z: le câble ou le cordon flexible externe de ce luminaire ne peut pas être remplacé; Si le
cordon est endommagé, l'appareil sera détruit.
27 Notez qu'aucun fil électrique ou autre dans le plafond ou le mur n'est touché pendant
l'installation de ce luminaire.
28 Les fils de l'installation électrique ne doivent jamais être serrés ou tordus (torsadés) entre le
luminaire et la surface de montage.
29 Ce produit est dimmable et compatible avec un variateur TRIAC.
30 Ce produit utilise la technologie LED et ne convient qu'à elle.
31 La source lumineuse de ce luminaire n'est pas remplaçable; lorsque la fin de la durée de vie est
atteinte, tout le luminaire doit être remplacé.
32 Source lumineuse remplaçable (LED uniquement) par un professionnel
33 Ce produit ne doit pas être couvert par des objets. Gardez ce produit à l'écart des arêtes vives,
des huiles et de la chaleur.
34 N'utilisez jamais ce produit dans une zone présentant un risque d'explosion ou à proximité de
substances ou de gaz inflammables.
35 Si ce produit est cédé à des tiers, des manuels doivent être inclus.
36 Conservez ce produit hors de la portée des enfants.
37 Éteignez le produit lorsque vous quittez la pièce.
Garantie: Tout changement et / ou modification du produit annulera la garantie. Nous déclinons toute
responsabilité pour les dommages causés par une mauvaise utilisation du produit.
Avis de non-responsabilité: les conceptions et les spécifications peuvent être soumises à des
modifications sans préavis. Tous les logos, marques et références de produits utilisés sont des
marques de commerce ou des marques déposées de leurs détenteurs respectifs et reconnus par les
présentes comme tels.
Sidan laddas...
Sidan laddas...
Sidan laddas...
Sidan laddas...
Sidan laddas...
Sidan laddas...
Sidan laddas...
Sidan laddas...
Sidan laddas...
Sidan laddas...
Sidan laddas...
Sidan laddas...
Sidan laddas...
Sidan laddas...
Sidan laddas...
Sidan laddas...
Sidan laddas...
Sidan laddas...
Sidan laddas...
Sidan laddas...
Sidan laddas...
Sidan laddas...
Sidan laddas...
Sidan laddas...
Sidan laddas...
Sidan laddas...
Sidan laddas...
Sidan laddas...
Sidan laddas...
Sidan laddas...
Sidan laddas...
Sidan laddas...
Sidan laddas...
Sidan laddas...
Sidan laddas...
Sidan laddas...
Sidan laddas...
Sidan laddas...
Sidan laddas...
Sidan laddas...
Sidan laddas...
Sidan laddas...
Sidan laddas...
Sidan laddas...
Sidan laddas...
Sidan laddas...
Sidan laddas...
Sidan laddas...
-
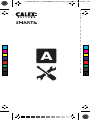 1
1
-
 2
2
-
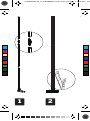 3
3
-
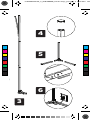 4
4
-
 5
5
-
 6
6
-
 7
7
-
 8
8
-
 9
9
-
 10
10
-
 11
11
-
 12
12
-
 13
13
-
 14
14
-
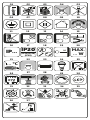 15
15
-
 16
16
-
 17
17
-
 18
18
-
 19
19
-
 20
20
-
 21
21
-
 22
22
-
 23
23
-
 24
24
-
 25
25
-
 26
26
-
 27
27
-
 28
28
-
 29
29
-
 30
30
-
 31
31
-
 32
32
-
 33
33
-
 34
34
-
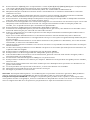 35
35
-
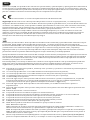 36
36
-
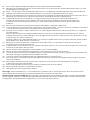 37
37
-
 38
38
-
 39
39
-
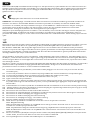 40
40
-
 41
41
-
 42
42
-
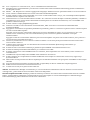 43
43
-
 44
44
-
 45
45
-
 46
46
-
 47
47
-
 48
48
-
 49
49
-
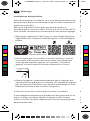 50
50
-
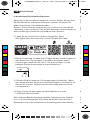 51
51
-
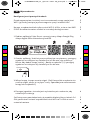 52
52
-
 53
53
-
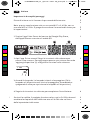 54
54
-
 55
55
-
 56
56
-
 57
57
-
 58
58
-
 59
59
-
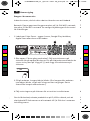 60
60
-
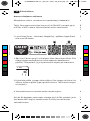 61
61
-
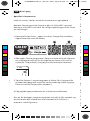 62
62
-
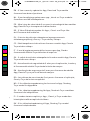 63
63
-
 64
64
-
 65
65
-
 66
66
-
 67
67
-
 68
68


Calex SMART GULVLAMPE RGB Bruksanvisning
- Typ
- Bruksanvisning
på andra språk
- italiano: Calex SMART GULVLAMPE RGB Manuale del proprietario
- slovenčina: Calex SMART GULVLAMPE RGB Návod na obsluhu
- Deutsch: Calex SMART GULVLAMPE RGB Bedienungsanleitung
- polski: Calex SMART GULVLAMPE RGB Instrukcja obsługi
- português: Calex SMART GULVLAMPE RGB Manual do proprietário
- français: Calex SMART GULVLAMPE RGB Le manuel du propriétaire
- dansk: Calex SMART GULVLAMPE RGB Brugervejledning
- Nederlands: Calex SMART GULVLAMPE RGB de handleiding
- română: Calex SMART GULVLAMPE RGB Manualul proprietarului
Relaterade papper
-
 Calex SMART UTENDØRS LED-STRIPE RGBW 5M Bruksanvisning
-
 Calex SMART UTELYS 3 STK Användarmanual
-
 Calex SMART UTENDØRS LYSSLYNGE RGB+CCT 10M Bruksanvisning
-
Calex 2759036 Användarmanual
-
Calex Outdoor LED Smart Outdoor Frameless Floodlight Användarmanual
-
Calex Slimme Lamp XXL Wifi LED Filament Verlichting Användarmanual


Andra dokument
-
 CALEX HOLLAND Smart Outdoor Lights Användarmanual
-
 CRX CRX3123A Användarmanual
-
Denver DMB-113CI Användarmanual
-
 Thorn Voyager Fit / VOYAGER FIT MRC E3T NM Installationsguide
-
König DVB-T FTA21 Användarmanual
-
LIVARNO 419995 Bruksanvisning
-
Waeco Waeco RV-70-DIG Bruksanvisningar
-
Topcom Sologic A811 Användarguide
-
-
 Thorn Vioo / VIOO 1L120 740 ANT Installationsguide


