
QUICK SETUP GUIDE
www.bualotech.com
EN DE FR IT ES PT NL SV
NO
DA FI
WLI-U2-SG54HG
AirStation Wireless USB Adapter


1
EN
AirStation Wireless USB Adapter (WLI-U2-SG54HG)
Package contents includes:
• WLI-U2-SG54HG Adapter
• USB 2.0 Cable
• Quick Setup Guide
• Setup CD-ROM
• Warranty Statement
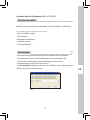
Thank you for purchasing a Bualo AirStation Wireless USB Adapter.
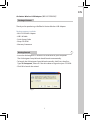
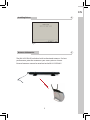
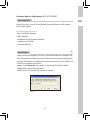
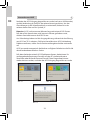
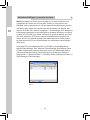
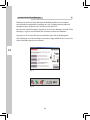
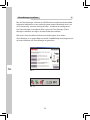
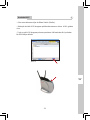
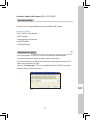
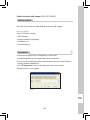
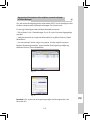
• Insert the AirNavigator CD into the CD-ROM drive of your computer.
The AirNavigator Setup Wizard should launch automatically.
• To launch the AirNavigator Setup Wizard manually, click Start, then Run.
Type “D:\Setup.exe”, where D is the drive letter assigned to your CD-ROM.
• Click OK to launch the wizard.
Package Contents
Getting Started
1
Fig: 1

EN
2
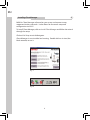
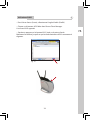
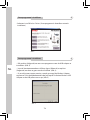
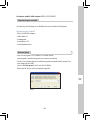
Installing Drivers
2
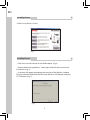
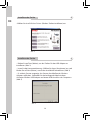
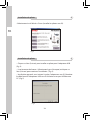
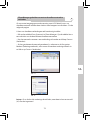
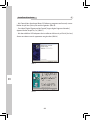
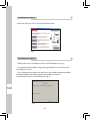
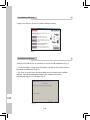
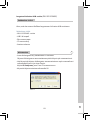
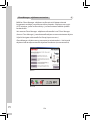
• Select Install Wireless Drivers.
Fig: 2
Installing Drivers
2
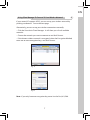
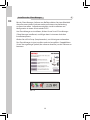
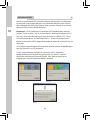
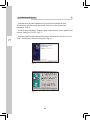
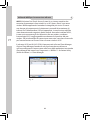
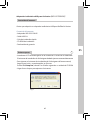
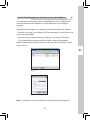
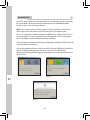
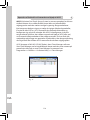
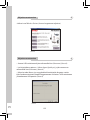
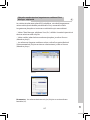
• Click Next to install a driver for the USB adaptor. (Fig: 3)
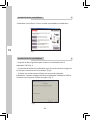
• Review the license agreement. Select Agree and click Next to continue
installation. (Fig: 4)
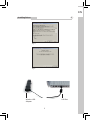
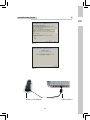
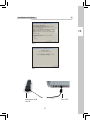
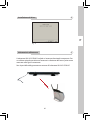
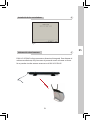
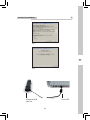
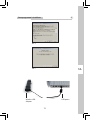
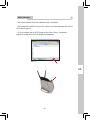
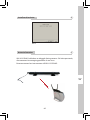
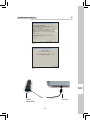
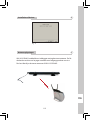
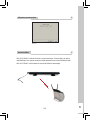
• A window will appear prompting the insertion of the Wireless Adapter.
Plug the included cable into the AirStation Wireless USB Adapter and your
PC’s USB port. (Fig: 5)
Fig: 3

3
EN
Installing Drivers
2
Fig: 4
Fig: 5
USB Port
Wireless USB
Adapter

EN
4
Installing Drivers
2
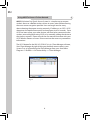
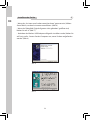
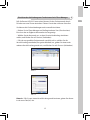
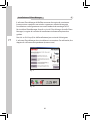
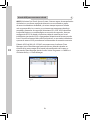
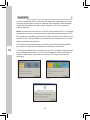
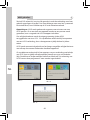
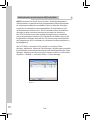
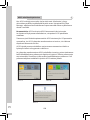
• When the ‘Found New Hardware Wizard’ launches, click Next to run the
wizard. (Fig: 6)
• If the ‘Digital Signature Not Found’ page opens, click Yes. (Fig: 7)
• When the Wireless USB Adapter is successfully installed, click Finish. Restart
your computer if prompted. (Fig: 8)
Fig: 6
Fig: 7

5
EN
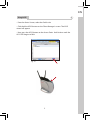
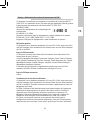
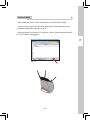
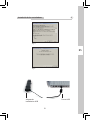
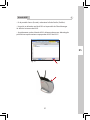
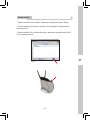
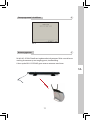
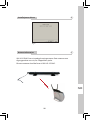
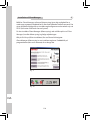
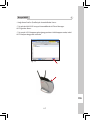
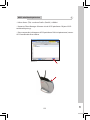
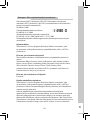
The WLI-U2-SG54HG includes a built-in directional antenna. For best
performance, point the antenna at your access point as shown.
External antennas cannot be attached to the WLI-U2-SG54HG.
Antenna Information
3
Fig: 8
Installing Drivers
2

EN
6
Installing Client Manager
4
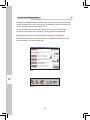
Fig: 9
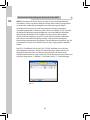
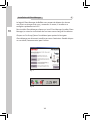
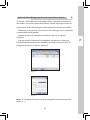
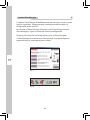
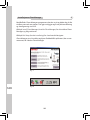
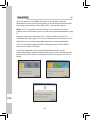
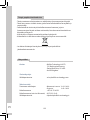
Buffalo’s Client Manager software lets you survey and connect to any
supported wireless networks. It also allows for one touch setup and
configuration via AOSS.
To install Client Manager, click on Install Client Manager and follow the wizard
through the setup.
Click on Exit Setup to exit AirNavigator.
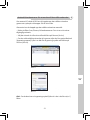
Client Manager is now installed and running. Double-click on its icon (the
black antenna) to use it.
Fig: 10

7
EN
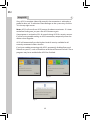
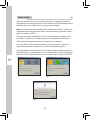
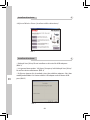
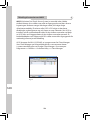
Using Client Manager To Connect To Your Wireless Network
5
If your router/AP supports AOSS, you can set up your wireless network by
pushing two buttons. Turn to the next page.
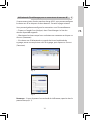
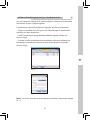
Alternatively, you can set up your wireless connections manually:
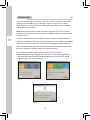
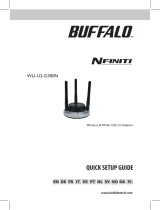
• Click the Scan tab in Client Manager. It will show you a list of available
networks.
• Choose the network you want to connect to and click Connect.
• If the chosen wireless network is encrypted, select the Encryption Method,
enter one or more encryption keys, and click Connect.
Fig: 11
Fig: 12
Note: If you only have one encryption key, enter it in the first (#1) field.

EN
8
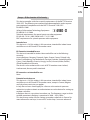
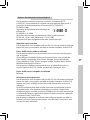
AOSS (AirStation One-Touch Secure System) is a simple way to connect
wireless clients to a Bualo wireless router or access point while enforcing
the most secure encryption possible. Users no longer need to worry
about choosing the proper security protocols, IP addresses, or SSID. AOSS
determines the optimal connection and congures itself in seconds. Once
AOSS has been setup, your other devices will need to be connected to the
wireless network by performing AOSS or by manually adding the device to
the wireless network. Please consult the user manual that came with your
AOSS Wireless Router or Access Point to retrieve the necessary connection
information.
The AOSS button for the WLI-U2-SG54HG is in its Client Manager software,
Start Client Manager by right clicking on the black antenna icon in your
System Tray, or by launching the Client Manager from your Start Menu:
Programs >> Bualo >> AirStation Utility >> Client Manager.
Using AOSS To Connect To Your Network
6
Fig: 13

9
EN
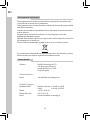
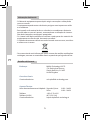
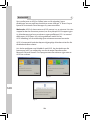
Using AOSS
7
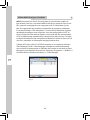
• From the Status Screen, select the Proles tab.
• Click the blue AOSS button on the Client Manager’s screen. The AOSS
wizard will appear.
• Now, press the AOSS button on the Access Point. Hold it down until the
AOSS LED begins to ash.
Fig: 14

EN
10
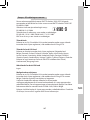
Using AOSS
7
Once AOSS is complete (about 30 seconds), the connection is archived as a
prole for later use. To minimize Client Manager to the system tray, click the
‘X’ in the top right corner.
Notes: AOSS will scan for an AOSS partner for about two minutes. If it times
out before nding one, just press the AOSS buttons again.
Output power is reduced to 25% of normal during AOSS for security reasons.
If you’re having trouble making an AOSS connection, temporarily move the
devices closer together.
AOSS will automatically use the highest level of security available for all
currently connected wireless devices.
If you have trouble connecting with AOSS, temporarily disable all personal
rewalls on your PC, such as ZoneAlarm or Microsoft Personal Firewall. These
programs may be re-enabled after AOSS has nished.
Fig: 15
Fig: 17
Fig: 16

11
EN
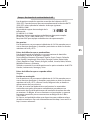
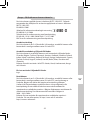
Europe - EU Declaration of Conformity
This device complies with the essential requirements of the R&TTE Directive
1999/5/EC. The following test methods have been applied in order to prove
presumption of compliance with the R&TTE Directive 1999/5/EC:
EN 60950-1:2001
Safety of Information Technology Equipment
EN 300328 V1.6.1:2004
Technical requirements for spread-spectrum radio equipment
EN 301489-1 V1.6.1:2005, EN301 489-17 V1.2.1:2002
EMC requirements for spread-spectrum radio equipment.
Intended use
This device is a 2.4 GHz wireless LAN transceiver, intended for indoor home
and oce use in all EU and EFTA member states.
EU Countries intended for use
This device is intended for indoor Home and oce use in the following
countries:
Austria, Belgium, Germany, Denmark, Spain, Greece, France, Finland, Italy,
Ireland, Luxembourg, The Netherlands, Portugal, Sweden, United Kingdom,
Cyprus, Czech Republic, Estonia, Hungry, Latvia, Lithuania, Malta, Poland,
Slovak Republic and Slovenia.
The device is also authorised for use in all EFTA member states Iceland,
Liechtenstein, Norway and Switzerland.
EU countries not intended for use
None
Potential restrictive use
This device is a 2.4 GHz wireless LAN transceiver, intended for indoor home
and oce use in all EU and EFTA member states, except in France, Belgium
and Italy where restrictive use applies.
In Italy the end-user should apply for a license at the national spectrum
authorities in order to obtain an authorization to use the device for setting up
outdoor radio links.
In Belgium there is a restriction in outdoor use. The frequency range in which
outdoor operation in Belgium is permitted is 2460 – 2483.5 MHz.
This device may not be used for setting up outdoor radio links in France. For
more information see http://www.anfr.fr/ and/or http://www.art-telecom.fr

EN
12
Environmental Information
• The equipment that you have purchased has required the extraction and
use of natural resources for its production.
• The equipment may contain hazardous substances that could impact health
and the environment.
• In order to avoid the dissemination of those substances in our environment
and to diminish
the pressure on the natural resources, we encourage you to use the
appropriate take-back systems.
• The take-back systems will reuse or recycle most of the materials of your end
life equipment in a sound way.
• The crossed-out wheeled bin symbol invites you to use those systems.
• If you need more information on the collection, reuse and recycling systems,
please contact your local or regional waste administration.
Contact Details
Address: Bualo Technology UK LTD
176, Buckingham Avenue,
Slough, Berkshire, SL1 4RD
United Kingdom
General Inquiries:
Email
sales@bualo-technology.com
Technical Support:
Helpdesk Hours Monday-Thursday 9:00 AM - 6:00 PM
Friday 9:00 AM - 4:30 PM
Phone +353 61 70 80 50
Phone (UK only) 08712 50 12 60
Email helpdesk@bualo-technology.ie

13
DE
AirStation Wireless-USB-Adapter (WLI-U2-SG54HG)
Der Packungsinhalt umfasst:
• WLI-U2-SG54HG-Adapter
• USB 2.0-Kabel
• Handbuch für die Schnellinstallation
• Installations-CD-ROM
• Garantieerklärung
Vielen Dank, dass Sie sich für den Bualo AirStation Wireless-USB-Adapter
entschieden haben!
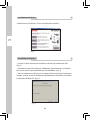
• Legen Sie die AirNavigator-CD in das CD-ROM-Laufwerk des Computers ein.
Der AirNavigator-Installationsassistent sollte automatisch gestartet werden.
• Um den AirNavigator-Installationsassistenten manuell zu starten, klicken Sie
auf Start und dann auf Ausführen.
Geben Sie „
D:\Setup.exe“ ein, wobei „D“ der Ihrem CD-ROM-Laufwerk
zugeordnete Laufwerksbuchstabe ist.
• Klicken Sie auf OK, um den Assistenten zu starten.
Packungsinhalt
Erste Schritte
1
Abb. 1

DE
14
Installieren der Treiber
2
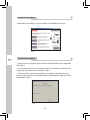
• Wählen Sie Install Wireless Drivers (Wireless-Treiber installieren) aus.
Abb. 2
Installieren der Treiber
2
• Klicken Sie auf Next (Weiter), um den Treiber für den USB-Adapter zu
installieren. (Abb. 3)
• Lesen Sie die Lizenzvereinbarung. Wählen Sie Agree (Annehmen) aus, und
klicken Sie auf Next (Weiter), um mit der Installation fortzufahren. (Abb. 4)
• Es wird ein Fenster angezeigt, das Sie zum Anschließen des Wireless-
Adapters auffordert. Verbinden Sie das beiliegende Kabel mit dem
AirStation Wireless-USB-Adapter und einem USB-Anschluss des Computers.
(Abb. 5)
Abb. 3

15
DE
Installieren der Treiber
2
Abb. 4
Abb. 5
USB-Anschluss
Wireless-USB-Adapter

DE
16
Installieren der Treiber
2
• Wenn der „Assistent zum Suchen neuer Hardware“ gestartet wird, klicken
Sie auf Weiter, um den Assistenten auszuführen. (Abb. 6)
• Wenn das Dialogfeld „Digitale Signatur nicht gefunden“ geöffnet wird,
klicken Sie auf Ja. (Abb. 7)
• Nachdem der Wireless-USB-Adapter erfolgreich installiert wurde, klicken Sie
auf Fertig stellen. Starten Sie den Computer neu, wenn Sie dazu aufgefordert
werden. (Abb. 8)
Abb. 6
Abb. 7

17
DE
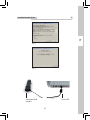
Der WLI-U2-SG54HG verfügt über eine integrierte, bidirektionale Antenne.
Um die bestmögliche Leistung zu erreichen, richten Sie die Antenne wie
unten gezeigt auf den Zugangspunkt (Access Point) aus.
Es können keine externen Antennen an den WLI-U2-SG54HG angeschlossen
werden.
Informationen zur Antenne
3
Abb. 8
Installieren der Treiber
2

DE
18
Installieren des Client Manager
4
Abb. 9
Mit der Client Manager-Software von Buffalo erhalten Sie einen Überblick
über alle unterstützten Funknetzwerke und können eine Verbindung
zu diesen herstellen. Außerdem ermöglicht sie die Installation und
Konfiguration in einem Schritt mittels AOSS.
Um Client Manager zu installieren, klicken Sie auf Install Client Manager
(Client Manager installieren) und folgen dem Assistenten durch den
Installationsprozess.
Klicken Sie auf Exit Setup (Setup beenden), um AirNavigator zu beenden.
Der Client Manager ist jetzt installiert und wird ausgeführt. Doppelklicken
Sie auf das zugehörige Symbol (die schwarze Antenne), um die Software zu
benutzen.
Abb. 10
Sidan laddas...
Sidan laddas...
Sidan laddas...
Sidan laddas...
Sidan laddas...
Sidan laddas...
Sidan laddas...
Sidan laddas...
Sidan laddas...
Sidan laddas...
Sidan laddas...
Sidan laddas...
Sidan laddas...
Sidan laddas...
Sidan laddas...
Sidan laddas...
Sidan laddas...
Sidan laddas...
Sidan laddas...
Sidan laddas...
Sidan laddas...
Sidan laddas...
Sidan laddas...
Sidan laddas...
Sidan laddas...
Sidan laddas...
Sidan laddas...
Sidan laddas...
Sidan laddas...
Sidan laddas...
Sidan laddas...
Sidan laddas...
Sidan laddas...
Sidan laddas...
Sidan laddas...
Sidan laddas...
Sidan laddas...
Sidan laddas...
Sidan laddas...
Sidan laddas...
Sidan laddas...
Sidan laddas...
Sidan laddas...
Sidan laddas...
Sidan laddas...
Sidan laddas...
Sidan laddas...
Sidan laddas...
Sidan laddas...
Sidan laddas...
Sidan laddas...
Sidan laddas...
Sidan laddas...
Sidan laddas...
Sidan laddas...
Sidan laddas...
Sidan laddas...
Sidan laddas...
Sidan laddas...
Sidan laddas...
Sidan laddas...
Sidan laddas...
Sidan laddas...
Sidan laddas...
Sidan laddas...
Sidan laddas...
Sidan laddas...
Sidan laddas...
Sidan laddas...
Sidan laddas...
Sidan laddas...
Sidan laddas...
Sidan laddas...
Sidan laddas...
Sidan laddas...
Sidan laddas...
Sidan laddas...
Sidan laddas...
Sidan laddas...
Sidan laddas...
Sidan laddas...
Sidan laddas...
Sidan laddas...
Sidan laddas...
Sidan laddas...
Sidan laddas...
Sidan laddas...
Sidan laddas...
Sidan laddas...
Sidan laddas...
Sidan laddas...
Sidan laddas...
Sidan laddas...
Sidan laddas...
Sidan laddas...
Sidan laddas...
Sidan laddas...
Sidan laddas...
Sidan laddas...
Sidan laddas...
Sidan laddas...
Sidan laddas...
Sidan laddas...
Sidan laddas...
Sidan laddas...
Sidan laddas...
Sidan laddas...
Sidan laddas...
Sidan laddas...
Sidan laddas...
Sidan laddas...
Sidan laddas...
Sidan laddas...
Sidan laddas...
Sidan laddas...
Sidan laddas...
-
 1
1
-
 2
2
-
 3
3
-
 4
4
-
 5
5
-
 6
6
-
 7
7
-
 8
8
-
 9
9
-
 10
10
-
 11
11
-
 12
12
-
 13
13
-
 14
14
-
 15
15
-
 16
16
-
 17
17
-
 18
18
-
 19
19
-
 20
20
-
 21
21
-
 22
22
-
 23
23
-
 24
24
-
 25
25
-
 26
26
-
 27
27
-
 28
28
-
 29
29
-
 30
30
-
 31
31
-
 32
32
-
 33
33
-
 34
34
-
 35
35
-
 36
36
-
 37
37
-
 38
38
-
 39
39
-
 40
40
-
 41
41
-
 42
42
-
 43
43
-
 44
44
-
 45
45
-
 46
46
-
 47
47
-
 48
48
-
 49
49
-
 50
50
-
 51
51
-
 52
52
-
 53
53
-
 54
54
-
 55
55
-
 56
56
-
 57
57
-
 58
58
-
 59
59
-
 60
60
-
 61
61
-
 62
62
-
 63
63
-
 64
64
-
 65
65
-
 66
66
-
 67
67
-
 68
68
-
 69
69
-
 70
70
-
 71
71
-
 72
72
-
 73
73
-
 74
74
-
 75
75
-
 76
76
-
 77
77
-
 78
78
-
 79
79
-
 80
80
-
 81
81
-
 82
82
-
 83
83
-
 84
84
-
 85
85
-
 86
86
-
 87
87
-
 88
88
-
 89
89
-
 90
90
-
 91
91
-
 92
92
-
 93
93
-
 94
94
-
 95
95
-
 96
96
-
 97
97
-
 98
98
-
 99
99
-
 100
100
-
 101
101
-
 102
102
-
 103
103
-
 104
104
-
 105
105
-
 106
106
-
 107
107
-
 108
108
-
 109
109
-
 110
110
-
 111
111
-
 112
112
-
 113
113
-
 114
114
-
 115
115
-
 116
116
-
 117
117
-
 118
118
-
 119
119
-
 120
120
-
 121
121
-
 122
122
-
 123
123
-
 124
124
-
 125
125
-
 126
126
-
 127
127
-
 128
128
-
 129
129
-
 130
130
-
 131
131
-
 132
132
-
 133
133
-
 134
134
-
 135
135
-
 136
136


Buffalo AirStation WLI-U2-SG54HG Användarmanual
- Typ
- Användarmanual
- Denna manual är också lämplig för
på andra språk
- italiano: Buffalo AirStation WLI-U2-SG54HG Manuale utente
- español: Buffalo AirStation WLI-U2-SG54HG Manual de usuario
- Deutsch: Buffalo AirStation WLI-U2-SG54HG Benutzerhandbuch
- português: Buffalo AirStation WLI-U2-SG54HG Manual do usuário
- français: Buffalo AirStation WLI-U2-SG54HG Manuel utilisateur
- dansk: Buffalo AirStation WLI-U2-SG54HG Brugermanual
- Nederlands: Buffalo AirStation WLI-U2-SG54HG Handleiding
Relaterade papper
Andra dokument
-
 Buffalo Technology Network Card WLI-U2-G300N Användarmanual
-
Sony PCWA-C300S Snabbstartsguide
-
 Buffalo Technology HD-PHSXXU2-UC Användarmanual
-
 Buffalo Technology HD-PFU2 Användarmanual
-
D-Link DWA-172 Quick Installation Manual
-
-
-
-
-


