Parkside PBH 1050 A1 Operation and Safety Notes
- Kategori
- Roterande hammare
- Typ
- Operation and Safety Notes

IAN 46883
HAMMER DRILL PBH 1050 A1
PORA- JA TALTTAVASARA
Käyttö- ja turvaohjeet
Alkuperäisen käyttöohjeen käännös
BOHR- UND MEISSELHAMMER
Bedienungs- und Sicherheitshinweise
Originalbetriebsanleitung
HAMMER DRILL
Operation and Safety Notes
Translation of original operation manual
MARTEAU PERFORATEUR ET BURINEUR
Instructions d‘utilisation et consignes de sécurité
Traduction du mode d‘emploi d‘origine
BORR- OCH MEJSELHAMMARE
Bruksanvisning och säkerhetsanvisningar
Översättning av bruksanvisning i original
KLOP- EN BEITELBOOR
Bedienings- en veiligheidsinstructies
Vertaling van de originele gebruiksaanwijzing

GB / IE Operation and Safety Notes Page 5
FI Käyttö- ja turvaohjeet Sivu 13
SE Bruksanvisning och säkerhetsanvisningar Sidan 21
FR / BE Instructions d‘utilisation et consignes de sécurité Page 29
NL / BE Bedienings- en veiligheidsinstructies Pagina 39
DE / AT / CH Bedienungs- und Sicherheitshinweise Seite 49
Before reading, unfold the page containing the illustrations and familiarise yourself with all functions of the
device.
Käännä ennen lukemista kuvallinen sivu esiin ja tutustu seuraavaksi laitteen kaikkiin toimintoihin.
Vik ut bildsidan och ha den till hands när du läser igenom anvisningarna och gör dig bekant med
apparatens / maskinens funktioner.
Avant de lire le mode d‘emploi, ouvrez la page contenant les illustrations et familiarisez-vous ensuite avec
toutes les fonctions de l‘appareil.
Vouw vóór het lezen de pagina met de afbeeldingen open en maak u vertrouwd met alle functies van het
apparaat.
Klappen Sie vor dem Lesen die Seite mit den Abbildungen aus und machen Sie sich anschließend mit allen
Funktionen des Gerätes vertraut.

C D E
A
B
8
7
1
4
3
109
6
11
5
6 a
2
3 a


5 GB/IE
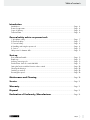
Introduction
Intended use ........................................................................................................................................ Page 6
Pictured components ........................................................................................................................... Page 6
Scope of delivery ................................................................................................................................Page 6
Technical Data ....................................................................................................................................Page 6
General safety advice on power tools
1. Workplace safety ...........................................................................................................................Page 7
2. Electrical safety ............................................................................................................................... Page 7
3. Personal safety ................................................................................................................................Page 8
4. Handling and using the power tool ..............................................................................................Page 8
5. Service .............................................................................................................................................Page 9
Safety notes for hammer drills ............................................................................................................ Page 9
Start-up
Pivot additional handle ....................................................................................................................... Page 9
Depth stop ...........................................................................................................................................Page 9
Inserting / removing tools ....................................................................................................................Page 9
Quick-release chuck for round shaft drills .........................................................................................Page 9
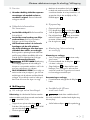
Setting the function with the function selector switch ........................................................................Page 10
Selecting the direction ........................................................................................................................Page 10
Switching on and off ........................................................................................................................... Page 10
Presetting the speed ............................................................................................................................ Page 10
Maintenance and Cleaning ..............................................................................................Page 10
Service ...............................................................................................................................................Page 11
Warranty .........................................................................................................................................Page 11
Disposal ............................................................................................................................................Page 11
Declaration of Conformity / Manufacturer..........................................................Page 12
Table of contents

6 GB/IE
Introduction
Hammer drill PBH 1050 A1
Introduction
Congratulations on your new product. You have se-
lected a high quality product. The instructions for use
are a part of this product. They contain important
information about safety, use and disposal. Before
using the product, please familiarise yourself with
all the operating and safety instructions. Only use
the product as described and for the indicated pur-
pose. When passing this product on to others please
be sure to also include all of its documentation.
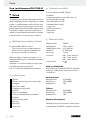
Intended use
The hammer drill and chisel hammer PBH 1050 A1
is suitable for:
- Hammer drilling bricks, concrete and stone
- Chiseling concrete, stone and plaster
- Drilling stone, wood and metal
Any other use or modifying the device is considered
improper use and involves considerable accident risks.
The manufacturer is not liable for damage caused
by improper use.
The device is not intended for commercial use.
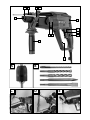
Pictured components
1
Wing screw
2
Clockwise / counter-clockwise switch
3
ON / OFF switch
3a
Speed setting
4
ON / OFF switch locking button
5
Light emitting diode
6
Function selector switch
6a
Release button for function selector switch
7
Additional handgrip
8
Tool holder
9
Dust cover
10
Locking sleeve
11
Depth stop
Scope of delivery
1 Hammer drill PBH 1050 A1
1 Additional handgrip
1 Quick-release chuck with adapter (see Fig. A)
3 Drills (see Fig. B)
1 Flat chisel (see Fig. B)
1 Pointed chisel (see Fig. B)
1 Depth stop
1 Tin of lubricating grease
1 Carrying case
1 Set of operating instructions
Technical Data
Rated input power: 1050 W
Rated voltage: 230 V∼, 50 Hz
Idle speed: n
0
0–980 / min
Impact frequency: 0–5300 / min
Impact energy: 3 joules
Drilling capacity: max. 13 mm in steel
max. 32 mm in wood
max. 26 mm in concrete
Protection class: II /
Noise and vibration data:
Measured sound value determined according to
EN 60745. The A-rated noise levels of the electrical
power tool are typically at:
Hammer drilling:
Sound pressure level: 91.26 dB(A)
Sound power level: 102.26 dB(A)
Uncertainty K: 3 dB
Chiselling:
Sound pressure level: 93.44 dB(A)
Sound power level: 103.44 dB(A)
Uncertainty K: 3 dB
Wear hearing protection!
The total vibration (vector sum of three directions) is
calculated in accordance with EN 60745:
Introduction / General safety advice on power tools

7 GB/IE
Introduction
Introduction / General safety advice on power tools
Main handle
Hammer drilling in
Concrete: a
h(HD)
= 9.853 m / s
2
,
K = 1.5 m / s
2
Additional handle
Hammer drilling in
Concrete: a
h(HD)
= 8.967 m / s
2
, K = 1.5 m / s
2
Main handle
Chiselling: a
h(CHeq)
= 12.738 m / s
2
,
K = 1.5 m / s
2
Additional handle
Chiselling: a
h(CHeq)
= 8.278 m / s
2
,
K = 1.5 m / s
2
The vibration level specified in
these instructions was measured in accordance with
an EN 60745 standardised measurement process
and can be used to compare equipment. The vibra-
tion emission value specified can also serve as a
preliminary assessment of the exposure.
The vibrati
on level may change with the application
of the tool and in some cases may be higher than
the value specified in these instructions. Regularly
using the electric tool in such a way may make it
easy to underestimate the vibration.
Note: If you wish to make an accurate assessment
of the vibration loads experienced during a particu-
lar period of work, you should also take into account
the intervening periods of time when the device is
switched off or is running but is not actually in use.
This can clearly reduce the vibration load through-
out the work period.
General safety advice on
power tools
Please read all safety in-
formation and instructions. Failure to observe
the safety information and instructions can result in
electric shock, fire and / or serious injury.
Keep all safety advice and instructions in
a safe place for future reference.
The term “power tool” as used in the safety advice
refers to electrical tools powered by mains electric-
ity (with mains lead) and electrical tools powered
by rechargeable batteries (without mains lead).
1. Workplace safety
a) Keep your work area clean and well lit.
Untidy or poorly lit work areas can lead to ac-
cidents.
b) Do not use the power tool in potential-
ly explosive environments containing
flammable liquids, gases or dusts. Pow-
er tools create sparks which can ignite dusts or
fumes.
c) Keep children and other people away
whilst operating the electrical tool.
Distractions can cause you to lose control of
the device.
2. Electrical safety
a) The mains plug on the device must fit
the mains socket. The plug must not
be modified in any way. Never use
adapter plug on earthed power tools.
Unmodified plugs and the correct sockets reduce
the risk of electric shock.
b) Avoid touching grounded surfaces such
as pipes, radiators, ovens, and refrig-
erators. There is a higher risk of electric shock
if your body is earthed.
c) Keep the device away from rain or
moisture. Water penetrating the electrical
device increases the risk of an electric shock.
d) Do not use the mains lead for any pur-
pose for which it was not intended,
e.g. to carry the device, to hang up
the device or to pull the mains plug
out of the mains socket. Keep the mains
lead away from heat, oil, sharp edges
or moving equipment parts. Damaged
or tangled cables increase the risk of an elec-
tric shock.
e) When using power tools outdoors al-
ways use extension cords approved

8 GB/IE
for outdoor use. Using an extension cable
suitable for outdoor use reduces the risk of
electric shock.
f) Use an earth leakage circuit breaker
if operating the power tool in a moist
environment cannot be avoided. Using
an earth leakage circuit breaker reduces the
risk of electric shock.
3. Personal safety
a) Remain alert at all times, watch what
you are doing and always proceed
with caution when using power tools.
Do not use power tools when tired or
under the influence of drugs, alcohol
or medication. One moment of carelessness
whilst using the power tool can result in serious
injury.
b) Always wear protective equipment
and safety glasses. Wearing personal
protective equipment such as a dust mask, non-
slip safety shoes, safety helmet or ear protec-
tors, depending on the type and application
of the power tool, reduces the risk of injuries.
c) Avoid accidental starting. Verify the
power tool is switched off before con-
necting it to the mains, picking it up or
carrying it. Carrying the power tool with
your finger on the ON / OFF switch or with the
device switched on can result in accidents.
d) Remove any adjusting tools or span-
ners before switching on the power
tool. Leaving a tool or spanner attached to a
rotating part of a device can lead to injury.
e) Avoid unnatural postures. Always
maintain proper footing and balance.
This will ensure having better control over the
power tool in unforeseen circumstances.
f) Wear suitable clothing. Do not wear
loose clothing or jewellery. Keep your
hair, clothing and gloves clear of mov-
ing parts. Loose clothing, jewellery or long
hair can become trapped in moving parts.
g) When using vacuum dust extraction
and collection devices remember to
verify these are properly connected
and used. Using of such devices reduces the
hazard presented by dust.
4. Handling and using
the power tool
a) Do not overload the device. Always
use a power tool intended for the task.
By using the right power tool for the job you will
work more safely and achieve a better result.
b) Do not use a power tool with a defec-
tive switch. Power tools that can no longer
be switched on and off are dangerous and must
be repaired.
c) Unplug from the mains before chang-
ing device settings or accessories, or
setting the device down. This precaution
will prevent the power tool from starting acci-
dentally.
d) Always be sure to keep power tools
out of reach of children when not in
use. Do not let anyone use the device
if he or she is not familiar with it or
has not read the instructions and ad-
vice. Power tools are dangerous when used
by inexperienced individuals.
e) Maintain the power tool with care.
Check that moving parts are working
properly and move freely. Check for
any parts that are broken or damaged
enough to detrimentally affect the
function of the power tool. Have dam-
aged parts repaired before using the
unit. Many accidents are caused by poorly
maintained power tools.
f) Keep cutting tools clean and sharp.
Carefully maintained cutting tools with sharp
cutting edges are less likely to jam and easier
to control.
g) Use the power tool, accessories, insert-
ed tools etc. according to these instruc-
tions. When doing so consider the
working conditions and the applica
tion.
Using power tools for purposes other than those
intended can lead to dangerous situations.
General safety advice on power tools
General safety advice on power tools / Start-up

9 GB/IE
General safety advice on power tools
5. Service
a) Only have the power tool repaired by
qualified professionals using OEM
spare parts. This ensures the safety of the
power tool is maintained.
Safety notes for hammer drills
Wear hearing protection. Exposure to
noise can cause hearing loss.
Use the additional handle when using
the device. Losing control can lead to injury.
Hold the device by the insulated han-
dles when performing work n appli-
cations where a potential danger of
the tool striking hidden electrical lines
or its own power cable. Contact with a
live wire could cause metal parts of the device
to become live and lead to electric shock.
Wear a dust mask.
TOXIC DUST! Working on
materials which can produce harmful / toxic dusts
presents a health risk to the user and people
within close vicinity.
CAUTION - LEADS! DANGER! Verify you
will not strike electric-, gas- or water lines whilst
using the power tool. If necessary, first use a
cable detector before drilling into or cutting
open a wall.
Start-up
Pivot additional handle
Note: For safety reasons this device must only be
used with the additional handle
7
installed (also
see Fig. C, D, E).
The position of the additional handle
7
can be
adjusted. Turn the wing screw
1
anti-clockwise
and swivel the additional handle
7
into the
desired position.
Then tighten the wing screw
1
again.
This unit features an LED
5
. It will light up once
the unit is connected to the mains, indicating
the unit is energised and will immediately switch
on when the ON / OFF switch
3
is activated.
Depth stop
Open the wing screw
1
.
Insert the depth stop
11
in the additional
handle
7
.
Make sure that the toothing on the depth stop
11
is pointing downwards.
Pull the depth stop
11
out as far as necessary
so that the distance between the tip of the drill
and the tip of the depth stop corresponds to
the desired drilling depth.
Firmly tighten the wing screw
1
.
Inserting / removing tools
Inserting tools:
Lightly grease the tool holder before inserting
the tool
8
.
To insert, pull back the locking sleeve
10
and
insert the tool.
Release the locking sleeve
10
. This locks the
tool holder. Pull the tool to ensure that it is firm-
ly locked in place. The tool has some radial play
inherent in the system.
Removing tools:
To remove the tool pull back on the locking
sleeve
10
.
Quick-release chuck for
round shaft drills
Do not use the quick-release
chuck for round shaft drills for hammer drilling or
chiseling applications!
Set the function selector switch
6
to the drill
symbol
.
General safety advice on power tools / Start-up

10 GB/IE
Start-up / Maintenance and Cleaning
Attaching the quick-release chuck for
round shaft drills:
To attach the additional chuck for round shaft
drills (also see Fig. A) pull back the locking
sleeve
10
and insert the additional chuck.
Release the locking sleeve
10
. This locks the
tool holder. Pull the tool to ensure that it is firm-
ly locked in place.
Removing the quick-release chuck for
round-shaft drills:
To remove the additional chuck pull back the lock-
ing sleeve
10
and remove the additional chuck.
Inserting tools:
RISK OF INJURY! Switch the
device off and unplug from the mains socket before
performing any work on the device.
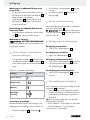
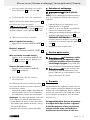
Setting the function with the
function selector switch
Press and hold the release button for the function
selector switch
6a
and turn the function selector
switch
6
until the desired symbol locks in next
to the arrow.
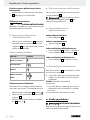
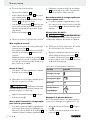
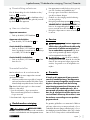
The functions are marked as follows:
Function Symbol
Drilling / screwing
Hammer drilling
Chiseling
Chisel position
adjustment
Adjusting the chisel position:
This function allows you to turn the tool to the nec-
essary position for chiseling (also see Fig. C, D).
Turn the function selector switch
6
to position
.
Turn the tool inside the tool holder
8
to the
necessary position.
To chisel, turn the function selector switch
6
to .
Selecting the direction
Select the direction of rotation by setting the direc-
tion switch
2
.
Only use / adjust the rotation
switch
2
with the device stopped.
Switching on and off
Switching on the device:
Press the ON / OFF switch
3
.
Switching the device off:
Release the ON / OFF switch
3
.
Activating permanent operation:
Press the ON/OFF switch
3
and lock whilst
pressed using the ON / OFF switch
4
.
Deactivating permanent operation:
Press and release the ON / OFF switch
3
.
Presetting the speed
The speed dial
3a
allows you to adjust the opera-
ting speed to specific speeds.
Which speed is most suitable depends on the
material you will be working on. We recommend
testing the speed to determine the correct setting.
Tip: These two basic rules about speeds
are always helpful:
1. larger bore diameter = lower speed and vice
versa, smaller bore diameter = higher speed
2. hard material = low speed
Maintenance and Cleaning
RISK OF INJURY! Switch the
device off and unplug from the mains socket before
performing any work on the device.
Maintenance and Cleaning / Service / Warranty / Disposal

11 GB/IE
Start-up / Maintenance and Cleaning
Maintenance and Cleaning / Service / Warranty / Disposal
Always keep the device clean, dry and free of
oil or grease.
Do not allow liquids to enter the hammer drill.
Use a dry cloth to clean the housing.
Regularly clean the tool holder
8
.
CAUTION! PRETENSION! Pull the locking
sleeve
10
back and release the dust cap
9
.
Clean and grease components.
Service
Have your appliance
repaired by qualified professionals
using OEM parts only. This will maintain
the safety of the device.
If the connection cable needs
to be replaced, this repair must be performed
by the manufacturer or a representative to pre-
vent safety hazards.
Warranty
The warranty for this appliance is for 3
years from the date of purchase. The ap-
pliance has been manufactured with care
and meticulously examined before deliv-
ery. Please retain your receipt as proof
of purchase. In the event of a warranty
claim, please make contact by telephone
with our Service Department. Only in this
way can a post-free despatch for your
goods be assured.
The warranty covers only claims for material and
maufacturing defects, but not for transport damage,
for wearing parts or for damage to fragile compo-
nents, e.g. buttons or batteries. This product is for pri-
vate use only and is not intended for commercial use.
The warranty is void in the case of abusive and im-
proper handling, use of force and internal tamper-
ing not carried out by our authorized service branch.
Your statutory rights are not restricted in any way
by this warranty.
The warranty period will not be extended by repairs
made unter warranty. This applies also to replaced
and repaired parts. Any damage and defects extant
on purchase must be reported immediately after
unpacking the appliance, at the latest, two days after
the purchase date. Repairs made after the expiration
of the warranty period are subject to payment.
GB
Service Great Britain
Tel.: 0871 5000 720
(0,10 GBP/Min.)
e-mail: k[email protected]
IAN 46883
IE
Service Ireland
Tel: 1890 930 034
(0,08 EUR/Min. (peak)
0,06 EUR/Min. (off peak))
e-mail: k[email protected]
IAN 46883
Disposal
The packaging is made of environmen-
tally friendly materials, which may be
disposed through your local recycling
facilities.
Do not dispose of power tools
with household rubbish!
In accordance with European Directive 2002 / 96 / EC
,
worn out power tools must be collected separately
and taken for environmentally compatible recycling.
Contact your local refuse disposal authority for
more details on the disposal of worn out electrical
devices.

12 GB/IE
Sisällysluettelo
Declaration of Conformity / Manufacturer
Declaration of Conformity /
Manufacturer
We, KOMPERNASS HANDELS GMBH, the person
responsible for documents: Mr Semi Uguzlu, BURG-
STRASSE 21, 44867 BOCHUM, GERMANY, hereby
declare that this product complies with the following
standards, normative documents and EU directives:
Machinery Directive
(2006 / 42 / EC)
EU Low Voltage Directive
(2006 / 95 / EC)
Electromagnetic Compatibility
(2004 / 108 / EC)
RoHS Directive
(2011 / 65 / EU)
applicable harmonised standards
EN 60745-1:2009+A11
EN 60745-2-6:2010
EN 55014-1:2006+A1+A2
EN 55014-2:1997+A1+A2
EN 61000-3-2:2006+A1+A2
EN 61000-3-3:2008
Type / Description of product:
Hammer drill PBH 1050 A1
Year of manufacture: 10–2013
Serial number: IAN 46883
Bochum, 31.10.2013
Semi Uguzlu
- Quality Manager -
We reserve the right to make technical modifica-
tions in the course of product development.

13 FI
Sisällysluettelo
Yleistä
Määräystenmukainen käyttö ............................................................................................................... Sivu 14
Laitteen osat.......................................................................................................................................... Sivu 14
Toimituksen sisältö ................................................................................................................................ Sivu 14
Tekniset tiedot ....................................................................................................................................... Sivu 14
Sähkötyökaluja koskevat yleiset turvaohjeet
1. Työpaikkaturvallisuus....................................................................................................................... Sivu 15
2. Sähköturvallisuus ............................................................................................................................. Sivu 15
3. Henkilöiden turvallisuus ................................................................................................................... Sivu 16
4. Sähkötyökalujen huolellinen käsittely ja käyttö ............................................................................. Sivu 16
5. Huolto ............................................................................................................................................... Sivu 16
Poravasaroita koskevat turvallisuusohjeet .......................................................................................... Sivu 17
Käyttöönotto
Lisäkahvan kääntäminen ..................................................................................................................... Sivu 17
Syvyysvaste .......................................................................................................................................... Sivu 17
Työkalujen asentaminen / irrottaminen ............................................................................................... Sivu 17
Pyörövarsiporan pikaistukka ............................................................................................................... Sivu 17
Toiminnon valitseminen valintakytkimellä ........................................................................................... Sivu 18
Pyörimissuunnan valitseminen ............................................................................................................. Sivu 18
Käynnistäminen ja sammuttaminen ..................................................................................................... Sivu 18
Kierrosluvun valitseminen..................................................................................................................... Sivu 18
Huolto ja puhdistus .................................................................................................................. Sivu 18
Huoltopalvelu ............................................................................................................................... Sivu 19
Takuu ................................................................................................................................................... Sivu 19
Hävittäminen ................................................................................................................................ Sivu 19
Vaatimustenmukaisuusvakuutus / Valmistaja ................................................. Sivu 20
Declaration of Conformity / Manufacturer

14 FI
Yleistä
Pora- ja talttavasara PBH 1050 A1
Q
Yleistä
Onnittelemme sinua hyvästä valinnastasi! Valitsit erit-
täin korkealaatuisen tuotteen. Käyttöohje on osa tätä
tuotetta. Se sisältää tärkeitä turvallisuusohjeita sekä
käyttöä ja hävitystä koskevia ohjeita. Tutustu ennen
tuotteen käyttöä huolellisesti kaikkiin käyttöja turval-
lisuusohjeisiin. Käytä tuotetta ainoastaan ohjeen
mukaan ja siinä mainittuihin tarkoituksiin. Anna kaik-
ki ohjeet mukaan, jos luovutat tuotteen edelleen.
Määräystenmukainen käyttö
Poravasara PBH 1050 A1 soveltuu:
- Tiilen, betonin ja kiven vasaraporaamiseen
- Betonin, kiven ja rappauksen talttaamiseen
- Kiven, puun ja metallin poraamiseen
Kaikki muu käyttö tai laitteen muuttaminen ei ole
määräystenmukaista ja se voi aiheuttaa huomattavia
vaaratilanteita.
Valmistaja ei ota vastuuta vahingoista, jotka johtu-
vat määräystenvastaisesta käytöstä.
Laite ei ole tarkoitettu ammattimaiseen käyttöön.
Laitteen osat
1
Siipiruuvi
2
Oikean / vasemman pyörimissuunnan kytkin
3
Virtakytkin
3a
Kierrosluvun valinta
4
Virtakytkimen lukituspainike
5
Valodiodi
6
Toiminnon valintakytkin
6a
Toiminnon valintakytkimen avauspainike
7
Lisäkahva
8
Työkalun kiinnitysistukka
9
Pölysuojus
10
Lukitushylsy
11
Syvyysvaste
Toimituksen sisältö
1 pora- ja talttavasara PBH 1050 A1
1 lisäkahva
1 pikakiinnitysistukka ja sovitin (katso kuva A)
3 poranterää (katso kuva B)
1 litteä taltta (katso kuva B)
1 kärkitaltta (katso kuva B)
1 syvyysvaste
1 purkki voitelurasvaa
1 kantolaukku
1 käyttöohje
Tekniset tiedot
Nimellisottoteho: 1050 W
Nimellisjännite: 230 V∼, 50 Hz
Tyhjäkäyntikierrosluku: n
0
0–980 / min
Iskutaajuus: 0–5300 / min
Iskuenergia: 3 joulea
Porausteho: maks. 13 mm teräkseen
maks. 32 mm puuhun
maks. 26 mm betoniin
Suojausluokka: II /
Melu- ja tärinätiedot:
Melun mittausarvo laskettu EN 60745 -standardin
mukaisesti. Sähkötyökalun A-painotettu melutaso
on tavallisesti:
Poravasarointi:
Äänenpainetaso: 91,26 dB(A)
Äänitehotaso: 102,26 dB(A)
Epätarkkuus K: 3 dB
Talttaus:
Äänenpainetaso: 93,44 dB(A)
Äänitehotaso: 103,44 dB(A)
Epätarkkuus K: 3 dB
Käytä kuulosuojaimia!
Värähtelyn kokonaisarvot (kolmen suunnan vektori-
summa) laskettu EN 60745 -standardin mukaisesti:
Yleistä / Sähkötyökaluja koskevat yleiset turvaohjeet

15 FI
Yleistä
Yleistä / Sähkötyökaluja koskevat yleiset turvaohjeet
Pääkahva
Poravasarointi betoniin:
a
h(HD)
= 9,853 m / s
2
,
K = 1,5 m / s
2
Lisäkahva
Poravasarointi betoniin:
a
h(HD)
= 8,967 m / s
2
, K = 1,5 m / s
2
Pääkahva
Talttaus: a
h(CHeq)
= 12,738 m / s
2
,
K = 1,5 m / s
2
Lisäkahva
Talttaus: a
h(CHeq)
= 8,278 m / s
2
,
K = 1,5 m / s
2
Näissä ohjeissa ilmoitettu väräh-
telytaso on määritetty EN 60745 -standardissa nor-
mitetulla mittausmenetelmällä ja sitä voidaan käyttää
laitevertailussa. Mainittua värähtelyarvoa voidaan
käyttää myös altistumisen alustavaan arviointiin.
Värähtelytaso muuttuu sähkötyökalun käytön mu
kaan
ja se saattaa joissakin tapauksissa ylittää tässä oh-
jeessa mainitun arvon. Värähtelyrasitusta saatetaan
aliarvioida, jos sähkötyökalua käytetään säännölli-
sesti tällä tavalla.
Huomio: Liikekuormituksen arvioimiseksi tietyn
työajan kestäessä on huomioitava myös ajat, jolloin
laite on sammutettuna, tai ajat, jolloin laite on käyn-
nissä, mutta ei työkäytössä. Tämä saattaa vähentää
merkittävästi liikerasitusta kokonaistyöskentelyajan
kestäessä.
Q
Sähkötyökaluja koskevat
yleiset turvaohjeet
Lue kaikki turva- ja muut
ohjeet! Turva- ja muiden ohjeiden laiminlyönti voi
aiheuttaa sähköiskun, tulipalon ja / tai vakavia louk-
kaantumisia.
Säilytä kaikki turva- ja muut ohjeet tulevaa
tarvetta varten!
Turvallisuusohjeissa käytetty käsite ”sähkötyökalu“
koskee verkkokäyttöisiä sähkötyökoneita (verkko-
johdolla) ja akkukäyttösisiä sähkötyökoneita (ilman
johtoa).
1.
Työpaikkaturvallisuus
a) Pidä työskentelypaikka puhtaana ja
hyvin valaistuna. Epäjärjestys ja huono
valaistus voivat johtaa tapaturmiin.
b) Älä käytä laitetta räjähdysvaaralli-
sessa ympäristössä, jossa säilytetään
helposti syttyviä nesteitä, kaasuja tai
jossa kehittyy pölyä. Sähkötyökalut kehit-
tävät kipinöintiä, joka voi sytyttää pölyn tai
höyryn.
c)
Lapsien ja asiattomien henkilöiden
läsnäolo työpaikalla laitteen ollessa
käynnissä ei ole sallittua. Voit helposti
menettää kontrollin laitteeseen.
2.
Sähköturvallisuus
a) Laitteen pistokkeen pitää sopia pisto-
rasiaan. Pistoketta ei saa muuttaa
millään tavalla. Älä käytä adapteria
yhdessä suojamaadoitettujen laitteiden
kanssa. Alkuperäinen pistoke ja sopivat pis-
torasia vähentävät sähköiskuvaaraa.
b) Vältä kosketusta maadoitettuihin pin-
toihin, kuten putkiin, lämpöpatterei-
hin, liesiin sekä jääkaappeihin. Vaarana
on saada sähköisku, jos kehosi on maadoitettu.
c)
Älä pidä laitetta sateessa tai muussa
kosteudessa. Veden pääsy laitteeseen lisää
sähköisku vaaraa.
d) Älä kanna laitetta riiputtamalla sitä
kaapelista ja vedä kaapeli irti pistora-
siasta pitämällä kiinni pistokkeesta.
Älä jätä kaapelia kuumaan paikkaan,
älä päästä siihen öljyä, varo teräviä
reunoja sekä laitteen pyöriviä osia.
Vialliset tai kietoutuneet kaapelit lisäävät riskiä
saada sähköisku.
e) Jos työskentelet ulkotiloissa, käytä
silloin jatkokaapelia, jonka käyttö on
sallittu myös ulkotilaan. Ulkotilaan sovel-
tuva kaapeli vähentää riskiä saada sähköisku.
f) Jos sähkötyökalua joudutaan käyttä-
mään kosteassa ympäristössä, on
käytettävä vikavirtakytkintä. Vikavirta-
kytkimen käyttö pienentää sähköiskun vaaraa.

16 FI
Sähkötyökaluja koskevat yleiset turvaohjeet
3. Henkilöiden turvallisuus
a) Ole aina tarkkaavainen, tarkista aina,
mitä teet ja toimi järkevästi sähkölait-
teilla työskennellessäsi. Älä käytä
laitetta, jos olet väsynyt, käyttänyt
huumeita, alkoholia tai lääkkeitä.
Epätarkkaavaisuus laitetta käytettäessä voi
aiheuttaa vaikeita loukkaantumisia.
b) Käytä henkilökohtaisia turvavarustei-
ta ja suojalaseja aina. Henkilökohtaisten
turvavarusteiden käyttö, kuten pölynaamari,
turvakengät, kypärä tai kuulosuoja, vähentä-
vät loukkaantumisriskiä.
c) Varo käynnistämästä laitetta vahin-
gossa. Varmista, että sähkötyökalu
on kytketty pois päältä, ennen kuin
liität sen pistorasiaan, nostat sen tai
kannat sitä. Tapaturmat ovat mahdollisia,
jos sormesi on laitetta kantaessasi virtakytki-
mellä tai laite on kytketty päälle.
d) Poista kaikki työkalut ja ruuviavaimet
paikalta ennen kuin kytket laitteen.
Pyörivässä laiteosassa oleva työkalu tai avain
voi johtaa tapaturmaan.
e) Vältä työskentelemästä epätavallises-
sa a
sennossa. Asetu tukevaan asentoon
ja pysyttele koko ajan tasapainossa.
Pystyt silloin hallitsemaan laitteen erityisesti yl-
lättävissä tilanteissa.
f) Käytä sopivaa vaatetusta. Älä käytä
löysiä vaatteita äläkä pidä koruja.
Hiukset, vaatteet ja käsineet on pidet-
tävä etäällä liikkuvista osista. Löysät
vaatteet, korut ja avonaiset hiukset voivat jäädä
kiinni liikkuviin osiin.
g) Jos laitteeseen asennetaan pölynimu-
ri- ja lastunkeruulaite, varmistu sitä
ennen, että osat on liitetty ja niitä käy-
tetään oikein. Näiden laitteiden liittäminen
vähentää pölystä aiheutuvia vaaroja.
4.
Sähkötyökalujen huolellinen
käsittely ja käyttö
a) Älä ylirasita laitetta. Käytä työssäsi
tätä työtä varten tarkoitettua sähkö-
työkalua. Sopivan sähkötyökalun kanssa
työskentelet paremmin ja varmemmin sen teho-
alueella.
b) Älä käytä mitään sähkötyökalua,
jonka käynnistyskytkin on viallinen.
Sähkötyökalu, jota ei voi enää kytkeä päälle
tai päältä, on vaarallinen ja se on korjattava.
c) Irrota pistotulppa pistorasiasta, ennen
kuin säädät laitetta, vaihdat sen va-
rusteita tai laitat sen varastoon. Nämä
varotoimenpiteet estävät sen, että laite käynnistyy
vahingossa.
d) Säilytä sähkötyökaluja silloin, kun nii-
tä ei käytetä, lasten ulottumattomissa.
Älä anna henkilöiden käyttää laitetta,
jos he eivät tunne sitä tai eivät ole lu-
keneet näitä käyttöohjeita. Sähkötyöka-
lut ovat vaarallisia, jos kokemattomat henkilöt
käyttävät niitä.
e) Hoida laitetta huolellisesti. Tarkasta,
toimivatko sen liikkuvat osat moit-
teettomasti ja että ne eivät jumitu;
tarkasta, onko joku osa katkennut tai
murtunut tai vahingoittunut niin, että
se haittaa laitteen toimintaa. Korjauta
vialliset osat aina ennen kuin käytät
laitetta. Moni tapaturma johtuu huonosti
huolletuista sähkötyökaluista.
f) Pidä terät terävinä ja puhtaina. Huolella
hoidetut leikkuuterät terävine leikkuureunoineen
eivät juutu niin helposti kiinni työkappaleeseen
ja ne toimivat kevyemmin.
g) Käytä sähkötyökaluja, lisätarvikkei-
ta, käyttötarvikkeita jne. tässä esitet-
tyjen määräysten mukaisesti ja aina
erityistä tyyppiä vastaavasti. Ota
huomioon työolosuhteet ja työ. Sähkö-
työkalujen käyttö muuhun kuin sille määrättyyn
tarkoitukseen voi aiheuttaa vaarallisia tilanteita.
5.
Huolto
a) Anna laitteet huoltoliikkeen tai sähkö-
liikkeen korjattavaksi. Korjauksissa
s
aa käyttää vain alkuperäisiä varaosia
.
Laitteesi säilyy näin turvallisena.
Sähkötyökaluja koskevat yleiset turvaohjeet / Käyttöönotto

17 FI
Sähkötyökaluja koskevat yleiset turvaohjeet
Sähkötyökaluja koskevat yleiset turvaohjeet / Käyttöönotto
Poravasaroita koskevat
turvallisuusohjeet
Käytä kuulosuojaimia! Melu voi johtaa
kuulon heikkenemiseen.
Käytä laitteen mukana toimitettuja
lisäkahvoja. Hallinnan menettäminen
laitteesta voi johtaa loukkaantumisiin.
Pidä laitteen eristetystä otealueesta
kiinni työskennellessäsi, jos laite jou-
tuu kosketuksiin piilossa olevien säh-
köjohtojen tai laitteen oman sähkö-
johdon kanssa. Kosketus jännitteelliseen
johtoon voi johtaa jännitteen myös laitteen me-
talliosiin, jolloin seurauksena voi olla sähköisku.
Käytä pölynaamaria.
MYRKYLLISIÄ PÖLYJÄ!
Vahingollisten / myrkyllisten pölyjen työstäminen
vaarantaa käyttävän henkilön tai lähellä sijaits-
evien henkilöiden terveyden.
HUOMIOI JOHDOT! VAARA! Varmista,
ettet osu sähkö-, kaasu- tai vesijohtoihin sähkö-
työkalulla työskennellessäsi. Tarkista tarvittaessa
johtoilmaisimella, ennen kuin poraat tai revit
seinän auki.
Käyttöönotto
Lisäkahvan kääntäminen
Huomautus: Turvallisuussyistä laitetta saa käyt-
tää vain asennetulla lisäkahvalla
7
(katso myös
kuvat C, D, E).
Lisäkahvan
7
tarttuma-asentoa voidaan
muuttaa. Kierrä siipiruuvia
1
vastapäivään ja
käännä lisäkahva
7
haluttuun asentoon.
Kiristä tämän jälkeen taas siipiruuvi
1
tiukkaan
Laite on varustettu valodiodilla
5
. Se syttyy
palamaan heti kun laite liitetään sähköverkkoon,
mikä osoittaa, että laite on jännitteenalainen ja
että laite käynnistyy heti kun virtakytkintä
3
käytetään.
Syvyysvaste
Avaa siipiruuvi
1
.
Aseta syvyysvaste
11
lisäkahvaan
7
.
Varmistaudu, että syvyysrajoitttimn
11
hammastus
näyttää alaspäin.
Vedä syvyysrajoitin
11
niin pitkälle ulos, että
poran kärjen ja syvyysrajoitttimen kärjen väli
vastaa haluttua poraussyvyyttä.
Kierrä siipiruuvi
1
taas tiukasti kiinni.
Työkalujen asentaminen /
irrottaminen
Työkalun asentaminen:
Voitele ennen työkalun asentamista työkalun
kiinnitysistukka
8
kevyesti.
Vedä lukitushylsy
10
taaksepäin ja aseta
työkalu paikoilleen.
Vapauta lukitushylsy
10
. Näin istukka lukittuu.
Tarkista moitteeton lukitus vetämällä työkalusta.
Työkalussa on järjestelmästä riippuva säteittäi-
nen välys.
Työkalun irrottaminen:
Kun haluat irrottaa työkalun vedä lukitushylsy
10
taaksepäin.
Pyörövarsiporan pikaistukka
Älä käytä pyörovarsiporan
pikaistukkaa poravasarointiin tai talttaukseen.
Aseta toiminnon valintakytkin
6
porasymbolin
kohdalle
.
Pyörövarsiporan pikakiinnitysistukan
asentaminen:
Pyörövarsiporan lisäistukan kiinnitystä varten
(katso myös kuva A) vedä lukitushylsy
10
taaksepäin ja kiinnitä lisäistukka.
Vapauta lukitushylsy
10
. Näin istukka lukittuu.
Tarkista moitteeton lukitus vetämällä työkalusta.

18 FI
Käyttöönotto / Huolto ja puhdistus
Pyörövarsiporan pikakiinnitysistukan
irrottaminen:
Vedä lisäistukan irrottamista varten lukitushylsy
10
taaksepäin ja irrota lisäistukka.
Työkalujen asentaminen:
LOUKKAANTUMISVAARA!
Kytke laite pois päältä ja irrota pistoke pistorasiasta
aina ennen laitteella työskentelyä.
Toiminnon valitseminen
valintakytkimellä
Pidä toiminnon valintakytkimen
6a
avauspaini-
ketta alaspainettuna ja käännä toiminnon val-
intakytkintä
6
niin, että haluttu symboli lukittuu
merkityn nuolen kohdalle.
Toiminnot on merkitty seuraavasti:
Toiminto Symboli
Poraus / ruuvaus
Vasaraporaus
Talttaus
Talttausasennon
säätö
Talttausasennon säätäminen:
Tällä toiminnolla voit kääntää työkalun talttausta
varten (katso myös kuvat C, D) tarvittavaan asentoon.
Käännä toiminnon valintakytkin
6
asentoon .
Käännä työkalu tarvittavaan asentoon kiinnitys-
istukassa
8
.
Talttausta varten käännä toiminnon valintakyt-
kin
6
asentoon .
Pyörimissuunnan valitseminen
Valitse pyörimissuunta oikean/vasemman pyörimis-
suunnan kytkimellä
2
.
Oikean/vasemman pyörimissu-
unnan kytkintä saa käyttää/asettaa
2
vain
laitteen ollessa pysähdyksissä.
Käynnistäminen ja
sammuttaminen
Laitteen käynnistäminen:
Paina virtakytkintä
3
.
Laitteen sammuttaminen:
Vapauta virtakytkin
3
.
Jatkuvan käytön päällekytkeminen:
Paina virtakytkintä
3
ja lukitse se alaspainet-
tuna virtakytkimen lukituspainikkeella
4
.
Jatkuvan käytön poiskytkeminen:
Paina virtakytkintä
3
ja vapauta se jälleen.
Kierrosluvun valitseminen
Kierrosluvun valinnan
3a
asetusrattaalla voit valita
kierrosluvun porrastettuna.
Sopiva kierrosluku riippuu työstettävästä mate-
riaalista. Suosittelemme kierrosluvun valintaa
testaamalla.
Vinkki: Nämä kaksi perussääntöä
auttavat aina:
1. iso poran halkaisija = alhaisempi kierrosluku ja
vastaavasti pieni poran halkaisija = korkeampi
kierrosluku
2. kova materiaali = alhaisempi kierrosluku
Huolto ja puhdistus
LOUKKAANTUMISVAARA!
Kytke laite pois päältä ja irrota pistoke pistorasiasta
aina ennen laitteella työskentelyä.
Huolto ja puhdistus / Huoltopalvelu / Takuu / Hävittäminen

19 FI
Käyttöönotto / Huolto ja puhdistus
Huolto ja puhdistus / Huoltopalvelu / Takuu / Hävittäminen
Laitteen tulee olla aina puhdas, kuiva ja puhdas
öljystä tai voitelurasvasta.
Poravasaran sisään ei saa päästä mitään nesteitä.
Käytä kotelon puhdistamiseen kuivaa liinaa.
Puhdista säännöllisesti työkalun kiinnitysistukka
8
.
VARO! ESIJÄNNITE! Vedä lukitushylsy
10
taaksepäin ja nosta pölysuojus
9
pois.
Puhdista osat ja rasvaa ne.
Huoltopalvelu
Anna vain pätevien
ammattihenkilöiden korjata laitteet
käyttämällä alkuperäisiä varaosia.
N
äin voidaan varmistaa laitteen turvallinen käyttö.
Liitäntäjohdon saa vaihtaa
uuteen vain valmistaja tai hänen valtuuttamansa
henkilö, jotta turvallisuusriskit voidaan välttää.
Q
Takuu
Laitteen takuu on 3 vuotta ostopäivästä.
Laite on valmistettu huolellisesti ja tarkis-
tettu tarkasti ennen toimitusta. Säilytä os-
tokuitti todisteeksi takuun voimassaolosta.
Ota takuutapauksessa puhelimitse yhteyttä
huoltopisteeseesi. Vain näin voidaan taata
tuotteesi maksuton lähettäminen huol
toon.
Takuu koskee ainoastaan materiaali- ja valmistusvir-
heitä, ei kuitenkaan kuljetusvaurioita, kuluvia osia
tai herkästi vaurioituvien osien, esim. kytkinten tai
akkujen vaurioita. Tuote on tarkoitettu ainoastaan
yksityiseen, ei kaupalliseen käyttöön.
Väärä tai asiaton käyttö, väkivallan käyttö ja muiden
kuin valtuutetun huoltopisteen suorittamat korjaukset
aiheuttavat takuun raukeamisen. Tämä takuu ei ra-
joita kuluttajan lakisääteisiä oikeuksia.
Takuukorjaus ei pidennä takuuaikaa. Tämä koskee
myös vaihdettuja ja korjattuja osia. Mahdollisista jo
ostettaessa olemassa olevista vahingoista ja puut-
teista on ilmoitettava välittömästi pakkauksesta pur-
kamisen jälkeen, kuitenkin viimeistään kaksi päivää
ostopäiväyksen jälkeen. Takuuajan jälkeen suoritetut
korjaukset ovat maksullisia.
FI
Huolto Suomi
Tel.: 010309 3582
e-mail: k[email protected]i
IAN 46883
Q
Hävittäminen
Pakkaus on valmistettu ympäristöystäväl-
lisistä kierrätettävistä materiaaleista.
Älä heitä sähkötyökaluja
talousjätteiden joukkoon!
Sähkölaitteiden hävittämistä koskevan EU-direktiivin
2002 / 96 / EC mukaan käytöstä poistettuja säh-
kölaitteita hävitettäessä on huolehdittava materiaa-
lien erottelusta ja kierrätyksestä.
Lisätietoja käytetyn laitteen hävittämismahdollisuuk-
sista antavat mm. paikalliset ympäristöviranomaiset.

20 FI
Vaatimustenmukaisuusvakuutus / Valmistaja
Q
Vaatimustenmukaisuusvakuu-
tus / Valmistaja
Me, KOMPERNASS HANDELS GMBH, dokumentoin-
nista vastaava: herra Semi Uguzlu, BURGSTRASSE
21,
44867 BOCHUM, GERMANY, vakuutamme täten,
että tämä tuote vastaa seuraavia standardeja, nor-
matiivisia dokumentteja ja EY-direktiivejä:
Konedirektiivi
(2006 / 42 / EC)
Pienjännitedirektiivi
(2006 / 95 / EC)
Elektromagneettista yhteensopivuutta
koskevat direktiivit
(2004 / 108 / EC)
RoHS Direktiivi
(2011 / 65 / EU)
Sovelletut harmonisoidut normit
EN 60745-1:2009+A11
EN 60745-2-6:2010
EN 55014-1:2006+A1+A2
EN 55014-2:1997+A1+A2
EN 61000-3-2:2006+A1+A2
EN 61000-3-3:2008
Tyyppi / Laitekuvaus:
Pora- ja talttavasara PBH 1050 A1
Date of manufacture (DOM): 10–2013
Sarjanumero: IAN 46883
Bochum, 31.10.2013
Semi Uguzlu
- Laatumanageri -
Pidätämme oikeuden muutoksiin.
Innehållsförteckning
Sidan laddas ...
Sidan laddas ...
Sidan laddas ...
Sidan laddas ...
Sidan laddas ...
Sidan laddas ...
Sidan laddas ...
Sidan laddas ...
Sidan laddas ...
Sidan laddas ...
Sidan laddas ...
Sidan laddas ...
Sidan laddas ...
Sidan laddas ...
Sidan laddas ...
Sidan laddas ...
Sidan laddas ...
Sidan laddas ...
Sidan laddas ...
Sidan laddas ...
Sidan laddas ...
Sidan laddas ...
Sidan laddas ...
Sidan laddas ...
Sidan laddas ...
Sidan laddas ...
Sidan laddas ...
Sidan laddas ...
Sidan laddas ...
Sidan laddas ...
Sidan laddas ...
Sidan laddas ...
Sidan laddas ...
Sidan laddas ...
Sidan laddas ...
Sidan laddas ...
Sidan laddas ...
Sidan laddas ...
-
 1
1
-
 2
2
-
 3
3
-
 4
4
-
 5
5
-
 6
6
-
 7
7
-
 8
8
-
 9
9
-
 10
10
-
 11
11
-
 12
12
-
 13
13
-
 14
14
-
 15
15
-
 16
16
-
 17
17
-
 18
18
-
 19
19
-
 20
20
-
 21
21
-
 22
22
-
 23
23
-
 24
24
-
 25
25
-
 26
26
-
 27
27
-
 28
28
-
 29
29
-
 30
30
-
 31
31
-
 32
32
-
 33
33
-
 34
34
-
 35
35
-
 36
36
-
 37
37
-
 38
38
-
 39
39
-
 40
40
-
 41
41
-
 42
42
-
 43
43
-
 44
44
-
 45
45
-
 46
46
-
 47
47
-
 48
48
-
 49
49
-
 50
50
-
 51
51
-
 52
52
-
 53
53
-
 54
54
-
 55
55
-
 56
56
-
 57
57
-
 58
58


Parkside PBH 1050 A1 Operation and Safety Notes
- Kategori
- Roterande hammare
- Typ
- Operation and Safety Notes
på andra språk
- Deutsch: Parkside PBH 1050 A1
- français: Parkside PBH 1050 A1
- English: Parkside PBH 1050 A1
- suomi: Parkside PBH 1050 A1
- Nederlands: Parkside PBH 1050 A1
Relaterade papper
-
Parkside PBH 1050 A1 Operation and Safety Notes
-
Parkside PBH 1100 A1 Operation and Safety Notes
-
-
-
-
Kompernass Drill PEBH 1010 Användarmanual
-
-