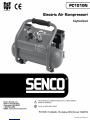
Senco PC1010N Operating Instructions Manual
- Kategori
- Luftkompressorer
- Typ
- Operating Instructions Manual


2
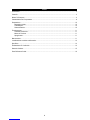
Table Of Contents
Introduction.................................................................................................................................................... 3
Inspection...................................................................................................................................................... 3
Safety Warnings............................................................................................................................................ 4
Compressor Features ................................................................................................................................... 8
Preparation..................................................................................................................................................10
Initial Set-Up .........................................................................................................................................10
Location ................................................................................................................................................ 10
Electrical ............................................................................................................................................... 10
Operation..................................................................................................................................................... 11
Pre-Start Checklist................................................................................................................................11
Start-Up ................................................................................................................................................ 11
Shutdown.............................................................................................................................................. 11
Maintenance................................................................................................................................................11
Troubleshooting .......................................................................................................................................... 12
Compressor Specifications .........................................................................................................................14
Declaration of Conformity............................................................................................................................ 14
Limited Warranty ......................................................................................................................................... 15
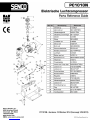
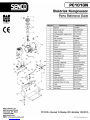
Parts Reference Guide................................................................................................................................ 16

3
Introduction
Congratulations on the purchase of your new SENCO® Air Compressor! You can be assured your
SENCO Air Compressor was constructed with the highest level of precision and accuracy. Each
component has been rigorously tested by technicians to ensure the quality, endurance and performance
of this air compressor.
This operator’s manual was compiled for your benefit. By reading and following the simple safety,
installation and operation, and maintenance steps described in this manual, you will receive years of
troublefree operation from your new SENCO Air Compressor. The contents of this manual are based on
the latest product information available at the time of publication. The manufacturer reserves the right to
make changes in price, color, materials equipment, specifications or models at any time without notice.
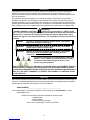
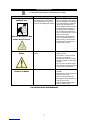
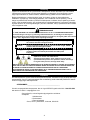
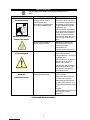
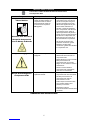
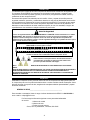
Safety Alert!
A “DANGER, WARNING or CAUTION” safety warning will be surrounded by a “SAFETY ALERT
BOX.
” This box is used to designate and emphasize Safety Warnings that must be followed when
operating this air compressor. Accompanying the safety warnings are “Signal Words” which
designate the degree or level of hazard seriousness. The “Signal Words” used in this manual are
as follows:
DANGER: Indicates an imminently hazardous situation which, if not avoided,
WILL result in death or serious injury.
WARNING: Indicates an imminently hazardous situation which, if not avoided,
COULD result in death or serious injury.
CAUTION: Indicates an imminently hazardous situation which, if not avoided
MAY result in minor or moderate injury or damage to the air
compressor.
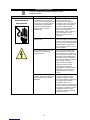
The symbols set to the left of this paragraph are “Safety Alert
Symbols
.” These symbols are used to call attention to items
or procedures that could be dangerous to you or other
persons using this equipment.
ALWAYS PROVIDE A COPY OF THIS MANUAL TO ANYONE USING THIS EQUIPMENT. READ ALL
INSTRUCTIONS IN THIS MANUAL AND ANY INSTRUCTIONS SUPPLIED BY MANUFACTURERS
OF SUPPORTING EQUIPMENT BEFORE OPERATING THIS AIR COMPRESSOR AND ESPECIALLY
POINT OUT THE “SAFETY WARNINGS” TO PREVENT THE POSSIBILITY OF PERSONAL INJURY
TO THE OPERATOR.
Inspection
Unbox the air compressor and write in the serial number in the space provided below. Inspect for signs of
obvious or concealed freight damage. Be sure that all damaged parts are replaced and any mechanical
problems are corrected prior to the operation of the air compressor.
SERIAL NUMBER__________________________________________
If you have Questions or Comments call SENCO’s toll-free Action-line: 1-800-543-4596 or, e-mail:
toolprof@Senco.com
Please have the following information available for all service calls:
1. Model Number
2. Serial Number
3. Date and Place of Purchase
Senco, 4270 Ivy Pointe Blvd., Cincinnati, OH 45245

4
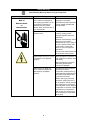
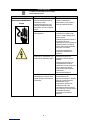
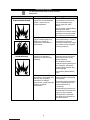
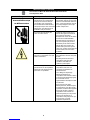
Safety Warnings
Read All Safety Warnings Before Using Air Compressor
Hazard
Potential Consequence
Prevention
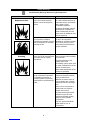
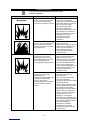
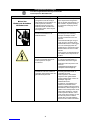
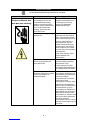
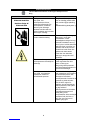
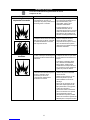
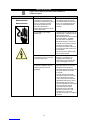
Risk of
Electric Shock
or
Electrocution
•Serious injury or death could
occur if the air compressor is
not properly grounded. Your air
compressor is powered by
electricity and may cause
electric shock or electrocution if
not used properly.
•Make sure the air compressor is
plugged into a properly
grounded outlet which provides
correct voltage and adequate
fuse protection.
•Electrical shock may occur from
electrical cord.
•Check power cord for signs of
crushing, cutting or heat
damage. Replace faulty cord
before use.
•Keep all connections dry and off
the ground. Do not allow
electrical cords to lay in water or
in such a position where water
could come in contact with
them. Do not touch plug with
wet hands.
•Do
not pull on the electrical cord
to disconnect from the outlet.
•Electrical shock may occur if air
compressor is not operated
properly.
•
Never operate air compressor in
wet conditions or outdoors when
it is raining.
•Never operate air compressor
with safety guards/covers
removed or damaged.
•Serious injury or death may
occur if electrical repairs are
attempted by unqualified
persons.
•Any electrical wiring or repairs
performed on this air
compressor should be done by
Authorized Service Personnel in
accordance with National and
Local electrical codes.
•Before opening any electrical
enclosure, always shut off the
air compressor, relieve pressure
and unplug the air compressor
from the power source. Allow air
compressor to cool down. Never
assume the air compressor is
safe to work on just because it
is not operating. It could restart
at any time!

5
Safety Warnings
Read All Safety Warnings Before Using Air Compressor
Hazard
Potential Consequence
Prevention
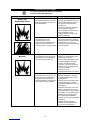
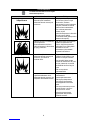
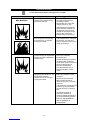
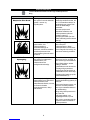
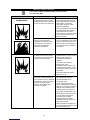
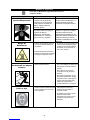
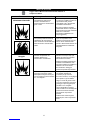
Risk of
Explosion or Fire
•Serious injury or death may
occur from normal electrical
sparks in motor and pressure
switch.
•Always operate air compressor
in a well ventilated area free of
flammable vapors, combustible
dust, gases or other
combustible materials.
•If spraying flammable material,
locate the air compressor at
least 6 meters away from the
spray area. (An additional hose
may be required.)
•Serious injury may occur if any
air compressor ventilation
openings are restricted, causing
the air compressor to overheat
and start on fire.
•Never place objects against or
on top of air compressor.
Operate air compressor at least
30 cm away from any wall or
obstruction that would restrict
proper ventilation.
Risk of
Bursting
•Serious injury or death may
occur from an air tank explosion
if air tanks are not properly
maintained.
•Drain air tank daily or after each
use to prevent moisture buildup
in the air tank.
•If air tank develops a leak,
replace the air tank
immediately. Never repair, weld
or make modifications to the air
tank or its attachments.
•Never make adjustments to the
factory set pressures.
•Serious injury may occur from
an air compressor malfunction
or exploding accessories if
incorrect system components ,
attachments or accessories are
used.
•Never exceed manufacturer's
maximum allowable pressure
rating of attachments.
•Because of extreme heat, do
not use plastic pipe or lead tin
soldered joints for a discharge
line.
•Never use air compressor to
inflate small, low pressure
objects such as toys.
•All hoses and fittings shall be
suitable for site use at the
maximum allowable working
pressure of the portable
compressor.
•Use only genuine SENCO®
repair parts for your air
compressor.

6
Safety Warnings
Read All Safety Warnings Before Using Air Compressor
Hazard
Potential Consequence
Prevention
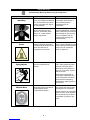
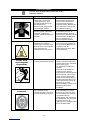
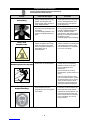
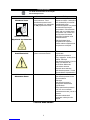
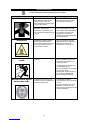
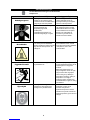
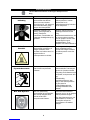
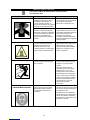
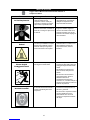
Risk to
Breathing
•Serious injury or death could
occur from inhaling compressed
air. The air stream may contain
carbon monoxide, toxic vapors
or solid particles.
•Never inhale air from the air
compressor either directly or
from a breathing device
connected to the air
compressor.
•Sprayed materials such as
paint, paint solvents, paint
remover, insecticides, weed
killers, etc. contain harmful
vapors and poisons.
•Operate air compressor only in
a well ventilated area. Follow all
safety instructions provided with
the materials you are spraying.
Use of a respirator may be
required when working with
some materials.
Risk of
Burns
•Serious injury could occur from
touching exposed metal parts.
These areas can remain hot for
some time after the air
compressor is shut down.
•Never allow any part of your
body or other materials to make
contact with any exposed metal
parts on the air compressor,
motor, or pipework.
Risk of
Flying Objects
•Soft tissue damage can occur
from the compressed air
stream.
•Always wear OSHA required
“Z87” safety glasses to shield
the eyes from flying debris.
•Never point the air stream at
any part of your body, anyone
else or animals.
•Never leave pressurized air
compressor unattended. Shut
off air compressor and relieve
pressure before attempting
maintenance, attaching tools or
accessories.
Eye Protection
Must Be Worn
•Serious injury can occur from
loose debris being propelled at
a high speed from the
compressed air stream.
•Always maintain a safe distance
from people and animals while
operating the air compressor.
•Do not move the air compressor
while air tank is under pressure.
Do not attempt to move the air
compressor by pulling on the
hose.

7
Safety Warnings
Read All Safety Warnings Before Using Air Compressor
Hazard
Potential Consequence
Prevention
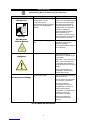
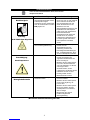
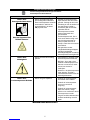
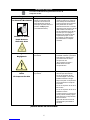
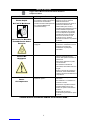
Risk from
Moving Parts
Warning:
Unit May Start
Without Warning
•Risk of bodily injury from
moving parts. This air
compressor cycles
automatically when the pressure
switch is in the
ON (1)
/Auto
position.
•Always turn off air compressor
when not in use
. Bleed pressure
from the air hose and unplug
from electrical outlet before
performing maintenance. All
repairs to the air compressor
should be made by an
Authorized Service person.
Never assume the air
compressor is safe to work on
just because it is not operating.
It could restart at any time!
•Risk of injury from negligent
use.
•Do not operate without
protective covers/guards.
Replace damaged
covers/guards before using the
air compressor.
Risk from
Negligence
•Never allow children or
adolescents to operate this air
compressor!
•Stay alert -- watch what you are
doing. Do not operate the air
compressor when fatigued or
under the influence of alcohol or
drugs.
•Know how to stop the air
compressor. Be thoroughly
familiar with controls.
Risk of
Air Compressor Damage
•Risk of major repair. •Do not operate air compressor
without an air filter.
•Do not operate air compressor
in a corrosive environment.
•Do not incline the air
compressor transversly or
longitudinally more than 10°.
•Always operate the air
compressor in a stable, secure
position to prevent air
compressor from falling.
•Follow all maintenance
instructions listed in this
manual.
! SAVE THESE INSTRUCTIONS !

8
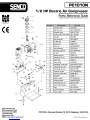
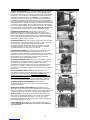
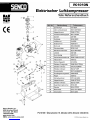
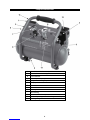
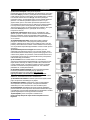
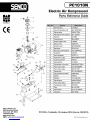
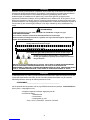
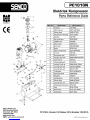
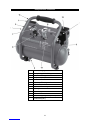
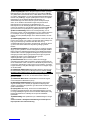
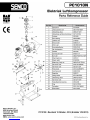
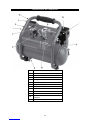
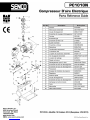
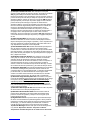
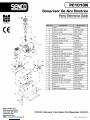
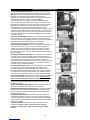
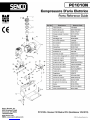
Compressor Features
1.
Motor/Pressure Switch
2.
Thermal Overload / Reset
3.
Air Intake Filter
4.
Air Compressor Pump
5.
Safety Relief Valve
6.
Air Tank Drain Valve
7.
Tank Pressure Gauge
8.
Outlet Pressure Gauge
9.
Pressure Regulator
10.
Discharge Line
11.
Electric Power Cord
12.
Ventilation Openings / Protective Shroud
13.
Quick Disconnect

9
Compressor Features
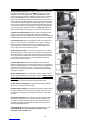
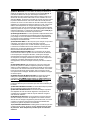
1) Motor/Pressure Switch:
This switch is used to start or stop the air
compressor. Moving the switch to the
ON (1) position will provide
automatic power to the pressure switch which will allow the motor to
start when the air tank pressure is below the factory set cut
-
in pressure.
When in the
ON (1) position, the pressure switch stops the motor
when the air tank pressu
re reaches the factory set cut-
out pressure. For
safety purposes, this switch also has a pressure release valve located
on the side of the switch designed to automatically release compressed
air from the air compressor pump head and its discharge line when
the
air compressor reaches cut
-out pressure or is shut off. This allows the
motor to restart freely. Moving the switch to the
OFF (0) position will
remove power from the
pressure switch and stop the air compressor.
2
)Motor Thermal Overload:
Motor has a protective breaker located
on the pump. Excessive amperage draw will result in the breaker
tripping to protect the motor and operator. Reset the breaker by pushing
the black plastic stem back into the housing. Reset switch if it is tripped.
3
)Air Intake Filter:
This filter is designed to clean air coming into the
pump. To ensure the pump continually receives a clean, cool, dry air
supply, this filter must always be clean and ventilation opening free
from obstructions. The filter can be removed for cleanin
g by using
warm, soapy water. Rinse the filter and air dry.
4
)Air Compressor Pump:
To compress air, the piston moves up and
down in the cylinder. On the downstroke, air is drawn in through the air
intake valve while the exhaust valve remains closed. On t
he upstroke,
air is compressed, the intake valve closes and compressed air is forced
out through the exhaust valve, into the discharge line, through the
check valve and into the air tank.
5
)Safety Relief Valve:
This valve is designed to prevent system
failures by relieving pressure from the system when the compressed air
reaches a predetermined level. The valve is preset by the manufacturer
and must not be modified in any way. To verify the valve is working
properly, pull on the ring. Air pressure should
escape. When the ring is
released, it will reseat.
6
)Air Tank Drain Valve:
The drain valve is used to remove moisture
from the air tank(s) after the air compressor is shut off. NEVER attempt
to open the drain valve when more than
0.7 bar of air pressure
is in
the air tank!
To open the drain valve, turn the knob counter-clockwise.
Tilt tank to ensure that all condensation drains through valve.
7
)Air Tank Pressure Gauge:
The air tank pressure gauge indicates
the reserve air pressure in the air tank(s).
8
)Outlet Pressure Gauge:
The outlet pressure gauge indicates the air
pressure available at the outlet side of the regulator. This pressure is
controlled by the regulator and is always less or equal to the air tank
pressure.
9
)Pressure Regulator:
The air pressure coming from the air tank is
controlled by the regulator knob. Turn the pressure regulation knob
clockwise to increase discharge pressure, and counter
-clockwise to
decrease discharge pressure. Follow tool operating instructions for
recomme
nded pressure range.
10) Discharge Line:
Please note that the discharge line is very hot.
HOT SURFACES: Do not remove protective shroud. High
temperature after sustained use.

10
Preparation
Initial Set-Up
1. Read safety warnings before setting-up air compressor.
Location
Caution
In order to avoid damaging the air compressor, do not incline the air
compressor transversely or longitudinally more than 10º.
1. Place air compressor at least 30 cm away from obstacles that may prevent proper ventilation.
Do not place air compressor in an area:
•Where there is evidence of oil or gas leaks.
•Where flammable gas vapors or materials may be present.
Warning
Serious injury or death may occur if electrical sparks from motor and pressure
switch come
in contact with flammable vapors, combustible dust, gases or
other combustible materials. When using the air compressor for spray
painting, place the air compressor as far away f rom the work area as possible,
using extra air hoses instead of extension cords.
•Where air temperatures fall below 0°C or exceed 40°C.
•Where extremely dirty air or water could be drawn into the air compressor.
Electrical
Danger
Improper connection of the equipment-grounding conductor can result in a
risk of shock or electrocutio
n. Check with a qualified electrician or service
personnel if you are in doubt as to whether the outlet is properly grounded.
Do not use any type of adapter with this product. If repair or replacement of
the cord or plug is necessary, do not connect the gr
ounding wire to either flat
blade terminal. The wire with insulation having an outer surface that is green
with or without yellow stripes is the grounding wire.
Warning
This product must be grounded. If there should be a malfunction or
breakdown,
grounding provides a path of least resistance for electric current
to reduce the risk of electric shock. This product is equipped with a cord
having an equipment grounding conductor and a grounding type plug. The
plug must be plugged into an appropriate ou
tlet that is properly installed and
grounded in accordance with all local codes and ordinances.
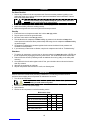
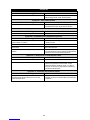
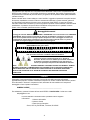
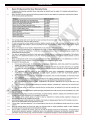
1. SENCO® DOES NOT RECOMMEND THE USE OF EXTENSION CORDS as this can create power
loss and overheating of the motor. Use of an additional air hose is recommended rather than an
extension cord. If use of an extension cord is unavoidable, it should be plugged into a GFCI found in
circuit boxes or protected receptacles.
When using an extension cord, observe the following:
Cable Length
Wire Gauge
Up to 8meters
12
AWG
Up to 30 meters
10
AWG
Up to 50 meters
8
AWG
Up to 75 meters
6
AWG
Use only extension cords having an electrical rating not less than the rating of the product. Do not use
damaged extension cords. Examine extension cord before using and replace if damaged. Do not
abuse extension cord and do not yank on any cord to disconnect. Keep cord away from heat and
sharp edges. Always shut off the air compressor switch before removing the plug from the receptacle.

11
Operation
Pre-Start Checklist
1. Remove any moisture in the air compressor tank. Remove excessive pressure by pulling on the
safety relief valve ring or with an air tool, then open the air tank drain valve in the bottom of the air
tank. Close tightly when drained.
Warning
:Risk of bodily injury. NEVER attempt to open the drain valve when
more than
0.7 bar of air pressure is in the air tank!
2. Make sure the air compressor Motor Switch is in the
OFF (0)
position.
3. Make sure all safety valves are working correctly.
4. Make sure all guards and covers are in place and securely mounted.
Start-Up
1. Ensure the lever on the pressure switch box is in the
OFF (0)
position.
2. Plug the power cord into the grounded outlet.
3. Move the motor switch to the
ON (1)
position.
4. This will allow the air compressor to
Start
building up pressure in the air tanks and
Stop
when
correct pressure is achieved. When pressure drops with usage, the air compressor will
Start
building
up pressure again.
5. Set pressure by adjusting the pressure regulator knob counter-clockwise for less pressure and
clockwise for more pressure.
6. If you notice any unusual noise or vibration, stop the air compressor and refer to “Troubleshooting.”
Shutdown
1. To stop the air compressor, move the lever on the motor switch to the
OFF (0)
position.NEVER stop
the air compressor by unplugging it from the power source.This could result in risk of electrocution.
2. Drain air from the air tank by releasing air with an attached air tool or by pulling on the safety relief
valve ring.
3. Once pressure in the air tanks register under 0.7 bar, open the drain valve under each air tank to
drain any moisture.
4. Allow the air compressor to cool down.
5. Wipe air compressor clean and store in a safe, non-freezing area.
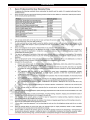
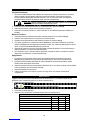
Maintenance
Read the instruction manual before performing maintenance. The following procedures must be
performed when stopping the air compressor for maintenance or service.
1. Turn off the air compressor.
Warning
:Never assume the air compressor is safe to work on just because it
is not operating. It could restart at any time!
2. Disconnect cord from main power supply.
3. Open all drains.
4. Wait for the air compressor to cool before starting service.
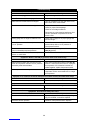
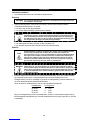
Maintenance Chart
Procedure
Daily
Weekly
Monthly
Drain condensation in air tank(s)
X
Check for unusual noise/vibration
X
Check for air leaks
X
Inspect air filter
X
Clean exterior of compressor
X
Check safety relief valve
X

12
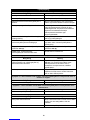
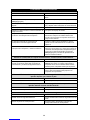
Troubleshooting
Symptom 1. Motor will not run or restart.
Probable Cause
Remedy
•Power cord not plugged in. •Plug cord into grounded outlet.
•Motor/Pressure switch in OFF (0) position. •Move switch to ON (1) position.
•Motor thermal overload switch has tripped. •Turn air compressor off, wait until motor is cool,
then check motor circuit breaker.
•Fuse blown or circuit breaker has tripped. •Replace fuse or reset circuit breaker.
•Check for proper fuse amperage.
•Check for low voltage conditions.
•Disconnect any other electrical appliances from
circuit or operate air compressor on its own
branch circuit.
•Wrong gauge wire or length of extension cord. •Check chart on page 10 for proper gauge wire
and cord length.
•Air tank pressure exceeds motor/pressure switch
“cut-in” pressure.
•Motor will start automatically when air tank
pressure drops below “cut-in” pressure of
motor/pressure switch.
•Pressure release valve on motor/pressure switch
has not unloaded pump head pressure.
•Bleed the line by moving the switch to the
OFF (0) position.
•Defective motor, motor capacitor, motor/pressure
switch, or check valve.
•Contact Senco Customer Service.
Symptom 2. When in the ON (1) position, motor runs continuously.
Probable Cause
Remedy
•Motor/Pressure switch does not shut off motor
when air compressor reaches “cut-out” pressure
and safety relief valve activates.
•Move the motor/pressure switch to the OFF (0)
position. If the motor doesn’t shut off, unplug the
air compressor. If the electrical contacts are
welded together, replace the pressure switch.
•Air compressor is incorrectly sized. •Limit the air pressure to the capacity of the air
compressor. Either use a smaller tool or a larger
air compressor.
Symptom 3. Air continues to leak at motor/pressure switch release valve after motor stops.
Probable Cause
Remedy
•The check valve is stuck open. •Remove, clean, or replace.
Symptom 4. Air continues to leak at motor/pressure switch release valve after motor is running.
Probable Cause
Remedy
•Defective motor/pressure switch. •Replace.
Symptom 5. Air leaks from safety relief valve.
Probable Cause
Remedy
•Possible defective safety relief valve. •Operate safety relief valve manually by pulling on
ring. If it still leaks, it should be replaced.
•Excessive air tank pressure. •Defective motor/pressure switch. Replace.

13
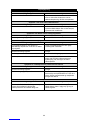
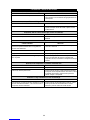
Troubleshooting
Symptom 6. Air leaks at fittings.
Probable Cause
Remedy
•Fittings are not tight enough. •Tighten fittings where air can be heard escaping.
Check fittings with soapy water solution.
Do not overtighten.
Symptom 7. Air leak in air tank.
Probable Cause
Remedy
•Defective or rusted air tank. •Air tank must be replaced.
Do not attempt to repair air tank!
Do not weld, repair or make modifications.
Symptom 8. Air blowing from inlet filter.
Probable Cause
Remedy
•Damaged inlet (reed) valve. •Contact SENCO Customer Service.
Symptom 9. Insufficient pressure at air tool or accessory.
Probable Cause
Remedy
•Pressure regulator knob not turned to high
enough pressure or defective pressure regulator.
•Adjust pressure regulator knob to proper setting
or replace.
•Restricted air intake filter. •Clean.
•Air leaks. •Check for leaks and repair.
•Air compressor is not large enough for air
requirement.
•Check the accessory air requirement. If it is
higher than the CFM or pressure supply of the air
compressor, you need a larger air compressor.
Symptom 10. Air compressor not making enough air.
Probable Cause
Remedy
•Restricted air intake filter. •Clean.
•Defective (reed) valve. •Drain air tank and measure pump up time.
Compare to specifications. If lower, remove pump
head and inspect valve plate, clean or replace.
Symptom 11. Moisture in discharge air.
Probable Cause
Remedy
•Condensation in air tank caused by high level of
atmospheric humidity or air compressor is not run
long enough.
•Drain air tank after every use. Drain air tank more
often in humid weather and use an air line filter.

14
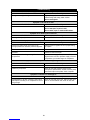
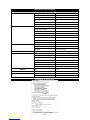
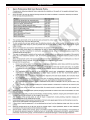
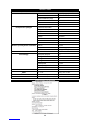
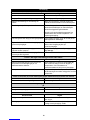
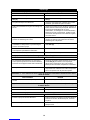
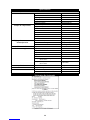
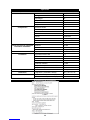
Compressor Specifications
Model #: PC 1010N EU
Motor
Horsepower 0.5 HP (peak) / 0.3 HP (Running)
Voltage 230V
Amperage 2A
Hz. 50
Phase Single
RPM 2850
Compressor Pump
Number of Cylinders 1
Compression Stage 1
Crankcase Aluminum
Bearings Ball
Cylinder Aluminum
Valves Reed-Single
Head Aluminum
Filter Insert
Motor/Pressure Switch Setting
Cut-out 9 bar (130 PSI)
Cut-in 7 bar (100 PSI)
Controls ON (1) / OFF (0)
Air Tank
Capacity 3.8 liter
Performance
CFM Air Displacement 1.2
CFM @ 40 PSI
0.7
CFM @ 90 PSI
0.5
CFM @ 100 PSI
0.45
Maximum Pressure
9 bar (130 PSIG)
Pump-up Time: 0-135 PSI
150 seconds
Recovery Time: 105-135 PSI
36 seconds
Weight
Net
9.7 kg
Dimensions
Basic L×W×H
36.5 ×30 ×31 cm
Noise
Measured sound power level (dB)
78 dBA
Guaranteed sound power level (dB)
81 dBA
Declaration of Conformity


2
Inhalt
Einleitung....................................................................................................................................................... 3
Inspektion...................................................................................................................................................... 3
Sicherheitshinweise...................................................................................................................................... 4
Leistungsmerkmale des Kompressors.......................................................................................................... 8
Vorbereitung................................................................................................................................................10
Einrichten Für Die Erstmalige Inbetriebnahme..................................................................................... 10
Aufstellort.............................................................................................................................................. 10
Elektrik .................................................................................................................................................. 10
Betrieb .........................................................................................................................................................11
Checkliste Für Vorbereitung Auf Die Inbetriebnahme.......................................................................... 11
Inbetriebnahme..................................................................................................................................... 11
Ausschalten ..........................................................................................................................................11
Wartung.......................................................................................................................................................11
Störungsbeseitigung ................................................................................................................................... 12
Technische Daten .......................................................................................................................................14
Konformitätserklärung .................................................................................................................................14
Begrenzte Garantie .....................................................................................................................................15
Parts Reference Guide................................................................................................................................ 16

3
Einleitung
Wir beglückwünschen Sie zum Kauf Ihres neuen SENCO®-Luftkompressors! Sie können sich sicher sein,
dass Ihr SENCO-Luftkompressor mit höchster Präzision gebaut wurde. Jede Komponente wurde streng
von Technikern geprüft, um Qualität, Haltbarkeit und Leistung dieses Luftkompressors sicherzustellen.
Diese Bedienungsanleitung soll Ihnen beim Betrieb helfen. Wenn Sie dieses Handbuch durchlesen und
die in ihm enthaltenen einfachen Sicherheits-, Montage-und Bedienungsanweisungen sowie
Wartungsschritte beachten, wird Ihr neuer SENCO-Luftkompressor jahrelang störungsfrei funktionieren.
Der Inhalt dieses Handbuchs basiert auf den neusten Produktinformationen, die zum Zeitpunkt der
Veröffentlichung vorlagen. Der Hersteller behält sich das Recht vor, Preis, Farbe, Werkstoffe,
Ausstattung, Spezifikationen oder Modelle jederzeit ohne Vorankündigung zu ändern.
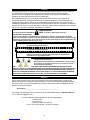
Sicherheitshinweis!
Jeder Sicherheitshinweis des Typs “GEFAHR”, “WARNUNG” oder ACHTUNG” ist mit einem
“SICHERHEITSHWEIS-KASTEN” umrandet.
Dieser Kasten dient dazu, Sicherheitshinweise zu markieren und hervorzuheben, die beim Betrieb des
Luftkompressors zu beachten sind. Vor den Sicherheitshinweisen finden Sie “Signalwörter”, die den Grad
bzw. die Größenordnung der Gefahr bezeichnen. Die in diesem Handbuch verwendeten “Signalwörter”
lauten wie folgt:
GEFAHR:Bezeichnet eine unmittelbar gefährliche Situation, die –falls sie nicht
vermieden wird tödlich oder mit Personenschäden enden wird.
WARNUNG:Bezeichnet eine potenziell gefährliche Situation, die –falls sie nicht
vermieden wird –tödlich oder mit Personenschäden enden könnte.
ACHTUNG:Bezeichnet eine potenziell gefährliche Situation, die –falls sie nicht
vermieden wird –mit geringfügigen oder minderschweren
Personenschäden oder der Beschädigung des Luftkompressors enden
könnte.
Die Symbole links neben diesem Abschnitt sind so genannte
“Sicherheitshinweis-Symbole.”
Diese Symbole dienen dazu, auf bestimmte Punkte oder Prozeduren
aufmerksam zu machen, die für Sie oder Personen, die dieses Gerät
benutzen, gefährlich sein könnten.
STELLEN SIE JEDER PERSON, DIE DIESES GERÄT BENUTZT, EINE KOPIE DIESES HANDBUCHS ZUR
VERFÜGUNG. LESEN SIE ALLE IN DIESEM HANDBUCH ENTHALTENEN ANWEISUNGEN UND SONSTIGEN
VON DER HERSTELLER DER ZUBEHÖRTEILE MITGELIEFERTEN ANWEISUNGEN DURCH, EHE SIE DIESEN
LUFTKOMPRESSOR BEDIENEN, UND HEBEN SIE BESONDERS DIE “SICHERHEITSHINWEISE” HERVOR,
UM DIE GEFAHR ZU VERMEIDEN, DASS SICH DER BEDIENER VERLETZT.
Inspektion
Nehmen Sie den Luftkompressor aus der Transportkiste und notieren Sie seine Seriennummer in der
unten dafür vorgesehenen Rubrik. Inspizieren Sie den Luftkompressor auf Anzeichen für sichtbare oder
verdeckte Transportschäden. Stellen Sie sicher, dass alle beschädigten Teile ausgetauscht und alle
mechanischen Probleme behoben werden, bevor Sie den Luftkompressor in Betrieb nehmen.
Seriennummer__________________________________________
Wenn Sie Fragen haben oder Hinweise geben möchten, dann können Sie SENCO gebührenfrei unter
folgender Tel.-Nr. anrufen:1-800-543-4596 oder E-Mail:toolprof@Senco.com
Bitte halten Sie bei Service-Anrufen folgende Informationen bereit:
1. Nummer des Modells
2. Seriennummer
3. Datum und Ort des Kaufs
Senco, 4270 Ivy Pointe Blvd., Cincinnati, OH 45245

4
Sicherheitshinweise
Lesen sie alle sicherheitshinweise durch, bevor sie den
kompressor betreiben
Gefahr
Potenzielle Folgen
Unfallverhütung
Gefahr Durch
Elektrische Schläge
oder
Tödliche Elektroschocks
•Wenn der Luftkompressor nicht
ordnungsgemäß geerdet wird, kann
dies Verletzungen, eventuell mit
Todesfolge, nach sich ziehen. Der
Luftkompressor wird elektrisch
betrieben und kann Quelle
elektrischer Schläge oder sogar
tödli
cher Elektroschocks sein, wenn
er nicht ordnungsgemäß betrieben
wird.
•Stellen Sie sicher, dass der
Luftkompressor an eine
ordnungsgemäß geerdete
Netzsteckdose angeschlossen wird,
die die richtige Spannung führt und
angemessen durch eine Sicherung
gesichert ist.
•Prüfen Sie das Netzkabel auf
Anzeichen für Beschädigung durch
Quetschung, Schnitte oder Wärme.
•Das Netzkabel kann Quelle
elektrischer Schläge sein.
•Ersetzen Sie das Netzkabel vor
Inbetriebnahme, falls es beschädigt
ist.
•Hallten Sie alle Anschlüsse
trocknen unin ausreichendem
Abstand zum Boden. Netzkabel
dürfen nicht im Wasser liegen oder
an Stellen, an denen sie in Kontakt
mit Wasser kommen könnten.
Berühren Sie den Stecker niemals
mit nassen Händen.
•Zu elektrischen Schlägen kann es
kommen, wenn der Luftkompressor
nicht ordnungsgemäß betrieben
wird.
•Ziehen Sie nicht am Netzkabel, um
den Stecker aus der Steckdose zu
ziehen.
•Betreiben Sie den Luftkompressor
niemals unter feuchten
Umgebungsbedingungen oder
unter freiem Himmel, wenn es
regnet.
•Wenn unqualifizier tes Personal
versucht, den Luftkompressor zu
reparieren, kann dies zu
Verletzungen führen.
•Betreiben Sie den Luftkompressor
niemals, wenn die
Schutzverkleidung bzw. die
Abdeckungen entfernt oder
beschädigt sind.
•Der Luftkompressor darf nur von
zugelassenen
Kundendiensttechnikern in
Übereinstimmung mit nationalen
und örtlicheelektrotechnischen
Vorschriften verdrahtet oder
repariert werden.
•Vor dem Öffnen des elektrischen
Schaltschranks muss der
Luftkompressor stets ausgeschaltet
werden; anschließend muss der
Druck abgelassen und der
Luftkompressor von der
Spannungsquelle getrennt werden.
•Lassen Sie den Luftkompressor
abkühlen. Gehen Sie niemals
davon aus, dass der
Luftkompressor betriebssicher ist,
nur weil er gerade nicht läuft. Er
könnte jederzeit unvermittelt
starten!
Sidan laddas ...
Sidan laddas ...
Sidan laddas ...
Sidan laddas ...
Sidan laddas ...
Sidan laddas ...
Sidan laddas ...
Sidan laddas ...
Sidan laddas ...
Sidan laddas ...
Sidan laddas ...
Sidan laddas ...
Sidan laddas ...
Sidan laddas ...
Sidan laddas ...
Sidan laddas ...
Sidan laddas ...
Sidan laddas ...
Sidan laddas ...
Sidan laddas ...
Sidan laddas ...
Sidan laddas ...
Sidan laddas ...
Sidan laddas ...
Sidan laddas ...
Sidan laddas ...
Sidan laddas ...
Sidan laddas ...
Sidan laddas ...
Sidan laddas ...
Sidan laddas ...
Sidan laddas ...
Sidan laddas ...
Sidan laddas ...
Sidan laddas ...
Sidan laddas ...
Sidan laddas ...
Sidan laddas ...
Sidan laddas ...
Sidan laddas ...
Sidan laddas ...
Sidan laddas ...
Sidan laddas ...
Sidan laddas ...
Sidan laddas ...
Sidan laddas ...
Sidan laddas ...
Sidan laddas ...
Sidan laddas ...
Sidan laddas ...
Sidan laddas ...
Sidan laddas ...
Sidan laddas ...
Sidan laddas ...
Sidan laddas ...
Sidan laddas ...
Sidan laddas ...
Sidan laddas ...
Sidan laddas ...
Sidan laddas ...
Sidan laddas ...
Sidan laddas ...
Sidan laddas ...
Sidan laddas ...
Sidan laddas ...
Sidan laddas ...
Sidan laddas ...
Sidan laddas ...
Sidan laddas ...
Sidan laddas ...
Sidan laddas ...
Sidan laddas ...
Sidan laddas ...
Sidan laddas ...
Sidan laddas ...
Sidan laddas ...
Sidan laddas ...
Sidan laddas ...
Sidan laddas ...
Sidan laddas ...
Sidan laddas ...
Sidan laddas ...
Sidan laddas ...
Sidan laddas ...
Sidan laddas ...
Sidan laddas ...
Sidan laddas ...
Sidan laddas ...
Sidan laddas ...
Sidan laddas ...
Sidan laddas ...
Sidan laddas ...
Sidan laddas ...
Sidan laddas ...
Sidan laddas ...
Sidan laddas ...
Sidan laddas ...
Sidan laddas ...
Sidan laddas ...
Sidan laddas ...
Sidan laddas ...
Sidan laddas ...
Sidan laddas ...
Sidan laddas ...
Sidan laddas ...
Sidan laddas ...
Sidan laddas ...
Sidan laddas ...
Sidan laddas ...
Sidan laddas ...
Sidan laddas ...
Sidan laddas ...
Sidan laddas ...
Sidan laddas ...
Sidan laddas ...
Sidan laddas ...
Sidan laddas ...
Sidan laddas ...
Sidan laddas ...
Sidan laddas ...
Sidan laddas ...
Sidan laddas ...
Sidan laddas ...
Sidan laddas ...
Sidan laddas ...
Sidan laddas ...
Sidan laddas ...
Sidan laddas ...
Sidan laddas ...
Sidan laddas ...
Sidan laddas ...
Sidan laddas ...
Sidan laddas ...
Sidan laddas ...
Sidan laddas ...
Sidan laddas ...
Sidan laddas ...
Sidan laddas ...
Sidan laddas ...
Sidan laddas ...
-
 1
1
-
 2
2
-
 3
3
-
 4
4
-
 5
5
-
 6
6
-
 7
7
-
 8
8
-
 9
9
-
 10
10
-
 11
11
-
 12
12
-
 13
13
-
 14
14
-
 15
15
-
 16
16
-
 17
17
-
 18
18
-
 19
19
-
 20
20
-
 21
21
-
 22
22
-
 23
23
-
 24
24
-
 25
25
-
 26
26
-
 27
27
-
 28
28
-
 29
29
-
 30
30
-
 31
31
-
 32
32
-
 33
33
-
 34
34
-
 35
35
-
 36
36
-
 37
37
-
 38
38
-
 39
39
-
 40
40
-
 41
41
-
 42
42
-
 43
43
-
 44
44
-
 45
45
-
 46
46
-
 47
47
-
 48
48
-
 49
49
-
 50
50
-
 51
51
-
 52
52
-
 53
53
-
 54
54
-
 55
55
-
 56
56
-
 57
57
-
 58
58
-
 59
59
-
 60
60
-
 61
61
-
 62
62
-
 63
63
-
 64
64
-
 65
65
-
 66
66
-
 67
67
-
 68
68
-
 69
69
-
 70
70
-
 71
71
-
 72
72
-
 73
73
-
 74
74
-
 75
75
-
 76
76
-
 77
77
-
 78
78
-
 79
79
-
 80
80
-
 81
81
-
 82
82
-
 83
83
-
 84
84
-
 85
85
-
 86
86
-
 87
87
-
 88
88
-
 89
89
-
 90
90
-
 91
91
-
 92
92
-
 93
93
-
 94
94
-
 95
95
-
 96
96
-
 97
97
-
 98
98
-
 99
99
-
 100
100
-
 101
101
-
 102
102
-
 103
103
-
 104
104
-
 105
105
-
 106
106
-
 107
107
-
 108
108
-
 109
109
-
 110
110
-
 111
111
-
 112
112
-
 113
113
-
 114
114
-
 115
115
-
 116
116
-
 117
117
-
 118
118
-
 119
119
-
 120
120
-
 121
121
-
 122
122
-
 123
123
-
 124
124
-
 125
125
-
 126
126
-
 127
127
-
 128
128
-
 129
129
-
 130
130
-
 131
131
-
 132
132
-
 133
133
-
 134
134
-
 135
135
-
 136
136
-
 137
137
-
 138
138
-
 139
139
-
 140
140
-
 141
141
-
 142
142
-
 143
143
-
 144
144
-
 145
145
-
 146
146
-
 147
147
-
 148
148
-
 149
149
-
 150
150
-
 151
151
-
 152
152
-
 153
153
-
 154
154
-
 155
155
-
 156
156
-
 157
157
-
 158
158
-
 159
159
-
 160
160


Senco PC1010N Operating Instructions Manual
- Kategori
- Luftkompressorer
- Typ
- Operating Instructions Manual
på andra språk
- italiano: Senco PC1010N
- español: Senco PC1010N
- Deutsch: Senco PC1010N
- français: Senco PC1010N
- dansk: Senco PC1010N
- Nederlands: Senco PC1010N
Andra dokument
-
DeWalt DPC10RC Användarmanual
-
DeWalt DPC10QTC Användarmanual
-
Paslode Proline 248 User And Maintenance Manual
-
DeWalt XR FLEXVOLT LI-ION DCC1054 Användarmanual
-
Michelin MCX550 Instruction Manual And Safety Instructions
-
Ferm CRM1024 Bruksanvisning
-
-
EINHELL 40.433.10 Bruksanvisningar
-
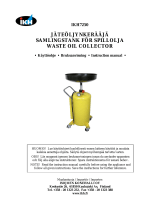 IKH IKH7250 Användarmanual
