Simplicity 2-STAGE SNOWTHROWER, GROUP C, CE Användarmanual
- Kategori
- Snöslungor
- Typ
- Användarmanual

Not for
Reproduction

1
2
3
4
5
6
7
8
9
10
11
12
2
Not for
Reproduction

13
3
Not for
Reproduction

Products Covered by This Manual
The following products are covered by this manual:
1696058, 1696059
Manual Contents:
Operator Safety.................................................................... 4
Safety System Tests............................................................. 7
Features and Controls......................................................... 7
Operation.............................................................................. 7
Maintenance......................................................................... 9
Troubleshooting................................................................. 10
© 2011 Briggs & Stratton Corporation, Milwaukee, WI, USA. All rights reserved.
The images in this document are representative, and are meant to compliment the
instructional copy they accompany. Your unit may vary from the images displayed. LEFT
and RIGHT are as seen from the operator's position.
Operator Safety
Discharge Chute Warning
DANGER
Amputation hazard
The discharge chute contains a rotating impeller to throw snow. Fingers can
quickly become caught in the impeller. Never clear or unclog the discharge chute
with your hands. Always use a clean-out tool.
Failure to observe these safety instructions will result in traumatic amputation
or severe laceration.
Hand contact with the rotating impeller inside the discharge chute is the most common
cause of injury associated with snowthrowers. Never use your hands to clean out the
discharge chute.
To safely clear a clogged discharge chute, follow these instructions:
1. Shut OFF the engine.
2. Wait 10 seconds to be sure the impeller blades have stopped rotating.
3. Always use a clean-out tool, not your hands.
Safety Alert Symbol and Signal Words
The safety alert symbol indicates a potential personal injury hazard. A signal word
(DANGER, WARNING, or CAUTION) is used with the alert symbol to designate a degree
or level of hazard seriousness. A safety symbol may be used to represent the type of hazard.
The signal word NOTICE is used to address practices not related to personal injury.
DANGER indicates a hazard which, if not avoided, will result in death or serious
injury.
WARNING indicates a hazard which, if not avoided, could result in death or serious
injury.
CAUTION indicates a hazard which, if not avoided, could result in minor or moderate
injury.
NOTICE addresses practices not related to personal injury.
2-Stage Snowthrower Hazard Symbols
MeaningSymbolMeaningSymbol
Read and understand the
operator's manual before
operating or servicing the unit.
Safety information about
hazards that can result in
personal injury.
Read the operator's manual
before performing service.
Amputation hazard - rotating
impeller.
Amputation hazard - rotating
auger
Amputation hazard - rotating
impeller.
Thrown objects hazard.Amputation hazard - do not
touch moving parts.
Explosion hazard.Fire hazard.
Toxic fume hazard.Shock hazard.
Ear protection recommended
for extended use.
Hot surface hazard.
Remove the key before
performing service.
Keep a safe distance.
Kickback hazard.Keep children away.
General Safety Warnings
Read the Manual
DANGER
This snowthrower is capable of amputating hands and feet and throwing objects.
Read and observe all the safety instructions in this manual. Failure to do so will
result in death or serious injury.
WARNING
Read the operator's manuals before operating the machine. This machine can be
dangerous if used carelessly.
• Save these original instructions for future reference.
• Never operate the snowthrower without all guards, covers, shields, and other safety
protection devices in place and working.
• Stop the engine whenever leaving the operating position.
• Stop the engine and remove the key before unclogging the impeller housing or
discharge chute, and before making repairs or adjustments.
• When leaving the machine, remove the key.
• To reduce the risk of fire, keep the machine clean and free from spilled fuel, oil, and
debris.
WARNING
Read, understand, and follow all the instructions on the snowthrower and in the
operator’s manual before operating this unit. Failure to observe the safety
instructions in this manual could result in death or serious injury.
• Be thoroughly familiar with the controls and the proper use of the snowthrower.
• Make sure you are properly trained before operating the snowthrower.
• Know how to stop the unit and disengage the controls quickly.
• Never allow anyone to operate the snowthrower without proper instruction.
4
Not for
Reproduction

• Always follow the instructions in the operator’s manual, if the snowthrower will be
stored for an extended period. Maintain or replace safety and instruction labels as
necessary.
• Never attempt to make major repairs on the snowthrower unless you have been
properly trained. Improper servicing of the snowthrower can result in hazardous
operation, equipment damage, and voiding of the product warranty.
Operation and Equipment Safety
WARNING
This snowthrower is only as safe as the operator. If it is misused, or not properly
maintained, it can be dangerous. Remember: you are responsible for your safety
and that of those around you.
• Keep the area of operation clear of all persons, particularly small children and pets.
• Thoroughly inspect the area where the snowthrower will be used and remove all
doormats, sleds, boards, wires, and other foreign objects.
• Do not operate the snowthrower without wearing adequate winter clothing.
• Wear footwear that will improve footing on slippery surfaces. Use caution to avoid
slipping or falling especially when operating the snowthrower in reverse.
• Never operate the snowthrower without good visibility or light.
• Disengage the auger while transporting.
• Always be sure of your footing, and keep a firm hold on the handles. Walk, never run.
• Do not clear snow across the face of slopes. Use extreme caution when changing
direction on slopes. Do not attempt to clear steep slopes.
• Do not overload the machine capacity by attempting to clear snow too quickly.
• Never operate the snowthrower at high transport speeds on slippery surfaces. Look
behind the snowthrower and use care when operating in reverse.
• Do not use the snowthrower on surfaces above ground level such as roofs of
residences, garages, porches, or other such structures or buildings.
• Operators should evaluate their ability to operate the snowthrower safely enough to
protect themselves and others from injury.
• The snowthrower is intended to remove snow only. Do not use the snowthrower for
any other purpose.
• Do not carry passengers.
• After striking a foreign object, shut OFF the engine, disconnect the cord on electric
motors, thoroughly inspect the snowthrower for any damage, and repair the damage
before restarting and operating the snowthrower.
• If the snowthrower vibrates abnormally, shut OFF the engine. Vibration is generally a
warning of trouble. See an authorized dealer if necessary for repairs.
• For models equipped with electric starting motors, disconnect the power cord after
the engine starts.
•Exercise extreme caution when operating on or crossing gravel drives, walks, or roads.
Stay alert for hidden hazards or traffic.
• Run the machine a few minutes after throwing snow to prevent freeze-up of the
collector/impeller.
Fuel Handling
WARNING
Fuel and its vapors are extremely flammable and explosive. Always handle fuel
with extreme care.
Failure to observe these safety instructions can cause a fire or explosion which
could result in severe burns or death.
When adding fuel:
• Never add fuel to a running engine or to a hot engine.
• Turn off engine and let cool at least 2 minutes before removing the fuel cap and adding
fuel.
• Fill fuel tank outdoors or in a well ventilated area.
• Never fill containers inside a vehicle or on a truck or trailer bed with a plastic liner.
Always place containers on the ground, away from your vehicle, before filling.
• When practical, remove gas-powered equipment from the truck or trailer and refuel it
on the ground. If this is not possible, then refuel such equipment on a trailer with a
portable container, rather than from a gasoline dispenser nozzle.
• Keep the nozzle in contact with the rim of the fuel tank or container opening at all
times, until refueling is complete. Do not use a nozzle lock-open device.
• Replace gasoline cap securely and allow spilled fuel evaporate before starting the
engine.
• Do not overfill the fuel tank. To allow for the expansion of gasoline, do not fill above
the bottom of the fuel tank neck.
• Keep fuel away from sparks, open flames, pilot lights, heat, and otherignition sources.
• Check fuel lines, cap, and fittings frequently for cracks or leaks. Replace if necessary.
• Use an approved fuel container.
• If fuel spills, wait until it evaporates before starting engine.
• If fuel is spilled on clothing, change clothing immediately.
When starting the engine:
• Ensure that spark plug, muffler, fuel cap, and air cleaner (if equipped) are in place
and secured.
• Do not crank the engine with the spark plug removed.
• If fuel is spilled, do not attempt to start the engine, but move the snowthrower away
from the area of the spill, and avoid creating any source of ignition, until the fuel vapors
have dissipated.
• Do not over-prime the engine. Follow the engine starting instructions in this manual.
• If the engine floods, set choke (if equipped) to OPEN/RUN position, move throttle (if
equipped) to FAST position and crank until engine starts.
When operating the equipment:
• Do not tip the snowthrower at an angle which causes the fuel to spill.
• Do not choke the carburetor to stop the engine.
• Never run the engine with the air cleaner assembly (if equipped) or the air filter (if
equipped) removed.
• If you drain the oil from the top oil fill tube, the fuel tank must be empty or fuel can leak
out and result in a fire or explosion.
When transporting equipment:
• Transport with fuel tank EMPTY, or with fuel shut-off valve OFF.
When storing gasoline or equipment with fuel in the tank:
• Gasoline is highly flammable and its vapors are explosive. Fumes may travel to a
distant ignition source and an explosion and/or fire may result.
• Handle gasoline carefully. Never store a unit, with fuel in the tank, indoors in a poorly
ventilated enclosure where fuel fumes could reach an open flame, spark, or pilot light,
such as a furnace, water heater, or clothes dryer.
• Store away from furnaces, stoves, water heaters, or other appliances that have pilot
light or other ignition source because they can ignite fuel vapors.
Moving Parts
DANGER
Keep hands, feet, and clothing away from rotating parts. Rotating parts can contact
or entangle hands, feet, hair, clothing, or accessories.
Failure to observe these safety instructions will result in traumatic amputation
or severe laceration.
• Whenever cleaning, repairing, or inspecting the snowthrower, make sure the engine
is OFF, the engine key is removed, and all moving parts have stopped.
• Do not put hands or feet near or under rotating parts. Keep clear of the discharge
opening at all times.
• Never operate the snowthrower without proper guards, and other safety devices in
place and working.
• Never leave the snowthrower unattended while engine is running. Always disengage
the auger and traction controls, stop engine, and remove keys.
• Keep all loose clothing away from the front of the snowthrower and auger. Scarves,
mittens, dangling drawstrings, loose clothes, and pants can quickly become caught
in the rotating device and amputation will occur. Tie up long hair and remove jewelry.
• Run the machine a few minutes after discharging snow to prevent freeze-up of the
collector/impeller.
• Disengage power to the collector/impeller when snowthrower is transported or not in
use.
5
Not for
Reproduction

Thrown Objects
WARNING
Objects can be picked up by the auger and thrown from the chute. Never discharge
snow toward bystanders or allow anyone in front of the snowthrower. Failure to
observe these safety instructions could result in death or serious injury.
• Always wear safety glasses or eye shields during operation, and while performing an
adjustment or repair to protect eyes from foreign objects that may be thrown from the
machine.
• Always be aware of the direction the snow is being thrown. Nearby pedestrians, pets,
or property may be harmed by objects being thrown.
• Be aware of your environment while operating the snowthrower. Running over items
such as, gravel, doormats, newspapers, toys, and rocks hidden under snow, can all
be thrown from the chute or jam in the auger.
• Use extreme caution when operating on or crossing gravel drives, walks, or roads.
• Adjust the collector housing height to clear gravel or crushed rock surface.
• Never operate the snowthrower near glass enclosures, automobiles, window wells,
drop-offs, and the like without proper adjustment of the discharge chute angle.
• Familiarize yourself with the area in which you plan to operate the snowthrower. Mark
off boundaries of walkways and driveways.
Children
WARNING
Tragic accidents can occur if the operator is not alert to the presence of children.
Children are often attracted to the unit and the operating activity. Never assume
that children will remain where you last saw them.
• Keep children out of the area during operation. Children are often attracted to the
equipment. Be mindful of all persons present.
• Be alert and turn the unit off if children enter the area.
• Never allow children to operate the unit.
• Use extra care when approaching blind corners, shrubs, trees, or other objects that
may obscure vision. Children may be present.
Engine Safety
WARNING
Safe operation of the snowthrower requires the proper care and maintenance of
the engine. Failure to observe the safety instructions in this manual could result
in death or serious injury.
• Disengage all clutches and shift into neutral before starting the engine.
• Let the engine adjust to outdoor temperature before starting to clear snow.
• Use extension cords and receptacles as specified by the manufacturer for all units
with electric drive motors or electric starting motors.
• Use a grounded three-wire plug-in for all snowthrowers equipped with electric drive
motors or electric starting motors.
WARNING
Kickback hazard
Rapid retraction of the starter cord (kickback) will pull your hand and arm toward
the engine faster than you can let go. Broken bones, fractures, bruises, or sprains
could result.
When starting engine, pull the starter cord slowly until resistance is felt and then
pull rapidly to avoid kickback.
Carbon Monoxide
WARNING
Engines give off carbon monoxide, an odorless, colorless, poison gas.
Breathing carbon monoxide can cause nausea, fainting, or death.
• Start and run the engine outdoors.
• Do not run the engine in an enclosed area, even if doors and windows are open.
Ignition Source
WARNING
Starting the engine creates sparking.
Sparking can ignite nearby flammable gasses.
Explosion and fire could result.
• If there is natural gas or LP gas leakage in the area, do not start the engine.
• Do not use pressurize starting fluids because their vapors are flammable.
Hot Surfaces
WARNING
Running the engine produces heat. Engine parts, especially the muffler, become
extremely hot.
Failure to observe these safety instructions could result in severe thermal burns
on contact.
• Never touch a hot engine or muffler. Allow muffler, engine cylinder, and fins to cool
before touching.
• Remove debris from muffler area and cylinder area.
• Install and maintain in working order a spark arrester before using equipment on
forest-covered, grass-covered, or brush-covered unimproved land.
•U.S.A. Models: It is a violation of California Public Resource Code Section 4442 to
use or operate the engine on or near any forest-covered, brush-covered, or
grass-covered land unless the exhaust system is equipped with a spark arrester
meeting any applicable local or state laws. Other states or federal areas may have
similar laws.
Maintenance and Storage
WARNING
This snowthrower must be properly maintained to ensure safe operation and
performance. Failure to observe the safety instructions in this manual could result
in death or serious injury.
• When performing any maintenance or repairs on the snowthrower, shut OFF the
engine, wait for all moving parts to stop, and remove the engine key to prevent
someone from accidently starting the engine.
• Check shear bolts and other hardware at frequent intervals for proper tightness to be
sure the snowthrower is in safe working condition.
• Keep nuts and bolts tight and keep snowthrower in good condition.
• Never tamper with safety devices. Check their proper operation regularly and make
necessary repairs if they are not functioning properly.
• Components are subject to wear, damage, and deterioration. Frequently check
components and replace with recommended parts, when necessary.
• Check control operation frequently. Adjust and service as required.
• Use only factory authorized replacement parts, or equivalent, when making repairs.
• Always comply with factory specifications on all settings and adjustments.
• Only authorized service locations should be utilized for major service and repair
requirements.
• Use only attachments and accessories approved by the factory, or equivalent, (such
as wheel weights, counterweights, or cabs).
• Never attempt to make any adjustments while the engine is running (except when
specifically recommended by the factory).
• Always refer to the operator's manual for important details if the snowthrower is to be
stored for an extended period of time.
Safety Decals
Before operating your unit, read the safety decals. The cautions and warnings are for your
safety. To avoid a personal injury or damage to the unit, understand and follow all the safety
decals.
6
Not for
Reproduction

WARNING
If any safety decals become worn or damaged, and cannot be read, order replacement
decals from your local dealer.
Chute Danger DecalA
Auger Danger DecalB
Safety System Tests
Safety System Test (units without Free
Hand control)
WARNING
Amputation hazard
This snowthrower is equipped with several mechanical safety systems designed to keep
the operator safe while using the unit. Check the operation of these systems regularly
using the safety system tests listed. If the unit fails to operate as described, DO NOT
operate it. See your authorized dealer for service immediately.
Test 1 - Auger/Impeller Control
With the engine running:
• Press down on the auger control lever. (The auger/impeller should rotate)
• Release the auger control lever. (The auger/impeller should stop within 5 seconds)
Test 2 - Traction Drive Control
With the engine running and speed control in 1st gear:
• Press down on the traction control lever. (The unit should move forward)
• Release the traction control lever. (The unit should stop)
Features and Controls
Engine Features and Controls
For engine features and controls, please refer to the engine operator's manual.
Snowthrower Features and Controls
DescriptionIconLocation
Speed Select Lever - Allows the operator to
use one of three forward and one reverse
speeds. To shift, move speed select lever to
desired position.
NOTE: Do not move speed select lever while
Traction Control is engaged. This may result
in severe damage to the drive system.
1
R1
R2
2
3
A
Auger Control Lever - Used to engage and
disengage the auger and impeller. To engage,
push down. To disengage, release.
B
DescriptionIconLocation
Traction Control Lever - Used to propel
snowthrower forward or reverse. Push down to
engage, release to disengage. See also,
"Free-Hand Control".
C
Chute Rotation Crank - Used to rotate the
discharge chute to the left or right.
D
Chute Deflector - Used to control the angle of
snow discharge (up or down).
E
Clean-Out Tool - Used to remove snow and
debris from the discharge chute and the auger
housing.
-F
Skid Shoes - Used to adjust the ground
clearance of the auger housing.
-G
Operation
Before Operating the Snowthrower
WARNING
Read the operator's manual before operating the machine. This machine can be
dangerous if used carelessly.
• Never operate the snowthrower without all guards, covers, and shields in place.
• Stop the engine whenever leaving the operating position.
• Remove the key before unclogging the impeller housing or discharge chute, and
before making repairs or adjustments.
• When leaving the machine, remove the key.
• To reduce the risk of fire, keep the machine clean and free from spilled fuel, oil,
and debris.
• On electric start models, disconnect the extension cord before operating.
• Be sure to check the engine oil level before starting the engine. See the engine
operator's manual for oil recommendations.
Operating the Snowthrower
DANGER
Amputation hazard
The discharge chute contains a rotating impeller to throw snow. Fingers can
quickly become caught in the impeller. Never clear or unclog the discharge chute
with your hands. Always use a clean-out tool.
Failure to observe these safety instructions will result in traumatic amputation
or severe laceration.
Hand contact with the rotating impeller inside the discharge chute is the most common
cause of injury associated with snowthrowers. Never use your hands to clean out the
discharge chute.
To safely clear a clogged discharge chute, follow these instructions:
1. Shut OFF the engine.
2. Wait 10 seconds to be sure the impeller blades have stopped rotating.
3. Always use a clean-out tool, not your hands.
DANGER
Toxic fume hazard
Engines give off carbon monoxide, an odorless, colorless, poison gas.
Breathing carbon monoxide can cause nausea, fainting, or death.
• Start and run the engine outdoors.
• Do not start or run the engine in an enclosed area, even if doors and windows are
open.
7
Not for
Reproduction

WARNING
Thrown objects hazard
This machine is capable of throwing objects that could injure bystanders, or cause damage
to buildings.
Be sure the operating area is clear of bystanders. Never direct the discharge toward
anyone, or toward buildings or cars.
1. Start the engine. Please refer to the engine operator's manual for engine information.
2. Rotate the chute rotation crank (D, Figure 2) to set the direction of the discharge chute.
3. Loosen the wingnut securing the discharge chute deflector (E). Raise the deflector to
throw snow further. Set the defector to the desired position and tighten the wingnut.
4. Use the speed select lever (A) to select the forward or reverse drive speed. Use lower
speeds when clearing wet, heavy snow. Use higher speeds for light snow or
transporting.
NOTE: Always set engine speed to FAST (full throttle).
5. Fully press the auger control lever (B) to engage the auger. Release the auger control
lever to stop the auger.
6. Fully press and hold the traction control lever (C) to engage the traction drive and
begin moving the snowthrower. To stop, release the lever.
NOTE: Always release the traction control lever before changing speeds.
Stopping the Snowthrower
1. Release the auger control lever (B, Figure 2).
2. Release the traction control lever (C).
3. Stop the engine. Please refer to the engine operator's manual for engine instructions.
Deflector Adjustment - Manual Control
Loosen the deflector knob (A, Figure 3), adjust the deflector to the desired position, and
then tighten the knob to secure. Raise the deflector to throw snow further.
Chute Rotation Adjustment
The chute rotation crank (A, Figure 4) is located on the left side of the handle bars, just
below the control panel. Rotate the crank to rotate the chute.
Wheel Release - Lock Pins (if equipped)
Wheels equipped with a traction lock pin (A, Figure 5) can be completely released by
removing the pin and installing it in the outer axle hole. Reverse this process to engage the
drive wheel.
Filling the Fuel Tank
Please refer to the engine operator's manual for information about filling the fuel tank, and
for fuel recommendations.
Clearing a Clogged Discharge Chute
DANGER
Amputation hazard
The discharge chute contains a rotating impeller to throw snow. Fingers can
quickly become caught in the impeller. Never clear or unclog the discharge chute
with your hands. Always use a clean-out tool.
Failure to observe these safety instructions will result in traumatic amputation
or severe laceration.
Hand contact with the rotating impeller inside the discharge chute is the most common
cause of injury associated with snowthrowers. Never use your hands to clean out the
discharge chute.
To safely clear a clogged discharge chute, follow these instructions:
1. Shut OFF the engine.
2. Wait 10 seconds to be sure the impeller blades have stopped rotating.
3. Always use a clean-out tool, not your hands.
A clean-out tool (A, Figure 6) is provided with the unit.
Shear Bolt and Spacer Replacement
Augers are secured to the auger shaft with special bolts that are designed to break if an
object becomes lodged in the auger housing. Use only factory spec, or equivalent, shear
bolts.
1. Turn off the engine and wait for all moving parts to stop.
2. Remove the existing shear bolt.
3. Lubricate the auger grease fittings. Spin the auger to lubricate the auger shaft.
4. Align the bolt and spacer holes. Install the new shear bolt (A, Figure 7), spacer (B),
through the auger shaft (C). Secure with the locknut (D).
Skid Shoe Height Adjustment
DANGER
Amputation hazard
The discharge chute contains a rotating impeller to throw snow. Fingers can quickly
become caught and traumatic amputation or severe laceration will result. Hand contact
with the rotating impeller inside the discharge chute is the most common cause of injury
associated with snowthrowers.
Turn the engine OFF, wait for all moving parts to stop, and remove the engine key before
performing any maintenance or repairs.
WARNING
Thrown objects hazard
Objects such as gravel, rocks, or other debris, if struck by the impeller, may be thrown
with sufficient force to cause personal injury, property damage, or damage to the
snowthrower.
Be sure to set the skid shoes at the proper height to maintain ground clearance for the
type of surface being cleared.
This snowthrower is equipped with two height adjust skids, secured to the outside of the
auger housing. These elevate the front of the snowthrower.
When removing snow from a hard surface area such as a paved driveway or walk, adjust
the skids up to bring the front of the snowthrower down.
When removing snow from rock or uneven construction, raise the front of the snowthrower
by moving the skids down. This will help to prevent rocks and other debris from being picked
up and thrown by the augers.
1. Determine how much clearance you want between the scraper bar at the bottom of
the auger housing and the ground. If clearing a gravel surface, enough ground
clearance is needed to prevent the unit from picking up rocks.
2. Place a block equal to the desired ground clearance under the scraper bar.
3. Loosen the skid shoe mounting nuts (A, Figure 8) and push the skid shoe (B) down
until it touches the ground. Re-tighten mounting nuts.
4. Set the skid shoe on the other side at the same height.
Off-Season Storage
If the unit will be stored for 30 days or more at the end of the season, the following steps
are recommended to prepare it for storage. Always refer to the operator's manual for
important details if the unit is to be stored for an extended period.
Please refer to the engine operator's manual for engine storage information.
NOTE: Fuel must be removed or treated to prevent gum deposits from forming in the tank,
filter, hose, and carburetor during storage.
WARNING
Fire and explosion hazard
Gasoline is highly flammable and its vapors are explosive. Fumes may travel to a distant
ignition source and an explosion and/or fire may result.
Handle gasoline carefully. Never store the unit, with fuel in the tank, indoors or in a poorly
ventilated enclosure where fuel fumes could reach an open flame, spark, pilot light, such
as a furnace, water heater, or clothes dryer.
• Thoroughly clean the unit.
8
Not for
Reproduction

• Lubricate all lubrication points (see Maintenance section).
• Make sure all nuts, bolts, and screws are securely fastened. Inspect all visible moving
parts for damage, breakage, and wear. Replace if necessary.
• Touch up all rusted or chipped paint surfaces; sand lightly before painting.
• Cover the bare metal parts of the snowthrower housing auger, and the impeller with
rust preventative.
• If possible, store your unit indoors and cover it to give protection from dust and dirt.
• If the machine must be stored outdoors, cover with a heavy tarpaulin.
To Return to Service:
• Fill the fuel tank with a fresh fuel.
• Make sure all fasteners are tight.
• Make sure all guards, shields, and covers are in place.
Maintenance
Maintenance Schedule
Before Each Use
• Check engine oil level
• Perform Safety System Test
Every 8 Hours or Daily
• Check engine oil level
Every 25 Hours or Annually
• Lubricate control lever linkage
• Lubricate the auger assembly
• Lubricate the discharge chute rotation gear and deflector
• Lubricate the drive system hex shaft with 5w-30 synthetic motor oil, and chains with
grease
Every 50 Hours or Annually
• Check muffler and spark arrester (if equipped)
• Check tire pressure
Engine Maintenance
For engine maintenance schedules and procedures, please refer to the engine operator's
manual.
Control Lever Linkage Lubrication
WARNING
Amputation hazard
It is critical for safe operation of the unit that the controls disengage when released. Under
no circumstances should the unit be used if the controls do not function properly. See
Safety Systems Tests to confirm correct operation.
Auger Assembly Lubrication
Lubricate Auger Gear Box
The auger gear box is lubricated at the factory and should not require additional lubrication.
If for some reason the lubricant should leak out, or if the auger gear box has been serviced,
add Lubriplate GR132 Grease or equivalent. Maximum 3-1/4 ounces, (92 grams) should
be used.
Remove filler plug (A, Figure 10), once a year to check grease level. If grease is visible, do
not add. If grease is not visible, use a piece of fine wire, like a dipstick to check if there is
grease in the gear box.
Lubricate Auger Shaft Fittings
Using a grease gun, lubricate the auger shaft fittings (B, Figure 10) every 25 operating hours,
or once per season. Each time a shear bolt or pin (C) is replaced, the auger shaft MUST be
greased.
For storage or when replacing shear bolts or pins, remove the shear bolts or pins (C),
lubricate the shaft fittings (B), and rotate the augers several times to distribute the grease.
Reinstall the shear bolts or pins when complete.
Discharge Chute and Deflector Lubrication
Lubricate the chute rotation gear (Figure 11) with grease, and the deflector mechanism with
automotive type oil every twenty five operating hours.
Where an oil can is pictured, lubricate with engine oil. Where a grease gun is pictured,
lubricate with lithium grease.
Hex Shaft and Chain Lubrication
The hex shaft and drive chains must be lubricated at the interval specified in the Maintenance
Chart. Please have your authorized dealer perform this maintenance.
Traction Cable Inspection
The cables are adjusted at the factory and no adjustment should be necessary. However,
if the cables have become stretched or are sagging, adjustment will be necessary. Please
see your dealer for this adjustment.
Traction Drive Belt Adjustment
The traction drive belt is under constant spring tension and does not require any adjustment.
If the traction drive belt is slipping, see your authorized dealer.
Speed Control Rod Adjustment
If the speed control rod requires adjustment, see an authorized dealer.
Auger Cable Adjustment
WARNING
Amputation hazard
Over-tighten the auger cable may cause the auger drive to engage without depressing
the auger drive control.
Follow the adjustment procedure to ensure the cable is not over-tightened.
1. With the auger control lever released, the hook (A, Figure 12) should barely touch the
lever (B) without raising it. There can be a maximum of 1/32" (0.8 mm) clearance.
2. To adjust, loosen the nut (C) by holding the adjusting flats (D) and turning the nut.
Then, turn the adjusting flats and hold the adjustment screw (E). The adjustment screw
is a Phillips screw and the head can be held or turned by inserting a screwdriver
through the spring (F).
3. Hold the adjusting flats and tighten the nut.
4. To ensure that the auger does not engage unless the control is fully depressed, please
perform the Safety System Tests. The auger must stop within 5 seconds of the
control being released.
Auger Shear Pin Replacement
The augers are secured to the auger shaft with special shear pins that are designed to break
if an object becomes lodged in the auger housing. Use of a harder grade shear pin will
reduce the protection provided by the shear pin.
Under most circumstances, if the auger strikes an object which could cause damage to the
unit, the shear pin will break. This protects the gear box and other parts from damage.
NOTICE
Do not replace the shear pins with anything other than the correct grade replacement
shear pin. Use of bolts, screws, or harder grade shear pins can result in equipment
damage.
DANGER
Amputation hazard
The discharge chute contains a rotating impeller to throw snow. Fingers can quickly
become caught and traumatic amputation or severe laceration will result. Hand contact
with the rotating impeller inside the discharge chute is the most common cause of injury
associated with snowthrowers.
Turn the engine OFF, wait for all moving parts to stop, and remove the engine key before
performing any maintenance or repairs.
9
Not for
Reproduction

The shear pins and clips (A and B, Figure 13) are located on the auger shaft. Replace a
broken shear pin as follows.
1. Tap out the broken shear pin with a pin punch.
2. Install a new shear pin and cotter pin. Bend the ends of the cotter pin down.
Checking Tire Pressure
Tire pressure should be checked periodically. Recommended tire pressure varies by tire
manufacturer. A good rule of thumb is to inflate the tire up to, but not exceeding, the "Max
Inflation" stamped on the side-wall of the tire.
Troubleshooting
Troubleshooting Chart
Perform the inspection or repair as indicated in the Troubleshooting Chart.
RemedyLook forProblem
Release both auger control and Free Hand control (if
equipped) to stop auger.
Free Hand control (if equipped) is ACTIVE.Auger does not stop within 5 seconds after right control lever
is released.
See authorized dealer.Auger drive belt out of adjustment.
See authorized dealer.Auger belt guide out of adjustment.
See authorized dealer.Electrical failure.Discharge chute or deflector does not work (electric).
Adjust and/or lubricate control linkage.Discharge chute or deflector out of adjustment or needs
lubrication.
Discharge chute or deflector does not work (remote-manual).
See authorized dealer.Traction control out of adjustment.Drive fails to move snowthrower at slow speeds.
Set key to ON position.Key is in OFF position.Engine fails to start.
Press primer button twice and restart.Failure to prime a cold engine.
Turn valve to OPEN position.Fuel shut-off valve, if equipped, is in CLOSED position.
Fill fuel tank.Out of fuel.
Turn choke ON, set throttle to FAST.Choke OFF - cold engine.
Move the choke to OPEN/RUN position, move throttle to
FAST position, and crank until the engine starts.
Engine flooded.
See authorized dealer.No spark.
Drain tank. (Dispose of fuel at an authorized hazardous waste
facility.) Fill with fresh fuel.
Water in fuel, or old fuel.Engine starts hard or runs poorly.
See authorized dealer.Spark plug faulty, fouled, or gapped improperly.
Clear vent.Fuel cap vent is blocked.
Stop engine immediately. Tighten all hardware. If vibration
continues, have the unit serviced by an authorized dealer.
Loose parts or damaged impeller.Excessive vibration.
See authorized dealer.Traction control out of adjustment.Snowthrower does not stop when traction control lever is
released.
Raise or lower skid shoes and scraper bar.Skid shoes and scraper bar improperly adjusted.Scraper bar does not clean hard surface.
Replace drive belt. See authorized dealer.Drive belt loose or damaged.Unit fails to propel itself.
See authorized dealer.Incorrect adjustment of traction drive cable.
Replace friction disc. See authorized dealer.Worn or damaged friction disc.
See authorized dealer.Auger drive belt loose or damaged.Unit fails to discharge snow.
Adjust auger control cable. Refer to Maintenance section of
this manual.
Auger control cable not adjusted correctly.
Replace shear pin or bolt. Refer to Maintenance section of
this manual , or see an authorized dealer.
Broken shear pin or shear bolt.
Stop engine immediately. Always use the clean-out tool to
clear a clogged discharge chute, not your hands. Clean
discharge chute and inside of auger housing. Refer to
Discharge Chute Warning in the Operator Safety section.
Discharge chute clogged.
Stop engine immediately. Always use the clean-out tool to
clear a clogged chute, not your hands. Remove object from
auger. Refer to WARNINGS in the Operator Safety section.
Foreign object lodged in auger.
10
Not for
Reproduction

Výrobky, kterých se týká tento návod
Tento návod týká následujících produktů:
1696058, 1696059
Tablica Sadržaja :
Bezpečnost obsluhy.......................................................... 11
Bezpečnostní testy systému............................................. 14
Funkce a ovládání.............................................................. 14
Provoz................................................................................. 14
Údržba................................................................................. 16
Řešení problémů................................................................ 17
© 2011 Briggs & Stratton Corporation, Milwaukee, WI, USA. Všechna práva vyhrazena.
Obrázky v tomto dokumentu jsou pro ilustraci, doprovázejí pokyny, se kterými jsou dodány.
Vaše jednotka se může od zobrazených obrázků lišit. LEVÁ aPRAVÁ jsou zobrazeny z
pozice obsluhy.
Bezpečnost obsluhy
Varování výsypného žlábku
NEBEZPEČÍ
Riziko amputace
Odpadový žlab zahrnuje rotujícího šneka k odhazování sněhu. V rotoru může
snadno dojít k zachycení prstů. Odpadový žlab nikdy nečistěte rukama. Vždy
používejte čistící nástroj.
Nedodržení těchto bezpečnostních pokynů může vést k amputacím či vážným
laceracím.
Nejčastější poranění při použití sněhové frézy vznikají při kontaktu rukou s poháněčem
odpadového nosníku. K čištění odpadového nosníku nikdy nepoužívejte holé ruce.
Pro bezpečné vyčištění ucpaného odpadního žlabu postupujte následovně:
1. VYPNĚTE motor.
2. Vyčkejte 10 sekund, abyste si byli jistí, že poháněč se zcela zastavil.
3. Vždy používejte nářadí k vyčištění, nikdy nepoužívejte ruce.
Bezpečností varovné značky a signální
slova
Bezpečnostní varovný symbol ukazuje na možné riziko poranění. Signální slova
(NEBEZPEČÍ, VAROVÁNÍ nebo POZOR) jsou používána s varovnou značkou k upozornění
na stupeň vážnosti rizika. Bezpečnostní značka může být navíc použita k reprezentaci typu
rizika. Signální slovo UPOZORNĚNÍ se používá k upozornění na postupy, které nejsou
spojeny s poraněními.
NEBEZPEČÍ ukazuje na riziko, které, jestliže se mu nepředejde, povede vést ke
smrti či vážnému poranění.
VAROVÁNÍukazuje na riziko, které, jestliže se mu nepředejde, by mohlo vést ke
smrti nebo vážnému poranění.
POZOR ukazuje na riziko, které, jestliže se mu nepředejde, by mohlo vést ke smrti
či vážnému poranění.
UPOZORNĚNÍ ukazuje na postupy, které nejsou spojeny s poraněním osob.
Značky rizik dvoustupňové sněhové frézy
VýznamZnačkaVýznamZnačka
Před provozem či servisem
jednotky si přečtěte návod k
obsluze a porozumějte mu.
Bezpečnostní informace o
rizicích, která mohou vést
k poraněním.
Před prováděním servisu si
přečtěte návod k obsluze.
Riziko amputace - rotor.
Riziko amputace - rotující šnek.Riziko amputace - rotor.
Nebezpečí odhazovaných
předmětů.
Riziko amputace -
nedotýkejte se pohybujících
se částí.
Riziko výbuchu.Riziko požáru.
Riziko toxických plynů.Riziko šoku.
Při delším použití se doporučuje
ochrana uší.
Riziko horkého povrchu.
Před prováděním servisu
vyndejte klíč.
Udržujte bezpečnou
vzdálenost.
Riziko zpětného rázuNedovolte přístup dětem.
Obecná bezpečnostní varování
Přečtěte si návod
NEBEZPEČÍ
Tato sněhová fréza je schopna amputovat ruce a nohy a odhazovat předměty.
Přečtěte si a dodržujte všechny bezpečnostní pokyny v tomto návodu. Jestliže
tak neučiníte, může to vést ke smrti či vážným poraněním.
VAROVÁNÍ
Před obsluhou stroje či přečtěte návod k obsluze. Jestliže je používán
nedbale,tento stroj může být nebezpečný.
• Sněhovou frézu nikdy nepoužívejte bez řádných chráničů, krytů a jiných ochranných
pomůcek.
• Při odchodu z provozní pozice vždy vypněte motor.
• Před čištěním rotoru či odpadového žlabu či před opravami a úpravami vždy zastavte
motor a vyndejte klíč.
• Při odchodu od stroje odpojte klíč.
• Ke snížení rizika požáru stroj udržujte čistý a bez rozlitého paliva, oleje či odpadu.
VAROVÁNÍ
Před spuštěním této jednotky si přečtěte, porozumějte a dodržujte všechny pokyny
na sněhové fréze a v návodu k obsluze. Nedodržení bezpečnostních pokynů v
tomto návodu může vést ke smrti či vážnému poranění.
• Uschovejte originál těchto pokynů pro budoucí použití.
• Důkladně se seznamte s ovladači a s řádným použitím sněhové frézy.
• Ujistěte se, že před použitím sněhové frézy jste řádně vyškoleni.
• Ujistěte se, že víte, jak rychle přístroj zastavit a deaktivovat.
• Nikdy nedovolte, aby se sněhovou frézou zacházely osoby bez řádných pokynů.
• Jestliže má být fréza uložena na delší dobu, vždy postupujte podle pokynů v návodu
k obsluze. Udržujte bezpečnostní nálepky a, jestliže je to nutné, vyměňte je.
11
Not for
Reproduction

• Jestliže jste k tomu nebyli řádně vyškoleni, nikdy se sami nepokoušejte provést žádné
větší opravy sněhové frézy. Nesprávný servis sněhové frézy může vést k
nebezpečnému provozu, poškození zařízení a porušení záruky.
Bezpečnost při obsluze a provozu
VAROVÁNÍ
Bezpečnost této sněhové frézy závisí na obsluze. Jestliže není použita správně
nebo není správně udržována, může být nebezpečná. Pamatujte si: Nesete
zodpovědnost za vaši bezpečnost a za bezpečnost osob kolem vás.
• Udržujte pracovní oblast bez osob, zvláště pak malých dětí, a zvířat.
• Důkladně prohlédněte oblast, kde sněhovou frézu budete používat, a odstraňte
všechny rohožky, saně, prkna, dráty a jiné cizí předměty.
• Sněhovou frézu nepoužívejte bez toho, abyste na sobě měli vhodné zimní oblečení.
• Používejte boty, které vám poskytnou oporu i na kluzkém povrchu. Dávejte pozor,
abyste předešli uklouznutí nebo pádu, zvláště pak při zpětném pohybu sněhové frézy.
• Frézu nikdy nepoužívejte za špatné viditelnosti nebo bez světla.
• Při přepravě vyřaďte šneka.
•Vždy se ujistěte o dobrém podkladu a udržujte si pevné uchycení držadel. Jděte, nikdy
neběhejte.
•Neodstraňujte s ní sníh napříč svahů. Buďte zvláště opatrní při změně směru na svahu.
Nepokoušejte se odstraňovat sníh na příkrých svazích.
• Nepřekračujte kapacitu zařízení tím, že se budete sníh snažit čistit příliš rychle.
• Sněhovou frézu nikdy nepoužívejte za velké rychlosti na kluzkém povrchu. Při
zpátečním pohybu sněhové frézy kontrolujte, co je za vámi, a dávejte pozor.
• Sněhovou frézu nepoužívejte na površích nad zemí – jako například na střechách
obytných budov, garáží, verand nebo na jiných takových budovách.
• Obsluha musí zhodnotit své schopnosti bezpečně ovládat zařízení tak, aby ochránila
sebe i ostatní před poraněním.
• Sněhová fréza je určena pouze k odstraňování sněhu. Nepoužívejte ji pro žádné jiné
účely.
• Nevozte pasažéry.
• Po zasažení cizího předmětu zastavte motor, odpojte kabel elektrických motorů, frézu
důkladně prohlédněte pro známky jakéhokoli poškození, a před nastartováním a
dalším použitím sněhové frézy opravte jakákoli poškození.
• Jestliže se sněhová fréza neobvykle třese, VYPNĚTE motor. Vibrace jsou normálně
známkou problému. Jestliže je to nutné, vyhledejte autorizovaného zástupce pro
opravu.
• U modelů s elektrickým startérem po nastartování motoru odpojte napájecí kabel.
• Dávejte si velký pozor při překračování vjezdů, chodníků či silnic. Sledujte možná
rizika a dopravu.
• Po ukončení odstraňování sněhu frézu nechte několik minut běžet, aby se předešlo
zamrznutí sběrače.
Zacházení s palivem
VAROVÁNÍ
Palivo a jeho páry jsou velice hořlavé a výbušné. S palivem vždy zacházejte velice
opatrně.
Nedodržení těchto bezpečnostních pokynů může vést k požáru či explozi, které
způsobí vážné popáleniny nebo smrt.
Při přidávání paliva:
• Palivo nikdy nepřidávejte k běžícímu nebo horkému motoru.
• Vypněte motor a před sundáním krytu nádrže a přidáním paliva ho nechte nejméně
2 minuty chladnout.
• Tankujte venku nebo v dobře ventilovaném prostoru.
• Nádoby nikdy neplňte uvnitř vozidla nebo na nákladním vozidle nebo na přívěsu s
plastovou výplní. Před plněním vždy nádobu umístěte na zem, pryč od vozidla.
• Jestliže je to možné, zařízení pohonu sundejte z vozidla a plňte ho na zemi. Jestliže
to není možné, tak pak ho naplňte na přívěsu s přenosnou nádobou, spíše než přímo
z adaptéru benzínu.
• Udržujte kontakt mezi nálevkou a okrajem nádrže nebo otvorem nádoby do té doby,
než je tankování ukončeno. Nepoužívejte uzamykatelné adaptéry.
• Bezpečně vraťte zpět palivovou zátku a před startováním motoru vyčkejte, než se
rozlité palivo vypaří.
• Nádrž nepřeplňujte. Aby se umožnila expanze benzínu, netankujte nad spodní část
hrdla nádrže.
• Palivo udržujte mimo otevřený oheň, jiskry, pilotní světla, teplo nebo jiné zdroje
vzplanutí.
• Palivové trubičky, uzávěr a příslušenství často kontrolujte pro známky poškození či
úniků. Jestliže je to nutné, nahraďte je novými.
• Používejte schválenou nádobu na palivo.
• Jestliže dojde k rozlití paliva, před dalším startováním vyčkejte, než znovu vyschne.
• Jestliže došlo k rozlití paliva na oblečení, okamžitě ho vyměňte.
Při startování motoru:
• Ujistěte se, že svíčky, dusítko, uzávěr nádrže a filtr (kde existují) jsou na svém místě
a bezpečné.
• Nestartuje s odstraněnými svíčkami.
• Jestliže dojde k rozlití paliva, nepokoušejte se nastartovat motor, sněhovou frézu
namísto toho přeneste z místa rozlití a vyvarujte se tvorbě jakýchkoli zdrojů ohně do
té doby, než dojde k odchodu par paliva.
• Motor nepřesycujte. Postupujte podle pokynů pro startování motoru v tomto návodu.
• Jestliže dojde k přeplnění motoru palivem, nastavte sytič, kde existuje, do polohy
OTEVŘÍT/SPUSTIT, plyn, kde existuje, přeneste do polohy RYCHLE a startujte, až
se motor nastartuje.
Při obsluze zařízení:
• Sněhovou frézu nenaklánějte na úhel, který vede k rozlití paliva.
• Nehaste karburátor k zastavení motoru.
• Motor nikdy nenechávejte běžet s vyndaným čističem vzduchu nebo vzduchovým
filtrem (kde existují).
• Jestliže vypouštíte olej z horní plnící trubice, musí být prázdná nádrž, protože jinak
může dojít k úniku paliva, což může vést k požáru či explozi.
Při přepravě zařízení:
• Přepravujte s PRÁZDNOU nádrží či s ventilem paliva v poloze OFF.
Při skladování paliva či zařízení s palivem v nádrži:
• Benzín je vysoce hořlavý a páry jsou také výbušné. Výpary mohou cestovat ke
vzdálenějším zdrojům vznícení, může tak dojít k výbuchu či ohni.
• S benzínem zacházejte opatrně. Motor nikdy neskladujte s palivem v nádrži, uvnitř či
ve špatně větraném uzavřeném prostoru, kde by výpary paliva mohly dosáhnou na
otevřený plamen, jiskry nebo pilotní světlo hořáku či sušičky prádla.
• Skladujte odděleně od kamen, trub, ohřívačů vody či jiných zařízení, která mají pilotní
světlo nebo jiný zdroj vznětu, protože by mohlo dojít ke vznícení palivových plynů.
Pohyblivé části
NEBEZPEČÍ
Nohy a ruce udržujte z dosahu rotujících částí. Rotující části mohou přijít do
kontaktu s rukama, nohama, vlasy, oděvy či doplňky.
Nedodržení těchto bezpečnostních pokynů může vést k amputacím či vážným
laceracím.
• Při čištění, opravách či kontrolách sněhové frézy se ujistěte, že motor je v poloze OFF,
svíčky jsou odpojené a všechny pohyblivé části se zastavily.
• Pod rotující části či do jejich blízkosti nedávejte ruce nebo nohy. Nikdy neblokujte
výstup.
• Frézu nikdy nepoužívejte bez řádných krytů a jiných ochranných pomůcek.
•Jestliže běží motor, sněhovou frézu nikdy neponechávejte bez dozoru. Vždy deaktivujte
šneka a kontrolu trakce, vypněte motor a vyndejte klíčky.
• Udržujte všechny volné oděvy z dosahu přední části frézy a šneku. Šály, rukavice,
šňůrky a volné oděvy se mohou rychle zachytit v rotujícím zařízení a může dojít
k amputacím. Svažte si dlouhé vlasy a sundejte šperky.
• Po ukončení odstraňování sněhu frézu nechte několik minut běžet, aby se předešlo
zamrznutí sběrače a rotoru.
• Jestliže se fréza nepoužívá nebo je převážená, deaktivujte pohon sběrače/rotoru.
12
Not for
Reproduction

Odhazované předměty.
VAROVÁNÍ
Šnek může sebrat předměty a vyhodit je ze žlábku. Sníh nikdy neodhazujte ve
směru chodců, nikomu nedovolujte pohyb před sněhovou frézou. Nedodržení
těchto bezpečnostních pokynů může vést ke smrti či vážnému poranění.
• Při obsluze nebo nastavení či opravách vždy používejte ochranné brýle nebo ochranu
očí, abyste si ochránili oči od cizích předmětů, které mohou být odhozeny z přístroje.
• Vždy dbejte na směr odhazování sněhu. Může dojít k poškození blízkých chodců,
zvířat a budov odhozenými předměty.
• Při práci se sněhovou frézou dávejte pozor na okolí. Přejezd přes předměty jako
kameny, rohožky, noviny, hračky ukryté pod sněhem může vést k jejich vyhození nebo
k ucpání šneka.
• Dávejte si velký pozor při překračování vjezdů, chodníků či silnic.
• Umístění sběrače nastavte tak, aby se nedotýkal štěrku nebo povrchu z rozbitých
kamenů.
• Se sněhovou frézou nikdy nepracujte poblíž sklem ohrazených prostor, automobilů,
oken a podobných bez toho, abyste nejdříve upravili úhel odpadového nosníku.
• Seznamte se s místem, kde sněhovou frézu plánujete používat. Označte hranice
chodníků a vjezdů.
Děti
VAROVÁNÍ
Jestliže si obsluha neuvědomí přítomnost dětí, může dojít k tragickým nehodám.
Děti jsou často přitahované k jednotce a k její činnosti. Nikdy se nedomnívejte,
že děti zůstanou tam, kde jste je naposledy viděli.
• Při provozu udržujte děti mimo pracovní oblast. Zařízení často přitahuje děti. Mějte
na paměti všechny přítomné osoby.
• Dávejte pozor a jednotku vypněte, jestliže se poblíž objeví děti.
• Nikdy nedovolte, aby s přístrojem zacházely děti.
•Jestliže se blížíte do zatáček, kde nevidíte, ke keřům, stromům nebo jiným předmětům,
které omezují vaši viditelnost, dávejte prosím zvýšený pozor. Mohou tam být děti.
Bezpečnost motoru
VAROVÁNÍ
Bezpečný provoz sněhové frézy si vyžaduje řádnou péči a údržbu motoru.
Nedodržení bezpečnostních pokynů v tomto návodu může vést ke smrti či
vážnému poranění.
• Před nastartováním motoru vyřaďte rychlosti a přejděte do neutrálu.
• Před začátkem odklízení sněhu vyčkejte, než se motor přizpůsobí venkovní teplotě.
• Používejte prodlužovací kabely a přípojky, které jsou specifikované výrobcem pro
všechny jednotky s elektrickými motory nebo elektrickým startovacím motoru.
• Pro všechny sněhové frézy s elektrickými motory či elektrickými startéry používejte
uzemněnou zástrčku se třemi vidlicemi.
VAROVÁNÍ
Riziko zpětného rázu
Rychlé stažení startovacího kabelu zatáhne vaši ruku nebo paži směrem k motoru
rychleji, než můžete spustit držení kabelu. Může to vést k zlomeninám,
pohmožděninám či odřeninám.
Při startování motoru za startovací kabel táhněte pomalu, až ucítíte odpor, aby
se předešlo zpětnému tlaku, pak zatáhněte rychle.
Oxid uhelnatý
VAROVÁNÍ
Z motoru vychází oxid uhelnatý (bezbarvý nezapáchající otravný plyn).
Vdechování oxidu uhelnatého může vést k nevolnostem, mdlobám nebo smrti.
• Motor startujte a provozujte venku.
• Motor nespouštějte uvnitř, i když jsou otevřená okna nebo dveře.
Zdroj vzplanutí
VAROVÁNÍ
Startování motoru vede k jiskrám.
Jiskry mohou zapálit blízké hořlavé plyny.
Může dojít k požáru nebo explozi.
• Jestliže je v oblasti únik zemního plynu nebo LPG, nespouštějte motor.
• Nepoužívejte stlačené startovací tekutiny, protože jejich páry jsou hořlavé.
Horké povrchy
VAROVÁNÍ
Provoz motoru vede ke tvorbě tepla. Části motoru, zvláště tlumič, budou velice
horké.
Nedodržení těchto bezpečnostních pokynů může vést k vážným popáleninám při
kontaktu.
• Nedotýkejte se horkého motoru nebo tlumiče. Před dotykem vyčkejte, až tlumič,
cylindry motoru a lopatky motoru vychladnou.
• Odpad odstraňte z tlumiče a oblasti cylindru.
• Namontujte zachycovač jisker a udržujte ho v dobrém stavu, jestliže frézu budete
používat na povrchu pokrytém stromy, trávou nebo křovím.
•USA modely: Použití či provoz motoru v či poblíž lesů, křovin či travnatých ploch bez
toho, aby výfuk měl lapač jisker v souladu s platnými místními a státními zákony, je
porušením Veřejného pořádku pro stát Kalifornii číslo 4442. Jiné státy či federální
oblasti mohou mít podobné zákony.
Údržba a skladování
VAROVÁNÍ
Tuto sněhovou frézu je nutno řádně udržovat, aby se zajistil bezpečný provoz a
výkon. Nedodržení bezpečnostních pokynů v tomto návodu může vést ke smrti
či vážnému poranění.
• Při provádění jakékoli údržby či jakýchkoli oprav sněhové frézy VYPNĚTE motor,
vyčkejte, až se zastaví veškeré pohyblivé části a vyndejte klíč zapalování, aby se
předešlo náhodnému nastartování motoru.
• Pravidelně kontrolujte všechny šrouby a jiné části, zda jsou správně utažené, abyste
se ujistili, že sněhová fréza je v bezpečném pracovním stavu.
• Matice a šrouby udržujte utažené a sněhovou frézu udržujte v dobrém stavu.
• Nikdy neměňte bezpečnostní zařízení. Jejich řádnou funkci pravidelně kontrolujte a,
jestliže řádně nefunguje, proveďte nutné opravy.
•Součástky jsou předmětem opotřebování, poškození nebo zhoršení časem. Součástky
často kontrolujte a nahraďte je doporučenými součástkami, jestliže je to nutné.
• Pravidelně kontrolujte funkci ovládání. Jestliže je to nutné, opravte a proveďte servis.
• Při provádění oprav používejte pouze náhradní díly schválené výrobcem či ekvivalent.
• Při všech nastaveních a úpravách vždy dodržujte výrobní specifikace.
• Pro větší servis a opravy by měla být používána pouze schválená servisní centra.
• Používejte pouze nástavce a doplňky schválené výrobcem (jako závaží na kola,
protiváhu nebo kabiny).
•Nikdy se nepokoušejte provést žádné změny, zatímco běží motor (kromě těch případů,
kdy to doporučil výrobce).
•Jestliže má být fréza uložená po delší dobu, vždy překontrolujte důležité údaje v návodu
k obsluze.
Bezpečnostní štítky
Před provozem vaší jednotky si přečtěte bezpečnostní štítky. Upozornění a varování jsou
pro vaši bezpečnost. Aby se předešlo poranění či poškození sněhové frézy, porozumějte
těmto bezpečnostním štítkům a dodržujte je.
VAROVÁNÍ
Jestliže budou jakékoli bezpečnostní štítky opotřebované, poškozené či nečitelné, od
vašeho místního prodejce si objednejte náhradní.
13
Not for
Reproduction

Štítek nebezpečí žlabuA
Štítek nebezpečí šnekaB
Bezpečnostní testy systému
Bezpečnostní test systému (jednotky bez
ručního ovladače)
VAROVÁNÍ
Riziko amputace
Tato sněhová fréza je vybavena řadou mechanických bezpečnostníchsystémů určených
k udržení bezpečnosti obsluhy při používání jednotky. Pravidelně kontrolujte provoz těchto
systémů s použitím uvedených testů bezpečnostních systémů. Jestliže jednotky nepracuje
tak, jak je uvedeno, NEPOUŽÍVEJTE ji. Okamžitě kontaktujte autorizovaného prodejce
pro servis.
Test 1 – Ovládání šneka/rotoru
Se spuštěným motorem:
• Stiskněte směrem dolů páku ovládání šneka. (Šnek/rotor by se měl otáčet)
• Uvolněte páku ovládání šneku. (Šnek/rotor by se měl do 5 sekund zastavit)
Test 2 – Ovládání trakčního pohonu
Se spuštěným motorem a řazením v první rychlosti:
• Páku ovládání trakce stiskněte směrem dolů. (Jednotka by se měla pohybovat
dopředu)
• Uvolněte páku ovládání trakce. (Jednotka by se měla zastavit)
Funkce a ovládání
Funkce a ovládání motoru
Pro funkce a ovladače motoru si prosím prostudujte návod k obsluze motoru.
Funkce a ovládání sněhové frézy
PopisIkonaPoloha
Páka k volbě rychlosti - Umožňuje obsluze
používat jednu ze tří rychlostí vpřed či jednu
rychlost zpět. K změně rychlosti přeneste řadící
páku do požadované polohy.
POZNÁMKA: Řadící pákou nepohybujte, když
je aktivní spojka trakčního pohonu. Mohlo
by to vést k vážnému poškození systému
pohonu.
1
R1
R2
2
3
A
Páka řízení šneka - Používá se k aktivaci a
deaktivaci šneka a rotoru. K aktivaci stiskněte
dolů. K deaktivaci uvolněte.
B
PopisIkonaPoloha
Páka řízení trakce - Používá se k posunu
sněhové frézy vpřed či zpět. Stiskněte k aktivaci,
uvolněte k deaktivaci. Viz ovladač Free Hand.
C
Hřídel rotace žlabu - Používá se k rotaci
odpadového žlabu doleva či doprava.
D
Odklaněč žlabu - Používá se k řízení úhlu
odhazování sněhu (nahoru či dolů).
E
Čistící nástroj - Používá se k odstranění sněhu
a odpadu z odpadového žlabu a krabice šneka.
-F
Protismykové botičky - Používají se k úpravě
vzdálenosti krabice šneka od země.
-G
Provoz
Před provozem sněhové frézy
VAROVÁNÍ
Před obsluhou stroje či přečtěte návod k obsluze. Jestliže je používán
nedbale,tento stroj může být nebezpečný.
• Sněhovou frézu nikdy nepoužívejte bez všech chráničů, krytů a štítů.
• Při odchodu z provozní pozice vždy vypněte motor.
•Před čištěním rotoru či odpadového žlabu či před opravami a úpravami vždy vyndejte
klíč.
• Při odchodu od stroje odpojte klíč.
• Ke snížení rizika požáru stroj udržujte čistý a bez rozlitého paliva, oleje či odpadu.
• U modelů s elektrickým startérem před provozem odpojte prodlužovací kabel.
• Ujistěte se, že před nastartováním motoru překontrolujete množství oleje. Pro
doporučení oleje si prostudujte návod pro obsluhu motoru.
Provoz sněhové frézy
NEBEZPEČÍ
Riziko amputace
Odpadový žlab zahrnuje rotujícího šneka k odhazování sněhu. V rotoru může
snadno dojít k zachycení prstů. Odpadový žlab nikdy nečistěte rukama. Vždy
používejte čistící nástroj.
Nedodržení těchto bezpečnostních pokynů může vést k amputacím či vážným
laceracím.
Nejčastější poranění při použití sněhové frézy vznikají při kontaktu rukou s poháněčem
odpadového nosníku. K čištění odpadového nosníku nikdy nepoužívejte holé ruce.
Pro bezpečné vyčištění ucpaného odpadního žlabu postupujte následovně:
1. VYPNĚTE motor.
2. Vyčkejte 10 sekund, abyste si byli jistí, že poháněč se zcela zastavil.
3. Vždy používejte nářadí k vyčištění, nikdy nepoužívejte ruce.
NEBEZPEČÍ
Riziko toxických plynů
Z motoru vychází oxid uhelnatý (bezbarvý nezapáchající otravný plyn).
Vdechování oxidu uhelnatého může vést k nevolnostem, mdlobám nebo smrti.
• Motor startujte a provozujte venku.
• Motor nespouštějte či nepoužívejte uvnitř, i když jsou otevřená okna nebo dveře.
14
Not for
Reproduction

VAROVÁNÍ
Nebezpečí odhazovaných předmětů
Tento stroj je schopný odhazovat předměty, které by mohly poranit poblíž stojící osoby,
či způsobit škody budovám.
Ujistěte se, že na pracovní ploše nejsou žádné osoby. Odpad nikdy nesměrujte na jiné
osoby či směrem k budovám či vozům.
1. Nastartujte motor. Informace o motoru naleznete v návodu k obsluze motoru.
2. Otočte kliku rotace žlabu (D, obrázek 2) k nastavení směru odhazovacího žlabu.
3. Uvolněte křídlovou matici upevňující deflektor žlabu (E). K odhazování sněhu dále
deflektor zvedněte. Deflektor nastavte do požadované polohy a utáhněte křídlovou
matici.
4. Použijte řadící páku (A) k výběru rychlosti vpřed či zpět. Jestliže čistíte mokrý, těžký
sníh, používejte nižší rychlosti. Pro lehký sníh či při přepravě používejte vyšší rychlosti.
POZNÁMKA: Rychlost motoru nastavte vždy na RYCHLE (plný plyn).
5. Plně stiskněte páku ovládání šneka (B) k jeho aktivaci. Uvolněte páku ovládání šneka
k zastavení šneka.
6. Plně stiskněte a držte páku ovladače trakce (C) k aktivaci trakce a spuštění pohybu
frézy. K zastavení páku uvolněte.
POZNÁMKA: Páku ovladače trakce uvolněte před každou změnou rychlosti.
Zastavení sněhové frézy
1. Uvolněte páku ovládání šneku (B, obrázek 2).
2. Uvolněte páku ovladače trakce (C).
3. Zastavte motor. Pokyny k motoru naleznete v návodu k obsluze motoru.
Úprava deflektoru - ruční ovládání
Uvolněte knoflík deflektoru (A, obrázek 3), deflektor upravte do požadované polohy a pak
k upevnění znovu utáhněte knoflík. K odhazování sněhu dále deflektor zvedněte.
Úprava rotace žlabu
Páka rotace žlabu (A, obrázek 4) se nachází na levé straně držadel, pod panelem řízení. K
otočení žlabu otočte pákou.
Uvolnění kola - Pojistné kolíky (kde jsou
dodávány)
Kola vybavená s trakčními pojistnými kolíky (A, obrázek 5) mohou být zcela uvolněna
odstraněním kolíku a jeho vložením do vnějšího otvoru na nápravě. K aktivaci kola tento
postup obraťte.
Naplňte palivovou nádrž
Informace o plnění nádrže palivem a doporučení paliva naleznete v návodu k provozu
motoru.
Čistění ucpaného odpadového nosníku
NEBEZPEČÍ
Riziko amputace
Odpadový žlab zahrnuje rotujícího šneka k odhazování sněhu. V rotoru může
snadno dojít k zachycení prstů. Odpadový žlab nikdy nečistěte rukama. Vždy
používejte čistící nástroj.
Nedodržení těchto bezpečnostních pokynů může vést k amputacím či vážným
laceracím.
Nejčastější poranění při použití sněhové frézy vznikají při kontaktu rukou s poháněčem
odpadového nosníku. K čištění odpadového nosníku nikdy nepoužívejte holé ruce.
Pro bezpečné vyčištění ucpaného odpadního žlabu postupujte následovně:
1. VYPNĚTE motor.
2. Vyčkejte 10 sekund, abyste si byli jistí, že poháněč se zcela zastavil.
3. Vždy používejte nářadí k vyčištění, nikdy nepoužívejte ruce.
Čistící nástroj (A, obrázek 6) je poskytován s jednotkou.
Výměna šroubu a podložky
Šnek je k hřídeli šneka připevněn s pomocí speciálních šroubů, které jsou vyrobeny tak,
aby se zlomily, jestliže v krabici šneka uvázne předmět. Používejte pouze tovární šrouby či
jejich ekvivalent.
1. Vypněte motor a vyčkejte, až se zastaví všechny pohyblivé části.
2. Vyndejte stávající šroub.
3. Namažte upevnění šneka. Šneka otočte k lubrikaci všech částí.
4. Vyrovnejte otvory na šrouby a podložky. Vložte nový šroub (A, obrázek 7), podložku
(B) skrze hřídel šneka (C). Upevněte s pomocí matice (D).
Úprava protismykových botiček
NEBEZPEČÍ
Riziko amputace
Odpadový žlab zahrnuje rotujícího šneka k odhazování sněhu. Velice rychle může dojít
k zachycení prstů a jejich amputacím či vážným poraněním. Nejčastější poranění při
použití sněhové frézy vznikají při kontaktu rukou s poháněčem odpadového nosníku.
Než začnete provádět jakoukoli údržbu či opravy, VYPNĚTE motor, vyčkejte, až se
pohyblivé části zastaví, a pak vyndejte klíč motoru.
VAROVÁNÍ
Nebezpečí odhazovaných předmětů
Předmìty jako kameny, štěrk nebo jiný odpad mohou po odhození šnekem letět takovou
silou, že způsobí poranění, škody na majetku nebo poškození sněhové frézy.
Ujistěte se, že pluhy jsou v řádné výšce k udržování volného prostoru pro typ čištěného
povrchu.
Tato sněhová fréza má pluhy s dvěma různými výškami, tyto jsou připevněny na vnější
straně krabice šneka. Tyto smyky zvedají přední stranu frézy.
Při odstraňování sněhu z tvrdých podkladů, jako jsou dlažbové vjezdy či chodníky, upravte
pluhy tak, že je na přední straně frézy přenesete dolů.
Při odstraňování sněhu z kamenitých či nerovných podkladů zvedněte přední část sněhové
frézy posunem pluhů směrem dolů. Toto pomůže zabránit sbíraní kamenů a jiného odpadu
a jeho odhazováním šnekem.
1. Určete, kolik prostoru chcete mezi pluhem na spodní straně krabice šneka a zemí.
Jestliže čistíte štěrk, požaduje se dostatečný prostor na to, aby se předešlo sběru
kamenů jednotkou.
2. Pod pluh umístěte kostku o stejné výšce, jako je požadovaná vzdálenost od země.
3. Uvolněte matice upevnění pluhu (A8) a pluh zatlačte dolů (B), až se dotkne země.
Znovu utáhněte matici.
4. Na druhé straně výšku upravte na stejnou velikost.
15
Not for
Reproduction

Skladování mimo sezónu
Jestliže bude sněhová fréza skladována po dobu třiceti (30) dnů či déle po sezóně, pro
přípravu ke skladování se doporučují následující kroky. Jestliže má být jednotka uložena
po delší dobu, vždy překontrolujte důležité údaje v návodu k obsluze.
Informace o skladování motoru naleznete v návodu k obsluze motoru.
POZNÁMKA: Palivo je nutno vypustit či ošetřit, aby se při skladování předešlo tvorbě
depozitů v nádrži, filtru, hadicích a karburátoru.
VAROVÁNÍ
Riziko požáru a výbuchu
Benzín je vysoce hořlavý a páry jsou také výbušné. Výpary mohou cestovat ke
vzdálenějším zdrojům vznícení, může tak dojít k výbuchu či ohni.
S benzínem zacházejte opatrně. Motor nikdy neskladujte s palivem v nádrži, uvnitř či ve
špatně větraném uzavřeném prostoru, kde by výpary paliva mohly dosáhnou na otevřený
plamen, jiskry nebo pilotní světlo hořáku či sušičky prádla.
• Jednotku důkladně vyčistěte.
• Všechny mazací body namažte (viz část Údržba).
• Prověřte, že všechny šrouby a matice jsou bezpečně utažené. Prohlédněte všechny
pohyblivé části pro známky poškození a opotřebování. Jestliže je to nutné, nahraďte
je novými.
• Přemalujte všechny povrchy s rezem či prasklinami; před malováním je jemně odřete
skelným papírem.
• Pokryjte otevřené kovové části krabice šneku a rotoru sněhové frézy s mazadlem proti
rezu.
• Jestliže je to možné, jednotku ukládejte uvnitř a přikryjte ji k ochraně před prachem a
nečistotami.
• Jestliže je nutné zařízení skladovat venku, přikryjte ho silnou plachtou.
K návratu do provozu:
• Nádrž naplňte čerstvým palivem.
• Zkontrolujte, že všechna upevnění jsou utažená.
• Ujistěte se, že všechny vodiče, kryty a chrániče jsou na místě.
Údržba
Plán údržby
Před každým použitím
• Zkontrolujte množství oleje
• Proveďte bezpečnostní test systému
Každých 8 hodin či denně
• Zkontrolujte množství oleje
Každých 25 hodin či ročně
• Namažte spojení ovládací páky
• Namažte šneka
• Namažte rotační část a deflektor žlabu
• Hnací hřídel namažte syntetickým motorovým olejem 5w-30 a řetězy namažte
mazivem
Každých 50 hodin či ročně
• Překontrolujte tlumič a zachycovač jisker (kde je)
• Překontrolujte tlak pneumatik
Údržba motoru
Pro postupy a plány údržba motoru si prosím prostudujte návod k obsluze motoru.
Mazání spojení páky řízení
VAROVÁNÍ
Riziko amputace
Pro bezpečné ovládání jednotky je důležité, aby byly ovladače po uvolnění deaktivovány.
Jednotka nesmí být v žádném případě používána, jestliže ovladače řádně nefungují. Viz
Testy bezpečnostních systémů k potvrzení správného provozu.
Mazání šneka
Namažte krabici rychlostí šneka
Převodovka šneka je namazaná z továrny a nevyžaduje si další mazání. Jestliže mazadlo
z jakéhokoli důvodu unikne nebo po servisu převodovky, přidejte mazadlo Lubriplate GR132
či podobné. Mělo by se používat maximálně 92 gramů.
Vyndejte plnící zátku (A, obrázek 10), jednou za rok ke kontrole množství mazadla. Jestliže
je mazadlo viditelné, žádné nepřidávejte. Jestliže tomu tak není, použijte kousek tenkého
drátu podobně jako měřítko oleje ke kontrole mazadla v převodovce.
Namažte upevnění hřídele šneka
S použitím mazací pistole namažte upevnění hřídele šneka (B, obrázek 10) po každých 25
hodinách provozu či jednou za sezónu. Po každé náhradě kolíku či závlačky (C) MUSÍ být
pohon šneku namazán .
Ke skladování či při výměně šroubů či kolíků vyndejte šrouby či kolíky (C), namažte upevnění
hřídele (B) a šneka několikrát otočte k distribuci mazadla. Po dokončení vložte šrouby či
kolíky zpět.
Mazání odpadového žlabu a deflektoru
Namažte rychlosti rotace žlabu (obrázek 11) s mazadlem a mechanismus deflektoru s
motorovým olejem, toto provádějte každých 25 hodin provozu.
Kde je zakreslena olejová konévka, použijte motorový olej. Kde je zakreslen přístroj s
mazadlem, použijte lithiové mazadlo.
Mazání hřídele a řetězu
Hřídel a hnací řemeny je nutno mazat v intervalech uvedených v Plánu údržby. O tuto službu
požádejte vašeho autorizovaného prodejce.
Kontrola trakčního kabelu
Kabely byly upraveny v továrně a neměla by být nutná jejich další úprava. Jestliže se však
kabely natáhnou či propadávají, bude nezbytná úprava. K této úpravě prosím kontaktujte
autorizovaného prodejce.
Úprava řemenu trakce
Řemen trakce má stálé napětí a nevyžaduje si úpravy. Jestliže trakční řemen padá,
kontaktujte autorizovaného prodejce.
Úprava tyče řízení rychlosti
Jestliže si tyč řízení rychlosti vyžaduje úpravu, kontaktujte autorizovaného prodejce.
Úprava kabelu šneka
VAROVÁNÍ
Riziko amputace
Nadměrné natažení kabelu šneka může vést k aktivaci pohonu šneka bez stisku ovladač.
Postupujte podle následujícího postupu k zajištění toho, že kabel není přetažený.
1. Při uvolněné páce ovládání šneka by se měl hák (A, Obrázek 12) sotva dotýkat páky
(B) bez jejího zvedání. Maximální mezera je 0,8 mm.
2. K úpravě uvolněte matici (C) držením upravovacích ploch (D) a otočením matice.
Upravovací plochy pak otočte a držte upravovací šroub (E). Upravovací šroub je
určený pro křížový šroubovák, lze ho držet či otočit vložením šroubováku skrze pružinu
(F).
3. Upravovací plochy držte dolů a utáhněte matici.
16
Not for
Reproduction

4. Aby se zajistilo, že šnek se neaktivuje bez toho, aby byl plně stisknut ovladač, proveďte
prosím Bezpečnostní testy systému Šnek se musí zastavit do 5 sekund od uvolnění
ovladače.
Auger Shear Pin Replacement
The augers are secured to the auger shaft with special shear pins that are designed to break
if an object becomes lodged in the auger housing. Use of a harder grade shear pin will
reduce the protection provided by the shear pin.
Under most circumstances, if the auger strikes an object which could cause damage to the
unit, the shear pin will break. This protects the gear box and other parts from damage.
UPOZORNĚNÍ
Do not replace the shear pins with anything other than the correct grade replacement
shear pin. Use of bolts, screws, or harder grade shear pins can result in equipment
damage.
NEBEZPEČÍ
Riziko amputace
Odpadový žlab má rotující šnek k odhazování sněhu. Velice rychle může dojít k zachycení
prstů a jejich amputacím či vážným poraněním. Nejčastější poranění při použití sněhové
frézy vznikají při kontaktu rukou s poháněčem odpadového nosníku.
Než začnete provádět jakoukoli údržbu či opravy, VYPNĚTE motor, vyčkejte, až se
pohyblivé části zastaví, a pak vyndejte klíč motoru.
The shear pins and clips (A and B, Figure ) are located on the auger shaft. Replace a broken
shear pin as follows.
1. Tap out the broken shear pin with a pin punch.
2. Install a new shear pin and cotter pin. Bend the ends of the cotter pin down.
Překontrolujte tlak pneumatik
Tlak pneumatiky je nutno kontrolovat pravidelně. Doporučený tlak pneumatiky se liší podle
výrobce pneumatiky. Doporučuje se nafouknutí pneumatiky na tlak až do Maximálního tlaku,
ne však většího, ten je uveden na straně pneumatiky.
Řešení problémů
Diagram řešení problémů
Proveďte kontrolu či opravu uvedenou v diagramu řešení problémů
ŘešeníZkontrolujteProblém
Uvolněte oba ovladače šneka a Free Hand (kde je) k
zastavení šneka.
Nástroj Free Hand (kde je) je AKTIVNÍ.Šnek nezastaví do 5 pěti sekund po uvolnění pravé páky.
Kontaktujte autorizovaného prodejce.Řemen pohonu šneka je mimo polohu.
Kontaktujte autorizovaného prodejce.Vodič řemenu šneka je mimo polohu.
Kontaktujte autorizovaného prodejce.Elektrické selhání.Odpadový žlab či deflektor nepracuje (elektrický).
Upravte a/nebo namaže spojení ovladačů.Odpadový žlab či deflektor je mimo polohu nebo potřebuje
mazání.
Odpadový žlab či deflektor nepracuje (dálkový, manuální).
Kontaktujte autorizovaného prodejce.Ovladač trakce je mimo polohu.Pohon neposunuje sněhovou frézu při nízkých rychlostech.
Klíč dejte do ZAPNUTÉ polohy.Klíč je ve VYPNUTÉ poloze.Motor nestartuje.
Tlačítko přípravy stiskněte dvakrát a znovu startujte.Selhání při přípravě studeného motoru.
Ventil přeneste do OTEVŘENÉ polohy.Palivový ventil, kde je, je v ZAVŘENÉ poloze.
Naplňte palivovou nádrž.Došlo palivo.
Sytič zapněte, plyn nastavte na RYCHLE.Sytič je ve VYPNUTÉ poloze se studeným motorem.
Sytič přeneste do polohy OTEVŘÍT/SPUSTIT, plyn do polohy
RYCHLE a startujte, až dojde k nastartování motoru.
Motor je zalitý.
Kontaktujte autorizovaného prodejce.Nedochází k jiskře.
Vyprázdněte nádrž. (Palivo zlikvidujte na schválené skládce
pro nebezpečný odpad.) Natankujte čerstvé palivo.
Voda v palivu či staré palivo.Obtížné startování motoru či problémy s funkcí motoru.
Kontaktujte autorizovaného prodejce.Rozbitá svíčka či nesprávná mezera.
Otvor vyčistěte.Otvor palivové zátky je zablokovaný.
Okamžitě zastavte motor. Utáhněte všechny součástky.
Jestliže vibrace pokračují, nechte jednotku opravit
oprávněným prodejcem.
Volné části nebo poškozený rotor.Nadměrné vibrace.
Kontaktujte autorizovaného prodejce.Ovladač trakce je mimo polohu.Sněhová fréza se nezastaví po uvolnění páky ovládání trakce.
Zvedněte či snižte botičky a pluh.Nastavení botiček a pluhů potřebuje upravit.Škrabací lišta nečistí tvrdé povrchy.
Vyměňte hnací řemen. Kontaktujte autorizovaného prodejce.Hnací řemen je uvolněný nebo poškozený.Jednotka se nezvedá.
Kontaktujte autorizovaného prodejce.Nesprávné nastavení kabelu trakce.
Vyměňte ho. Kontaktujte autorizovaného prodejce.Opotřebované či poškozené frikční kolečko.
17
Not for
Reproduction

ŘešeníZkontrolujteProblém
Kontaktujte autorizovaného prodejce.Řemen pohonu šneka je uvolněn nebo poškozen.Jednotka neodhazuje sníh.
Upravte řídící kabely šneka. Prostudujte si část Údržba tohoto
návodu.
Řídící kabely šneka nejsou řádně nastavené.
Vyměňte sponku nebo šroub. Prostudujte si část Údržba
tohoto návodu či kontaktujte oprávněného prodejce.
Zlomená sponka nebo šroub.
Okamžitě zastavte motor. K čištění ucpaného žlabu vždy
používejte čistící nástroj, nepoužívejte holé ruce. Vyčistěte
odpadový nosník a vnitřek šneka. Prostudujte si Varování pro
odpadový žlábek v části Bezpečnost obsluhy.
Odpadový nosník je ucpaný.
Okamžitě zastavte motor. K čištění ucpaného žlabu vždy
používejte čistící nástroj, nepoužívejte holé ruce. Odstraňte
předmět ze šneka. Prostudujte si VAROVÁNÍ v části
Bezpečnost obsluhy.
Ve šneku se zachytil cizí předmět.
18
Not for
Reproduction

Produkte, für dieses Handbuch gilt
Diese Bedienungsanleitung gilt für folgende Produkte:
1696058, 1696059
Inhaltsverzeichnis :
Bedienersicherheit............................................................. 19
Prüfungen des Sicherheitssystems................................. 22
Funktionen und Bedienelemente..................................... 22
Bedienung........................................................................... 23
Wartung............................................................................... 25
Fehlersuche und -Behebung............................................ 26
© 2011 Briggs & Stratton Corporation, Milwaukee, WI, USA. Alle Rechte vorbehalten.
Die Abbildungen in diesem Dokument sind repräsentativ und zur Ergänzung der textlichen
Anleitung gedacht, zu der sie gehören. Ihr Gerät kann u. U. von den Abbildungen abweichen.
LINKS und RECHTS gelten aus Sicht des Bedieners
Bedienersicherheit
Warnung zum Auswurfkanal
GEFAHR
Gefahr der Abtrennung von Gliedmaßen
Der Auswurfkanal verfügt über ein rotierendes Wurfgebäse um Schnee
auszuwerfen. Ihre Finger könnten schnell im Gebläserad eingequetscht werden.
Beseitigen Sie Blockierungen im Auswurfkanal nie mit Ihren Händen. Verwenden
Sie immer ein Reinigungswerkzeug.
Die Nichteinhaltung dieser Sicherheitshinweise kann dazu führen, dass
Gliedmaßen abgeschnitten oder schwer verletzt werden.
Handkontakt mit dem rotierenden Gebläserad im Inneren des Auswurfkanals ist die
häufigste Ursache von Verletzungen im Zusammenhang mit Schneefräsen. Reinigen Sie
den Auswurfkanal niemals mit der Hand.
Beachten Sie die folgenden Anleitungen, um eine Verstopfung im Auswurfkanal
sicher zu beseitigen:
1. Schalten Sie den Motor ab.
2. Warten Sie 10 Sekunden, damit sichergestellt ist, dass die Gebläseblätter nicht
mehr rotieren.
3. Verwenden Sie immer ein Reinigungswerkzeug, nicht die Hände.
Sicherheitshinweissymbol und
Signalwörter
Dieses Warnsymbol zeigt eine potenzielle Verletzungsgefahr an. Ein Signalwort
(GEFAHR, WARNUNG oder VORSICHT) wird zusammen mit dem Warnsymbol verwendet,
um das Ausmaß der Gefährdung anzuzeigen. Ein Gefahrensymbol kann verwendet werden,
um die Art der Gefahr darzustellen. Das Signalwort HINWEIS wird für Informationen zu
Praktiken verwendet, die keine Verletzungsgefahr in sich bergen.
GEFAHR weist auf eine Gefahr hin, deren Nichtvermeidung zu schweren Verletzungen
oder zum Tod führt.
WARNUNG weist auf eine Gefahr hin, deren Nichtvermeidung zu schweren
Verletzungen oder zum Tod führen könnte.
VORSICHT weist auf eine Gefahr hin, deren Nichtvermeidung zu leichten bis
mittelschweren Verletzungen führen könnte.
HINWEIS bezieht sich auf Praktiken, die keine Verletzungsgefahr in sich bergen.
Gefahrensymbole für eine
Zweistufen-Schneefräse
BedeutungSymbolBedeutungSymbol
Lesen Sie vor der Bedienung
oder Wartung des Geräts die
Bedienungsanleitung. Sie
müssen sie vollständig
verstehen.
Warnhinweis zu Gefahren,
die zu Verletzungen führen
können.
Lesen Sie vor der Durchführung
von Wartungsarbeiten die
Bedienungsanleitung durch.
Gefahr der Abtrennung von
Gliedmaßen - rotierendes
Gebläserad
Gefahr der Abtrennung von
Gliedmaßen - rotierende
Schnecke
Gefahr der Abtrennung von
Gliedmaßen - rotierendes
Gebläserad
Gefahr durch
umhergeschleuderte
Gegenstände
Gefahr der Abtrennung von
Gliedmaßen - keine sich
bewegenden Teile berühren
Explosionsgefahr.Brandgefahr
Gefahr durch giftige DämpfeStromschlaggefahr
Bei längerer Arbeit mit dem
Gerät wird ein Gehörschutz
empfohlen.
Gefahr durch heiße
Oberflächen
Vor der Durchführung von
Wartungsarbeiten den Schlüssel
abziehen.
Sicherheitsabstand
bewahren.
RückschlaggefahrKinder auf sicheren Abstand
halten.
Allgemeine Warnhinweise
Lesen Sie das Handbuch
GEFAHR
Diese Schneefräse kann Gliedmaßen abtrennen und wirft Gegenstände aus.
Lesen und befolgen Sie strikt alle Sicherheitshinweise dieses Handbuchs. Das
Nichtbeachtung dieser Hinweise kann tödliche oder ernsthafte Verletzungen zur
Folge haben.
WARNUNG
Lesen Sie sich vor der Arbeit mit dieser Maschine die Bedienungsanleitung
aufmerksam durch. Die Maschine kann bei nicht ordnungsgemäßen Gebrauch
gefährlich sein.
• Heben Sie diese Orignalanweisungen zum späteren Nachschlagen auf.
• Die Schneefräse darf nur mit ordnungsgemäß angebrachten und funktionierenden
Schutzeinrichtungen, Abdeckungen, Abschirmungen oder anderen
Sicherheitsvorrichtungen betrieben werden.
• Stellen Sie stets den Motor ab, wenn Sie die Bedienposition verlassen.
• Stellen Sie den Motor ab und ziehen Sie den Schlüssel ab, bevor Sie das Gehäuse
des Gebläserads oder den Auswurfkanal von Verstopfungen befreien und bevor Sie
Reparaturen oder Einstellungen vornehmen.
• Ziehen Sie den Schlüssel ab, wenn Sie die Maschine unbeaufsichtigt lassen.
• Um das Feuerrisiko zu reduzieren, halten Sie die Maschine sauber und frei von
verschüttetem Kraftstoff, Öl oder Schmutz.
WARNUNG
Lesen und befolgen Sie alle Anweisungen auf der Schneefräse und im Handbuch
vor Bedienung dieser Maschine. Die Nichtbeachtung der Sicherheitshinweise
dieses Handbuchs kann zum Tod oder zu schweren Verletzungen führen.
19
Not for
Reproduction

• Sie müssen mit den Bedienelementen und der ordnungsgemäßen Bedienung der
Schneefräse vertraut sein.
• Lassen Sie sich vor der Nutzung der Schneefräse entsprechend schulen.
• Sie müssen wissen wie Sie die Einheit schnell stoppen und die Kontrollen schnell
auskuppeln können.
• Lassen Sie niemanden die Schneefräse ohne entsprechende Einweisung bedienen.
• Wenn die Schneefräse über eine längere Zeit eingelagert werden soll, befolgen Sie
stets die entsprechenden Anweisungen in der Bedienungsanleitung. Belassen Sie
Sicherheits- und Anleitungsetiketten an ihrem Platz oder ersetzen Sie sie, falls es
erforderlich ist.
• Versuchen Sie niemals größere Reparaturen an der Schneefräse vorzunehmen, es
sei denn Sie wurden entsprechend ausgebildet. Der unsachgemäße Gebrauch der
Schneefräse kann zu gefährlichen Situationen, zu Schäden der Maschine und zum
Verlust der Gewährleistung führen.
Arbeitsschutz und Gerätesicherheit
WARNUNG
Die Schneefräse ist nur so sicher, wie sie der Bediener verwendet. Wird die
Schneefräse nicht gemäß den Angaben genutzt oder nicht ordnungsgemäß
gewartet, so kann dies zu gefährlichen Situationen führen. BITTE BEACHTEN:
Denken Sie daran, dass Sie für Ihre Sicherheit und die Ihres Umfelds
verantwortlich sind.
• Halten Sie den Betriebsbereich frei von Personen, insbesondere von kleinen Kindern
und Haustieren.
• Überprüfen Sie, dass sich im Arbeitsbereich der Schneefräse keine Fußabtreter,
Schlitten, Bretter, Kabel oder andere Fremdkörper befinden und entfernen Sie diese
gegebenenfalls.
• Tragen Sie zur Bedienung der Schneefräse entsprechende Winterkleidung.
• Tragen Sie festes Schuhwerk, das für eine sichere Trittfestigkeit auf glatten
Oberflächen sorgt. Arbeiten Sie vorsichtig und vermeiden Sie somit, dass Sie
ausrutschen oder fallen, besonders wenn Sie die Schneefräse im Rückwärtsgang
betätigen.
• Betreiben Sie die Schneefräse nie ohne gute Sichtbarkeit oder Licht.
• Kuppeln Sie die Schnecke aus, wenn Sie die Schneefräse an eine andere Stelle
fahren, ohne Schnee zu räumen.
• Achten Sie stets auf guten Stand und halten Sie die Griffe fest. Gehen Sie, nicht
rennen.
• Entfernen Sie mit der Schneefräse keinen Schnee an einer Böschung. Seien Sie sehr
vorsichtig beim Richtungswechsel an Neigungen. Räumen Sie keinen Schnee an
steilen Abhängen.
•Überlasten Sie die Maschinenleistung nicht indem Sie zu schnell den Schnee räumen.
• Bewegen Sie die Schneefräse auf glatten Oberflächen nie mit hohen
Fahrgeschwindigkeiten. Schauen Sie nach hinten, wenn Sie rückwärts fahren.
• Verwenden Sie die Schneefräse nicht auf Flächen, die sich oberhalb des Geländes
befinden, z. B. auf Dächern von Wohngebäuden, Garagen, auf Vordächern sowie
ähnlichen Bauteilen oder Gebäuden.
• Die Bediener müssen selbst einschätzen, ob sie das Gerät sicher genug bedienen
können, um sich und andere vor Verletzungen zu schützen.
• Die Schneefräse ist ausschließlich zum Schneeräumen gedacht. Verwenden Sie
daher die Schneefräse nicht für andere Zwecke.
• Transportieren Sie damit keine Personen.
• Bei Kontakt mit einem Fremdkörper, stellen Sie den Motor sofort ab, trennen Sie das
Netzkabel bei Schneefräsen mit Elektromotor, untersuchen Sie die Schneefräse
gründlich auf Schäden und beheben Sie Schäden, bevor Sie die Schneefräse erneut
in Betrieb nehmen.
• Schalten Sie den Motor AUS, wenn die Schneefräse ungewöhnlich vibriert. Die
Vibration weist in der Regel auf eine Störung hin. Setzen Sie sich für die Reparatur
mit einem Vertragshändler in Verbindung.
• Bei Modellen, die über einen elektrischen Startmotor verfügen, ziehen Sie nach dem
Anschalten das Stromkabel.
• Gehen Sie äußerst vorsichtig vor, wenn Sie auf Schotterwegen oder Schotterstraßen
arbeiten oder diese überqueren. Achten Sie auf verborgene Gefahren und Verkehr.
• Lassen Sie die Maschine nach der Schneeräumung einige Minuten laufen, um ein
Einfrieren des Sammlers/Gebläserades zu verhindern.
Handhabung des Kraftstoffs
WARNUNG
Der Kraftstoff und die Dämpfe sind leicht entzündbar und es besteht
Explosionsgefahr. Gehen Sie besonders sorgfältig mit Kraftstoff um.
Werden diese Sicherheitshinweise nicht befolgt, kann es zu einem Brand oder
einer Explosion mit schweren oder tödlichen Verbrennungen kommen.
Bei der Betankung:
• Füllen Sie niemals Kraftstoff in einen laufenden oder heißen Motor nach.
• Stellen Sie den Motor aus und lassen Sie diesen für mindestens 2 Minuten abkühlen,
bevor Sie den Tankdeckel entfernen und Kraftstoff einfüllen.
• Füllen Sie den Tank an einem gut ventilierten Ort oder draußen auf.
• Befüllen Sie Behälter nie innerhalb eines Fahrzeugs bzw. auf einem LKW oder
Anhänger mit Kunststoffauskleidung. Stellen Sie den Behälter immer auf den Boden,
von Ihrem Fahrzeug entfernt, bevor Sie ihn befüllen.
•Nehmen Sie Geräte mit Verbrennungsmotor nach Möglichkeit vom LKW oder Anhänger
und betanken Sie diese auf dem Boden. Falls das nicht möglich ist, betanken Sie das
Gerät besser mit einem tragbaren Kanister auf dem Anhänger auf, anstatt mit einer
Zapfpistole.
• Achten Sie darauf, dass die Düse bis zum Ende des Auftankens immer mit dem Rand
des Kraftstofftanks oder Behälters im Kontakt bleibt. Verwenden Sie keine Zapfpistole
mit Verriegelungsvorrichtung.
• Bringen Sie den Tankdeckel wieder fest an und lassen Sie verschütteten Kraftstoff
verdunsten, bevor Sie den Motor starten.
• Überfüllen Sie den Kraftstofftank nicht. Füllen Sie den Kraftstoff nicht weiter als bis
zur Unterkante des Tankstutzens am Kraftstofftank auf, damit sich das Benzin
ausdehnen kann.
• Halten Sie den Kraftstoff von Zündquellen, offenem Feuer, Zündflammen, Hitze oder
anderen Glühherden fern.
• Überprüfen Sie die Kraftstoffleitungen, den Deckel und Dichtungen regelmäßig auf
Brüchigkeit und Durchlässiglkeit. Wechseln Sie die Teile gegebenenfalls aus.
• Verwenden Sie einen zugelassenen Kraftstoffbehälter.
• Sollte der Kraftstoff auslaufen, warten Sie ab bis dieser verdunstet ist und starten Sie
erst dann den Motor.
• Falls Kraftstoff auf Ihre Kleidung gelangt, wechseln Sie diese bitte sofort.
Beim Anlassen des Motors:
• Stellen Sie sicher, dass die Zündkerze, der Schalldämpfer, der Tankdeckel und der
Luftfilter (je nach Ausstattung) fest eingesetzt sind.
• Machen Sie den Motor ohne Zündkerze nicht an.
• Wenn Kraftstoff verschüttet wurde, starten Sie den Motor nicht, sondern entfernen
Sie die Schneefräse aus dem Bereich der Verschüttung und vermeiden Sie alle
Zündquellen, bis sich die Kraftstoffdämpfe aufgelöst haben.
• Der Motor sollte nicht zu stark ansaugen. Folgen Sie den Anweisungen dieses
Handbuchs bezüglich des Motorstarts.
• Sollte der Motor abwürgen, stellen Sie den Choke (falls vorhanden) auf die Position
OFFEN/ START, bewegen Sie den Hebel (falls vorhanden) in die Position SCHNELL
und lassen Sie den Motor an.
Bei der Bedienung des Geräts:
• Kippen Sie die Schneefräse nicht soweit an, dass es zum Auslaufen von Kraftstoff
kommt.
• Drosseln Sie NICHT den Vergaser, um den Motor abzustellen.
•Starten Sie niemals den Motor wenn der Luftreiniger (falls vorhanden) oder der Luftfilter
(falls vorhanden) entfernt worden sind.
• Wenn Sie das Öl über das oben befindliche Öleinfüllrohr ablassen, muss der
Kraftstofftank leer sein, da ansonsten Kraftstoff auslaufen kann und somit Feuer- und
Explosionsgefahr besteht.
Beim Transport des Geräts:
• Transportieren Sie die Maschine mit einem LEEREN Kraftstofftank bzw. mit
geschlossenem Kraftstoffventil.
Bei der Lagerung von Benzin oder des Geräts mit Kraftstoff im Tank:
• Benzin ist hochgradig entflammbar, und seine Dämpfe sind explosiv. Die Dämpfe
können an eine entfernte Zündquelle gelangen und zu einer Explosion bzw. zu einem
Brand führen.
20
Not for
Reproduction
Sidan laddas ...
Sidan laddas ...
Sidan laddas ...
Sidan laddas ...
Sidan laddas ...
Sidan laddas ...
Sidan laddas ...
Sidan laddas ...
Sidan laddas ...
Sidan laddas ...
Sidan laddas ...
Sidan laddas ...
Sidan laddas ...
Sidan laddas ...
Sidan laddas ...
Sidan laddas ...
Sidan laddas ...
Sidan laddas ...
Sidan laddas ...
Sidan laddas ...
Sidan laddas ...
Sidan laddas ...
Sidan laddas ...
Sidan laddas ...
Sidan laddas ...
Sidan laddas ...
Sidan laddas ...
Sidan laddas ...
Sidan laddas ...
Sidan laddas ...
Sidan laddas ...
Sidan laddas ...
Sidan laddas ...
Sidan laddas ...
Sidan laddas ...
Sidan laddas ...
Sidan laddas ...
Sidan laddas ...
Sidan laddas ...
Sidan laddas ...
Sidan laddas ...
Sidan laddas ...
Sidan laddas ...
Sidan laddas ...
Sidan laddas ...
Sidan laddas ...
Sidan laddas ...
Sidan laddas ...
Sidan laddas ...
Sidan laddas ...
Sidan laddas ...
Sidan laddas ...
Sidan laddas ...
Sidan laddas ...
Sidan laddas ...
Sidan laddas ...
Sidan laddas ...
Sidan laddas ...
Sidan laddas ...
Sidan laddas ...
Sidan laddas ...
Sidan laddas ...
Sidan laddas ...
Sidan laddas ...
Sidan laddas ...
Sidan laddas ...
Sidan laddas ...
Sidan laddas ...
Sidan laddas ...
Sidan laddas ...
Sidan laddas ...
Sidan laddas ...
Sidan laddas ...
Sidan laddas ...
Sidan laddas ...
Sidan laddas ...
Sidan laddas ...
Sidan laddas ...
Sidan laddas ...
Sidan laddas ...
Sidan laddas ...
Sidan laddas ...
Sidan laddas ...
Sidan laddas ...
Sidan laddas ...
Sidan laddas ...
Sidan laddas ...
Sidan laddas ...
Sidan laddas ...
Sidan laddas ...
Sidan laddas ...
Sidan laddas ...
Sidan laddas ...
Sidan laddas ...
Sidan laddas ...
Sidan laddas ...
Sidan laddas ...
Sidan laddas ...
Sidan laddas ...
Sidan laddas ...
-
 1
1
-
 2
2
-
 3
3
-
 4
4
-
 5
5
-
 6
6
-
 7
7
-
 8
8
-
 9
9
-
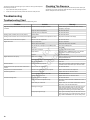 10
10
-
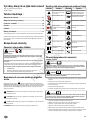 11
11
-
 12
12
-
 13
13
-
 14
14
-
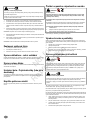 15
15
-
 16
16
-
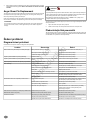 17
17
-
 18
18
-
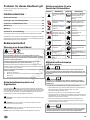 19
19
-
 20
20
-
 21
21
-
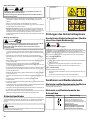 22
22
-
 23
23
-
 24
24
-
 25
25
-
 26
26
-
 27
27
-
 28
28
-
 29
29
-
 30
30
-
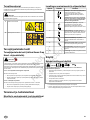 31
31
-
 32
32
-
 33
33
-
 34
34
-
 35
35
-
 36
36
-
 37
37
-
 38
38
-
 39
39
-
 40
40
-
 41
41
-
 42
42
-
 43
43
-
 44
44
-
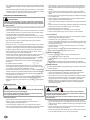 45
45
-
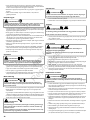 46
46
-
 47
47
-
 48
48
-
 49
49
-
 50
50
-
 51
51
-
 52
52
-
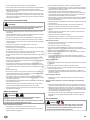 53
53
-
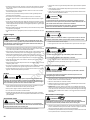 54
54
-
 55
55
-
 56
56
-
 57
57
-
 58
58
-
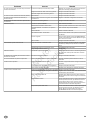 59
59
-
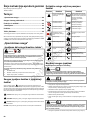 60
60
-
 61
61
-
 62
62
-
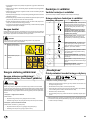 63
63
-
 64
64
-
 65
65
-
 66
66
-
 67
67
-
 68
68
-
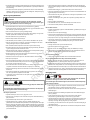 69
69
-
 70
70
-
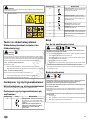 71
71
-
 72
72
-
 73
73
-
 74
74
-
 75
75
-
 76
76
-
 77
77
-
 78
78
-
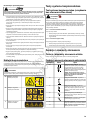 79
79
-
 80
80
-
 81
81
-
 82
82
-
 83
83
-
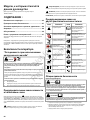 84
84
-
 85
85
-
 86
86
-
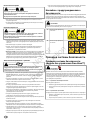 87
87
-
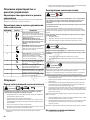 88
88
-
 89
89
-
 90
90
-
 91
91
-
 92
92
-
 93
93
-
 94
94
-
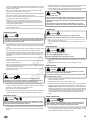 95
95
-
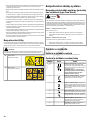 96
96
-
 97
97
-
 98
98
-
 99
99
-
 100
100
-
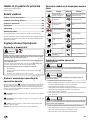 101
101
-
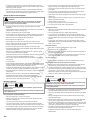 102
102
-
 103
103
-
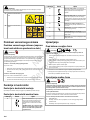 104
104
-
 105
105
-
 106
106
-
 107
107
-
 108
108
-
 109
109
-
 110
110
-
 111
111
-
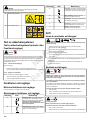 112
112
-
 113
113
-
 114
114
-
 115
115
-
 116
116
-
 117
117
-
 118
118
-
 119
119
-
 120
120


Simplicity 2-STAGE SNOWTHROWER, GROUP C, CE Användarmanual
- Kategori
- Snöslungor
- Typ
- Användarmanual
på andra språk
Relaterade papper
-
Simplicity SIMPLICITY DUAL STAGE SNOWTHROWER CE, LFD 14.5/28 AND 16.5/30 Användarmanual
-
-
-
-
-
Snapper 1694852 Bruksanvisning
-
-
-
-