
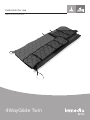
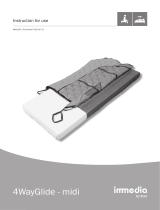
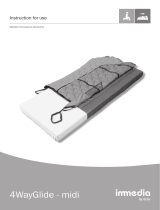
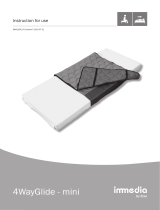
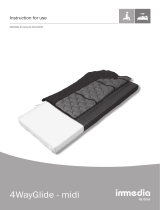
Instruction for use
4WayGlide Twin
IMM1009_IFU.Version7.2023-08-04

2
Index
Models ................................................... 2
Illustrations ...........................................3
User manual – English .........................5
Bruksanvisning – Svenska .................12
Bruksanvisning – Norsk .....................19
Brugervejledning – Dansk .................. 26
Käyttöohjeet – Suomi .........................33
Gebrauchsanweisung – Deutsch ......40
Gebruiksaanwijzing – Nederlands .....47
Instruction d’utilisation – Francais ....54
Istruzioni per l’uso – Italiano .............61
Instrucciones de uso – Español ........68
See www.etac.com
Models
TwinSheet4Glide 2-parted
IM140/200TD
IM140/200TT
NylonSheet
IM85/200NS IM85/200LPL IM85/200LPLNS
IM85/2002LPL IM85/2003LPL

ES IT FR NL DE FI DA NO SV GB ILL.
3
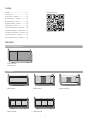
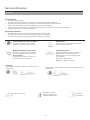
Illustrations
1 2 3
4 5 6
7 8 9
10 11 12

4
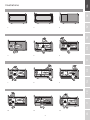
Illustrations
13 14 15
16 17 18
19 20 21
22 23 24

5
ES IT FR NL DE FI DA NO SV GB ILL.
To avoid accidents and injury when moving and handling the
products, please read this manual carefully.
This symbol appears alongside the text in the
manual. It draws the reader’s attention to points at
which there may be a risk to the health and safety
of the user or carer.
These products comply with the standards applicable for Class
1 products in the Medical Device Regulation (EU) 2017/745 on
medical devices.
At Etac we strive to improve our products all the time and
therefore we reserve the right to make changes to products
without prior warning. All measurements given on illustrations
and similar material are for guidance only and Etac cannot be
held liable for errors and defects.
The information given in this manual, including
recommendations, combinations and sizing, does not apply
to special orders and modications. If the customer makes
adjustments, repairs or uses combinations not predetermined
by Etac, the Etac CE certication and Etac warranty will not be
valid. If in doubt, please contact Etac.
When combining the device with other products, the
combination must not change the intended purpose of the
products or modify the products in such a way that compliance
with the applicable requirements may be affected. The person/
company responsible for the combination of the products must
ensure that the applicable requirements are fullled.
Warranty: Two-year warranty on material and manufacturing
defects, provided that the product is used correctly.
Expected lifetime: The device has an expected service life of 1
to 2 years under normal use. The service life of the device varies
depending on usage frequency, loads and how often and how it
is washed.
For further information on the Etac Patient Handling range,
see www.etac.com.
The product can be scrapped in accordance with national
regulations.
In case of an adverse event occurred in relation to the device,
incidents should be reported to your local dealer and the
national competent authority in a timely manner. The local
dealer will forward information to manufacturer.
General
Thank you for choosing an Etac product.
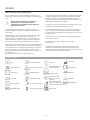
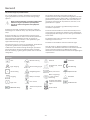
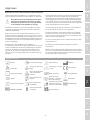
Washing
Do not bleach
Tumbledry
Iron
Do not dryclean
Medical device
Never leave on the oor
Risk of sliding down
Keep out of the sun
Read the user manual
Warning
Production year, month
and day
Batch no./Lot no.
User mass limit =
maximum rated load
The product can be
scrapped according to
national regulations
Manufacturer
CE-marking
Keep dry
Non sterile
Article number
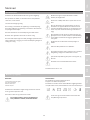
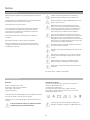
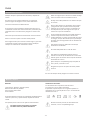
Symbols in general
Manual Cleaning
UKCA marked
Do not add fabric
conditioner

6
Introduction The person referred to as “the user” is the person who is lying in the product. "The carer" is the person
who is handling the product.
Intended Purpose The in-bed system is an assistive device intended for alleviation of, or compensation for, a functional
impairment due to an injury or disability. The device is designed for an individual lacking the ability to
reposition or turn themselves in bed due to reduced mobility or physical strength.
Intended User The device can be used by children, adults and elderly people with a need for repositioning.
Intended Environment For indoor use in acute care, long-term care and home care.
Indications For users who are in need of support to be safely and comfortably positioned and turned in lying
positions or who are in need of mobilisation, e.g. users with limited ability to move, and/or users who are
sensitive to pain, shear or tactile input. Not an exhaustive list.
The user group for the device is based on individual health and mobility function and not on a specic
diagnosis or age.
Contraindications There are no known contraindications.
Precautions Not to be used without NylonSheet.
Not to be locked when transfer is completed if there is an increased risk of pressure injury.
Not to be unlocked when transfer is completed if there is an increased risk of involuntary movements.
Training Requirements Only carers who have read and understood the user manual are allowed to use the device.

7
ES IT FR NL DE FI DA NO SV GB ILL.
Practical handling
Place 4WayGlide NylonSheet with locking system on the
bed. The “this side up” label should be at the head end
(Illustration 1). Secure the elastic band around the bed mattress
(Illustration 2). If required, lock the glide system so that the non-
slip material is visible.
First t the lower part of 4Way Glide Twins lower part. Next t the
top part of 4Way Glide Twin (Illustration 3) and join the Velcro.
Position the user so that the 4Way Glide Twin seam does not
risk causing pressure sores (Illustration 4).
If required, t the corner straps around the mattress corners
Position the user in the bed.
The product can be positioned under the user if he/she is
permanently bedridden - use the same method as for changing
sheets.
Positioning
Use
Important: Always conduct a risk assessment with the intended
user before installing and use!
2 carers:
1 lock:
To unlock/lock the system, one carer on each side holds the
handles attached to the nylon sheet hanging over the foot end
of the bed and pulls them slowly upwards towards the head
end (Illustration 5). When the carers feel resistance, they must
stop pulling. Then one carer takes hold of the handles on the
opposite side of the glide system, and the other carer helps
to pull the locking system up past the hip area (Illustration 6).
The carers then do the same on the opposite side.
The glide system is now unlocked and the user can be moved in
all directions by pulling the handles under the mattress at the
shoulders and hips (Illustration 7).
When the carers have nished repositioning/moving the user,
the glide system should, if required, be relocked unless the risk
assessment states something else (Illustration 8).
2 locks:
To unlock/lock the system, one carer on each side takes hold of
the handles attached to the nylon sheet hanging over the foot
end of the bed, folds and pulls them slowly upwards towards the
head end (Illustration 9).
One carer on each side takes hold of the handles attached to
the nylon sheet hanging over the head end of the bed, and pulls
then slowly upwards towards the foot end (Illustration 10).
The glide system is now unlocked and the user can be moved in
all directions by pulling the handles under the mattress at the
shoulders and hips (Illustration 7).
When the carers have nished repositioning/moving the user,
the glide system should, if required, be relocked unless the risk
assessment states something else.
3 locks:
To unlock/lock the system, one carer on each side takes hold
of the handles attached to the nylon lock from the nylon sheet
hanging over the bed side. Fold the nylon lock and carefully
push the nylon lock under the user. The carer on the opposite
side takes hold of the handles and slowly pulls and fastens
the ap with the Velcro. Carry out the same procedure with all
3 locks (Illustration 11).
The glide system is now unlocked and the user can be moved in
all directions by pulling the handles under the mattress at the
shoulders and hips (Illustration 7).
When the carers have nished repositioning/moving the user,
the glide system should, if required, be relocked unless the risk
assessment states something else.
Sliding down:
Unlock the glide mattress (Illustrations 5+6 (1 lock) or 9+10
(2 locks) or 11 (3 locks)). The carers take hold of the straps
under the user at the shoulders (and hips, if necessary) and
then slowly pull the user upwards using weight transference
(Illustration 12).
Single handed care/“2 to 1”/1 carer:
Unlock the system as described before one of the carers
has to go from one side to the other and, if required in the
risk assessment, secure the opposite side with the bed rail
(Illustration 13).
One carer can easily use the hoist to help turn the user.
Attach the functional handles of the mattress to the sling bar.
Raise the hoist a few centimetres until the weight of the user is
eased and unlock the system. Raise the hoist until the user is in
the correct horizontal position. The carer can either push down
on the glide mattress or pull on the handles to make sure the
user is turned in the middle of the bed (Illustrations 14+15).
To support the user during personal care, the carer can leave
the top part attached to the hoist and remove the lower part to
give easy access to the lower back area (Illustration 16).
Sliding down:
Unlock the glide mattress (Illustrations 5+6 (1 lock) or 9+10
(2 locks) or 11 (3 locks)). The carers push in GlideMattress at
the hip and shoulder and the user will move to the opposite
side diagonally. Then take hold of the handles at the shoulder
and hips and reposition the user in the middle of the bed.
Alternatively take hold of the handles at the shoulder and hips
and pull the user towards you and reposition the user in the
middle of the bed.
Remember to use weight transfer (Illustration 17).
Supine positioning:
If the user has to remain on his/her side for personal care or
positioning, the user can be supported using a positioning
wedge or positioning pillows placed according to their needs
(example in Illustration 18).
After moving the user, it will often be benecial to smooth out
the glide system under the user. To do this, pull diagonally on
the corners, preferably one layer at a time

8
Seated positioning:
Lock the glide system. If reduced freedom of movement in the
upper body is required in the seated position, you can lock the
glide system at both sides at the shoulders by tting corner
straps around the mattress (Illustration 19). Remember to bend
the knees rst before raising the head end (Illustration 20).
The head end can now be raised, without the user sliding down
(Illustration 21).
The “5 smiles” technique:
To ensure the most comfortable position (seated or lying), it is
imperative that the carers remove any tension occurring on the
skin when the user’s head or feet are raised.
First Smile: move and reposition the pillow (Illustration 22).
Second and third Smile: relieve the skin tension under the
shoulders (Illustration 23) on each side. Use the Immedia
MultiGlide glove and place the gloved hand under the user
and slowly move it down towards the bed end.
Fourth and fth Smile: relieve the skin tension under the legs
(Illustration 24) one leg at the time. Use the Immedia MultiGlide
glove and place the gloved hand under the buttocks and slowly
move it towards the bed end.
Seated position:
Once the carer has ensured that any tension on the skin is
released, they can support the user in the seated/lying position
with positioning wedges or positioning pillows.

9
ES IT FR NL DE FI DA NO SV GB ILL.
Notice
Always check the product before use and after washing.
Never use a defective product. If the product shows signs of
wear-and-tear, it must be scrapped.
Read these instructions carefully.
It is important that carers receive instruction in manual
handling. Etac offers advice and training in the safe use of the
product. For further information, contact Etac.
Always use the correct manual handling techniques
Encourage the user to assist where possible.
To ensure that the user feels safe and that every manual activity
is smooth, always plan the manual handling in advance.
There is a risk that the user may slide off. Never leave
the user alone on the edge of the bed.
Never leave 4Way Glide Twin or a nylon sheet on the
oor.
Always conduct a risk assessment, and ensure that
the assistive product can be used for the intended
user and, in combination with other devices, is safe
for both user and carers.
It is recommended that the guard rail is in place when
the user is left on the glide system, unless a risk
assessment has found that the user can be safely left
on the glide system without the need of guard rails.
Always lock the glide system when you have
completed the transfer.
Do not use 4Way Glide Twin as a sling.
To reduce sliding to the side, if the head end is
elevated, t the corner straps around the bed
mattress.
Always remove the “Loop Washing Strap” after
washing and drying and before use.
Ensure that the 2 Velcro parts can be fastened.
If in any doubt - please contact Etac.
Material:
Top side: Polyester/cotton (green)
Fill:100% Polyester bre
Back side: 100% Nylon
Handles: Polyester
The product should be checked regularly, preferably each time it
is used, and especially after washing.
Check that there is no damage to seams or fabric.
Never try to repair a product yourself.
Never use a defective product.
Washing instructions:
Recommended to wash the product before use.
Shrinks 5%. Do not use fabric softener.
This product can be cleaned with a solvent-free cleaning agent
with a pH level between 5 and 9, or a 70% disinfection solution.
During washing and drying the Velcro must be
assembled or use the “Loop Washing Strap”.
Material and cleaning
Special features

10
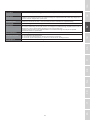
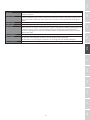
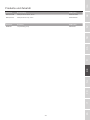
Products and accessories
Article no. Product Description Size (mm)
IM140/200TD 4Way Glide Twin Down, Green W1400xL1330
IM140/200TT 4Way Glide Twin Top, Green W1400XL850
Article no. Accessory Size (mm)
IMLWS60 Loop Washing Strap W60xL520

11
ES IT FR NL DE FI DA NO SV GB ILL.
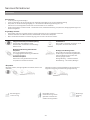
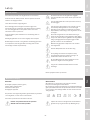
Service information
Inspection
First inspection:
• Is the packaging intact?
• Read the label on the packaging and check the article no. and product description
• Check that Short Instruction is enclosed – updated User Manual/Instruction for use can be downloaded from www.etac.com or contact your Etac
Customer Service or the local dealer.
• Check the label on the product - does it include article no., product description, lot/batch no., cleaning instructions and supplier name?
Periodic Inspection:
• Make sure that your Manual transfer system always is in a perfect condition.
• After wash – always check materials, stitching, handles, buckles.
• If the product shows signs of wear and tear, it must be removed from service immediately.
Visual inspection/Check the product:
Ensure that the materials, seams, stitching,
handles, buckles are intact/faultless.
Mechanical load or stress/Test handles:
Draw hard in the handles in opposite directions
and control the material, seams and stitching.
Test buckles:
Lock the buckle and draw in opposite directions,
control the buckle and the stitching.
Stability test:
Try to bend the product verify that it feels rm,
stable and solid.
Test low/high friction:
Place the product on a rm surface or a bed,
place your hands on the material and test the fric-
tion by pushing your hands down into the product.
Low friction – slides effortlessly
High friction – no sliding/moving
The product can be
scrapped in accordance
with national regulations
Read the
user manual
Check:
Manual transfer aids with handles, straps and buckles: Manual transfer aids with for sitting and lying transfer and
with high or low friction:
Production year, month
and day

12
Allmänt
Tack för att du har valt en produkt från Etac.
För att undvika olyckor och personskador vid hantering och
användning av produkten bör du läsa igenom bruksanvisningen
noga.
Den här symbolen förekommer i manualen
tillsammans med text. Den vill påkalla
uppmärksamhet när brukarens eller hjälparens
säkerhet kan äventyras.
Denna produkt uppfyller kraven i standarden för Klass 1
produkter enligt förordningen för medicintekniska produkter
(2017/745).
På Etac strävar vi efter att hela tiden förbättra våra produkter.
Därför förbehåller vi oss rätten att göra ändringar av
produkterna utan att meddela detta i förväg. Alla mått som
anges på bilder och i liknande material är endast vägledande.
Etac kan inte hållas ansvariga för felaktigheter och brister.
Informationen i dessa instruktioner, inklusive rekommendationer,
kombinationer och storlekar, gäller inte för specialbeställningar
och modikationer. Om kunden gör några ändringar, reparationer
eller kombinationer som inte har godkänts av Etac, upphör
Etacs CE-certiering och garanti att gälla. Kontakta Etac om du
har några frågor.
När enheten kombineras med andra produkter får
kombinationen inte ändra produkternas avsedda ändamål eller
modiera produkterna på ett sådant sätt att det kan påverka
överensstämmelsen med tillämpliga krav. Den person/det
företag som ansvarar för kombinationen av produkterna måste
säkerställa att tillämpliga krav uppfylls.
Garanti: Två års garanti för material- och tillverkningsfel, under
förutsättning att produkten används på rätt sätt.
Förväntad livslängd: Enheten har en förväntad livslängd på
1 till 2 år vid normal användning. Enhetens livslängd varierar
beroende på användningsfrekvens, belastning och hur ofta och
hur den rengörs.
Mer information om Etacs sortiment av föryttningsprodukter
nns på www.etac.com.
Produkten kan kasseras i enlighet med nationella
bestämmelser.
I händelse av en biverkning i samband med produkten ska
incidenter rapporteras till din lokala återförsäljare och den
nationella behöriga myndigheten i tid. Den lokala återförsäljaren
vidarebefordrar information till tillverkaren.
Tvätt
Ingen blekning
Torktumling
Strykning
Ingen kemtvätt
Medicinsk enhet
Lämna aldrig på golvet
Nedglidningsrisk
Skydda från solljus
Läs bruksanvisningen
Varning
Tillverkningsdatum: år,
månad och dag
Batchnr/partinr
Största massa för
brukare = maximal
belastning
Produkten kan avfalls-
hanteras i enlighet med
nationella bestämmelser
Tillverkare
CE-märkning
Hålls torr
Icke steril
Artikelnummer
Allmänna symboler
Manuell rengöring
UKCA-märkt
Använd inte sköljmedel

13
ES IT FR NL DE FI DA NO SV GB ILL.
Introduktion ”Brukaren” är den person som ligger i produkten. ”Vårdgivaren” är den person som hanterar produkten.
Avsett syfte Sängsystemet är ett hjälpmedel som används för att lindra eller kompensera för funktionsnedsättning.
Enheten är utformad för personer som saknar förmåga att ompositionera eller vända sig i sängen på
grund av nedsatt rörlighet eller fysisk styrka.
Avsedda brukare Enheten kan användas för barn, vuxna och äldre personer med behov av ompositionering.
Avsedd miljö För användning inom akutvård, långtidsvård och hemvård.
Indikationer För brukare som behöver stöd för säker och bekväm positionering och vändning i liggande ställning och
som kräver mobilisering till exempel personer med begränsad rörelseförmåga och/eller brukare som är
känsliga för smärta, skjuvning eller beröring. Inte en uttömmande lista.
Enhetens målgrupp baseras på individuell hälsa och funktionsförmåga och inte på ett specikt
hälsotillstånd eller en specik ålder.
Kontraindikationer Det nns inga kända kontraindikationer.
Försiktighetsåtgärder Får inte användas utan NylonSheet.
Får inte låsas efter föryttning om det nns ökad risk för tryckskador.
Får inte låsas upp efter föryttning om det nns en ökad risk för ofrivilliga rörelser.
Utbildningskrav Enheten får endast användas av vårdgivare som har läst och förstått användarhandboken.

14
Praktiskt handhavande
Placera 4WayGlide NylonSheet med låssystemet på sängen.
Etiketten ”denna sida upp” ska placeras i huvudänden (bild 1).
Fäst sedan resårbandet runt bäddmadrassen (bild 2). Lås vid
behov glidsystemet så att non-slip-materialet syns.
Placera först den nedre delen av 4Way Glide Twin. Placera
sedan den övre delen av 4Way Glide Twin (bild 3) och stäng
kardborrebanden.
Placera brukaren så att sömmen på 4Way Glide Twin inte kan
orsaka trycksår (bild 4).
Fäst vid behov resårbanden runt madrasshörnen.
Placera brukaren i sängen.
Produkten kan placeras under brukaren om denne är
sängbunden – använd samma metod som vid lakansbyte.
Placering
Användning
Viktigt! Gör alltid en riskbedömning för den aktuella brukaren
innan produkten installeras och används!
Två hjälpare:
Ett lås:
Låsa/låsa upp glidsystemet: En hjälpare på varje sida tar tag
i funktionshandtagen på nylonlakanet som hänger ned vid
fotänden och drar dem långsamt uppåt mot huvudänden (bild
5). När hjälparna känner motstånd måste de sluta dra. Därefter
tar en hjälpare tag i funktionshandtagen på motsatt sida av
glidsystemet och den andre hjälparen hjälper till att dra upp
låssystemet förbi höftområdet (bild 6). Därefter gör hjälparna
likadant från motsatt sida.
Glidsystemet är nu upplåst och brukaren kan yttas i alla
riktningar genom att dra i funktionshandtagen under madrassen
vid axlarna och höfterna (bild 7).
När hjälparna är färdiga med att omplacera/ytta brukaren bör
glidsystemet låsas på nytt förutsatt att inte riskbedömningen
anger annat (bild 8).
Två lås:
Låsa/låsa upp glidsystemet: En hjälpare på varje sida tar tag i
funktionshandtagen som är fästa vid nylonlakanet och hänger
ned vid fotänden, viker och drar dem långsamt uppåt mot
huvudänden (bild 9).
En hjälpare på varje sida tar tag i funktionshandtagen som är
fästa vid nylonlakanet och hänger ned vid huvudänden och drar
dem långsamt nedåt mot fotänden (bild 10).
Glidsystemet är nu upplåst och brukaren kan yttas i alla
riktningar genom att dra i funktionshandtagen under madrassen
vid axlarna och höfterna (bild 7).
När hjälparna är färdiga med att omplacera/ytta brukaren bör
glidsystemet låsas på nytt förutsatt att inte riskbedömningen
anger annat.
Tre lås:
Låsa/låsa upp glidsystemet: En hjälpare på varje sida tar tag i
funktionshandtagen som är fästa vid nylonlåset på nylonlakanet
och hänger ned från sängkanterna. Vik nylonlåset och skjut
varsamt in nylonlåset under brukaren. Hjälparen på andra sidan
tar tag i funktionshandtagen, drar långsamt och fäster låsiken
med kardborrebandet. Gör samma sak med alla 3 låsen
(bild 11).
Glidsystemet är nu upplåst och brukaren kan yttas i alla
riktningar genom att dra i funktionshandtagen under madrassen
vid axlarna och höfterna (bild 7).
När hjälparna är färdiga med att omplacera/ytta brukaren bör
glidsystemet låsas på nytt förutsatt att inte riskbedömningen
anger annat.
Glida nedåt:
Lås upp glidmadrassen (bild 5+6 (1 lås) eller 9+10 (2 lås)
eller 11 (3 lås). Hjälparna tar tag i funktionshandtagen under
brukaren vid axlarna (och höfterna vid behov) och drar sedan
långsamt brukaren uppåt med hjälp av viktöverföring (bild 12).
Ensam hantering/”2 till 1”/en hjälpare:
Lås upp systemet enligt tidigare beskrivning, men eftersom den
enda hjälparen behöver röra sig mellan sängens båda sidor
bör denne höja sänggrinden på den oövervakade sidan om
riskbedömningen anger att detta ska göras (bild 13).
En hjälpare kan enkelt använda lyften för att få hjälp att vända
brukaren.
Fäst funktionshandtagen på glidmadrass i lyftbygeln. Höj
lyften några centimeter. Brukarens vikt vilar inte längre mot
låset och systemet låses upp. Höj sedan lyften tills brukaren
har nått korrekt position. Hjälparen kan antingen trycka ned
glidmadrassen eller dra i handtagen för att se till att brukaren
vänds i mitten av sängen (bild 14+15).
För att stötta brukaren under hygienvård kan hjälparen låta
ovandelen sitta kvar i lyften och bara lösgöra nederdelen. Detta
gör det lätt att komma åt ländryggsområdet (bild 16).
Glida nedåt:
Lås upp glidmadrassen (bild 5+6 (1 lås) eller 9+10 (2 lås) eller
11 (3 lås)). Hjälparna trycker in GlideMattress vid höft och axel
för att ytta brukaren diagonalt mot andra sidan. Hjälparna
ska nu ta tag i handtagen vid höfter och axlar och omplacera
brukaren i mitten av sängen. Du kan också ta tag i handtagen
vid axlar och höfter och dra brukaren mot dig och därefter ytta
brukaren i mitten av sängen.
Kom ihåg att utnyttja viktöverföring (bild 17).
Liggande positionering:
Om brukaren behöver ligga kvar i sidoläge för hygienvård eller
positionering kan brukaren stödjas med en Positioning Wedge
eller positioneringskuddar allt efter brukarens behov
(exempel visas i bild 18).
Efter att brukaren har yttats kan det vara bra att jämna till
glidsystemet under brukaren. Dra diagonalt i hörnen, helst ett
lager i taget.

15
ES IT FR NL DE FI DA NO SV GB ILL.
Sittande läge:
Lås glidsystemet. Om överkroppens rörelsefrihet i sittande läge
behöver begränsas kan glidsystemet låsas på båda sidor av
axlarna genom att fästa hörnremmar runt madrassen (bild 19).
Tänk på att använda sängens funktion för att böja knäna innan
huvudänden höjs (bild 20).
Huvudänden kan nu höjas utan att brukaren glider ned (bild 21).
”5 smiles”-tekniken:
För att säkerställa en så bekväm position som möjligt (sittande
eller liggande) är det viktigt att hjälparna ser till att huden inte
är sträckt när brukarens huvud eller fötter höjs.
Smile 1: skaka kudden och lägg tillbaka den (bild 22)
Smile 2 och 3: se till att skulderbladen är avslappnade utan
sträckning i huden (bild 23), ett i taget. Använd Immedia
MultiGlide Glove och placera handen med handsken under
brukaren och rör handen långsamt mot sängänden.
Smile 4 och 5: se till att benen är avslappnade utan sträckning
i huden (bild 24), ett i taget. Använd Immedia MultiGlide Glove
och placera handen med handsken under skinkorna och för
handen långsamt mot sängänden.
Sittande ställning:
När hjälparen har sett till att huden är avslappnad kan han/hon
stötta brukaren i sittande/liggande ställning med Positioning
Wedge eller kuddar.

16
Information
Kontrollera alltid produkten före användning och efter rengöring.
Använd aldrig en defekt produkt. Om produkten är sliten måste
den kasseras.
Läs dessa instruktioner noga.
Det är viktigt att hjälparna får instruktioner i manuell
föryttningsteknik. Etac erbjuder råd och utbildning för hjälpare.
Kontakta Etac om du vill veta mer.
Använd alltid rätt föryttningsteknik.
Uppmuntra brukaren att hjälpa till så mycket som möjligt.
Planera alltid föryttningen i förväg så att brukaren känner sig
trygg och föryttningen går smidigt.
Det nns risk att brukaren kan glida av. Lämna aldrig
brukaren ensam på sängkanten.
Lämna aldrig en 4Way Glide Twin eller ett nylonlakan
på golvet.
Genomför alltid en riskbedömning, kontrollera
att hjälpmedlet går att använda hos den enskilde
brukaren och se till att det är säkert för brukaren och
hjälparna att använda det tillsammans med andra
hjälpmedel.
Vi rekommenderar att sängens grindar sitter på plats
när brukaren lämnas på glidsystemet, såvida man
inte har konstaterat i en riskbedömning att det är
säkert att lämna brukaren på glidsystemet utan att
grindar sitter på plats.
Lås alltid glidsystemet när föryttningen är färdig.
Använd inte 4Way Glide Twin som en lyftsele.
Du kan minska risken att brukaren glider åt sidan när
huvudänden är upphöjd genom att fästa hörnremmar
kring bäddmadrassen.
Ta alltid bort tvättremsan Loop Washing Strap efter
tvätt och torkning samt före användning.
Se till att de två kardborredelarna kan fästas.
Kontakta Etac om du har några frågor.
Material:
Overside: Polyester/bomull (grön)
Fyllning: 100% polyesterber
Baksida: 100% nylon
Håndtak: Polyester.
Produkten bör kontrolleras regelbundet, helst varje gång
den ska användas och särskilt efter tvätt.
Kontrollera att sömmar och tyg inte är skadade.
Försök aldrig att reparera en produkt själv.
Använd aldrig en defekt produkt.
Tvättinstruktioner:
Tvätt rekommenderas före användning.
Krymper 5 %. Använd inte sköljmedel.
Produkten kan rengöras med rengöringsmedel utan lösnings-
medel och med pH-värde 5–9 eller med 70 % tvättsprit.
Vid tvätt och torkning måste kardborrebandet stängas.
Alternativt kan tvättremsan Loop Washing Strap
användas.
Material och rengöring
Särskilda egenskaper

17
ES IT FR NL DE FI DA NO SV GB ILL.
Produkter och tillbehör
Artikelnr Produktbeskrivning Storlek (mm)
IM140/200TD 4Way Glide Twin Down, Green W1400xL1330
IM140/200TT 4Way Glide Twin Top, Green W1400XL850
Artikelnr Accessory Storlek (mm)
IMLWS60 Loop Washing Strap W60xL520

18
Serviceinformation
Inspektion
Första inspektion:
• Är förpackningen oskadad?
• Läs etiketten på förpackningen och kontrollera artikelnummer och produktbeskrivning.
• Kontrollera att Kortinformationen har bifogats en aktuell bruksanvisning kan laddas ned från
www.etac.se eller beställas via Etacs kundtjänst eller din lokala återförsäljare
• Kontrollera etiketten på produkten – innehåller den artikelnummer, produktbeskrivning, parti-/batchnummer,
rengöringsinstruktioner och leverantörens namn?
Regelbundna inspektioner:
• Kontrollera att det manuella överyttningssystemet alltid är i perfekt skick.
• Kontrollera alltid material, sömmar, handtag och spännen efter rengöring.
• Om produkten visar spår av förslitning måste den omedelbart tas ur bruk.
Visuell inspektion/kontrollera produkten:
Kontrollera att material, sömmar, stygn,
handtag och spännen är hela/utan fel.
Mekanisk belastning/test av handtag:
Dra hårt i handtagen åt motsatt håll och
kontrollera material, sömmar och stygn.
Test av spännen:
Stäng spännet och dra åt motsatt håll.
Kontrollera spännet och stygnen.
Stabilitetstest:
Försök att böja produkten för att kontrollera
att den känns fast och stabil.
Testa låg/hög friktion:
Placera produkten på en fast yta eller säng,
lägg händerna på materialet och testa
friktionen genom att trycka händerna ned
mot produkten.
Låg friktion – glider enkelt
Hög friktion – glider/rör sig inte
Produkten kan avfalls-
hanteras i enlighet med
nationella bestämmelser
Läs bruks-
anvisningen
Kontrollera:
Hjälpmedel för manuell föryttning med handtag, remmar
och spännen:
Hjälpmedel för manuell föryttning, sittande och liggande med hög
eller låg friktion:
Produksjonsår, måned og
dag

19
ES IT FR NL DE FI DA NO SV GB ILL.
Generelt
Takk for at du har valgt et produkt fra Etac.
Les bruksanvisningen grundig for å unngå uhell og skader under
ytting og bruk av produktene.
Dette symbolet vises ved siden av teksten i bruks-
anvisningen. Den trekker leserens oppmerksomhet
mot punkter hvor det kan være fare for brukerens
eller assistentens helse eller sikkerhet.
Produktene overholder standardene for Klasse 1-produkter i
Forskrift om medisinsk utstyr (EU) 2017/745 Medisinsk utstyr.
Hos Etac arbeider vi kontinuerlig med å forbedre produktene
våre. Vi forbeholder oss derfor retten til å endre produktene uten
ytterligere forvarsel. Alle mål i illustrasjoner og liknende materiell
er kun veiledende. Etac er ikke ansvarlig for feil og defekter.
Innholdet i denne bruksanvisningen, inkludert anbefalinger,
kombinasjoner og størrelser, gjelder ikke ved spesialbestillinger
eller modikasjoner. Hvis kunden foretar justeringer, reparasjoner
eller kombinasjoner som ikke er avtalt med Etac på forhånd, vil
Etacs CE-sertisering og garanti være ugyldig. Kontakt Etac hvis
du er i tvil.
Hvis utstyret kombineres med andre produkter er det viktig at
kombinasjonen ikke endrer det tiltenkte formålet for produktene
eller modiserer produktene på en slik måte at det påvirker
oppfyllelsen av gjeldende krav. Vedkommende som er ansvarlig
for kombinasjonen av produktene, må påse at gjeldende krav
oppfylles.
Garanti: To års garanti mot material- og produksjonsfeil forutsatt
at produktet brukes på riktig måte.
Forventet levetid: Utstyret har en forventet levetid på 1 til 2
år under normal bruk. Utstyrets levetid varierer avhengig av
brukshyppighet, belastning og hvor ofte og hvordan det blir
vasket.
Se www.etac.no for mer informasjon om Etacs
forytningshjelpemidler.
Produkten kan kasseras i enlighet med nationella
bestämmelser.
Hvis det skulle oppstå en uønsket hendelse relatert til utstyret,
skal hendelsen rapporteres til din lokale forhandler og nasjonale
myndigheter innen rimelig tid. Den lokale forhandleren vil
videresende informasjon til produsenten.
Generelle symboler
Vasking
Må ikke blekes
Tørkes i tørketrommel
Strykes
Må ikke renses
Medisinsk utstyr
Etterlat ikke produktet
på gulvet
Fare for nedglidning
Må ikke utsettes
for sollys
Les bruksanvisningen
Advarsel
Produksjonsår, måned
og dag
Batchnummer /
LOT-nummer.
Maks brukervekt
= maksimalt testet
belastning
Produktet kan kasseres
i henhold til gjeldende
regelverk.
Produsent
CE-merking
Må holdes tørr
Ikke steril
Artikkelnummer
Vaskes for hånd
UKCA-merketIkke bruk tøymykner

20
Innledning Personen som betegnes som «brukeren», er personen som ligger i produktet. «Pleieren» er personen
som håndterer produktet.
Tiltenkt bruk I-sengen-systemet er et hjelpemiddel for å avhjelpe eller kompensere for nedsatt funksjonsevne på
grunn av skade eller funksjonsnedsettelse. Utstyret er utformet for personer som ikke kan posisjonere
seg eller snu seg i sengen på grunn av nedsatt bevegelighet eller redusert fysisk styrke.
Tiltenkt bruker Utstyret kan brukes av barn, voksne og eldre med behov for reposisjonering.
Tiltenkt miljø For innendørsbruk i akuttpleie, langtidspleie og hjemmepleie.
Indikasjoner For brukere som trenger støtte for trygg og komfortabel posisjonering og vending i liggende stilling,
eller som trenger mobilisering, f.eks. brukere med begrenset bevegelsesevne og/eller brukere som er
følsomme for smerte, forskyvning eller berøring. Listen er ikke uttømmende.
Målgruppen for utstyret deneres ut fra individuell helse- og mobilitetsfunksjon, ikke en spesikk
diagnose eller alder.
Kontraindikasjoner Det er ingen kjente kontraindikasjoner.
Forholdsregler Skal ikke brukes uten NylonSheet.
Skal ikke låses når forytningen er fullført hvis det er økt risiko for trykkskade.
Skal ikke låses opp når forytningen er fullført hvis det er økt risiko for ufrivillige bevegelser.
Opplæringskrav Utstyret skal bare brukes av pleiere som har lest og forstått bruksanvisningen.
Sidan laddas...
Sidan laddas...
Sidan laddas...
Sidan laddas...
Sidan laddas...
Sidan laddas...
Sidan laddas...
Sidan laddas...
Sidan laddas...
Sidan laddas...
Sidan laddas...
Sidan laddas...
Sidan laddas...
Sidan laddas...
Sidan laddas...
Sidan laddas...
Sidan laddas...
Sidan laddas...
Sidan laddas...
Sidan laddas...
Sidan laddas...
Sidan laddas...
Sidan laddas...
Sidan laddas...
Sidan laddas...
Sidan laddas...
Sidan laddas...
Sidan laddas...
Sidan laddas...
Sidan laddas...
Sidan laddas...
Sidan laddas...
Sidan laddas...
Sidan laddas...
Sidan laddas...
Sidan laddas...
Sidan laddas...
Sidan laddas...
Sidan laddas...
Sidan laddas...
Sidan laddas...
Sidan laddas...
Sidan laddas...
Sidan laddas...
Sidan laddas...
Sidan laddas...
Sidan laddas...
Sidan laddas...
Sidan laddas...
Sidan laddas...
Sidan laddas...
Sidan laddas...
Sidan laddas...
Sidan laddas...
Sidan laddas...
-
 1
1
-
 2
2
-
 3
3
-
 4
4
-
 5
5
-
 6
6
-
 7
7
-
 8
8
-
 9
9
-
 10
10
-
 11
11
-
 12
12
-
 13
13
-
 14
14
-
 15
15
-
 16
16
-
 17
17
-
 18
18
-
 19
19
-
 20
20
-
 21
21
-
 22
22
-
 23
23
-
 24
24
-
 25
25
-
 26
26
-
 27
27
-
 28
28
-
 29
29
-
 30
30
-
 31
31
-
 32
32
-
 33
33
-
 34
34
-
 35
35
-
 36
36
-
 37
37
-
 38
38
-
 39
39
-
 40
40
-
 41
41
-
 42
42
-
 43
43
-
 44
44
-
 45
45
-
 46
46
-
 47
47
-
 48
48
-
 49
49
-
 50
50
-
 51
51
-
 52
52
-
 53
53
-
 54
54
-
 55
55
-
 56
56
-
 57
57
-
 58
58
-
 59
59
-
 60
60
-
 61
61
-
 62
62
-
 63
63
-
 64
64
-
 65
65
-
 66
66
-
 67
67
-
 68
68
-
 69
69
-
 70
70
-
 71
71
-
 72
72
-
 73
73
-
 74
74
-
 75
75


på andra språk
- italiano: Immedia 4WayGlide LPL Manuale utente
- eesti: Immedia 4WayGlide LPL Kasutusjuhend
- español: Immedia 4WayGlide LPL Manual de usuario
- Deutsch: Immedia 4WayGlide LPL Benutzerhandbuch
- français: Immedia 4WayGlide LPL Manuel utilisateur
- dansk: Immedia 4WayGlide LPL Brugermanual
- Nederlands: Immedia 4WayGlide LPL Handleiding
Relaterade papper
-
 Immedia 4WayGlide LPL Användarmanual
-
 Immedia 4WayGlide LPL Användarmanual
-
Immedia IMM1045 Användarmanual
-
 Immedia TwinSheet4Glide Användarmanual
-
 Immedia 4WayGlide Midi Användarmanual
-
 Immedia 4WayGlide Midi Användarmanual
-
 Immedia 4WayGlide Mini Användarmanual
-
 Immedia 4WayGlide Midi Användarmanual
-
 Immedia 4WayGlide Mini Användarmanual


