Parkside PSSA 3.6 C3 Translation Of The Original Instructions
- Typ
- Translation Of The Original Instructions

CORDLESS SCREWDRIVER PSSA 3.6 C3
CORDLESS SCREWDRIVER
Translation of the original instructions
AKKUKÄYTTÖINEN RUUVINVÄÄNNIN
Alkuperäisen käyttöohjeen käännös
BATTERIDREVEN BOREMASKINE
Oversættelse af den originale driftsvejledning
SLADDLÖS STAVSKRUVDRAGARE
Översättning av bruksanvisning i original
ACCU-STAAFSCHROEFMACHINE
Vertaling van de originele gebruiksaanwijzing
VISSEUSE SANS FIL
Traduction des instructions d‘origine
AKKU-STABSC HRAUBER
Originalbetriebsanleitung
IAN 104021
104021_par_Akku-Stabschrauber_cover_FI_SE_DK_BE_NL.indd 2 28.01.15 11:16

GB / IE Translation of the original instructions Page 4
FI Alkuperäisen käyttöohjeen käännös
Sivu 16
SE Översättning av bruksanvisning i original
Sidan 28
DK Oversættelse af den originale driftsvejledning Side 40
FR / BE Traduction des instructions d‘origine Page 52
NL / BE Vertaling van de originele gebruiksaanwijzing Pagina 66
DE / AT / CH Originalbetriebsanleitung
Seite 79
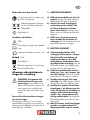
Before reading, unfold the page containing the illustrations and familiarise yourself with all functions of the
device.
Käännä ennen lukemista kuvallinen sivu esiin ja tutustu seuraavaksi laitteen kaikkiin toimintoihin.
Vik ut bildsidan och ha den till hands när du läser igenom anvisningarna och gör dig bekant med
apparatens / maskinens funktioner.
Før du læser, vend siden med billeder frem og bliv bekendt med alle apparatets funktioner.
Avant de lire le mode d‘emploi, ouvrez la page contenant les illustrations et familiarisez-vous ensuite avec
toutes les fonctions de l‘appareil.
Vouw vóór het lezen de pagina met de afbeeldingen open en maak u vertrouwd met alle functies van het
apparaat.
Klappen Sie vor dem Lesen die Seite mit den Abbildungen aus und machen Sie sich anschließend mit allen
Funktionen des Gerätes vertraut.
104021_par_Akku-Stabschrauber_cover_FI_SE_DK_BE_NL.indd 3 28.01.15 11:16

1
2
2
3 4
4
4
6
6
6
5
5
7
8
9
9 9
10
11
12
13
15
14
11 1
3
7
12

4
GB IE
Contents
Introduction .................................4
Intended use ................................ 4
General description ......................5
Extent of the delivery ........................ 5
Overview ........................................ 5
Function description.......................... 5
Technical data .............................. 6
Safety information ....................... 6
Symbols .......................................... 6
General safety instructions for power
tools ............................................... 7
Correct handling of the battery
charger ......................................... 10
Charging process .......................10
Charging the battery ...................... 11
Initial Operation .........................11
Switching ON and OFF .................. 11
Checking the charge status of the
rechargeable battery ...................... 11
Set the direction of rotation ............. 11
Inserting/replacing bits ................... 12
Torque setting ................................ 12
Handle setting ............................... 12
Use as a torch ............................... 12
Cleaning/Maintenance ...............12
Cleaning ....................................... 12
Maintenance ................................. 13
Storage ......................................13
Disposal and the environment ....13
Spare parts/Accessories ............. 13
Guarantee .................................14
Repair Service ............................15
Service-Center ............................15
Importer .................................... 15
Translation of the original EC
declaration of conformity ...........93
Introduction
Congratulations on the purchase of your
new device. With it, you have chosen a
high quality product. During production,
this equipment has been checked for qual-
ity and subjected to a nal inspection. The
functionality of your equipment is therefore
guaranteed.
The operating instructions constitute
part of this product. They contain
important information on safety, use
and disposal.
Before using the product, familiarise
yourself with all of the operating
and safety instructions. Use the
product only as described and for
the applications specied. Keep this
manual safely and in the event that
the product is passed on, hand over
all documents to the third party.
Intended use
The device is intended for drilling screws in
and out in wood, metal or plastic and for
light drilling operations. The device is not
suitable for commercial use.
Any other use not specically mentioned
in this manual can lead to damage to the
unit and may present a serious hazard to
the user.
The manufacturer will not be held respon-
sible for damage or injuries caused by use
outside that stipulated by the manual or by
improper handling.

5
GB IE
General description
The illustration of the princi-
pal functioning parts can be
found on the front and back
foldout pages.
Extent of the delivery
Carefully unpack the appliance and check
that it is complete.
Dispose of the packaging material cor-
rectly.
- Cordless screwdriver
- Charger
- 26 bits
- 1 Bit holder
- Case
- Instruction Manual
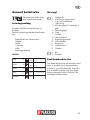
26 bits:
SL
25mm 3 • 4 • 5 • 6 • 7
50mm 5
PZ
25mm 0 • 2 x 1 • 2 x 2 • 3
50mm 2
PH
25mm 0 • 2 x 1 • 2 x 2 • 3
T
25mm 10 • 15 • 20 • 25
H
25mm 3 • 4 • 5
Slot
No.
No.
No.
No.
No.
No.
No.
Cross
Cross
Torx
Hexagonal
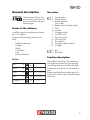
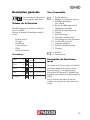
Overview
1 Spring sleeve
2 Torque setting
3 Battery Indicator
(not visible)
4 Release key for handle setting
5 Torch
6 Handle
7 Charging socket
8 On/Off switch
9 Direction switch
10 LED work light
11 Bit adapter
12 Charging cable connector
13 Charger
14 Bits
15 Bit holder
Function description
The cordless screwdriver with clockwise/
anticlockwise rotation has 6 torque steps,
one drilling level and one LED work light.
Furthermore, the device can be used as a
torch.
Please read the following descriptions for
the function of the various controlling parts
of the unit.

6
GB IE
Technical data
Unit
Motor voltage .................3.6 V
1.5 Ah
Rated speed (n
0
) .......................200 min
-1
Torque ..................................max. 4 Nm
Protection class ..............................
III
III
Weight (without charger) .............0.43 kg
Sound pressure level (L
pA
) ........ 55.4 dB(A)
................................................ K= 3 dB
Sound power level (L
wA
) .......... 66.4 dB(A)
................................................ K= 3 dB
Vibration (a
h
) ..........0.37 m/s
2
, K= 1.5 m/s
2
Battery (Li-Ion)
Battery cells ...................................... 1
Nominal voltage ......................3.6 V
Capacity .................................. 1.5 Ah
Loading time ............................ca. 3 h
Charger ............... IVP0550-0550W
Nominal consumption ..................48 W
Voltage input ....................100-240 V~,
.................................. 50/60 Hz, 0.2 A
Voltage Output ..........5.5 V
550 mA
Output rating ........................max. 6 W
Protection class .............................
II
Protection category ...................... IPX0
The noise and vibration levels have been
calculated according to the norms stated
in the conformity statement. Technical and
optical alterations to serve progress may
be made without notice. All measurements,
instructions and other data given in this
manual are therefore given without guar-
antee of correctness. Legal claims made
on the basis of this manual are therefore
excluded.
The stated vibration emission value was
measured in accordance with a standard
testing procedure and may be used to com-
pare one power tool to another. The stated
vibration emission value may also be used
for a preliminary exposure assessment.
Warning: The vibration emission
value may differ during actual use
of the power tool from the stated
value depending on the manner in
which the power tool is used.Safety
precautions aimed at protecting the
user should be based on estimated
exposure under actual usage condi-
tions (all parts of the operating cycle
are to be considered, including, for
example, times during which the
power tool is turned off and times
when the tool is turned on but is run-
ning idle).
Safety information
When using the device, please observe the
safety instructions.
Symbols
Symbols in the manual
Warning symbols (instead of
the exclamation mark, the
danger may be explained)
with information on damage
and injury prevention.
Instruction symbols (the instruction
may be explained at the place of
the exclamation mark) with informa-
tion on preventing damage.
Help symbols with information on
improving tool handling.

7
GB IE
1) WORK AREA SAFETY
a) Keep work area clean and well
lit. Cluttered or dark areas invite ac-
cidents.
b) Do not operate power tools in
explosive atmospheres, such as
in the presence of ammable
Iiquids, gases or dust. Power tools
create sparks which may ignite the
dust or fumes.
c) Keep children and bystanders
away while operating a power
tool. Distractions can cause you to
lose control.
2) ELECTRICAL SAFETY
a) Power tool plugs must match
the outlet. Never modify the
plug in any way. Do not use
any adapter plugs with earthed
(grounded) power tools. Unmodi-
ed plugs and matching outlets will
reduce risk of electric shock.
b) Avoid body contact with
earthed or grounded surfaces,
such as pipes, radiators, ranges
and refrigerators. There is an
increased risk of electric shock if your
body is earthed or grounded.
c) Do not expose power tools to
rain or wet conditions. Water
entering a power tool will increase the
risk of electric shock.
d) Do not abuse the cord. Never
use the cord for carrying, pulling
or unplugging the power tool.
Keep cord away from heat, oil,
sharp edges or moving parts.
Damaged or entangled cords increase
the risk of electric shock.
e) When operating a power tool
Symbols on the unit
Before using for the rst time, care-
fully read through the user manual.
Do not dispose of the device
with the battery installed in
household waste.
III
Protection class III
Symbols on the charger
Attention!
Read the manual.
The charger is for indoor use only.
Pole orientation
Protection class II
Electric devices do not belong with
domestic waste.
General safety instructions
for power tools
WARNING! Read all safety
directions and instructions.
Omissions in the compliance with
safety directions and instructions
can cause electrical shock, re
and/or severe injuries.
Retain all safety directions and in-
structions for future use.
The term “Power Tools” used in the safety
instructions refers to mains-operated power
tools (with power cord) and to battery-op-
erated power tools (without power cord).

8
GB IE
outdoors, use an extension cord
suitable for outdoor use. Use of a
cord suitable for outdoor use reduces
the risk of electric shock.
f) If operating a power tool in a
damp location is unavoidable,
use a residual current device
(RCD) protected supply. Use of an
RCD reduces the risk of electric shock.
3) PERSONAL SAFETY
a) Stay alert, watch what you are
doing and use common sense
when operating a power tool.
Do not use a power tool while
you are tired or under the inu-
ence of drugs, alcohol or medi-
cation. A moment of inattention white
operating power tools may result in
serious personal injury.
b) Use personal protective equip-
ment. Always wear eye protec-
tion. Protective equipment such as dust
mask, non-skid safety shoes, hard hat,
or hearing protection used for appro-
priate conditions will reduce personal
injuries.
c) Prevent unintentional starting.
Ensure the switch is in the off-
position before connecting to
power source and/or battery
pack, picking up or carrying the
tool. Carrying power tools with your
nger on the switch or energising pow-
er tools that have the switch on invites
accidents.
d) Remove any adjusting key or
wrench before turning the pow-
er tool on. A wrench or a key left at-
tached to a rotating part of the power
tool may result in personal injury.
e) Do not overreach. Keep proper
footing and balance at all times.
This enables better control of the pow-
er tool in unexpected situations.
f) Dress properly. Do not wear
loose clothing or jewellery.
Keep your hair, clothing and
gloves away from moving
parts. Loose clothes, jewellery or long
hair can be caught in moving parts.
g) If devices are provided for the
connection of dust extraction
and collection facilities, ensure
these are connected and prop-
erly used. Use of dust collection can
reduce dust-related hazards.
4) POWER TOOL USE AND CARE
a) Do not force the power tool. Use
the correct power tool for your
application. The correct power tool
will do the job better and safer at the
rate for which it was designed.
b) Do not use the power tool if the
switch does not turn it on and
off. Any power tool that cannot be
controlled with the switch is dangerous
and must be repaired.
c) Disconnect the plug from the
power source and/or the bat-
tery pack from the power tool
before making any adjust
-ments, changing accessories, or
storing power tools. Such preven-
tive safety measures reduce the risk of
starting the power tool accidentaIly.
d) Store idle power tools out of the
reach of children and do not al-
low persons unfamiliar with the
power tool or these instructions
to operate the power tool. Power
tools are dangerous in the hands of
untrained users.

9
GB IE
e) Maintain power tools. Check
for misalignment or binding
of moving parts, breakage of
parts and any other condition
that may affect the power tool’s
operation. If damaged, have the
power tool repaired before use. Many
accidents are caused by poorly main-
tained power tools.
f) Keep cutting tools sharp and
clean. Properly maintained cutting
tools with sharp cutting edges are less
Iikely to bind and are easier to control.
g) Use the power tool, accessories
and tool bits etc. in accordance
with these instructions, taking
into account the working condi-
tions and the work to be per-
formed. Use of the power tool for op-
erations different from those intended
could result in a hazardous situation.
h) Hold the device by the insu-
lated gripping surfaces when
performing work in which the
cutting tool may come into con-
tact with hidden wiring or its
own cord. Contact with a live wire
can also cause a charge in metal parts
of the device and result in an electric
shock.
5) CAREFUL HANDLING AND USE
OF BATTERY DEVICES
a) Charge the batteries only in
chargers that are recommended
by the manufacturer. Risk of re if a
charger that is suitable for a specic type
of battery is used with other batteries.
b) In the power tools, use only the
batteries designed for the pur-
pose. The use of other batteries may
result in injuries and risk of re.
c) Keep the unused battery away
from paper clips, coins, keys,
nails, screws and other small
metal objects, which could cause
bridging of the contacts. A short
circuit between the battery contacts
may cause burns or re.
d) If used incorrectly, liquid may
leak from the battery. Avoid
contact with this. In the event
of accidental contact, rinse off
with water. If the liquid gets into
eyes, seek medical assistance.
Leaking battery uid may cause skin ir-
ritations or burns.
6) SERVICE
a) Have your power tool serviced
by a qualied repair person us-
ing only identical replacement
parts. This will ensure that the safety
of the power tool is maintained.
7) SPECIAL SAFETY DIRECTIONS FOR
BATTERY-OPERATED TOOLS
a) Do not subject the battery to
strong sunlight over long pe-
riods and do not leave it on a
heater. Heat damages the battery and
there is a risk of explosion.
b) Allow a hot battery to cool be-
fore charging.
c) Do not open up the battery and
avoid mechanical damage to
the battery. Risk of short circuit and
fumes may be emitted that irritate the
respiratory tract. Ensure fresh air and
seek medical assistance in the event of
discomfort.

10
GB IE
Correct handling of the bat-
tery charger
a) This appliance can be used by
persons with reduced physical,
sensory or mental capabili-
ties or lack of experience and
knowledge if they have been
given supervision or instruction
concerning use of the appliance
in a safe way and understand
the hazards involved. Children
shall not play with the appli-
ance.
b) Do not use the charger to
charge non-rechargeable batter-
ies.
c) To charge the battery, use only
the charger supplied. Risk of re
and explosion. This ensures that the
safety of the device is maintained.
d) Before each use, check the
charger, cable and plug and
have them repaired by quali-
ed professionals and only with
original parts. Do not use a de-
fective charger and do not open
it up yourself. This ensures that the
safety of the device is maintained.
e) Connect the charger only to a
socket with an earth. Ensure
that the mains voltage matches
the specications on the charger
rating plate. Risk of electric shock.
f) Disconnect the charger from the
mains before closing or open-
ing connection to the battery /
power tool / device. This ensures
that the battery and charger are not
damaged.
g) Keep the charger clean and
away from wet and rain. Do not
use the charger outdoors. Dirt
and the entry of water increase the risk
of electric shock.
h) Operate the charger only with
the appropriate original bat-
teries. Charging other batteries may
result in injuries and risk of re.
i) Avoid mechanical damage to
the charger. This can result in inter-
nal short circuits.
j) Do not operate the charger on a
combustible surface (e.g. paper,
textiles). Risk of re due to heating
during charging.
k) In order to minimise the risk of
electric shock, pull the charger
plug out of the socket prior to
cleaning it.
l) If the power cable for this equip-
ment is damaged, it must be
replaced by the manufacturer,
a customer service agent of the
same or a similarly qualied
person in order to prevent haz-
ards.
Charging process
Do not expose the battery to
extreme conditions such as
heat and impact. There is a
risk of injury from leaking
electrolyte solution! In case
of contact, rinse with water
or neutraliser and consult a
doctor if contact has occurred
with eyes etc.
Charge the battery only in
dry areas.
There is a risk of injury from
electric shock.

11
GB IE
Ensure that the equipment is
charged for no longer than 3hours
without interruption. The battery
and equipment could be damaged
and they consume energy unneces-
sarily in case of longer charging
time. Overcharging invalidates the
guarantee.
• The device may only be powered with
SELV (Safety Extra Low Voltage) as
marked on the device.
• Before initial use, charge the battery
installed in the equipment. Do not
charge the battery for several short pe-
riods in succession.
• Use the charger supplied to charge
the Li-ion battery installed in the equip-
ment.
• Recharge the battery if the equipment
runs too slowly.
• In all cases, observe the applicable
safety information as well as the regu-
lations and directions for environmen-
tal protection.
• Defects resulting from improper han-
dling are not subject to the guarantee.
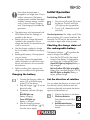
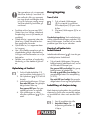
Charging the battery
1. Connect the charging cable con-
nector (12) with the charging
socket (7) of the device.
2. Plug the charger (
13) into an
electrical outlet.
3. The battery indicator (3) lights
up:
Red LED lights up:
Battery charging.
Green LED lights up:
Battery is charged.
4. After the charging process,
disconnect the charger (
13)
from the mains supply.
Initial Operation
Switching ON and OFF
1. Press the on/off switch (8) to start
the device. The LED work light
(10) lights up during operation.
2. To turn it off, release the on/off
switch (8).
Overload protection: The safety cut-off of the
device switches off in case of overload. Re-
lease the On/Off switch, the device can be
switched on again after a few seconds.
Checking the charge status of
the rechargeable battery
The battery indicator ( 3) signalises the
state of charge of the battery.
• Press the On/Off switch, the state of
charge of the battery is displayed by
turning on the 3 coloured LED lights:
Green LED lights up brightly: Battery is
fully charged.
Red and yellow LEDs light up brightly:
Battery has a residual charge (< 90 %).
Red LED lights up brightly: Battery is
empty, please charge.
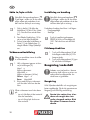
Set the direction of rotation
You can select the direction of rotation with
the direction switch (clockwise and anti-
clockwise direction) and secure the device
against accidental start up.
1. Wait for the device to shut-down.
2. Clockwise direction:
Press direction switch (9) to
the right.
3. Anticlockwise direction:
Press direction switch (9) to
the left.

12
GB IE
4. Switch lock: Bring direction switch
to neutral position.
Direction switch may only be activat-
ed at a standstill to prevent damage
to the transmission.
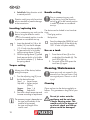
Inserting/replacing bits
Prior to commencing any work on the
device, bring the direction switch
(
9) to the neutral position in order
to prevent an accidental start up.
1. Insert the desired bit (14) or bit
holder (15) into the bit adapter
(11). It locks into place audibly.
2. To remove the bit or bit holder
pull the spring sleeve (1) back.
3. With the spring sleeve (1) pulled
back remove the bit or bit holder
from the bit adapter (11). Release
the spring sleeve.
Torque setting
Always turn off the device, before
setting the torque.
1. Turn the adjusting ring (2) to se-
lect the desired torque:
Step 1 --> lowest torque,
Step
MAX
--> highest torque
(4Nm).
Screws: Steps 1 - 6
Drilling: Step MAX.
2. Start with a lower torque step and
increase according to requirement.
The necessary torque is dependent on:
- the type and hardness of the
material to be treated;
- the type and length of the
screws used.
Handle setting
Prior to commencing any work
on the device, bring the direction
switch (
9) to the neutral position
in order to prevent an accidental
start up.
The device can be locked in two hand set-
tings:
- Pistol grip position
- Rod position
Press the release key PRESS (4) and
turn the handle (6) of the device by
180°. It locks into place audibly.
Use as a torch
1. Press the torch lens (5) on the
underside of the handle (6). The
torch LEDs light up.
2. To switch off the LEDs press the
torch lens (5) again.
Cleaning/Maintenance
Leave any work not covered in this
manual to our Service Centre. Only
use original parts. There is a risk of
injury!
Cleaning
Clean and service the device regularly as
follows. This guarantees a long life for your
unit:
Do not jet water onto the
appliance and do not clean
it under owing water. This
would result in the danger of
an electric shock and the ap-
pliance could be damaged.

13
GB IE
• Keep the ventilation slits, motor hous-
ing and handles on the equipment
clean. To do this, use a damp cloth or
brush.
Never use cleaning agents or solvents,
which can cause irreparable damage
to the unit.
Maintenance
The device is maintenance free.
Storage
• Keep the device in the blade guard
supplied, dry and out of reach of chil-
dren.
• Store the battery only in a partially
charged state. The state of charge
should be 40 – 60 % over a longer
storage period.
• Store the device between 10° C and
25° C. During storage, avoid extreme
cold or heat so the battery does not
lose power.
• During a longer storage period, check
the state of charge of the battery and
recharge if necessary roughly every
3months.
Disposal and the
environment
Be environmentally friendly. Return the
tool, accessories and packaging to a recy-
cling centre when you have nished with
them.
Machines do not belong with do-
mestic waste.
Do not dispose of the device
with the battery installed in
household waste, re (risk of
explosion) or water. Damaged
batteries may damage the envi-
ronment and your health if toxic
fumes or liquids leak out.
• Dispose of the equipment with the
battery discharged. Do not open the
equipment or the battery.
• Dispose of the equipment in accord-
ance with the local regulations. Take
the equipment to a collection point,
where it will be recycled in an environ-
mentally friendly manner. For informa-
tion about this, ask your local waste
management company or our service
centre.
• Defective units returned to us will be
disposed of for free.
Spare parts/Accessories
Spare parts and accessories
can be obtained at
www.grizzly-service.eu
If you do not have internet access, please
contact the Service Centre via telephone
(see “Service-Center” page 15). Please
have the order number mentioned below
ready.
26 Bits .................................. 91104080
Bit holder .............................. 91104081
Charger EU ........................... 80001073

14
GB IE
Guarantee
Dear Customer,
This equipment is provided with a 3-year
guarantee from the date of purchase.
In case of defects, you have statutory rights
against the seller of the product. These
statutory rights are not restricted by our
guarantee presented below.
Terms of Guarantee
The term of the guarantee begins on the
date of purchase. Please retain the original
receipt. This document is required as proof
of purchase.
If a material or manufacturing defect
occurs within three years of the date of
purchase of this product, we will repair or
replace – at our choice – the product for
you free of charge. This guarantee requires
the defective equipment and proof of pur-
chase to be presented within the three-year
period with a brief written description of
what constitutes the defect and when it oc-
curred.
If the defect is covered by our guarantee,
you will receive either the repaired product
or a new product. No new guarantee pe-
riod begins on repair or replacement of the
product.
Guarantee Period and Statutory
Claims for Defects
The guarantee period is not extended by
the guarantee service. This also applies for
replaced or repaired parts. Any damages
and defects already present at the time of
purchase must be reported immediately af-
ter unpacking. Repairs arising after expiry
of the guarantee period are chargeable.
Guarantee Cover
The equipment has been carefully pro-
duced in accordance with strict quality
guidelines and conscientiously checked
prior to delivery.
The guarantee applies for all material and
manufacturing defects. This guarantee
does not extend to cover product parts that
are subject to normal wear and may there-
fore be considered as wearing parts (e.g.
bits, charger) or to cover damage to break-
able parts (e.g. switches, batteries).
This guarantee shall be invalid if the prod-
uct has been damaged, used incorrectly or
not maintained. Precise adherence to all of
the instructions specied in the operating
manual is required for proper use of the
product. Intended uses and actions against
which the operating manual advises or
warns must be categorically avoided.
The product is designed only for private
and not commercial use. The guarantee
will be invalidated in case of misuse or
improper handling, use of force, or inter-
ventions not undertaken by our authorised
service branch.
Processing in Case of Guarantee
To ensure quick handling of you issue,
please follow the following directions:
• Please have the receipt and identica-
tion number (IAN 104021) ready as
proof of purchase for all enquiries.
• Please nd the item number on the rat-
ing plate.
• Should functional errors or other de-
fects occur, please initially contact the
service department specied below by
telephone or by e-mail. You will then
receive further information on the pro-
cessing of your complaint.

15
GB IE
• After consultation with our customer
service, a product recorded as defec-
tive can be sent postage paid to the
service address communicated to you,
with the proof of purchase (receipt)
and specication of what constitutes
the defect and when it occurred. In or-
der to avoid acceptance problems and
additional costs, please be sure to use
only the address communicated to you.
Ensure that the consignment is not sent
carriage forward or by bulky goods,
express or other special freight. Please
send the equipment inc. all accessories
supplied at the time of purchase and
ensure adequate, safe transport pack-
aging.
Repair Service
For a charge, repairs not covered by the
guarantee can be carried out by our ser-
vice branch, which will be happy to issue
a cost estimate for you.
We can handle only equipment that has
been sent with adequate packaging and
postage.
Attention: Please send your equipment to
our service branch in clean condition and
with an indication of the defect.
Equipment sent carriage forward or by
bulky goods, express or other special
freight will not be accepted.
We will dispose of your defective devices
free of charge when you send them to us.
Service-Center
Service Great Britain
Tel.: 0871 5000 720
(£ 0.10/Min.)
E-Mail: [email protected]
IAN 104021
Service Ireland
Tel.: 1890 930 034
(0,08 EUR/Min., (peak))
(0,06 EUR/Min., (off peak))
E-Mail: [email protected]
IAN 104021
Importer
Please note that the following address is
not a service address. Please initially con-
tact the service centre specied above.
Grizzly Tools GmbH & Co. KG
Stockstädter Straße 20
63762 Großostheim
Germany
www.grizzly-service.eu
GB
IE

16
FI
Sisältö
Alkusanat ..................................16
Käyttötarkoitus ..........................16
Yleinen kuvaus ..........................17
Toimituksen laajuus ......................... 17
Übersicht ...................................... 17
Toiminto ........................................ 17
Tekniset tiedot ............................18
Turvallisuusmääräykset .............18
Symbolit ja kuvat ........................... 18
Yleiset turvallisuusviitteet ................. 19
Akun latauslaitteen oikea käyttö ....... 22
Lataus ........................................22
Akun lataaminen ............................ 23
Käyttöönotto ..............................23
Päälle- ja poiskytkentä .................... 23
Akun lataustilan tarkastaminen ......... 23
Pyörimissuunnan asettaminen .......... 23
Ruuvauskärjen asettaminen
paikoilleen/vaihtaminen ................. 23
Vääntömomentin säätö ................... 24
Kahvan asento ............................... 24
Taskulampun käyttäminen ................ 24
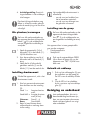
Puhdistus ja huolto ....................24
Puhdistus ....................................... 24
Huolto .......................................... 25
Säilytys ......................................25
Jätehuolto/Ympäristönsuojelu ....25
Varaosat/Tarvikkeet ..................25
Takuu ........................................26
Korjaus-huolto ...........................27
Service-Center ............................27
Maahantuoja .............................27
Alkuperäisen CE yhdenmukaisuus-
todistuksen käännös ..................93
Alkusanat
Onnittelumme uuden laitteen ostollesi. Olet
valinnut laadukkaan tuotteen.
Tämän laitteen laatua on tarkastettu val-
mistuksen aikana ja siihen on suoritettu
lopputarkastus. Laitteesi toimintakyky on
siten taattu.
Käyttöohje on tuotteeseen kuuluva
osa. Se sisältää tärkeitä turvalli-
suuteen, käyttöön ja laitteen hävit-
tämiseen liittyviä ohjeita. Tutustu
käyttö- ja turvallisuusohjeisiin ennen
tuotteen käyttöönottoa. Käytä tuotet-
ta vain ohjeiden mukaisesti ja vain
sille tarkoitettuun käyttöön.
Pidä käyttöohje tallessa ja luovuta
kaikki asiakirjat laitteen mukana
seuraavalle käyttäjälle.
Käyttötarkoitus
Tämä laite on tarkoitettu ruuvien sisäänkier-
tämiseen puu-, metalli- ja muovimateriaa-
leihin ja niiden irrottamiseen sekä kevyisiin
poraustöihin.
Tämä laite ei sovellu ammatilliseen käyttöön.
Kaikki muu käyttö, jota ei nimenomaan hy-
väksytä tässä käyttöohjeessa, voi aiheuttaa
vahinkoja laitteeseen ja tuottaa käyttäjälle
vakavia vaaratilanteita.
Valmistaja ei vastaa vahingoista, jotka
johtuvat määräystenvastaisesta ja väärästä
käytöstä.

17
FI
Yleinen kuvaus
Kuvat ensimmäisellä kään-
nettävällä sisäsivulla.
Toimituksen laajuus
Poista laite pakkauksesta ja tarkasta, onko se
täydellinen.
Poista pakkausmateriaali määräysten mukai-
sesti.
- Akkuruuvinväännin
- Laturi
- 26 Ruuvauskärjet
- 1 Ruuvauskärjen pidin
- Säilytyslaatikko
- Käyttöohje
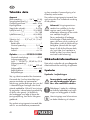
26 Ruuvauskärjet:
SL
25mm 3 • 4 • 5 • 6 • 7
50mm 5
PZ
25mm 0 • 2 x 1 • 2 x 2 • 3
50mm 2
PH
25mm 0 • 2 x 1 • 2 x 2 • 3
T
25mm 10 • 15 • 20 • 25
H
25mm 3 • 4 • 5
Tasapääruuvi
nro
nro
nro
nro
nro
nro
nro
Ristipääruuvi
Ristipääruuvi
Torx-ruuvi
Kuusioruuvi
Übersicht
1 Jousiholkki
2 Vääntömomentin säätö
3 Lataustilan näyttö
(ei näkyvissä)
4 Kahvasäädön vapautuspainike
5 Taskulamppu
6 Kahva
7 Latausliitäntä
8 Virtakytkin
9 Pyörimissuunnan valintakytkin
10 LED-työvalo
11 Ruuvauskärjen kiinnitys
12 Latauspistoke
13 Laturi
14 Ruuvauskärjet
15 Ruuvauskärjen pidin
Toiminto
Akkuruuvinvääntimessä on pyörimissuunta
oikealle ja vasemmalle, 6 vääntömoment-
titasoa, poraustaso ja LED-työvalo. Lisäksi
sitä voidaan käyttää taskulamppuna.
Käyttäosien toiminto selostetaan seuraavis-
sa kuvauksissa.

18
FI
Tekniset tiedot
Laite
Moottorijännite ...............3,6 V
1,5 Ah
Joutokäyntinopeus (n
0
) ...............200 min
-1
Vääntömomentti ....................maks. 4 Nm
Suojaluokka ..................................
III
III
Paino (ilman laturia) ....................0,43 kg
Äänen painetaso (L
pA
) ............. 55,4 dB(A)
................................................ K= 3 dB
Äänitehotaso (L
wA
) ................. 66,4 dB(A)
................................................ K= 3 dB
Vibration (a
h
) ..........0,37 m/s
2
, K= 1,5 m/s
2
Akkulohko (Li-Ion)
Akkukenno ....................................... 1
Nimellisjännite ......................... 3,6 V
Kapasiteetti .............................. 1,5 Ah
Latausaika ................................... n 3 h
Laturi ................... IVP0550-0550W
Nimellisvirta ...............................48 W
Tulojännite/
Input ...... 100-240 V~, 50/60 Hz, 0,2 A
Lähtöjännite/
Output ......................5,5 V
550 mA
Lähtöteho .............................max. 6 W
Suojaluokka .................................
II
Suojaustyyppi.............................. IPX0
Melu- ja tärinäarvot on määritelty standar-
dinmukaisuustodistuksessa olevia normeja
ja määräyksiä vastaaviksi.
Teknisiä ja ulkonäköä koskevia muutoksia
laitteen kehityksen suhteen voidaan tehdä
ilmoittamatta niistä etukäteen. Kaikki tässä
käyttöohjeessa annetut mitat, viitteet ja
tiedot ovat ilman takuuta. Käyttöohjeesta
poikkeavia muutosvaatimuksia ei voida
hakea oikeusteitse.
Esitetty värähtelyn päästöarvo on mitattu
normitetun tarkistusmenettelyn mukaisesti
ja arvoa voi käyttää sähkölaitetta toiseen
laitteeseen vertaillessa.
Esitetyn värähtelyn päästöarvoa voi käyt-
tää myös alustavaan pysähdyksen arvioin-
tiin.
Varoitus:
Värähtelyn päästöarvo voi sähkö-
käyttöisen työkalun todellisen käy-
tön aikana olla annetusta arvosta
eroavainen, riippuen sähkötyökalun
käytöstä ja käyttötavasta.
Tarpeen on määrätä käyttäjän
turvallisuuteen johtavat suojatoimen-
piteet, jotka kohdistuvat todellisten
käyttöedellytyksien aikana arvioita-
vaan pysähdykseen (tällöin on huo-
mioitava kaikki käyttöjakson osiot,
esimerkiksi ajat, jolloin sähkötyökalu
on pysähtynyt, ja sellaiset, jolloin se
on tosin käynnissä, mutta kuormituk-
setta).
Turvallisuusmääräykset
Tämä luku sisältää periaatteelliset turvalli-
suusohjeet laitetta käytettäessä.
Symbolit ja kuvat
Ohjeessa olevat symbolit
Vaaraan viittaavat merkit
(huutomerkin sijaan vaara on
voitu selittää) henkilö- ja ai-
nevahinkojen välttämiseksi.
Kieltomerkit (huutomerkin asemasta
kielto selitetään) ja tiedot vahinkojen
estämiseksi.
Viitemerkit laitteen käytön helpotta-
miseksi.

19
FI
1) TYÖPAIKAN TURVALLISUUS
a) Pidä työpaikka puhtaana ja
huolehdi riittävästä valaistuk-
sesta. Epäpuhtaus ja huono valaistus
työpaikalla voivat johtaa loukkaantumi-
siin.
b) Älä työskentele sähkölaitteella
räjähdysvaarallisella alueella,
jossa on helposti syttyviä nes-
teitä, kaasuja tai pölyä. Sähköllä
käyvät työkalut kehittävät kipinöintiä,
joka voi sytyttää pölyn tai höyryt.
c) Älä anna pienten lasten tai
asiattomien henkilöiden olla
työpaikalla sähkölaitteella
työskennellessä. Häiritseminen voi
aiheuttaa sen, että menetät koneen hal-
linnan.
2) TURVALLISUUS:
a) Sähkölaitteen pistokkeen täytyy
sopia pistorasiaan. Pistoketta
ei saa muuttaa millään tavalla.
Älä käytä adapteripistokkeita
yhdessä maadoitettujen sähkö-
työkalujen kanssa. Alkuperäiset
pistokkeet ja sopivat pistorasiat vähen-
tävät sähköiskuvaaraa.
b) Vältä kosketusta maadoitet-
tuihin pintoihin, kuten putkiin,
lämmityksiin, hellaan tai jää-
kappiin. Sähköiskuvaara on olemas-
sa, kun kehosi on maadoitettu.
c) Älä pidä sähkölaitetta sateessa
tai märässä paikassa. Veden pää-
sy laitteeseen kohottaa sähköiskuvaa-
raa.
d) Älä käytä kaapelia mihinkään
muuhun tarkoitukseen, älä
kanna sähkölaitetta kaapelista
kiinni pitäen tai ripusta laitet-
ta kaapelista, älä myöskään
Laitteessa olevien kuvien selitys:
Lue käyttöohje ennen käyttöönottoa
huolellisesti läpi.
Akku sisältää haitallisia ainei-
ta.
III
Suojaluokka III
Laturissa olevat symbolit:
Huomio!
Tutustu ennen käyttöä käyttöohjee-
seen.
Laturi on tarkoitettu käytettäväksi
vain sisätiloissa.
Navoitus
Suojaluokka II
Sähkölaitteet eivät kuulu talousjättei-
siin.
Yleiset turvallisuusviitteet
VAROITUS! Lue kaikki turval-
lisuusohjeet ja neuvot. Turval-
lisuusohjeiden noudattamattomuus
voi johtaa sähköiskun saamiseen,
aiheuttaa tulipalon ja/tai vaaralli-
sia vammoja.
Pidä turvallisuusohjeet ja neuvot
hyvin tallessa tulevaisuuden va-
ralle. Turvallisuusohjeissa käytetty termi „
Sähkötyökalu“ tarkoittaa sähköisesti toimi-
via työkaluja (verkkokaapelilla) ja akulla
toimivia työkaluja (ilman verkkokaapelia).

20
FI
vedä kaapelia irti pistorasiasta
kaapelista vetämällä vaan pidä
silloin kiinni pistokkeesta. Varo,
ettei kaapeli joudu kuumuuteen,
siihen ei pääse öljyä eikä terä-
vät reunat tai liikkuvat osat voi
vioittaa sitä. Vioittuneet tai kiertynyt
kaapeli voi aiheuttaa sähköiskun.
e) Kun työskentelet sähkölaitteella
ulkona, käytä vain ulkokäyt-
töön soveltuvaa jatkokaapelia.
Ulkokäyttöön soveltuva jatkokaapeli
vähentää sähköiskuvaaraa.
f) Jos sähkölaitteen käyttöä mä-
rissä tiloissa ei voida välttää,
täytyy silloin olla käytettävissä
myös vikavirtakytkin. Vikavirtakyt-
kimen käyttö vähentää sähköiskuvaa-
raa.
3) HENKILÖITÄ KOSKEVA TURVALLI-
SUUS:
a) Ole varovainen ja käytä sähkö-
laitetta harkiten. Älä työskentele
sähkölaitteella, jos olet väsynyt
tai huumeiden, alkoholin tai
lääkkeiden vaikutuksen alainen.
Hetkellinen huolimattomuus sähkölait-
teen käytössä voi johtaa vaikeisiin tapa-
turmiin.
b) Käytä henkilökohtaisia suoja-
vaatteita ja aina suojalaseja.
Henkilökohtaisten suojavarusteiden
pito, kuten turvakengät, suojakypärä ja
kuulosuoja vähentävät loukkaantumis-
vaaraa.
c) Vältä tahatonta käynnistystä.
Varmista, että sähkölaite on kyt-
ketty päältä pois ennen virtaan
liittämistä tai kun nostat tai kan-
nat laitetta. Jos pidät sähkölaitetta
kantaessasi sormea kytkimessä tai liität
laitteen sähköihin, vaikka sitä ei ole kyt-
ketty pois päältä, voi se johtaa loukaan-
tumiseen.
d) Poista kaikki säätötyökalut ja
ruuvivääntimet ennen sähkölait-
teen kytkentää.
e) Pidä huoli siitä, että seisot tu-
kevasti ja vältät epätavallista
asentoa työskennellessäsi. Siten
voit parhaiten välttää odottamat tilanteet
työskennellessäsi.
f) Käytä sopivia työvaatteita. Älä
pidä löysiä vaatteita, koruja.
Pidä hiukset, vaatteet ja käsineet
etäällä liikkuvista osista. Löysät
vaatteet, korut ja pitkät hiukset voivat
jäädä kiinni liikkuviin osiin.
4) SÄHKÖLAITTEEN KÄYTTÖ JA KÄ-
SITTELY:
a) Älä ylikuormita laitetta. Käytä
työssäsi vain siihen tarkoitettuja
sähkötyökaluja. Sopivilla työkaluilla
on parempi ja turvallisempi työskennellä
määrätyllä tehoalueella.
b) Älä käytä sähkötyökaluja, joiden
koskettimet ovat rikki. Laite, jota ei
pysty kytkemään päälle tai pois päältä,
on vaarallinen, ja se täytyy korjata.
c) Irrota pistoke pistorasiasta en-
nen kuin teet laitteeseen säätö-
jä, vaihdat osia tai laitat työn
lopussa laitteen pois. Nämä varo-
toimenpiteet estävät sähköketjusahan
tahattaoman käynnistyksen.
d) Pidä käyttämätön sähkölaite
aina pois lasten ulottuvilta. Älä
anna laitetta käyttöön henkilölle,
joka ei tunne laitteen käyttöä tai
ei ole lukenut ohjeita. Sähkölaitteet
ovat vaarallisia käytöstä kokemattomille
henkilöille.
Sidan laddas...
Sidan laddas...
Sidan laddas...
Sidan laddas...
Sidan laddas...
Sidan laddas...
Sidan laddas...
Sidan laddas...
Sidan laddas...
Sidan laddas...
Sidan laddas...
Sidan laddas...
Sidan laddas...
Sidan laddas...
Sidan laddas...
Sidan laddas...
Sidan laddas...
Sidan laddas...
Sidan laddas...
Sidan laddas...
Sidan laddas...
Sidan laddas...
Sidan laddas...
Sidan laddas...
Sidan laddas...
Sidan laddas...
Sidan laddas...
Sidan laddas...
Sidan laddas...
Sidan laddas...
Sidan laddas...
Sidan laddas...
Sidan laddas...
Sidan laddas...
Sidan laddas...
Sidan laddas...
Sidan laddas...
Sidan laddas...
Sidan laddas...
Sidan laddas...
Sidan laddas...
Sidan laddas...
Sidan laddas...
Sidan laddas...
Sidan laddas...
Sidan laddas...
Sidan laddas...
Sidan laddas...
Sidan laddas...
Sidan laddas...
Sidan laddas...
Sidan laddas...
Sidan laddas...
Sidan laddas...
Sidan laddas...
Sidan laddas...
Sidan laddas...
Sidan laddas...
Sidan laddas...
Sidan laddas...
Sidan laddas...
Sidan laddas...
Sidan laddas...
Sidan laddas...
Sidan laddas...
Sidan laddas...
Sidan laddas...
Sidan laddas...
Sidan laddas...
Sidan laddas...
Sidan laddas...
Sidan laddas...
Sidan laddas...
Sidan laddas...
Sidan laddas...
Sidan laddas...
Sidan laddas...
Sidan laddas...
-
 1
1
-
 2
2
-
 3
3
-
 4
4
-
 5
5
-
 6
6
-
 7
7
-
 8
8
-
 9
9
-
 10
10
-
 11
11
-
 12
12
-
 13
13
-
 14
14
-
 15
15
-
 16
16
-
 17
17
-
 18
18
-
 19
19
-
 20
20
-
 21
21
-
 22
22
-
 23
23
-
 24
24
-
 25
25
-
 26
26
-
 27
27
-
 28
28
-
 29
29
-
 30
30
-
 31
31
-
 32
32
-
 33
33
-
 34
34
-
 35
35
-
 36
36
-
 37
37
-
 38
38
-
 39
39
-
 40
40
-
 41
41
-
 42
42
-
 43
43
-
 44
44
-
 45
45
-
 46
46
-
 47
47
-
 48
48
-
 49
49
-
 50
50
-
 51
51
-
 52
52
-
 53
53
-
 54
54
-
 55
55
-
 56
56
-
 57
57
-
 58
58
-
 59
59
-
 60
60
-
 61
61
-
 62
62
-
 63
63
-
 64
64
-
 65
65
-
 66
66
-
 67
67
-
 68
68
-
 69
69
-
 70
70
-
 71
71
-
 72
72
-
 73
73
-
 74
74
-
 75
75
-
 76
76
-
 77
77
-
 78
78
-
 79
79
-
 80
80
-
 81
81
-
 82
82
-
 83
83
-
 84
84
-
 85
85
-
 86
86
-
 87
87
-
 88
88
-
 89
89
-
 90
90
-
 91
91
-
 92
92
-
 93
93
-
 94
94
-
 95
95
-
 96
96
-
 97
97
-
 98
98


Parkside PSSA 3.6 C3 Translation Of The Original Instructions
- Typ
- Translation Of The Original Instructions
på andra språk
- Deutsch: Parkside PSSA 3.6 C3
- français: Parkside PSSA 3.6 C3
- English: Parkside PSSA 3.6 C3
- dansk: Parkside PSSA 3.6 C3
- suomi: Parkside PSSA 3.6 C3
- Nederlands: Parkside PSSA 3.6 C3
Relaterade papper
-
Parkside PBSA 12 A1 Original Instruction
-
Parkside PABSW 10.8 A1 Bruksanvisningar
-
-
-
-
-
Parkside PABS 10.8 A2 Operation and Safety Notes
-
Parkside PABS 18 A1 Operation and Safety Notes
-
-
Parkside PABS 14.4 A1 Operation and Safety Notes