

Always Keep a Copy of Your Original Data
Before you deliver your product for warranty services please backup all
data, including all software programs. You will be responsible for
reinstalling all data. Data recovery is not included in the warranty
service and our company is not responsible for data that may be lost or
damaged during transit or a repair.
Safety Instructions
* Do not expose to extreme temperatures.
* Do not allow any liquid form into the device.
* Do not apply or subject the player to excessive pressure.
* Do not expose to direct sunlight or heat sources.
* Do not try to disassemble and repair the device yourself.
* Do not expose device to chemicals such as benzene or thinner.
* Do not store device in dusty or damp area.
* our company will claim no responsibility for any damage on data loss due
to breakdown, repair or other causes.
Contents
Important Notice................................................................................ ..1
Before Using the Player.......................................................................5
Key & Function...................................................................................8
Main Menu Display.............................................................................9
Charging the Battery..........................................................................11
Get Started..............................................................................................17
Power ON / Power OFF......................................................................20
Set Key Lock........................................................................................20
Music Playback....................................................................................21
Video Playback....................................................................................25
FM Mode..............................................................................................27
Photo Mode..........................................................................................31
Text Mode.............................................................................................33
Record Mode........................................................................................38
Explorer Mode.....................................................................................39
Game Mode..........................................................................................40
Settings Mode.......................................................................................41
Using the AVI Converter Software.....................................................48
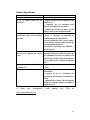
Troubleshooting....................................................................................53

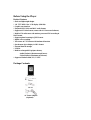
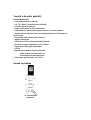
Before Using the Player
Product Features
* Sleek and lightweight design.
* 1.8'' TFT 262K Color LCD display (128x160).
* Graphic user interface.
* Playback MP3, WMA and WAV audio format.
* Supports AVI video format (comes with AVI Converter Software)
* Built-In FM radio tuner with stations preset and FM recording in
WAV format.
* Supports photo browsing in JPEG format.
* Digital voice recording.
* Text viewer in TXT format with bookmark function.
* Synchronous lyrics display in LRC format.
* Personal data file storage.
* USB 2.0.
* Built-in rechargeable li-polymer battery.
- Audio Playback (Maximum up 8 hours).
- Video Playback (Maximum up 4 hours).
* Supports Windows 2000 / XP / VISTA.
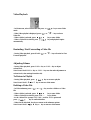
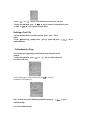
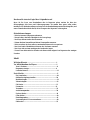
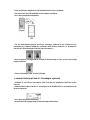
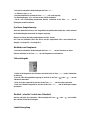
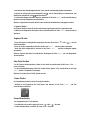
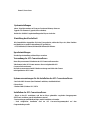
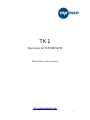
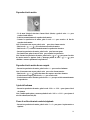
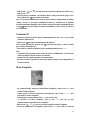
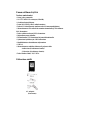
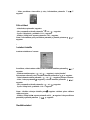
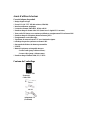
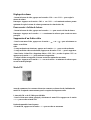
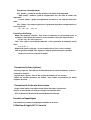
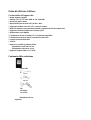
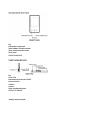
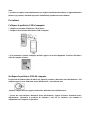
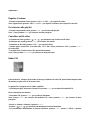
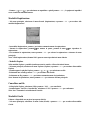
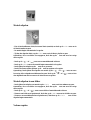
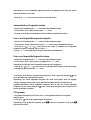
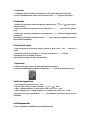
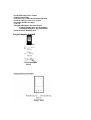
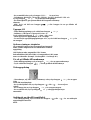
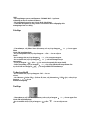
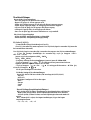
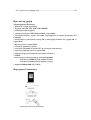
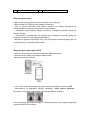
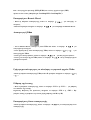
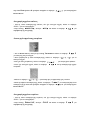
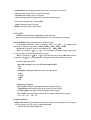
Package Contents
TK1player
AC Power Adapter
(Optional)

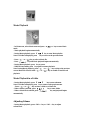
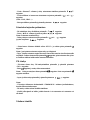
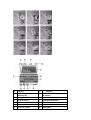
FRONT VIEW
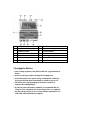
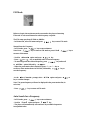
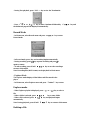
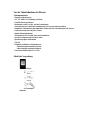
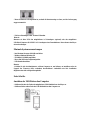
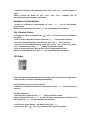
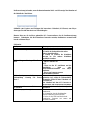
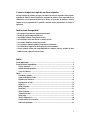
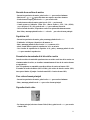
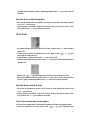
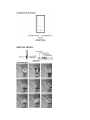
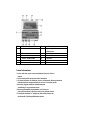
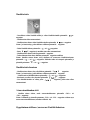
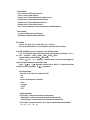
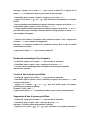
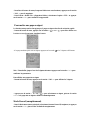
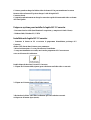
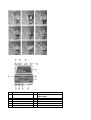
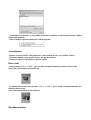
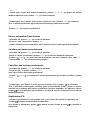
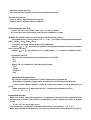
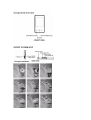
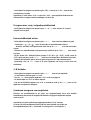
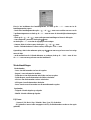
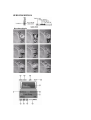
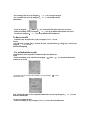
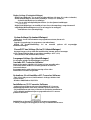
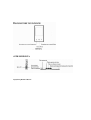
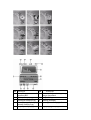
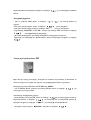
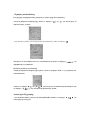
Main Menu Display

NO
Function NO
Function
1 Song Title & ID3 Display 7 Equalizer / Song Lyrics Display
2 Playback Timer 8 Track Duration
3 Playback Mode 9 Battery Indicator
4 Play / Pause Status 10 A-B Repeat
5 Playback Setting 11 Current Track Number
6 Volume Level 12 Total Track
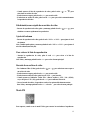
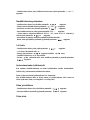
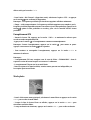
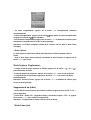
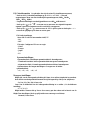
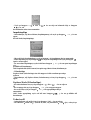
Charging the Battery
* Always charge up battery fully before initial use. (Approximately 8
hours).
* Switch on your player before starting the charging mode
* If the battery level is low, please charge it immediately. Otherwise
the player will shut down automatically or unable to power ON.
* The battery life varies depending on the music volume level
settings and backlight display.
* In order to protect the battery condition, we recommend that you
charge it every 4 months if you are not using it for a very long time.
* You may charge the player via AC Power Adapter (Optional) or via
USB cable connection with the computer.

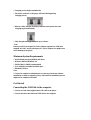
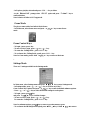
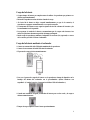
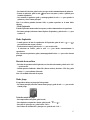
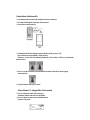
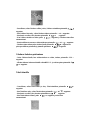
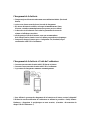
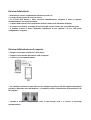
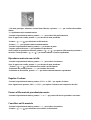
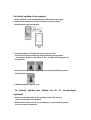
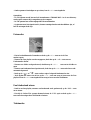
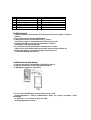
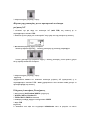
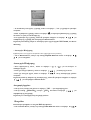
Charging the Battery Using Computer
* Connect one end of the supplied mini USB cable to the player.
* Connect the other end of the mini USB cable to the computer.
* Charging process begins automatically.
* To view battery charging process on the player, stop the USB
device in the computer system tray by using the “Safely Remove
Hardware” procedure. (Please refer to “Disconnecting the USB
Disk from the computer”).
* When it is fully charged, the battery indicator turns green color and
charging stops automatically.
* Fully charged time: Approximately up to 4 hours.
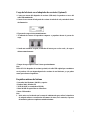
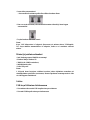
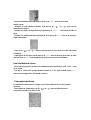
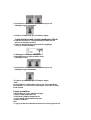
Charging the Battery Using AC Power Adapter (Optional)
* Connect one end of the AC Power Adapter (mini USB) to the
player via the supplied USB cable.
* Connect the other end of the AC Power Adapter to the wall outlet
and turn on the power supply.

* Charging process begins automatically.
* The battery indicator on the player will start flashing during
charging process.
* When it is fully charged, the battery indicator turns green color and
charging stops automatically.
* Fully charged time: Approximately up to 3 hours.
Note
Please use ONLY the original AC Power Adapter (optional) or USB cable
supplied. DO NOT use any third-party AC Power Adapter as it might cause
severe damage to the player.
Minimum System Requirements
* Intel Pentium processor 200MHz and above.
* Windows 2000 and Windows XP.
* 32MB of RAM (128MB recommended)
* Up to 100MB of available hard-disk space
* Standard USB Port
Note:
1. Log in the computer as Administrator account to perform any software
installation or firmware upgrade (if any). Otherwise the installation process
might not be completed successful.
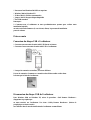
Get Started
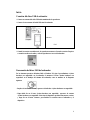
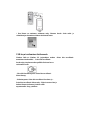
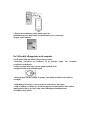
Connecting the USB Disk to the computer
* Connect one end of the supplied mini USB cable to the player.
* Connect the other end of the mini USB cable to the computer.

* When the connection is successful, the player will display the
connection icon. Begin to transfer any audio and video files into
the player via the computer.
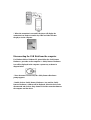
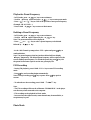
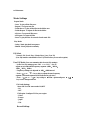
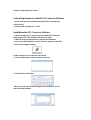
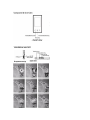
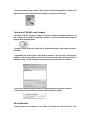
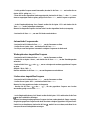
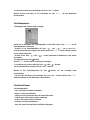
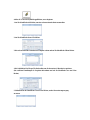
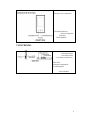
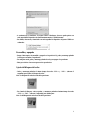
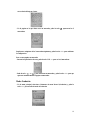
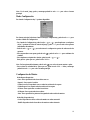
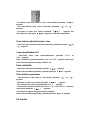
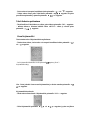
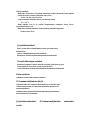
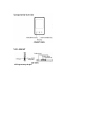
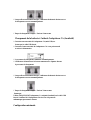
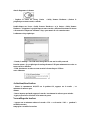
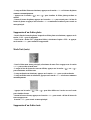
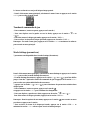
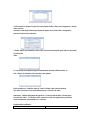
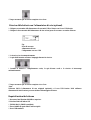
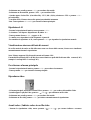
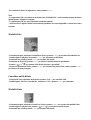
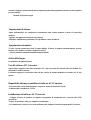
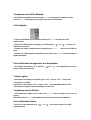
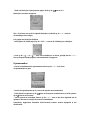
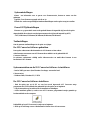
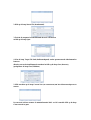
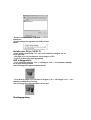
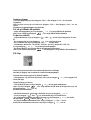
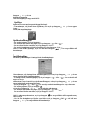
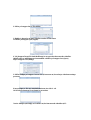
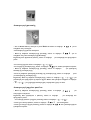
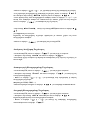
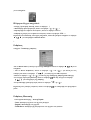
Disconnecting the USB Disk from the computer
For Windows 2000 or Windows XP, please follow the “Safe Remove
Hardware” procedure on the computer. A “Safely Remove Hardware”
icon will be displayed in the computer’s system tray as shown in
diagram below.
- Move the mouse over the icon, the “Safely Remove Hardware”
prompt appears.
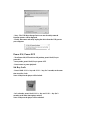
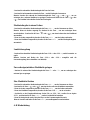
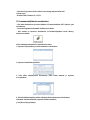
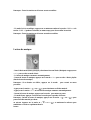
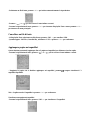
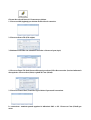
- Double click on “Safely Remove Hardware” icon and the “Safely
Remove Hardware” windows will be displayed. Select the device to be
disconnected and click on “Stop” button to end the connection between
the computer and the device.

- Next, “The USB Mass Storage Device can now be safely removed
from the system” will be displayed.
- Finally, disconnect and safely unplug the device from the USB port on
your computer.
Power ON / Power OFF
- Turn Power ON/OFF switch to ON position, press & hold / key to
power ON.
- In any mode, press & hold / key to power OFF.
- Press to start or pause playback.
Set Key Lock
- Press & hold “VOL+” key and “VOL–“ key (for 2 seconds) at the same
time to set Key Lock.
Note: All keys on the player will be locked.
- In Lock mode, press & hold “VOL+” key and “VOL–“ key (for 2
seconds) at the same time again to unlock.
Note: All keys on the player will be unlocked.

Music Playback
- In Main menu, select Music menu and press “ ∩∩ ” key to enter Music
mode.
- Music playback begins automatically.
- During Music playback, press “ ∩∩ ” key to enter Music playlist.
Note: If a folder is displayed, press key to return to the previous menu
- Press “ ” or “ ” key to select a Music file.
- Press “ ∩∩ ” key and Music playback begins automatically.
- During Music playback, press key to pause.
- While in Pause mode, press key again to resume playback.
Note: During Music playback, press “ ” or “ ” key to skip to the previous
or next Music file. Press & hold “ ” or “ ” key to rewind or fast forward
playback.
Music Playback in a Folder
- During Music playback, press “ ∩∩ ” key to enter submenu.
Note: If a folder is displayed, press key to return to the previous menu
- Press “ ” or “ ” key to select a folder or a Music file.
- When a folder is selected, press “ ∩∩ ” key to enter folder.
- When a Music file is selected, press “ ∩∩ ” key and playback begins
automatically.
Adjusting Volume
- During Music playback, press “VOL+” key or “VOL–“ key to adjust
volume level.

Note: Press & hold “VOL+“ key or “VOL–“ key can also make adjustment to
volume level (value settings from 00 to 40).
Skipping to Previous / Next Music File
- During Music playback, press “ ? ” or “ ? ” key to skip to Previous or
Next track.
Deleting a Music File
- During Music playback, press “ ∩∩ ” key to enter submenu.
- Press “ ” or “ ” key to select a folder or a Music file.
- When a folder is selected, press “ ∩∩ ” key to enter folder.
- When a Music file is selected, press “VOL –” key to delete.
- At the “Delete File” prompt “YES / NO”, scroll to “YES” option and
press “ ∩∩ ” key to confirm deletion.
- When the file is deleted, the player returns to previous submenu
options.
Note: Press & hold “∩∩ ” key or key to return to Main menu.
A-B Repeat
- During Music playback, press & hold “ ∩∩ ” key.
- “A-B Repeat” indicator displays “A”.
- Press & hold “ ∩∩ ” key again, “A-B” is displayed.
- Music will now repeat “A-B” playback in a loop.
- To cancel “A-B” repeat playback, press & hold “ ∩∩ ” key to resume.
Synchronous Song Lyrics Display
When a Music file in the player has a song lyrics file with same file
name, song lyrics will be displayed automatically during Music
playback.
Note: The player supports song lyrics file in .LRC format.
Both the Music file (MP3 or WMA) name and song Lyrics file (LRC) name
must both be identical. (Example: LoveSong.MP3 + LoveSong.LRC).
To Return to Main Menu
- During Music playback, press “ ∩∩ ” key to enter submenu.
- Press & hold “ ∩∩ ” key to return to Main menu.

Video Playback
- In Main menu, select Video menu and press “ ∩∩ ” key to enter Video
mode.
- When Video playlist is displayed, press “ ” or “ ” key to select a
Video file.
- When a folder is selected, press “ ∩∩ ” key to enter folder.
- When a Video file is selected, press “ ∩∩ ” key and playback begins
automatically.
Rewinding / Fast Forwarding a Video file
- During Video playback, press & hold “ ” or “ ” key to Rewind or Fast
Forward playback.
Adjusting Volume
- During Video playback, press “VOL+” key or “VOL–“ key to adjust
volume level.
Note: Press & hold “VOL+” key or “VOL–“ key can also make adjustment to
volume level (value settings from 00 to 40).
To Return to Playlist
- During Video playback, press “ ∩∩ ” key to return to playlist
Note: Press & hold “ ∩∩ ” key to return to Main menu.
Deleting a Video File
- In Video submenu, press “ ” or “ ” key to select a folder or a Video
file.
- When a folder is selected, press “ ∩∩ ” key to enter folder.
- When a Video file is selected, press “VOL –” key to delete.
- At the “Delete File” prompt “YES / NO”, scroll to “YES” option and
press “ ∩∩ ” key to confirm deletion.
- When the file is deleted, the player returns to the submenu options.
Note: Press & hold “∩∩ ” key or key to return to Main menu.

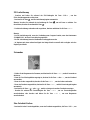
FM Mode
Before we begin, the earphone must be connected to the player when using
FM mode. It acts as an antenna for radio frequency reception.
The FM range goes from 87.5Mhz to 108Mhz.
- In Main menu, select FM menu and press “ ∩∩ ” key to enter FM mode.
Manual Search a Frequency
- In FM mode, press “ ∩∩ ” key to enter submenu.
Note: Press “ ∩∩ ” key to return to FM mode or press & hold “ ∩∩ ” key to
return to Main menu.
- Scroll to “Manual” option and press “ ∩∩ ” key.
- Press “ ” or “ ” key to manually select a favorite frequency.
- To manually preset the selected frequency, press “ ∩∩ ” key and scroll
to “MEM” option followed by “ ∩∩ ”.
- When the preset station list is displayed, press “ ? ” or “ ? ” key to
scroll to a desire station shown in red color, followed by “ ∩∩ ” key to
save the frequency.
- At the “Save Channel” prompt, select “YES” option and press “ ∩∩ ”
key to confirm changes.
Note: The preset frequency will now be displayed in the preset station list (in
red color).
- Press “ ∩∩ ” key to return to FM mode.
Auto Search for a Frequency
- In FM mode, press “ ∩∩ ” key to enter submenu.
- Scroll to “Auto” option and press “ ∩∩ ” key.
- The player will automatically scan and save any available frequencies
in sequential order.

Playback a Preset Frequency
- In FM mode, press “ ∩∩ ” key to enter submenu.
- Scroll to “Preset” option and press “ ∩∩ ” key to enter preset mode.
- Press “ ” or “ ” key to scroll to the previous or next preset frequency.
(Example: CH:01, CH02 ….)
- Press & hold “ ∩∩ ” key to return to Main menu.
Deleting a Preset Frequency
- In FM mode, press “ ∩∩ ” key to enter submenu.
- Scroll to “DEL” option followed by the “ ∩∩ ” key.
Note: The preset station list will be displayed.
- Press “ ” or “ ” key to select a preset frequency to be deleted
followed by “ ∩∩ ” key.
- At the “Del Channel” prompt, select “YES” option and press key to
confirm deletion.
Note: The preset frequency that has just been deleted will now display
“Empty” temporarily. The deleted preset frequency will be replaced by the
next available preset frequency. To refresh the preset list, press key exit
the preset list and enter again to see the new preset play list.
FM Recording
- During FM playback, press & hold “VOL+” key to enter FM recording
mode.
- Press key and recording begins automatically.
Note: During recording, press /key to pause. Press key again to
resume.
- To end and save the recording, press & hold “ ∩∩ ” key.
Note:
- The FM recording will be saved as filename “FM00001.WAV ” in the player
root directory when connected to the computer.
- FM recording can be playback in Music mode.
- In areas where the signal is weak, some channels may be unavailable, or
reception may be poor.
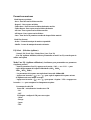
Photo Mode

- In Main menu, select Photo menu and press “ ∩∩ ” key to enter Photo
mode.
- When Photo playlist is displayed, press “ ”or “ ”key to select a
Photo file.
- When a folder is selected, press “ ∩∩ ” key to enter folder.
- When a Photo file is selected, press “ ∩∩ ” key and Photo playback
begins automatically.
- Press “ ” or “ ” key to view previous or next photo file.
- During Photo playback, press “ ∩∩ ” key to return to Photo playlist or
press & hold “ ∩∩ ” key to return to Main menu.
Deleting a Photo File
- In Photo playlist, when a photo file is selected, press “VOL–” key to
delete.
- At the “Delete File” prompt, select “YES” option and press “ ∩∩ ” key to
confirm deletion.
Text Mode
- In Main menu, select Text menu and press “ ∩∩ ” key to enter Text
mode.
- When Text playlist is displayed, press “ ” or “ ” key to select a Text
file.
- When a folder is selected, press “ ∩∩ ” key to enter folder.
- When a Text file is selected, press “ ∩∩ ” key and playback begins
automatically.

- Press “ ” or “ ” key to scroll backward or forward to view text.
- During Text playback, press “ ∩∩ ” key to return to Text playlist or press
& hold “ ∩∩ ” key to return to Main menu.
Deleting a Text File
- In Text playlist, when a Text file is selected, press “VOL–” key to
delete.
- At the “Delete File” prompt, select “YES” option and press “ ∩∩ ” key to
confirm deletion.
To Bookmark a Page
The Text function supports up to 3 bookmark pages for quick search
purpose.
- During Text playback, press “ ” or “ ” key to scroll backward or
forward to view Text.
- At the desire page to create a bookmark, press key and the 3
bookmark will be displayed.
Min - Scroll to any of the 3 following bookmarks and press “ ∩∩ ” key to
confirm settings.
To View a Bookmark Page

- During Text playback, press “VOL + ” key to view the 3 bookmarks.
- Press “ ” or “ ” key to select a bookmark followed by “ ∩∩ ” key and
the bookmark page will be displayed automatically.
Record Mode
- In Main menu, select Record menu and press “ ∩∩ ” key to enter
Record mode.
- In Record mode, press / key and recording begins automatically.
- During recording, press key to pause recording and press k
again to resume.
- To end recording, press & hold “ ∩∩ ” key to save the recording a
return to Main menu.
Note: Recording files (WAV format) can be playback in Music menu.
- Explorer Mode
The Explorer mode displays all the folders and files stored in the
player.
- In Main menu, select Explorer menu and press “ ∩∩ ” key to enter
Explorer mode.
- When Explorer playlist is displayed, press “ ” or “ ” key to select a
file.
- When a folder is selected, press “ ∩∩ ” key to enter folder.
- When a file is selected, press “ ∩∩ ” key and playback begins
automatically.
Note: During playback, press & hold “ ∩∩ ” key to return to Main menu.
Deleting a File

- In Explorer playlist, selected and press “ VOL – ” key to delete.
- At the “Delete File” prompt, select “YES” option and press “ ∩∩ ” key to
confirm deletion.
Note: Deletion of folder is NOT supported.
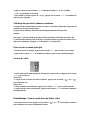
Game Mode
The player comes with a free built-in Brick Game.
- In Main menu, select Game menu and press “ ∩∩ ” key to enter Game
mode.
Game Control Keys
- To begin / pause, press / key.
- To move to left or right, press “ ” or “ ” key.
- To rotate the “Falling Brick”, press “VOL+” key.
- To accelerate the “Falling Brick” speed, press “VOL–” key.
Note: In Game mode, press & hold “ ∩∩ ” key to return to Main me
*
Settings Mode
There are 7 settings available in the Settings mode.
In Main menu, select Settings menu and press “ ∩∩ ” key to enter Settings mode.
- In Settings mode, press “ ” or “ ” key to scroll to any of the 7
Game Control Keys options and press “ ∩∩ ” key to enter individual submenu options.
- Press “ ” or “ ” key to select the desired settings in each options
- To begin / pause, press key.
and press “ ∩∩ ” key to confirm changes.
- To move to left or right, press “ ” or “ ” key.
To rotate the “Falling Brick”, press “VOL+” key.
Note: In submenu options, press key to return to previous menu or press
- To accelerate the “Falling Brick” speed, press “VOL–” key. & hold “ ∩∩ ” to return

to Main menu.
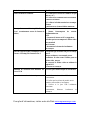
Music Settings
Repeat Mode
- Once: To play all the files once.
- Repeat 1: To repeat one file.
- Folder Once: To play all the files in the folder once.
- Folder Repeat: To repeat all files in the folder.
- All Once: To repeat all files once.
- All Repeat: To repeat all files.
- Intro: To play the first 10 seconds of each music file.
Play Mode
- Order: Music playback in sequence.
- Shuffle: Music playback randomly.
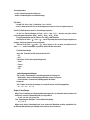
EQ Select
- Normal / 3D / Rock / Pop / Classic/ Bass / Jazz / User EQ
(User EQ must be customized in User EQ Mode before you use select option)
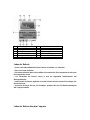
User EQ Mode (User can customize their favorite EQ settings)
- In the User EQ settings, press “VOL +” or “VOL –” key to
adjust on each individual frequency segment. (60Hz、300 Hz、
1KHz、3KHz、6KHz)
- Frequency settings are adjusted in -6dB~+6dB interval.
- Press “ ” or “ ” key to skip to adjust the next frequency
segment. (activated segment will be indicated in red color)
- Press “ ” or “ ” key to skip to “YES” option and press “ ∩∩ ”
key to save changes and exit.
FM Radio Settings
Stereo SW: Set FM stereo mode ON/OFF
- ON
- OFF
FM Region: Configure FM for your region.
- China
- Europe
- Japan
- USA
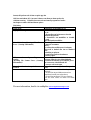
Record Settings

REC Quality: Recording quality & file size settings
- High Quality: Better recording quality with larger file size.
- General Quality: Normal recording quality with smaller file
size.
REC Volume: The highest settings +5 will produce the loudest
recording quality.
- +1 / - +2 / - +3 / - +4 / - +5
Display Settings
Blight Time: To set the backlight ON timer (unit in seconds). This function will be disabled
when the time is set to Always On.
- 5s/ 10s / 15s / 20s / 30s / Always On
Lum: To set the backlight brightness. (1 is the brightest setting)
- 1 / 2 / 3 / 4 / 5
Blight Mode: When set to Power Saver, the screen will turn OFF
according to the Blight Time settings (Press any key to resume).
Normal / Power Saver
System Settings
About: To display information on firmware version, date and
memory status.
Upgrade: For firmware upgrade (if any).
Default Set: To restore the player to original default settings.
PowerOff Time Settings
When no key is pressed within the time set, player will be turned
OFF. (This function will be disabled when time is set to OFF)
- OFF/10 Minutes/15 Minutes/30 Minutes/60 Minutes/120 Minutes
Languages Settings
To change the desire language settings on the player.
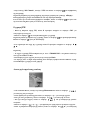
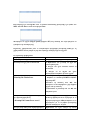
Using the AVI Converter Software
This player supports AVI format video files and can transform other
video formats to the supported AVI format by using the bundled AVI
Converter Software.
The software fully support fast speed video conversion of multi-video
Sidan laddas ...
Sidan laddas ...
Sidan laddas ...
Sidan laddas ...
Sidan laddas ...
Sidan laddas ...
Sidan laddas ...
Sidan laddas ...
Sidan laddas ...
Sidan laddas ...
Sidan laddas ...
Sidan laddas ...
Sidan laddas ...
Sidan laddas ...
Sidan laddas ...
Sidan laddas ...
Sidan laddas ...
Sidan laddas ...
Sidan laddas ...
Sidan laddas ...
Sidan laddas ...
Sidan laddas ...
Sidan laddas ...
Sidan laddas ...
Sidan laddas ...
Sidan laddas ...
Sidan laddas ...
Sidan laddas ...
Sidan laddas ...
Sidan laddas ...
Sidan laddas ...
Sidan laddas ...
Sidan laddas ...
Sidan laddas ...
Sidan laddas ...
Sidan laddas ...
Sidan laddas ...
Sidan laddas ...
Sidan laddas ...
Sidan laddas ...
Sidan laddas ...
Sidan laddas ...
Sidan laddas ...
Sidan laddas ...
Sidan laddas ...
Sidan laddas ...
Sidan laddas ...
Sidan laddas ...
Sidan laddas ...
Sidan laddas ...
Sidan laddas ...
Sidan laddas ...
Sidan laddas ...
Sidan laddas ...
Sidan laddas ...
Sidan laddas ...
Sidan laddas ...
Sidan laddas ...
Sidan laddas ...
Sidan laddas ...
Sidan laddas ...
Sidan laddas ...
Sidan laddas ...
Sidan laddas ...
Sidan laddas ...
Sidan laddas ...
Sidan laddas ...
Sidan laddas ...
Sidan laddas ...
Sidan laddas ...
Sidan laddas ...
Sidan laddas ...
Sidan laddas ...
Sidan laddas ...
Sidan laddas ...
Sidan laddas ...
Sidan laddas ...
Sidan laddas ...
Sidan laddas ...
Sidan laddas ...
Sidan laddas ...
Sidan laddas ...
Sidan laddas ...
Sidan laddas ...
Sidan laddas ...
Sidan laddas ...
Sidan laddas ...
Sidan laddas ...
Sidan laddas ...
Sidan laddas ...
Sidan laddas ...
Sidan laddas ...
Sidan laddas ...
Sidan laddas ...
Sidan laddas ...
Sidan laddas ...
Sidan laddas ...
Sidan laddas ...
Sidan laddas ...
Sidan laddas ...
Sidan laddas ...
Sidan laddas ...
Sidan laddas ...
Sidan laddas ...
Sidan laddas ...
Sidan laddas ...
Sidan laddas ...
Sidan laddas ...
Sidan laddas ...
Sidan laddas ...
Sidan laddas ...
Sidan laddas ...
Sidan laddas ...
Sidan laddas ...
Sidan laddas ...
Sidan laddas ...
Sidan laddas ...
Sidan laddas ...
Sidan laddas ...
Sidan laddas ...
Sidan laddas ...
Sidan laddas ...
Sidan laddas ...
Sidan laddas ...
Sidan laddas ...
Sidan laddas ...
Sidan laddas ...
Sidan laddas ...
Sidan laddas ...
Sidan laddas ...
Sidan laddas ...
Sidan laddas ...
Sidan laddas ...
Sidan laddas ...
Sidan laddas ...
Sidan laddas ...
Sidan laddas ...
Sidan laddas ...
Sidan laddas ...
Sidan laddas ...
Sidan laddas ...
Sidan laddas ...
Sidan laddas ...
Sidan laddas ...
Sidan laddas ...
Sidan laddas ...
Sidan laddas ...
Sidan laddas ...
Sidan laddas ...
Sidan laddas ...
Sidan laddas ...
Sidan laddas ...
Sidan laddas ...
Sidan laddas ...
Sidan laddas ...
Sidan laddas ...
Sidan laddas ...
Sidan laddas ...
Sidan laddas ...
Sidan laddas ...
Sidan laddas ...
Sidan laddas ...
Sidan laddas ...
Sidan laddas ...
Sidan laddas ...
Sidan laddas ...
Sidan laddas ...
Sidan laddas ...
Sidan laddas ...
Sidan laddas ...
Sidan laddas ...
Sidan laddas ...
Sidan laddas ...
Sidan laddas ...
Sidan laddas ...
Sidan laddas ...
Sidan laddas ...
Sidan laddas ...
Sidan laddas ...
Sidan laddas ...
Sidan laddas ...
Sidan laddas ...
Sidan laddas ...
Sidan laddas ...
Sidan laddas ...
Sidan laddas ...
Sidan laddas ...
Sidan laddas ...
Sidan laddas ...
-
 1
1
-
 2
2
-
 3
3
-
 4
4
-
 5
5
-
 6
6
-
 7
7
-
 8
8
-
 9
9
-
 10
10
-
 11
11
-
 12
12
-
 13
13
-
 14
14
-
 15
15
-
 16
16
-
 17
17
-
 18
18
-
 19
19
-
 20
20
-
 21
21
-
 22
22
-
 23
23
-
 24
24
-
 25
25
-
 26
26
-
 27
27
-
 28
28
-
 29
29
-
 30
30
-
 31
31
-
 32
32
-
 33
33
-
 34
34
-
 35
35
-
 36
36
-
 37
37
-
 38
38
-
 39
39
-
 40
40
-
 41
41
-
 42
42
-
 43
43
-
 44
44
-
 45
45
-
 46
46
-
 47
47
-
 48
48
-
 49
49
-
 50
50
-
 51
51
-
 52
52
-
 53
53
-
 54
54
-
 55
55
-
 56
56
-
 57
57
-
 58
58
-
 59
59
-
 60
60
-
 61
61
-
 62
62
-
 63
63
-
 64
64
-
 65
65
-
 66
66
-
 67
67
-
 68
68
-
 69
69
-
 70
70
-
 71
71
-
 72
72
-
 73
73
-
 74
74
-
 75
75
-
 76
76
-
 77
77
-
 78
78
-
 79
79
-
 80
80
-
 81
81
-
 82
82
-
 83
83
-
 84
84
-
 85
85
-
 86
86
-
 87
87
-
 88
88
-
 89
89
-
 90
90
-
 91
91
-
 92
92
-
 93
93
-
 94
94
-
 95
95
-
 96
96
-
 97
97
-
 98
98
-
 99
99
-
 100
100
-
 101
101
-
 102
102
-
 103
103
-
 104
104
-
 105
105
-
 106
106
-
 107
107
-
 108
108
-
 109
109
-
 110
110
-
 111
111
-
 112
112
-
 113
113
-
 114
114
-
 115
115
-
 116
116
-
 117
117
-
 118
118
-
 119
119
-
 120
120
-
 121
121
-
 122
122
-
 123
123
-
 124
124
-
 125
125
-
 126
126
-
 127
127
-
 128
128
-
 129
129
-
 130
130
-
 131
131
-
 132
132
-
 133
133
-
 134
134
-
 135
135
-
 136
136
-
 137
137
-
 138
138
-
 139
139
-
 140
140
-
 141
141
-
 142
142
-
 143
143
-
 144
144
-
 145
145
-
 146
146
-
 147
147
-
 148
148
-
 149
149
-
 150
150
-
 151
151
-
 152
152
-
 153
153
-
 154
154
-
 155
155
-
 156
156
-
 157
157
-
 158
158
-
 159
159
-
 160
160
-
 161
161
-
 162
162
-
 163
163
-
 164
164
-
 165
165
-
 166
166
-
 167
167
-
 168
168
-
 169
169
-
 170
170
-
 171
171
-
 172
172
-
 173
173
-
 174
174
-
 175
175
-
 176
176
-
 177
177
-
 178
178
-
 179
179
-
 180
180
-
 181
181
-
 182
182
-
 183
183
-
 184
184
-
 185
185
-
 186
186
-
 187
187
-
 188
188
-
 189
189
-
 190
190
-
 191
191
-
 192
192
-
 193
193
-
 194
194
-
 195
195
-
 196
196
-
 197
197
-
 198
198
-
 199
199
-
 200
200
-
 201
201
-
 202
202
-
 203
203
-
 204
204
-
 205
205
-
 206
206
-
 207
207
-
 208
208
-
 209
209


på andra språk
- italiano: MPMan TK1 Guida utente
- eesti: MPMan TK1 Kasutusjuhend
- español: MPMan TK1 Guía del usuario
- Deutsch: MPMan TK1 Benutzerhandbuch
- français: MPMan TK1 Mode d'emploi
Andra dokument
-
Yamaha Tyros4 Användarmanual
-
Yamaha Tyros2 Bruksanvisning
-
-
-
Yamaha CVP - 401 Användarmanual
-
-
Yamaha CVP-409 Bruksanvisning
-
-
X-Micro XMP3-R512F Användarmanual
-
Philips LFH0602/00 Användarmanual