
WG775E
EN
DK
FIN
NOR
SV
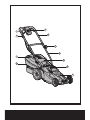
Cordless Lawn Mower
Ledningsfri plæneklipper
Johdoton ruohonleikkuri
Batteridrevet gressklipper
Sladdlös gräsklippare
P06
P18
P30
P41
P52

Original instructions EN
Original brugsanvisning DK
Alkuperäiset ohjeet FIN
Original driftsinstruks NOR
Bruksanvisning i original SV

1
5
6
7
8
9
10
11
2
3
4

12
1
2
3
1
2
1
1
2
a
b
K-1
K-2
K-3
L-1
L-2
L-3
13
14
a
Front
Back
1
2
A B1 B2
B3 C1 C2
C3 C4 D1
D2 D3 E1
E2 F1 F2
G H I
J K L
M1 M2 N

12
1
2
3
1
2
1
1
2
a
b
K-1
K-2
K-3
L-1
L-2
L-3
13
14
a
Front
Back
1
2
A B1 B2
B3 C1 C2
C3 C4 D1
D2 D3 E1
E2 F1 F2
G H I
J K L
M1 M2 N

6
Cordless Lawn Mower EN
1. SWITCH LEVER
2. CABLE CLIP
3. GRASS BAG FILLING INDICATOR
4. GRASS COLLECTION BAG
5. SAFETY KEY
6. UPPER HANDLE
7. HANDLE KNOB
8. LOWER HANDLE
9. SAFETY FLAP
10. BATTERY PACK*
11. MOTOR COVER
12. CHARGER* (See Fig. A)
13. BLADE BOLT (See Fig. M1)
14. BLADE (See Fig. M1)
* Not all the accessories illustrated or described are included in standard delivery.

7
Cordless Lawn Mower EN
TECHNICAL DATA
Type WG775E (7- designation of machinery, representative of Cordless Lawn Mower)
Voltage 24V
Cutting diameter 40cm
Cutting height 20-70mm
Cutting height positions 6 positions
Grass collection capacity 50L
Battery capacity 10Ah
Battery type Lead acid
Battery model WA3218
Charging time 10-12hrs
Charger model WA3749
Charger rating Input: AC 110-240V, 50/60Hz
Machine weight 23kg
NOISE / VIBRATION INFORMATION
A weighted sound pressure L
pA
: 81dB(A) K
pA
: 3dB(A)
A weighted sound power L
wA
: 92,3dB(A)
Wear ear protection when sound pressure is over
80dB(A)
Typical weighted vibration <2,5m/s
2
K=1.5m/s
2
ACCESSORY
Battery pack 1
Charger 1
Grass collection bag 1
We recommend that you purchase your accessories from the same store that sold you the tool.
Use good quality accessories marked with a well-known brand name. Choose the type according
to the work you intend to undertake. Refer to the accessory packaging for further details. Store
personnel can assist you and offer advice.

8
Cordless Lawn Mower EN
ORIGINAL INSTRUCTION
GENERAL POWER TOOL
SAFETY WARNINGS
WARNING! Read all safety warnings
and all instructions. Failure to follow
the warnings and instructions may result in
electric shock, fire and/or serious injury.
Carefully read the instructions for the
safe operation of the machine.
Save all warnings and instructions for
future reference.
- This appliance is not intended for use by
persons (including children) with reduced
physical, sensory or mental capabilities,
or lack of experience and knowledge,
unless they have been given supervision or
instruction concerning use of the appliance
by a person responsible for their safety.
- Children should be supervised to ensure
that they do not play with the appliance.
IMPORTANT
READ CAREFULLY BEFORE USE
KEEP FOR FUTURE REFERENCE
SAFE OPERATION PRACTICES
TRAINING
a) Read the instructions carefully. Be familiar
with the controls and the proper use of the
equipment;
b) Never allow children or people unfamiliar
with these instructions to use the
lawnmower. Local regulations can restrict
the age of the operator;
c) Never mow while people, especially
children, or pets are nearby;
d) Keep in mind that the operator or user
is responsible for accidents or hazards
occurring to other people or their property.
PREPARATION
a) While mowing, always wear substantial
footwear and long trousers. Do not operate
the equipment when barefoot or wearing
open sandals;
b) Thoroughly inspect the area where the
equipment is to be used and remove all
objects which can be thrown by the machine;
c) Before using, always visually inspect to
see that the blades, blade bolts and cutter
assembly are not worn or damaged.
Replace worn or damaged blades and
bolts in sets to preserve balance; Replace
damaged and unreadable labels.
d) On multi-bladed machines, take care as
rotating one blade can cause other blades
to rotate.
OPERATION
a) Mow only in daylight or in good artificial
light;
b) Avoid operating the equipment in wet
grass, where feasible;
c) Always be sure of your footing on slopes;
d) walk, never run;
e) For wheeled rotary machines, mow across
the face of slopes, never up and down;
f) Exercise extreme caution when changing
direction on slopes;
g) Do not mow excessively steep slopes;
h) Use extreme caution when reversing or
pulling the lawnmower towards you;
i) Stop the blade(s) if the lawnmower has to
be tilted for transportation when crossing
surfaces other than grass, and when
transporting the lawnmower to and from
the area to be mowed;
j) Never operate the lawnmower with
defective guards, or without safety devices,
for example deflectors and/or grass
catchers, in place;
k) Switch on the motor carefully according to
instructions and with feet well away from
the blade(s);
l) Do not tilt the lawnmower when switching
on the motor, except if the lawnmower has
to be tilted for starting In this case, do not
tilt it more than absolutely necessary and
lift only the part which is away from the
operator;
m) Do not put hands or feet near or under
rotating parts. Keep clear of the discharge
opening at all times;
n) Not to touch the blades before the
disabling device has been removed and the
blades have come to a complete stop;
o) Do not start the lawnmower when standing
in front of the discharge opening.

9
Cordless Lawn Mower EN
p) Do not transport the lawnmower while the
power source is running.
q) Stop the lawnmower, and remove the
disabling device. Make sure that all moving
parts have come to a complete stop.
– Whenever leaving the machine unattended,
– Before clearing a blockage,
– Before checking, cleaning or working on
the machine,
– After striking a foreign object. Inspect the
machine for damage and make repairs
before restarting and operating the
lawnmower
If the lawnmower starts to vibrate abnormally
(check immediately)
– Inspect for damage.
– Replace or repair any damaged parts.
– Check and tighten any loose parts.
MAINTENANCE AND STORAGE
a) Keep all nuts, bolts and screws tight to
be sure the equipment is in safe working
condition;
b) Check the grass catcher frequently for wear
or deterioration;
c) replace worn or damaged parts for safety.
Use only genuine replacement parts and
accessories.
d) Be careful during adjusting of the
lawnmower to prevent entrapment of the
fingers between moving blades and fixed
parts of the lawnmower.
e) Always allow the lawwnmower to cool
down before storing.
f) When servicing the blades be aware that,
even though the power source is switched
off, the blades can still be moved.
SAFETY WARNINGS FOR
BATTERY CHARGERS
WARNING! Read all safety warnings
and all instructions. Failure to follow
the warnings and instructions may result in
electric shock, fire and/or serious injury.
Save all warnings and instructions for
future reference.
- This appliance is not intended for use by
persons (including children) with reduced
physical, sensory or mental capabilities,
or lack of experience and knowledge,
unless they have been given supervision or
instruction concerning use of the appliance
by a person responsible for their safety.
- Children should be supervised to ensure
that they do not play with the appliance.
ADDITIONAL SAFETY
INSTRUCTIONS FOR YOUR
BATTERY CHARGER
1. Before charging, read the instructions.
2. After charging, disconnect the battery
charger from the supply mains. Then
remove the chassis connection and then
the battery connection.
3. Do not charge a leaking battery.
4. Do not use chargers for works other than
those for which they are designed.
5. Before charging, ensure your charger is
matching the local AC supply.
6. For indoor use, or do not expose to rain.
7. The charging device must be protected
from moisture.
8. Do not use the charging device in the open.
9. Do not short out the contacts of battery or
charger.
10. Respect the polarity “+/-“ when charging.
11. Do not open the unit and keep out of the
reach of children.
12. Do not charge the batteries of other
manufactures or ill-suited models.
13. Ensure that the connection between the
battery charger and battery is correctly
positioned and is not obstructed by foreign
bodies.
14. Keep battery charger’s slots are free of
foreign objects and protect against dirt
and humidity. Store in a dry and frost-free
place.
15. When charging batteries, ensure that the
battery charger is in a well-ventilated area
and away from inflammable materials.
Batteries can get hot during charging.
Do not overcharge any batteries. Ensure
that batteries and chargers are not left
unsupervised during charging.

10
Cordless Lawn Mower EN
16. Do not recharge non-rechargeable
batteries, as they can overheat and break.
17. Longer life and better performance can
be obtained if the battery pack is charged
when the air temperature is between 18°C
and 24°C. Do not charge the battery pack
in air temperatures below 4.5°C, or above
40.5°C. This is important as it can prevent
serious damage to the battery pack.
18. Charge only battery pack of the same
model provided by WORX and of models
recommended by WORX.
SAFETY WARNINGS FOR
BATTERY PACK
a) Do not dismantle, open or shred cells or
battery pack.
b) Do not short-circuit a battery pack. Do not
store battery packs haphazardly in a box or
drawer where they may short-circuit each
other or be short-circuited by conductive
materials. When battery pack is not in use,
keep it away from other metal objects, like
paper clips, coins, keys, nails, screws or
other small metal objects, that can make a
connection from one terminal to another.
Shorting the battery terminals together
may cause burns or a fire.
c) Do not expose battery pack to heat or fire.
Avoid storage in direct sunlight.
d) Do not subject battery pack to mechanical
shock.
e) In the event of battery leaking, do not allow
the liquid to come into contact with the skin
or eyes. If contact has been made, wash
the affected area with copious amounts of
water and seek medical advice.
f) Seek medical advice immediately if a cell
or battery pack has been swallowed.
g) Keep battery pack clean and dry.
h) Wipe the battery pack terminals with a
clean dry cloth if they become dirty.
i) Battery pack needs to be charged before
use. Always refer to this instruction and use
the correct charging procedure.
j) Do not maintain battery pack on charge
when not in use.
k) After extended periods of storage, it may
be necessary to charge and discharge
the battery pack several times to obtain
maximum performance.
l) Battery pack gives its best performance
when it is operated at normal room
temperature (20°C ± 5°C).
m) When disposing of battery packs, keep
battery packs of different electrochemical
systems separate from each other.
n) Recharge only with the charger specified
by WORX. Do not use any charger other
than that specifically provided for use with
the equipment. A charger that is suitable
for one type of battery pack may create a
risk of fire when used with another battery
pack.
o) Do not use any battery pack which is not
designed for use with the equipment.
p) Keep battery pack out of the reach of
children.
q) Retain the original product literature for
future reference.
r) Remove the battery from the equipment
when not in use.
s) Dispose of properly.
ADDITIONAL SAFETY
RULES FOR LEAD ACID
BATTERY:
1. Working in the vicinity of a lead-acid
battery is dangerous. Battery pack
generates explosive gases during normal
battery operation. For this reason it is of the
utmost importance that each time before
using your charger, you read and follow the
instructions provided exactly.
2. Never smoke or allow an open spark or
flame in the vicinity of the battery.
3. Use charger for charging a lead-acid battery
pack only.
4. Never place the charger directly above
or below the battery pack being charged;
gases or fluids from the battery pack will
corrode and damage the charger. Locate
the charger as far away from the battery
pack as DC cables permit.
5. Do not operate charger in a closed-in area
or restrict ventilation in any way.

11
Cordless Lawn Mower EN
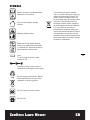
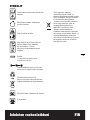
SYMBOLS
Read instruction handbook before
operation this machine
Only use the battery charger
indoors
Keep bystanders away.
Beware of sharp blades. Blades
continue to rotate after the motor
is switched off - Remove disabling
device before maintenance.
Fuse
T 2 A time lag fuse with rated
current of 2 A
The output plug is with positive
center pole and negative outer pole
Do not dispose of batteries. Return
exhausted batteries to your local
collection or recycling point.
Do not expose to rain or water
Do not burn
This product has been marked
with a symbol relating to removing
electric and electronic waste. This
means that this product shall not
be discarded with household waste
but that it shall be returned to a
collection system which conforms
to the European Directive 2002/96/
CE. It will then be recycled or
dismantled in order to reduce the
impact on the environment. Electric
and electronic equipment can be
hazardous for the environment and
for human health since they contain
hazardous substances.

12
Cordless Lawn Mower EN
INTENDED USE
This product is intended for domestic
lawn mowing.
CHARGER SAFETY RULES
1. Plug charger directly into an electrical
outlet. DO NOT ABUSE THE CORD. Never
carry charger by cord. Do not disconnect
the charger from the outlet or mower by
pulling it by the cord.
2. CAUTION: To reduce the risk of fire,
electrical shock, or personal injury
do not attempt to use this charger with any
other product.
Likewise, do not attempt to charge the
battery with any other charger.
3. Do not service mower with charger or
safety key installed.
4.
Do not operate a damaged charger. Replace
damaged cords or charger immediately at
an authorized WORX service center.
5. Always charge the mower in a dry area
protected from the weather. Do not expose
the mower or charger to rain. Do not
charge in wet locations. Do not charge
mower when temperature is above 104°F
(40°C) or below 41°F (5°C).
6. Keep the mower and charger away from
water, heat sources, (Such as radiators,
heaters, stoves...etc.) flames, or chemicals.
Be careful not to damage the charger cord,
by keeping cord away from sharp edges.
CHARGING PROCEDURE
1. Charging can be carried out only with the
battery REMOVED from the machine (See
Fig. A)
2. Insert the plug of the charger into the wall
receptacle, the Charging indicator light will
be green.
3. Plug the charger connector into the
receptacle on the battery, the light will
switch to be red indicating that you have
power and the battery is being charged.
4. The light will turn to be green when
charging is completed;
5. Always keep the battery connect with the
charger and the charger is powered on.
After the battery is fully charged, the green
light will turn on and the charger will stop
charging, but when the capacity is lower
than 90%, the charger will automatically
recharge to make sure the capacity stays
above 90%.
NOTE: if the battery is Defective, the red
light will Flash.
BATTERY CARE
The battery in your cordless lawnmower is a
24-volt sealed lead acid system. The mower
can be stored in any position without fear of
leakage.
• Foroptimalbatterylifeandperformance
the battery should be fully charged every 2
months during storage
• Foroptimalbatterylifeandperformance
the battery should be fully charged after
each use
• Storethebatteryinacooldrylocation.
• Thebatterycanbesafelystoreddownto
14°F (-10°C).
• Thebatterydoesnotneedtobefully
discharged before recharging.
• Initially2to3chargingcyclesmay
be required after purchase to achieve
maximum run time capacity.
ADDITIONAL BATTERIES can be obtained
from the Customer Helpline.
ASSEMBLY
IMPORTANT! Before you assemble
the lawn mower, check the accessories
according above information, make sure the
accessories are completed.
1. FITTING THE HANDLE
(See Fig. B1, B2, B3)
1) Remove the screws (X 2) on the both side
of deck. (See Fig. B1)
2) Insert the lower handle (8) into the holes
on the deck provided.
3) Secure with the screws provided.
(See Fig. B1)

13
Cordless Lawn Mower EN
4) Attach the upper handle (6) with the bolts
and Handle Knobs (7) to the lower handle
(8). (See Fig. B2)
5) Screw on the two Handle knobs. Check
that the handle is FULLY secured.
NOTE: Ensure the bolts are fully inserted
through the handles before fitting the
handle knobs.
6) Attach the cable clips (2) provided, to the
upper and lower handle. Insert the cable
into the clips ensuring there is enough
cable slack. (See Fig. B3)
2. GRASS COLLECTION BAG ASSEMBLY
Connect the grass box handle to the box top
as shown in Fig C1-C4.
Step 1 Press the front of the handle briefly.
(See Fig. C2)
Step 2 Then push it forward. (See Fig. C2)
Step 3 Push down the back of the handle.
(See Fig. C2)
Step 4 Finally, clip the plastic clips over the
metal frame. (See Fig. C3)
WARNING: Don’t fit the handle in
reversed direction. Fit the handle
as shown in Fig. C1.
3. GRASS COLLECTION BAG FITTING
(See Fig. D1, D2, D3)
1) Turn the mower off, wait until blade stops
and remove safety key (5).
2) Raise the safety flap (9) and hold it up,
ensure that the mulching insert has been
removed.
3) Pick up the grass collection bag by the
handle, and position grass collection bag
on the lower hooks (a) on the mower deck
(See Fig. D2).
4) Release the safety guard to lock the
grass bag into position. Ensure the grass
collection bag is installed securely (See
Fig. D3).
NOTE: Depress the grass collection bag
slightly to ensure that it is completely
installed.
4. REMOVING/EMPTYING
Hold the grass collection bag, lift the safety
flap (9) and hold up. Remove grass collection
bag (4).
WARNING! Always check the safety
flap can close the discharge outlet
tightly before using. Never lift the safety
flap (9) when the lawn mower is being used
without fitted grass collection bag.
5. FITTING/REMOVING BATTERY
(See Fig. E1, E2)
REMOVING BATTERY
Pull out the battery with the battery handle
directly. (See Fig. E1)
NOTE: Be careful not to drop the battery onto
your foot or on the ground when removing it.
FITTING BATTERY
Put the battery into the battery container;
make sure the battery is fitted correctly. (See
Fig. E2)
OPERATION
1. STARTING AND STOPPING
(See Fig. F1, F2)
WARNING! The blade continues
to rotate for a few seconds after the
machine is switched off. Allow the motor/
blade to stop rotating before switching “on”
again. Do not rapidly switch off and on.
STARTING
1) Insert safety key into the housing of the
switch box.
2) Slide the key to the right and hold in
position.
3) Pull the lever bar towards the handle and
the mower will start.
4) Release the safety key.
STOPPING
Release the switch lever.
2. BATTERY STATUS LED’S (See Fig. G)
NOTE: The Status LED’s will indicate the
battery condition when the button on
the battery is pressed.
The LED’s constantly senses and displays the
battery condition as follows:
Press the button “POWERTEST”, the light
button is illuminated.
When the three green lights are illuminated,
the battery is in a highly charged condition.

14
Cordless Lawn Mower EN
When two lights ( ) are illuminated, the
battery is in a moderately charged condition.
When only one green light ( ) is illuminated,
the battery charge is depleted.
Before using your new mower for the first
time, it is recommended that the unit be
charged overnight to ensure that the battery
is fully charged.
IMPORTANT
When only one light is illuminated,
your battery is overly discharged, even
though the mower may still be capable
of cutting grass. Continuing to operate
your lawnmower with the battery in this
discharged condition may reduce the life
and performance of your battery.
3. ADJUSTING THE CUTTING HEIGHT
(See Fig. H)
WARNING! Stop, release switch lever
and wait until the motor stops before
adjusting height. The blades continue to
rotate after the machine is switched off, a
rotating blade can cause injury.
CAUTION: Do not touch rotating blades.
For the first cutting of the season, a high
cutting adjustment should be selected.
The lawnmower can be set to 6 cutting
heights between 20mm and 70mm. For this
purpose, move the cutting height adjustment
lever outwards then adjust to the preferred
position.
4. GRASS BAG FILLING INDICATOR
(See Fig. I)
To remind you immediately to empty when
the grass collection bag is full, the mower
provides an indicator on the top of bag to
show the collection status. And you can
follow as below:
Empty status: flap floats (a)
Fully status: flap falls down (b)
5. REAR DISCHARGE (See Fig. J)
The mower provides a rear discharge
function, so that you can mower without bag
collection. The debris will be discharged from
the rear chute.
6. MOWING TIPS
NOTE: Always inspect area where
mower is to be used and remove all
stones, sticks, wire, metal and other
debris which might be thrown by the
rotating blade.
1. Mow across the face of slopes, never up-
and-down. Exercise extreme caution when
changing direction on slopes. Do not mow
excessively steep slopes. Always maintain
good footing.
2. Release switch lever to turn mower “OFF”
when crossing any graveled area (stones
can be thrown by the blade).
3. Set mower at highest cutting height when
mowing in rough ground or in tall weeds.
Removing too much grass at one time can
cause circuit breaker to trip, which stops
mower.
4. If a grass bag is used during the fast
growing season, the grass may tend to
clog up at the discharge opening. Release
switch lever to turn mower “OFF” and
remove the safety key. Remove the grass
bag and shake the grass down to the back
end of the bag. Also clean out any grass
or debris which may be packed around
the discharge opening. Replace the grass
collection bag.
5. If mower should start to vibrate
abnormally, release switch lever to turn
mower “OFF” and remove safety key.
Check immediately for cause. Vibration is a
warning of trouble. Do not operate mower
until a service check has been made.
6. ALWAYS RELEASE SWITCH LEVER TO
TURN MOWER “OFF” AND REMOVE
SAFETY KEY WHEN LEAVING IT
UNATTENDED EVEN FOR A SHORT
PERIOD OF TIME.
MAINTENANCE
WARNING: Stop the mower and
remove the safety key before
removing the grass bag.

15
Cordless Lawn Mower EN
NOTE: To ensure long and reliable service,
perform the following maintenance
procedures regularly. Check for obvious
defects such as a loose, dislodged or a
damaged blade, loose fittings, and worn
or damaged components. Check that the
covers and guards are all undamaged and
are correctly attached to mower. Carry out
any necessary maintenance or repairs before
operating mower. If the mower should
happen to fail despite regular maintenance,
please call our customer helpline for advice.
BLADE SHARPENING
KEEP BLADE SHARP FOR BEST MOWER
PERFORMANCE. A DULL BLADE DOES NOT
CUT GRASS CLEANLY OR MULCH PROPERLY.
WEAR PROPER EYE PROTECTION WHILE
REMOVING, SHARPENING, AND INSTALLING
BLADE. ENSURE THAT SAFETY KEY IS
REMOVED.
Sharpening the blade twice during a mowing
season is usually sufficient under normal
circumstances. Sand causes the blade to dull
quickly. If your lawn has sandy soil, more
frequent sharpening may be required.
REPLACE BENT OR DAMAGED BLADE
IMMEDIATELY.
WHEN SHARPENING THE BLADE:
1. Make sure blade remains balanced.
2. Sharpen blade at the original cutting
angle.
3. Sharpen cutting edges on both ends
of blade, removing equal amounts of
material from both ends.
TO SHARPEN BLADE IN A VISE
(See Fig. K)
1. Be sure the switch lever is released, the
blade has stopped and the safety key
removed before removing the blade.
2.
Remove blade from mower. See instructions
for removing and attaching blade.
3. Secure blade K-1 in a vise K-2.
4. Wear safety glasses and be careful not to
cut yourself.
5. Carefully file the cutting edges of the blade
with a fine tooth file K-3 or sharpening
stone.
6. Check balance of blade. See instructions
for blade balancing.
7. Replace blade on mower and tighten
securely. Refer to instructions below.
BLADE BALANCING (See Fig. L)
Check balance of blade by placing center hole
in blade L-1 over a nail or screwdriver shank L
-2, clamped horizontally in a vise L-3. If either
end of the blade rotates downward, file that
end. Blade is properly balanced when neither
end drops.
BLADE MAINTENANCE
(See Fig. M1, M2)
Renew your metal blade after 50 hours
mowing or 2 years, which ever is the sooner-
regardless of condition.
Follow these procedures to remove and
replace the blade. You will need garden
gloves (not provided) and a spanner wrench
(not provided) to remove the blade. Hold the
blade (14) and unscrew the blade bolt (13)
counter-clockwise using a spanner wrench,
and then remove blade.
To re-assemble, position the blade (14) with
the cutting edges towards the ground. Then
securely tighten the blade bolt (13).
STORAGE: (See Fig. N)
Stop the mower and always remove the
safety key. Clean the exterior of the machine
thoroughly using a soft brush and cloth. Do
not use water, solvents or polishes. Remove
all grass and debris, especially from the
ventilation slots.
Turn the machine on its side and clean the
blade area. If grass cuttings are compacted
in the blade area, remove with a wooden or
plastic implement.
Store the machine in a dry place. Do not place
other objects on top of the machine.
To aid storage, release the handle knobs, and
rotate or fold the upper handle.

16
Cordless Lawn Mower EN
ENVIRONMENTAL
PROTECTION
This product has been marked with a
symbol relating to removing electric
and electronic waste. This means that
this product shall not be discarded with
household waste but that it shall be returned
to a collection system which conforms to the
European Directive 2002/96/CE. It will then
be recycled or dismantled in order to reduce
the impact on the environment. Electric and
electronic equipment can be hazardous for
the environment and for human health since
they contain hazardous substances.
PLUG REPLACEMENT
(UK & IRELAND ONLY)
If you need to replace the fitted plug then
follow the instructions below.
IMPORTANT
The wires in the mains lead are colored in
accordance with the following code:
Blue = Neutral
Brown = Live
As the colors of the wires in the electrical
cord of this appliance may not correspond
with the colored markings identifying the
terminals in your plug, proceed as follows.
The wire which is colored blue must be
connected to the terminal which is marked
with N. The wire which is colored brown must
be connected to the terminal which is marked
with L.
WARNING! Never connect live or
neutral wires to the earth terminal of the
plug. Only fit an approved 13Amp BS1363/A
plug and the correct rated fuse.
NOTE: If a moulded plug is fitted and has
to be removed take great care in disposing
of the plug and severed cable, it must be
destroyed to prevent engaging into a socket.
Connect
Blue to N
(neutral)
Outer sleeve
firmly clamped
Cable grip
Brown L (live)
13 Amp fuse approved
to BS1362

17
Cordless Lawn Mower EN
DECLARATION OF
CONFORMITY
We,
POSITEC Germany GmbH
Konrad-Adenauer-Ufer 37
50668 Köln
Declare that the product
Description WORX Cordless Lawn Mower
Type WG775E (7- designation of
machinery, representative of Cordless
Lawn Mower)
Function Cutting grass
Complies with the following Directives,
2006/42/EC, 2006/95/EC, 2004/108/EC,
2011/65/EU, 2000/14/EC amended by
2005/88/EC
2000/14/EC amended by 2005/88/EC:
- Conformity assessment procedure as per
Annex VI.
- Measured Sound Power Level 92,3dB(A)
- Declared Guaranteed Sound Power Level
94dB(A)
The notified body involved
Name: Intertek Testing & Certification
Ltd (notified body 0359)
Address: Davy Avenue, Knowlhill, Milton
Keynes, MK5 8NL
Standards conform to,
EN 60335-1 EN 60335-2-77
EN ISO 3744 EN 55014-1
EN 55014-2 EN 61000-3-2
EN 61000-3-3 EN 62233
EN 60335-2-29
The person authorized to compile the
technical file,
Name: Russell Nicholson
Address: Positec Power Tools (Europe)
Ltd, PO Box 152,Leeds,LS10 9DS,UK
2014/02/25
Leo Yue
POSITEC Quality Manager

18
Ledningsfri plæneklipper DK
1. KONTAKTHÅNDTAG
2. KABELKLEMME
3. INDIKATOR FOR FYLDT GRÆSFANGER
4. GRÆSOPSAMLER
5. SIKKERHEDSNØGLE
6. ØVERSTE HÅNDTAG
7. HÅNDTAGETS KNAP
8. NEDERSTE HÅNDTAG
9. SIKKERHEDSKLAP
10. BATTERIPAKKE*
11. MOTORDÆKSEL
12. OPLADER* (Se A)
13. FASTGØRINGSSKRUE TIL KNIV (Se M1)
14. KNIV (Se M1)
* Illustreret eller beskrevet tilbehør er kun delvis indeholdt i leverancen.

19
Ledningsfri plæneklipper DK
TEKNISK DATA
Type WG775E (7- udpegning af maskiner, repræsentant for ledningsfri plæneklipper)
Nominel Effekt 24V
Skærediameter 40cm
Skæredybde 20-70mm
Antal stillinger til klippehøjden 6
Græsopsamlingskapacitet 50L
Batterikapacitet 10Ah
Batteritype Syre
Batteritype WA3218
Opladningtid 10-12 timer
Opladermodel WA3749
Mærkekapacitet på opladeren Indgang: AC 110-240V, 50/60Hz
Maskinens vægt 23kg
STØJ- OG VIBRATIONSDATA
A-vægtet lydtryksniveau L
pA
: 81dB(A) K
pA
: 3dB(A)
A-vægtet lydeffektniveau L
wA
: 92,3dB(A)
Bær høreværn, når lydtrykket er over
80dB(A)
Typisk vægtet vibration <2,5m/s
2
K=1.5m/s
2
TILBEHØR
Batteripakke 1
Oplader 1
Græsopsamler 1
Det anbefales, at alt udstyr købes i samme butik som maskinen. Anvend udstyr af god kvalitet og
af et velkendt mærke. Vælg typen afhængigt af det arbejde, du vil foretage. Se på emballagen til
tilbehøret for at få yderligere oplysninger. Få hjælp og råd i butikken.

20
Ledningsfri plæneklipper DK
OVERSÆTTELSE AF
DE OPRINDELIGE
INSTRUKTIONER
GENERELLE ADVARSLER
I FORBINDELSE MED
MASKINVÆRKTØJ
ADVARSEL: Læs alle
sikkerhedsadvarsler og alle
instruktioner. Læs samtlige anvisninger.
Manglende overholdelse af nedenstående
anvisninger kan resultere i elektrisk stød,
brand og/eller alvorlig personskade.
For at opnå sikker betjening af
maskinen, skal du læse instruktionerne
omhyggeligt.
Gem alle advarsler og instruktioner for
fremtidig reference.
- Dette redskab må ikke bruges af personer
(herunder børn) med nedsatte fysiske,
sensoriske eller mentale evner eller med
manglende erfaring og viden, medmindre
brugen foregår under opsyn, eller de er
blevet instrueret i brugen af redskabet af en
person, ansvarlig for deres sikkerhed.
- Børn skal være under opsyn, så de ikke
leger med redskabet.
VIGTIGT
LÆS OMHYGELIGT FØR BRUG
GEM TIL FREMTIDIG REFERENCE
SIKKERHEDSFORANSTALTNINGER
TRÆNING
a) Læs instruktionerne omhyggeligt. Lær
kontrollerne at kende og den korrekte brug
af apparatet.
b) Lad aldrig børn, eller folk der ikke er
bekendt med instruktionerne, bruge
maskinen. Lokale regulativer kan sætte
begrænsninger på alderen af operatøren.
c) Slå aldrig græs, mens mennesker, specielt
børn, eller kæledyr er i nærheden.
d) Operatøren, eller brugeren er ansvarlig
for ulykker eller fare, der opstår på andre
mennesker eller deres ejendom.
FORBEREDELSE
a) Når der slås græs skal du altid bære solidt
fodtøj og lange bukser. Brug ikke apparatet
når du er barfodet eller bærer åbne
sandaler.
b) Gennemfør en grundig inspektion af det
område, hvor maskinen skal anvendes og
fjern alle sten, pinde, tråd, ben, og andre
fremmedlegemer.
c) Før brug skal du altid udføre en visuel
inspektion for at se om bladene,
bladboltene og skæreenheden ikke er
slidt eller beskadiget. Udskift slidte eller
beskadigede blade og bolte i sæt, for at
bevare balancen; Udskift beskadigede og
ulæselige skilter.
d) På maskiner med flere knive skal der
udvises forsigtighed, da drejning af én kniv
kan få andre knive til at dreje rundt.
DRIFT
a) Slå kun græs i dagslys eller i god kunstigt
lys.
b) Undgå at bruge plæneklipperen i vådt
græs, hvis det er muligt.
c) Hold altid dit fodfæste på hældninger.
d) Gå, løb aldrig;
e) Ved brug af roterende maskiner på hjul,
skal der slås på tværs af hældninger, aldrig
op og ned.
f) Udvis ekstrem forsigtighed, når du ændrer
retning på hældninger.
g) Slå ikke på ekstreme hældninger.
h) Udvis ekstrem forsigtighed når du bakker
eller trækker plæneklipperen i mod dig.
i) Stop blade(ne) hvis plæneklipperen skal
hældes for transport når du kører over
andre overflader end græs, og når du
transporterer plæneklipperen til og fra det
område der skal slås.
j) Brug aldrig plæneklipperen med
defekte sikkerhedsskærme, eller uden
sikkerhedsanordninger, for eksempel,
deflektorer og/eller græsfangere på plads.
k) Tænd for motoren i overensstemmelse
med instruktionerne og med fødderne så
langt væk fra blade(ne) som muligt.
l) Hæld ikke plæneklipperen, når du tænder
for motoren, undtagen hvis plæneklipperen
skal hældes for start. I dette tilfælde,
Sidan laddas...
Sidan laddas...
Sidan laddas...
Sidan laddas...
Sidan laddas...
Sidan laddas...
Sidan laddas...
Sidan laddas...
Sidan laddas...
Sidan laddas...
Sidan laddas...
Sidan laddas...
Sidan laddas...
Sidan laddas...
Sidan laddas...
Sidan laddas...
Sidan laddas...
Sidan laddas...
Sidan laddas...
Sidan laddas...
Sidan laddas...
Sidan laddas...
Sidan laddas...
Sidan laddas...
Sidan laddas...
Sidan laddas...
Sidan laddas...
Sidan laddas...
Sidan laddas...
Sidan laddas...
Sidan laddas...
Sidan laddas...
Sidan laddas...
Sidan laddas...
Sidan laddas...
Sidan laddas...
Sidan laddas...
Sidan laddas...
Sidan laddas...
Sidan laddas...
Sidan laddas...
Sidan laddas...
Sidan laddas...
Sidan laddas...
-
 1
1
-
 2
2
-
 3
3
-
 4
4
-
 5
5
-
 6
6
-
 7
7
-
 8
8
-
 9
9
-
 10
10
-
 11
11
-
 12
12
-
 13
13
-
 14
14
-
 15
15
-
 16
16
-
 17
17
-
 18
18
-
 19
19
-
 20
20
-
 21
21
-
 22
22
-
 23
23
-
 24
24
-
 25
25
-
 26
26
-
 27
27
-
 28
28
-
 29
29
-
 30
30
-
 31
31
-
 32
32
-
 33
33
-
 34
34
-
 35
35
-
 36
36
-
 37
37
-
 38
38
-
 39
39
-
 40
40
-
 41
41
-
 42
42
-
 43
43
-
 44
44
-
 45
45
-
 46
46
-
 47
47
-
 48
48
-
 49
49
-
 50
50
-
 51
51
-
 52
52
-
 53
53
-
 54
54
-
 55
55
-
 56
56
-
 57
57
-
 58
58
-
 59
59
-
 60
60
-
 61
61
-
 62
62
-
 63
63
-
 64
64


på andra språk
- English: Worx WG775E User manual
- dansk: Worx WG775E Brugermanual
- suomi: Worx WG775E Ohjekirja
Relaterade papper
Andra dokument
-
BLACK+DECKER BEMW351 Användarmanual
-
BLACK DECKER BEMW461BH Användarmanual
-
-
Ryobi RLM 15E Electric Lawn Mower Användarmanual
-
BLACK+DECKER CLM5448PC2 Användarmanual
-
Robomow 769-25588A-00 Robotic Mower Användarguide
-
BLACK+DECKER CLM3820 Bruksanvisning
-
-
Makita DLM537 Användarmanual
-
DeWalt DCMW564 Bruksanvisning