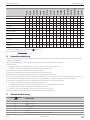
Dometic B162S Bruksanvisningar
- Kategori
- Vinkylare
- Typ
- Bruksanvisningar

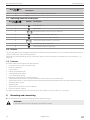
REFRIGERATION
WINE REFRIGERATORS
EN
Wine storage appliance
Installation and Operating Manual
SV
Vinkylskåp
Monterings- och bruksanvisning
DE
Weinlagerschrank
Montage- und Bedienungsanleitung
NO
Vinkjøleskap
Monterings- og bruksanvisning
FR
Appareil de stockage du vin
Instructions de montage et de service
FI
Viinijäähdytin
Asennus- ja käyttöohje
ES
Armario para la conservación de vinos
Manual de instalación y uso
RU
Винный холодильник
Руководство по эксплуатации и монтажу
PT
Aparelho de armazenagem de vinhos
Manual de montagem e operação
PL
Chłodziarka dowina
Instrukcja montażu i obsługi
IT
Frigorifero cantina
Istruzioni di montaggio e d’uso
SK
Spotrebič na uchovávanie vína
Návod na montáž a obsluhu
NL
Wijnbewaarkast
Montage- en gebruiksaanwijzing
CS
Spotřebičem pro uchovávání vína
Návod kmontáži aobsluze
DA
Vinkøleskab
Monterings- og betjeningsvejledning
HU
Bortároló készülék
Szerelési és kezelési útmutató
B29G, B68G, B162S, B195S, C20G, C50G, C101G, C125G
E7FG, E16FG, E18FGB, E28FG, E40FGD, E45FG, E49FGB, E91FG, E115FG

© 2021 Dometic Group. The visual appearance of the contents of this manual is protected by copyright and design law. The
underlying technical design and the products contained herein may be protected by design, patent or be patent pending. The
trademarks mentioned in this manual belong to Dometic Sweden AB.
All rights are reserved.

Bxxx, Cxxx, Exxx
SUPPLIER´S NAME
MODEL IDENTIFIER
kWh/annumXYZ
XYZ
ABCD
XY dB
A
B
B
C
D
E
F
G
eprel.ec.europa.eu
2021-03-17 4445103123 3

4 4445103123 2021-03-17
Bxxx, Cxxx, Exxx

12 – 80 mm
2021-03-17 4445103123 5
Bxxx, Cxxx, Exxx

Bxxx, Cxxx, Exxx
6 4445103123 2021-03-17

2021-03-17 4445103123 7
E18FGB, E49FGB

2
1
180
0
4
3
5
6
7
8
9
B29G, B68G
8 4445103123 2021-03-17
10
11

2021-03-17 4445103123 9
E7FG, E16FG, E28FG, E45FG, C20G, C50G

10 4445103123 2021-03-17
B162S, B195S, C101G, C125G, E91FG, E115FG

2021-03-17 4445103123 11
B162S, B195S, C101G, C125G, E91FG, E115FG

12 4445103123 2021-03-17
Bxxx, Cxxx, Exxx

4445103123 13
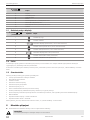
Wine Refrigerators
EN
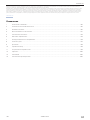
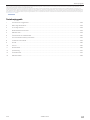
Table of contents
Please read these instructions carefully and follow all instructions, guidelines, and warnings included in this product manual in order to ensure that you install, use, and maintain the product properly at all times.
These instructions MUST stay with this product.
By using the product, you hereby conrm that you have read all instructions, guidelines, and warnings carefully and that you understand and agree to abide by the terms and conditions as set forth herein. You
agree to use this product only for the intended purpose and application and in accordance with the instructions, guidelines, and warnings as set forth in this product manual as well as in accordance with all
applicable laws and regulations. A failure to read and follow the instructions and warnings set forth herein may result in an injury to yourself and others, damage to your product or damage to other property
in the vicinity. This product manual, including the instructions, guidelines, and warnings, and related documentation, may be subject to changes and updates. For up-to-date product information, please visit
www.dometic.com.
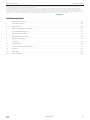
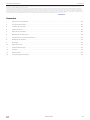
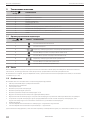
Table of contents
1 Explanation of symbols ............................................................................................................................... 14
2 Safety instructions ...................................................................................................................................... 14
3 Scope of delivery ....................................................................................................................................... 14
4 Intended use ............................................................................................................................................. 15
5 Technical description ................................................................................................................................. 15
6 Mounting and connecting .......................................................................................................................... 16
7 Using the wine refrigerator .......................................................................................................................... 18
8 Cleaning and maintenance ......................................................................................................................... 21
9 Storing .....................................................................................................................................................22
10 Service agent ............................................................................................................................................22
11 Troubleshooting ........................................................................................................................................22
12 Warranty ................................................................................................................................................... 23
13 Disposal ...................................................................................................................................................23
14 Technical data ...........................................................................................................................................23

14 4445103123
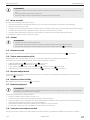
Explanation of symbols Wine Refrigerators
EN
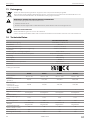
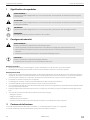
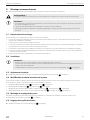
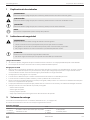
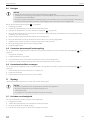
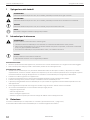
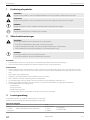
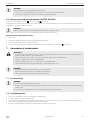
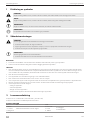
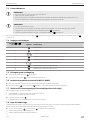
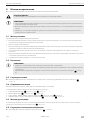
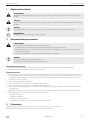
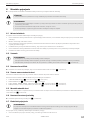
1 Explanation of symbols
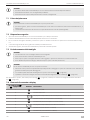
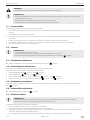
WARNING!
Indicates a hazardous situation that, if not avoided, could result in death or serious injury.
CAUTION!
Indicates a hazardous situation that, if not avoided, could result in minor or moderate injury.
NOTICE!
Indicates a situation that, if not avoided, can result in property damage.
NOTE:
Supplementary information for operating the product.
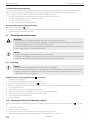
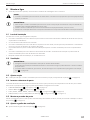
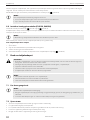
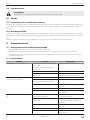
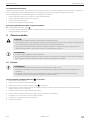
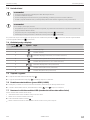
2 Safety instructions
WARNING!
Instructions pertaining to the risk of death or serious injury!
• Only use the wine refrigerator as intended.
• Do not store any explosive substances, such as spray cans with propellants, in the wine refrigerator.
• Do not operate the wine refrigerator if it is visibly damaged.
NOTICE!
Instructions pertaining to the risk of material damage!
• Do not use accessories that have not been recommended by the manufacturer.
Fire hazard!
• When positioning the device, ensure the supply cord is not trapped or damaged.
• Do not locate multiple portable socket-outlets or portable power supplies at the rear of the device.
Health hazard
• This wine refrigerator can be used by children aged from 8 years and above and persons with reduced physical, sensory or
mental capabilities or lack of experience and knowledge if they have been given supervision or instruction concerning use
of the device in a safe way and understand the hazards involved.
• Children shall not play with the device.
• Cleaning and user maintenance shall not be made by children without supervision.
• Children aged from 3 to 8 years are allowed to load and unload the wine refrigerator.
• Opening the wine refrigerator for long periods can cause signicant increase of the temperature in the compartments of
the device.
• Clean regularly surfaces that can come in contact with food and accessible drainage systems.
• If the wine refrigerator is le empty for long periods:
– Switch o the device.
– Defrost the device.
– Clean and dry the device.
– Leave the lid open to prevent mould developing within the device.
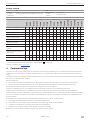
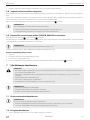
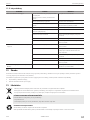
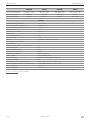
3 Scope of delivery
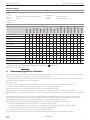
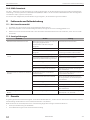
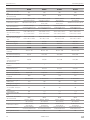
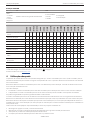
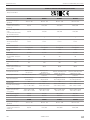
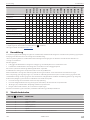
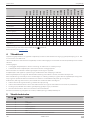
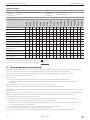
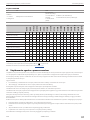
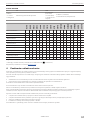
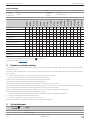
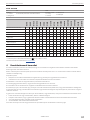
The wine refrigerator comes in 17 models (“Technical data”, on page 24).
The model name of the wine refrigerator includes the following information:
Example: E49 FGB
E 49 FGB
B: Basic
C: Classic
E: Elegance
Maximum number of bottles to be stored in
F: Frameless
G: Glass
S: Solid
B: Built-in
D: Double door

4445103123 15
Wine Refrigerators Intended use
EN
B29G
B68G
B162S
B195S
C20G
C50G
C101G
C125G
E7FG
E16FG
E18FGB
E28FG
E40FGD
E45FG
E49FGB
E91FG
E115FG
Wine refrigerator x x x x x x x x x x x x x x x x x
Water tank + + x x x x x x x x x x x x x x x
Keys x x x x x x
Label set x x x x x x x x
Carbon lter x x x x x x x x x x x x
Sliding shelf + + + + x x x x x x x x x x x x
Serving shelf + + + + + x x
Presentation shelf + + + + + x + +
Metal beverage shelf + + + + + + + + +
Door le upper hinge x x x x x x x x x x x x x x
Installation material x x x x x x x x x x x x x x x x x
Manual* x x x x x x x x x x x x x x x x x
Legend: x: included, +: optional
* Manuals can be downloaded via QR code (g. , on page 3).
Additional accessories under dometic.com.
4 Intended use
The wine storage appliance (also referred to as wine refrigerator) is intended to be used exclusively for the storage and tem-
perature control of wine. It`s intended for indoor use only.
In this manual wine refrigerators with dierent installation types are described. See technical data section for model reference.
Installation types:
• Built-in: The wine refrigerator is intended for installation in a piece of cabinetry or an installation niche.
• Freestanding: The wine refrigerator is not intended to be used as a built-in appliance.
Only closed and still sealed bottles may be stored in the appliance.
The wine refrigerator is not suitable for storing medicine or freezing foodstus.
This wine refrigerator is only suitable for the intended purpose and application in accordance with these instructions.
This manual provides information that is necessary for proper installation and/or operation of the wine refrigerator. Poor installa-
tion and/or improper operating or maintenance will result in unsatisfactory performance and a possible failure.
The manufacturer accepts no liability for any injury or damage resulting from:
• Incorrect assembly or connection, including excess voltage
• Incorrect maintenance or use of spare parts other than original spare parts provided by the manufacturer
• Alterations to the product without express permission from the manufacturer
• Use for purposes other than those described in this manual
Dometic reserves the right to change product appearance and product specications.
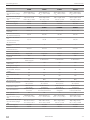
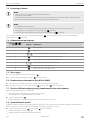
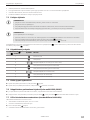
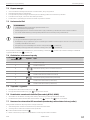
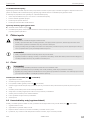
5 Technical description
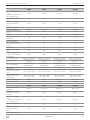
No in g. , on
page 4
Description
1 Foot
2 Ventilation grille
3 Door
4 Control panel
5 Temperature zone
6 Shelf
7 Upper temperature zone / Le temperature zone
8 Temperature zone divider

16 4445103123
Mounting and connecting Wine Refrigerators
EN
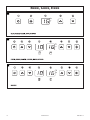
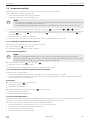
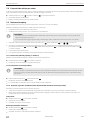
5.1 Operating elements and displays
No in g. to ,
on page 12
Symbol Description
1 On/O button
2 Light button
3
– / /
Temperature display (only zone/top or le zone)
4 Up button (only zone/top or le zone)
5 Down button (only zone/top or le zone)
6
/
Temperature display (bottom or right zone)
7 Up button (bottom or right zone)
8 Down button (bottom or right zone)
5.2 Shelves
The wine refrigerator is factory tted with detachable shelves for storing the bottles. You can increase the capacity by using the
optional accessory of reinforced storage shelves.
Depending on the model sliding shelves, presentation shelves and service shelves are available (see “Scope of delivery”, on
page 14).
5.3 Features
All models of the wine refrigerator are equipped with:
• UV impervious door with a reversible hinge
• Automatic defrosting
• Sensor buttons
• Setting temperature display
• Storing temperature display
• °C/°F temperature display
• LED interior lighting with two operating modes
• Temperature memory function: The set temperature is saved when the unit is switched o.
• Temperature monitor: A warning signal sounds and the temperature display ashes if the interior temperature noticeably
deviates from the one set
• Sabbath mode
• Temperature alarm system - visual and audible
• Door alarm system - audible
For additional equipment such as a lock and an active carbon lter see ”Scope of delivery”, on page 14.
6 Mounting and connecting
► Remove all the inner and outer packaging materials before setting up.
WARNING!
• Move and set up the wine refrigerator by at least two people.
No in g. , on
page 4
Description
9 Lower temperature zone / Right temperature zone
10 Lock

4445103123 17
Wine Refrigerators Mounting and connecting
EN
NOTICE!
• Do not place the wine refrigerator in direct sunlight or in the vicinity of strong heat sources (heating appliances,
ovens, etc.).
• Only locate the wine refrigerator indoors, never outside.
• Check that the voltage specication on the type plate is the same as that of the power supply.
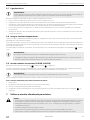
6.1 Installation site
When selecting the location, follow the instructions below:
• The wine refrigerator should stand in the coldest part of the room, away from heat sources (ovens, heating devices or
radiators).
• The location must not be damp or wet.
• The wine refrigerator must not be exposed to direct sunlight. This can damage the acrylic coating and lead to higher power
consumption.
• The ground must be level and suciently stable to bear the wine refrigerator at full capacity.
• The wine refrigerator must be suciently ventilated. The ventilation slots on the front of the wine refrigerator must not be
obstructed.
• Observe the installation dimensions, see technical data.
6.2 Ventilation
NOTICE!
• Ensure that the ventilation slots remain clear.
Obstructed ventilation slots lead to increased power consumption and can damage the wine refrigerator.
• Model E7FG needs at least 30mm space on the rear side for ventilation (g. , on page 5).
6.3 Adjusting the feet
► Make sure the wine refrigerator is level by adjusting the feet (g. , on page 5).
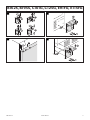
6.4 Reversing the door
You can change the hinge of the door, so that it opens to the le rather than the right.
For reversing the door follow the steps in the mentioned gures:
► E18FGB and E49FGB (g. , on page 7 to g. , on page 8)
► B29G and B68G (g. , on page 8 to g. , on page 8)
► E7FG, E16FG, E28FG, E45FG, C20G and C50G (g. , on page 9 to g. , on page 9)
► B162S, B195S, C101G, C125G, E91FG, E115FG (g. , on page 10 to g. , on page 11)
6.5 Mounting the door handle
Mount the door handle on the side opposite to the hinge. To get access to the bores partly li o the sealing at the inside of the
door (g. , on page 5).
6.6 Adjusting the ventilation grille
► Adjust the height of the ventilation grill (g. , on page 6).
6.7 Electrical connection
NOTICE!
Leave the wine refrigerator to stand upright for about 2 hours aer transporting, before you connect it to the
power supply. Otherwise this could cause faults in the cooling system.
Observe the following when connecting the wine refrigerator:
• Connect the wine refrigerator to a circuit that is protected with 15 A.
• Check that the voltage specication on the type plate is the same as that of the power supply.
• Have the socket and power circuit checked by a qualied electrician to ensure that the socket is earthed correctly. Do not
use an extension cable or a multiple power socket.
• The cable must rest securely behind the wine refrigerator and not be allowed to lie or hang unprotected.
• Ensure that the power cable is not jammed when pushing the wine refrigerator into place.

18 4445103123
Using the wine refrigerator Wine Refrigerators
EN
6.8 Integrating freestanding models
All freestanding models may as well be integrated either under a worktop between 820 mm and 890 mm in height or between
other cabinets.
If you integrate your wine refrigerator, observe the installation dimensions and ensure the door will open and close properly in
the chosen location. Make sure your installation does not block the front ventilation grille.
Model E7FG needs at least 30mm space on the rear side for ventilation (g. , on page 5).
NOTICE!
If the wine refrigerator is fully integrated behind a skirting board:
• Ensure that the ventilation openings in the skirting board have a cross-section of at least 300 cm2.
• Remove the ventilation grilles, so that warm air can disperse unhindered.
6.9 Installing built-in models (E18FGB, E49FGB)
Observe the installation dimensions (g. , on page 5 and g. , on page 5).
The wine refrigerator is equipped with an integrated ventilation system to disperse the warm air automatically. Air intake is pro-
vided underneath the door and the air escapes at the top of the door.
NOTICE!
The air inlet and outlet must not be covered or blocked in any way.
Aer installation make sure that the wine refrigerator door opens and closes properly.
Secure the wine refrigerator inside the cabinet:
1. Open the door.
2. Pop out the two cover caps on the opposite side of the hinge.
3. Tighten the screws through the attachment bracket.
4. Screw the attachment bracket to the inside of the cabinet to secure the wine refrigerator in the niche (g. , on page
6).
7 Using the wine refrigerator
WARNING!
• Never use the wine refrigerator in rooms where ammable materials are stored or ammable gases have built up.
Sparks from the motor could ignite them.
• Do not store any explosive substances, such as spray cans with propellants, in the wine refrigerator.
• Keep the keys out of the reach of children.
• Supervise children to ensure that they do not play with the wine refrigerator.
• Do not operate the wine refrigerator if it is visibly damaged.
NOTICE!
• Do not place any electrical devices inside the wine refrigerator.
• Do not use accessories that have not been recommended by the manufacturer.
• Never pull the plug out of the socket by the connection cable.
7.1 Before rst use
NOTICE!
Before you use the wine refrigerator for the rst time:
• Clean the wine refrigerator inside and outside for hygienic reasons (see “Cleaning and maintenance”, on page
21).
• Check that the operating voltage matches the mains voltage (see type plate).
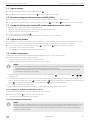
7.2 Saving energy
• Only open the wine refrigerator as oen and for as long as necessary.
• Avoid unnecessarily low temperature settings.

4445103123 19
Wine Refrigerators Using the wine refrigerator
EN
• For optimal energy consumption, position the shelves and drawers according to their position on delivery..
• On a regularly basis, make sure the door seal still ts properly.
• Clean dust and dirt from the condenser at regular intervals.
7.3 Positioning the bottles
NOTICE!
• Only store wine in closed and still sealed bottles.
• Do not overload the wine refrigerator.
• Do not cover the shelves with aluminum foil or any other objects, as this obstructs the air circulation.
• Be sure to use reinforced storage shelves (accessory) if you want to stack bottles.
NOTICE!
For wine refrigerators with sliding shelves:
• Make sure that the door is fully open when you pull out the shelves on roller-bearings. Otherwise the door seal
can be damaged.
• Do not put more than two layers of bottles on a sliding shelf (g. , on page 4).
• Observe the allowed number of bottles depending on the shelf-width (g. , on page 4).
For space-ecient storage note the given example (g. , on page 4). The example refers to standard Bordeaux type
bottles (g. , on page 4).
7.4 Operating elements and displays
No in g. to ,
on page 12
Symbol Description
1 On/O button
2 Light button
3
– / /
Temperature display (only zone/top or le zone)
4 Up button (only zone/top or le zone)
5 Down button (only zone/top or le zone)
6
/
Temperature display (bottom or right zone)
7 Up button (bottom or right zone)
8 Down button (bottom or right zone)
7.5 Switching on and o
► To switch on, press the on/o button briey.
► To switch o, press the on/o button for at least 5seconds.
7.6 Deactivating the key lock (only B29G, B68G)
► If the buttons are not touched for 2 minutes or longer, the key lock is activated automatically.
► To remove the key lock, press the up button and down button for at least 5 seconds.
7.7 Setting the LED interior lighting (standard mode or vitrine mode)
The LED interior lighting has two dierent modes:
• Standard mode: The interior is illuminated when the door is opened.
• Vitrine mode: The interior is illuminated constantly.
► Press the light button briey.
9
The lighting mode changes from standard mode to vitrine mode or vice-versa.

20 4445103123
Using the wine refrigerator Wine Refrigerators
EN
7.8 Switching to Sabbath mode
In Sabbath mode, the display, interior lighting and warning signal for the temperature monitor are deactivated. When the Sab-
bath mode is activated, it switches o automatically aer 96 hours. The refrigeration continues as usual.
► Press both the on/o button and the light button for at least 5 seconds.
9
The temperature indicator ashes 4times.
9
The Sabbath mode is activated respectively deactivated.
7.9 Setting the temperature
The temperature of each temperature zone can be set between 5 °C and 20 °C (41 °F and 68 °F).
To avoid food waste, note the following:
• Adjust the temperature to the quantity and type of the foodstu.
• Store the dierent foodstu types as shown in the gures.
NOTE:
• If the temperature zones are one above the other, the temperature for the lower zone must always be just as high
or higher than the temperature for the upper zone.
• The wine refrigerator functions at its best if the dierence in temperature between the two zones is at least 4 °C
(39 °F).
1. Display the set temperature by briey pressing the up button or the down button (g. and , on page 12).
2. If your wine refrigerator has two temperature zones, set the temperature for each zone separately by using the correspond-
ing up button and down button . Briey press the up button to increase the temperature or the down button
to decrease the temperature.
9
The display ashes while you make the setting.
9
Once you have set the temperature, the display shows the current inner temperature again.
7.9.1 Setting the temperature unit (°C or °F)
You can select whether the temperature is displayed in Celsius or Fahrenheit.
► Press the light button for at least 5seconds.
9
The display shows the temperature in the other unit.
7.9.2 Displaying the set temperature
NOTE:
When using the wine refrigerator for the rst time or if it has not been used for a long time, the inner temperature
could dier from the one you have set. The temperature display ashes as long as this is the case. Once the set
temperature has been reached, the temperature display lights up constantly.
► Press the up button or the down button briey.
9
The display shows the set temperature.
9
Aer 5seconds the display shows the current inner temperature again.
7.9.3 Switching the fan on/o (dynamic cooling mode or silent mode)
The fan can be operate in two dierent modes:
• Silent mode: The fan runs only when required. The fan switches o when the set temperature is reached.
• Dynamic cooling mode: The fan runs permanently to regulate humidity and temperature. This way an homogeneous cli-
mate for the interior of a temperature zone is reached.
Silent mode
► Press the up button for at least 5seconds.
9
Three acoustic signals are emitted.
9
The fan is switched to silent mode.
Dynamic cooling mode
► Press the down button for at least 5seconds.
9
Five acoustic signals are emitted.
9
The fan is switched to dynamic cooling mode.
Sidan laddas ...
Sidan laddas ...
Sidan laddas ...
Sidan laddas ...
Sidan laddas ...
Sidan laddas ...
Sidan laddas ...
Sidan laddas ...
Sidan laddas ...
Sidan laddas ...
Sidan laddas ...
Sidan laddas ...
Sidan laddas ...
Sidan laddas ...
Sidan laddas ...
Sidan laddas ...
Sidan laddas ...
Sidan laddas ...
Sidan laddas ...
Sidan laddas ...
Sidan laddas ...
Sidan laddas ...
Sidan laddas ...
Sidan laddas ...
Sidan laddas ...
Sidan laddas ...
Sidan laddas ...
Sidan laddas ...
Sidan laddas ...
Sidan laddas ...
Sidan laddas ...
Sidan laddas ...
Sidan laddas ...
Sidan laddas ...
Sidan laddas ...
Sidan laddas ...
Sidan laddas ...
Sidan laddas ...
Sidan laddas ...
Sidan laddas ...
Sidan laddas ...
Sidan laddas ...
Sidan laddas ...
Sidan laddas ...
Sidan laddas ...
Sidan laddas ...
Sidan laddas ...
Sidan laddas ...
Sidan laddas ...
Sidan laddas ...
Sidan laddas ...
Sidan laddas ...
Sidan laddas ...
Sidan laddas ...
Sidan laddas ...
Sidan laddas ...
Sidan laddas ...
Sidan laddas ...
Sidan laddas ...
Sidan laddas ...
Sidan laddas ...
Sidan laddas ...
Sidan laddas ...
Sidan laddas ...
Sidan laddas ...
Sidan laddas ...
Sidan laddas ...
Sidan laddas ...
Sidan laddas ...
Sidan laddas ...
Sidan laddas ...
Sidan laddas ...
Sidan laddas ...
Sidan laddas ...
Sidan laddas ...
Sidan laddas ...
Sidan laddas ...
Sidan laddas ...
Sidan laddas ...
Sidan laddas ...
Sidan laddas ...
Sidan laddas ...
Sidan laddas ...
Sidan laddas ...
Sidan laddas ...
Sidan laddas ...
Sidan laddas ...
Sidan laddas ...
Sidan laddas ...
Sidan laddas ...
Sidan laddas ...
Sidan laddas ...
Sidan laddas ...
Sidan laddas ...
Sidan laddas ...
Sidan laddas ...
Sidan laddas ...
Sidan laddas ...
Sidan laddas ...
Sidan laddas ...
Sidan laddas ...
Sidan laddas ...
Sidan laddas ...
Sidan laddas ...
Sidan laddas ...
Sidan laddas ...
Sidan laddas ...
Sidan laddas ...
Sidan laddas ...
Sidan laddas ...
Sidan laddas ...
Sidan laddas ...
Sidan laddas ...
Sidan laddas ...
Sidan laddas ...
Sidan laddas ...
Sidan laddas ...
Sidan laddas ...
Sidan laddas ...
Sidan laddas ...
Sidan laddas ...
Sidan laddas ...
Sidan laddas ...
Sidan laddas ...
Sidan laddas ...
Sidan laddas ...
Sidan laddas ...
Sidan laddas ...
Sidan laddas ...
Sidan laddas ...
Sidan laddas ...
Sidan laddas ...
Sidan laddas ...
Sidan laddas ...
Sidan laddas ...
Sidan laddas ...
Sidan laddas ...
Sidan laddas ...
Sidan laddas ...
Sidan laddas ...
Sidan laddas ...
Sidan laddas ...
Sidan laddas ...
Sidan laddas ...
Sidan laddas ...
Sidan laddas ...
Sidan laddas ...
Sidan laddas ...
Sidan laddas ...
Sidan laddas ...
Sidan laddas ...
Sidan laddas ...
Sidan laddas ...
Sidan laddas ...
Sidan laddas ...
Sidan laddas ...
Sidan laddas ...
Sidan laddas ...
Sidan laddas ...
Sidan laddas ...
Sidan laddas ...
Sidan laddas ...
Sidan laddas ...
Sidan laddas ...
Sidan laddas ...
Sidan laddas ...
Sidan laddas ...
Sidan laddas ...
Sidan laddas ...
Sidan laddas ...
Sidan laddas ...
Sidan laddas ...
Sidan laddas ...
Sidan laddas ...
Sidan laddas ...
Sidan laddas ...
Sidan laddas ...
Sidan laddas ...
Sidan laddas ...
Sidan laddas ...
Sidan laddas ...
Sidan laddas ...
Sidan laddas ...
Sidan laddas ...
Sidan laddas ...
Sidan laddas ...
Sidan laddas ...
Sidan laddas ...
Sidan laddas ...
Sidan laddas ...
Sidan laddas ...
Sidan laddas ...
Sidan laddas ...
Sidan laddas ...
Sidan laddas ...
Sidan laddas ...
Sidan laddas ...
Sidan laddas ...
Sidan laddas ...
Sidan laddas ...
Sidan laddas ...
Sidan laddas ...
Sidan laddas ...
Sidan laddas ...
Sidan laddas ...
Sidan laddas ...
Sidan laddas ...
Sidan laddas ...
Sidan laddas ...
Sidan laddas ...
Sidan laddas ...
Sidan laddas ...
Sidan laddas ...
Sidan laddas ...
Sidan laddas ...
Sidan laddas ...
Sidan laddas ...
Sidan laddas ...
Sidan laddas ...
Sidan laddas ...
Sidan laddas ...
Sidan laddas ...
Sidan laddas ...
Sidan laddas ...
Sidan laddas ...
Sidan laddas ...
Sidan laddas ...
Sidan laddas ...
Sidan laddas ...
Sidan laddas ...
Sidan laddas ...
Sidan laddas ...
Sidan laddas ...
Sidan laddas ...
Sidan laddas ...
Sidan laddas ...
Sidan laddas ...
Sidan laddas ...
Sidan laddas ...
Sidan laddas ...
Sidan laddas ...
Sidan laddas ...
Sidan laddas ...
Sidan laddas ...
Sidan laddas ...
Sidan laddas ...
Sidan laddas ...
Sidan laddas ...
Sidan laddas ...
Sidan laddas ...
Sidan laddas ...
-
 1
1
-
 2
2
-
 3
3
-
 4
4
-
 5
5
-
 6
6
-
 7
7
-
 8
8
-
 9
9
-
 10
10
-
 11
11
-
 12
12
-
 13
13
-
 14
14
-
 15
15
-
 16
16
-
 17
17
-
 18
18
-
 19
19
-
 20
20
-
 21
21
-
 22
22
-
 23
23
-
 24
24
-
 25
25
-
 26
26
-
 27
27
-
 28
28
-
 29
29
-
 30
30
-
 31
31
-
 32
32
-
 33
33
-
 34
34
-
 35
35
-
 36
36
-
 37
37
-
 38
38
-
 39
39
-
 40
40
-
 41
41
-
 42
42
-
 43
43
-
 44
44
-
 45
45
-
 46
46
-
 47
47
-
 48
48
-
 49
49
-
 50
50
-
 51
51
-
 52
52
-
 53
53
-
 54
54
-
 55
55
-
 56
56
-
 57
57
-
 58
58
-
 59
59
-
 60
60
-
 61
61
-
 62
62
-
 63
63
-
 64
64
-
 65
65
-
 66
66
-
 67
67
-
 68
68
-
 69
69
-
 70
70
-
 71
71
-
 72
72
-
 73
73
-
 74
74
-
 75
75
-
 76
76
-
 77
77
-
 78
78
-
 79
79
-
 80
80
-
 81
81
-
 82
82
-
 83
83
-
 84
84
-
 85
85
-
 86
86
-
 87
87
-
 88
88
-
 89
89
-
 90
90
-
 91
91
-
 92
92
-
 93
93
-
 94
94
-
 95
95
-
 96
96
-
 97
97
-
 98
98
-
 99
99
-
 100
100
-
 101
101
-
 102
102
-
 103
103
-
 104
104
-
 105
105
-
 106
106
-
 107
107
-
 108
108
-
 109
109
-
 110
110
-
 111
111
-
 112
112
-
 113
113
-
 114
114
-
 115
115
-
 116
116
-
 117
117
-
 118
118
-
 119
119
-
 120
120
-
 121
121
-
 122
122
-
 123
123
-
 124
124
-
 125
125
-
 126
126
-
 127
127
-
 128
128
-
 129
129
-
 130
130
-
 131
131
-
 132
132
-
 133
133
-
 134
134
-
 135
135
-
 136
136
-
 137
137
-
 138
138
-
 139
139
-
 140
140
-
 141
141
-
 142
142
-
 143
143
-
 144
144
-
 145
145
-
 146
146
-
 147
147
-
 148
148
-
 149
149
-
 150
150
-
 151
151
-
 152
152
-
 153
153
-
 154
154
-
 155
155
-
 156
156
-
 157
157
-
 158
158
-
 159
159
-
 160
160
-
 161
161
-
 162
162
-
 163
163
-
 164
164
-
 165
165
-
 166
166
-
 167
167
-
 168
168
-
 169
169
-
 170
170
-
 171
171
-
 172
172
-
 173
173
-
 174
174
-
 175
175
-
 176
176
-
 177
177
-
 178
178
-
 179
179
-
 180
180
-
 181
181
-
 182
182
-
 183
183
-
 184
184
-
 185
185
-
 186
186
-
 187
187
-
 188
188
-
 189
189
-
 190
190
-
 191
191
-
 192
192
-
 193
193
-
 194
194
-
 195
195
-
 196
196
-
 197
197
-
 198
198
-
 199
199
-
 200
200
-
 201
201
-
 202
202
-
 203
203
-
 204
204
-
 205
205
-
 206
206
-
 207
207
-
 208
208
-
 209
209
-
 210
210
-
 211
211
-
 212
212
-
 213
213
-
 214
214
-
 215
215
-
 216
216
-
 217
217
-
 218
218
-
 219
219
-
 220
220
-
 221
221
-
 222
222
-
 223
223
-
 224
224
-
 225
225
-
 226
226
-
 227
227
-
 228
228
-
 229
229
-
 230
230
-
 231
231
-
 232
232
-
 233
233
-
 234
234
-
 235
235
-
 236
236
-
 237
237
-
 238
238
-
 239
239
-
 240
240
-
 241
241
-
 242
242
-
 243
243
-
 244
244
-
 245
245
-
 246
246
-
 247
247
-
 248
248
-
 249
249
-
 250
250
-
 251
251
-
 252
252
-
 253
253
-
 254
254
-
 255
255
-
 256
256
-
 257
257
-
 258
258
-
 259
259
-
 260
260
-
 261
261
-
 262
262
-
 263
263
-
 264
264
-
 265
265
-
 266
266
-
 267
267
-
 268
268
-
 269
269
-
 270
270
-
 271
271


Dometic B162S Bruksanvisningar
- Kategori
- Vinkylare
- Typ
- Bruksanvisningar
på andra språk
- italiano: Dometic B162S Istruzioni per l'uso
- čeština: Dometic B162S Operativní instrukce
- slovenčina: Dometic B162S Návod na používanie
- español: Dometic B162S Instrucciones de operación
- Deutsch: Dometic B162S Bedienungsanleitung
- polski: Dometic B162S Instrukcja obsługi
- português: Dometic B162S Instruções de operação
- français: Dometic B162S Mode d'emploi
- English: Dometic B162S Operating instructions
- dansk: Dometic B162S Betjeningsvejledning
- русский: Dometic B162S Инструкция по эксплуатации
- suomi: Dometic B162S Käyttö ohjeet
- Nederlands: Dometic B162S Handleiding
Relaterade papper
-
Dometic B29G, B68G, B162S, B195S, C20G, C50G, C101G, C125G, E7FG, E16FG, E18FGB, E28FG, E40FGD, E45FG, E49FGB, E91FG, E115FG Bruksanvisningar
-
-
-
-
Mobicool D60 Användarmanual
-
-