Philips QP2520/65 Användarmanual
- Kategori
- Kroppsvårdare / rakapparater
- Typ
- Användarmanual

QP2531, QP2530,
QP2526, QP2525,
QP2522, QP2521,
QP2520


11
12
13
3
1
4
5
6
7
8
9
10
2

empty page before TOC


English
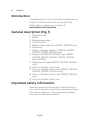
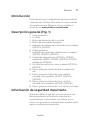
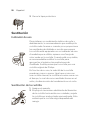
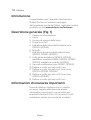
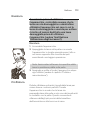
Introduction
Congratulations on your purchase and welcome to
Philips! To fully benefit from the support that
Philips offers, register your product at
www.philips.com/welcome.
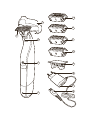
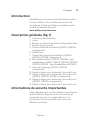
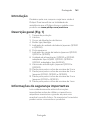
General description (Fig. 1)
1 Protection cap
2 Blade
3 Blade release slide
4 On/off button
5 Battery status indicator (QP2531, QP2530 only)
6 Small plug
7 Battery charging indicator (QP2526, QP2525,
QP2522, QP2521, QP2520 only)
8 Supply unit (QP2531, QP2530: type HQ850.
QP2526, QP2525, QP2522, QP2521, QP2520:
type A00390)
9 Replacement blade (QP2531, QP2526, QP2522
only)
10 Click-on stubble comb 5mm
11 Click-on stubble comb 3mm (QP2531, QP2530,
QP2526, QP2525, QP2520 only)
12 Click-on stubble comb 2mm (QP2531, QP2530
only)
13 Click-on stubble comb 1mm
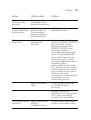
Important safety information
Read this important information carefully before
you use the appliance and its accessories and save
it for future reference. The accessories supplied
may vary for different products.
6
English

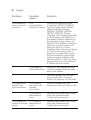
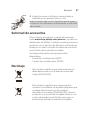
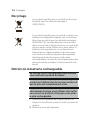
Danger
- Keep the supply unit dry.
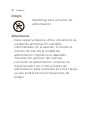
Warning
- To charge the battery, only use the
detachable supply unit provided with the
appliance. For the type number of the
original supply unit, please see ' General
description' in the manual.
- The supply unit contains a transformer. Do
not cut off the supply unit to replace it with
another plug, as this causes a hazardous
situation.
7
English

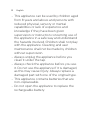
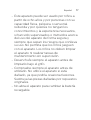
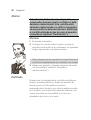
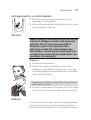
- This appliance can be used by children aged
from 8 years and above and persons with
reduced physical, sensory or mental
capabilities or lack of experience and
knowledge if they have been given
supervision or instruction concerning use of
the appliance in a safe way and understand
the hazards involved. Children shall not play
with the appliance. Cleaning and user
maintenance shall not be made by children
without supervision.
- Always unplug the appliance before you
clean it under the tap.
- Always check the appliance before you use
it. Do not use the appliance if it is damaged,
as this may cause injury. Always replace a
damaged part with one of the original type.
- This appliance contains batteries that are
non-replaceable.
- Do not open the appliance to replace the
rechargeable battery.
8
English

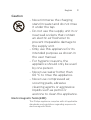
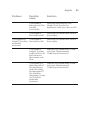
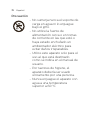
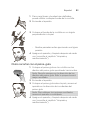
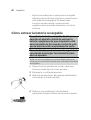
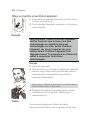
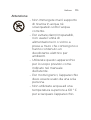
Caution
- Never immerse the charging
stand in water and do not rinse
it under the tap.
- Do not use the supply unit in or
near wall sockets that contain
an electric air freshener to
prevent irreparable damage to
the supply unit.
- Only use this appliance for its
intended purpose as shown in
the user manual.
- For hygienic reasons, the
appliance should only be used
by one person.
- Never use water hotter than
60°C to rinse the appliance.
- Never use compressed air,
scouring pads, abrasive
cleaning agents or aggressive
liquids such as petrol or
acetone to clean the appliance.
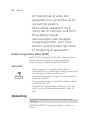
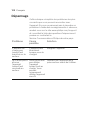
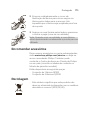
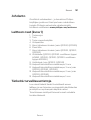
Electromagnetic fields (EMF)
This Philips appliance complies with all applicable
standards and regulations regarding exposure to
electromagnetic fields.
9
English

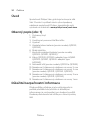
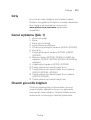
General
- This appliance is waterproof. It is suitable for
use in the bath or shower and for cleaning
under the tap. For safety reasons, the appliance
can therefore only be used without cord.
- The supply unit is suitable for mains voltages
ranging from 100 to 240 volts.
- The supply unit transforms 100-240 volts to a
safe low voltage of less than 24 volts.
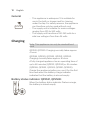
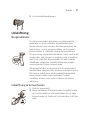
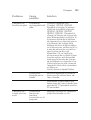
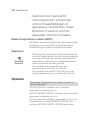
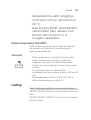
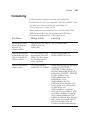
Charging
Note: This appliance can only be used without
cord.
QP2531, QP2530: Charging normally takes approx.
4hours.
QP2526, QP2525, QP2522, QP2521, QP2520:
Charging normally takes approx. 8hours.
A fully charged appliance has an operating time of
up to 60minutes (QP2531, QP2530) or 45minutes
(QP2526, QP2525, QP2522, QP2521, QP2520).
Charge the appliance before you use it for the first
time and when the battery charge indicator
indicates that the battery is almost empty.
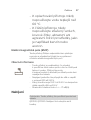
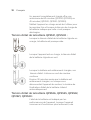
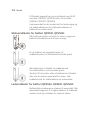
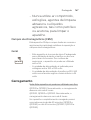
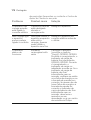
Battery status indicator QP2531, QP2530:
When the battery status indicator flashes orange,
the battery is almost empty.
10
English

When the appliance is charging, the battery status
indicator light flashes green.
When the battery is fully charged, thebattery
statusindicator lights up green continuously.
Approx. 30 minutes after the battery is fully
charged or when you disconnect the appliance
from the mains, the light of the battery status
indicator switches off automatically.
Battery status indicator QP2526, QP2525, QP2522,
QP2521, QP2520:
The battery status is indicated by the performance
of the appliance. When the appliance starts
working more slowly, the battery is almost empty
and needs to be charged for optimal performance.
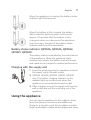
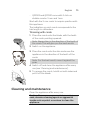
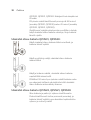
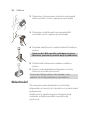
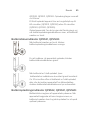
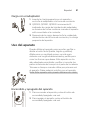
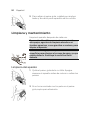
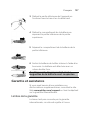
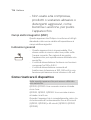
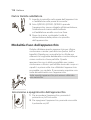
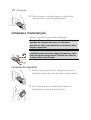
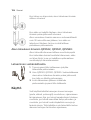
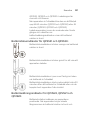
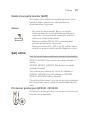
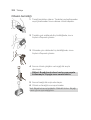
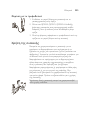
Charging with the supply unit
1 Insert the small plug into the appliance and put
the supply unit in the wall socket.
2 QP2526, QP2525, QP2522, QP2521, QP2520
only: The battery charging indicator on the
adapter lights up continuously when the
appliance is connected to the wall socket.
3 After charging, remove the supply unit from the
wall socket and pull the small plug out of the
appliance.
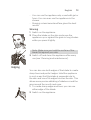
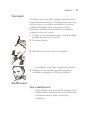
Using the appliance
You can use the appliance to trim, edge or shave
facial hair (beard, moustache and sideburns).
Shave for a smooth result, trim to obtain a certain
length and edge to create perfect edges and sharp
11
English

lines. This appliance is not intended for shaving,
edging or trimming hairs on lower body parts or
scalp hair. Take your time when you first start to
use the appliance. You have to acquire practice
with the appliance.
Note: This appliance can only be used without
cord.
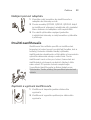
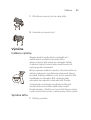
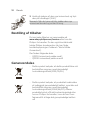
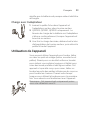
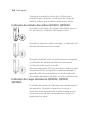
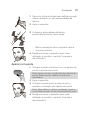
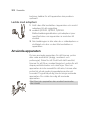
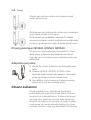
Switching the appliance on and off
1 To switch on the appliance, press the on/off
button once.
2 To switch off the appliance, press the on/off
button once.
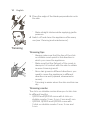
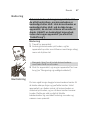
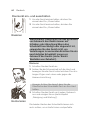
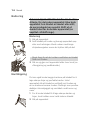
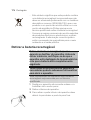
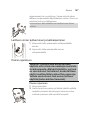
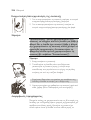
Shaving
Warning: Before you use the appliance,
always check the blade for damage or wear.
If the blade is damaged or worn, do not use
the appliance, as injury may occur. Replace
a damaged blade before you use the
appliance (see 'Replacement 'Ordering
accessories').
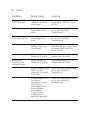
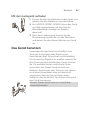
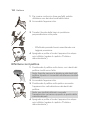
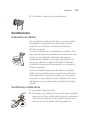
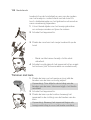
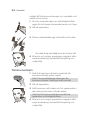
Shaving tips and tricks
- Make sure that the blade is in full contact with
the skin by placing it flat on the skin.
- For the best result, move the appliance against
the grain.
- Make long strokes while pressing lightly.
12
English

- You can use the appliance dry or wet with gel or
foam. You can even use the appliance in the
shower.
- Shaving a clean beard and face gives the best
results.
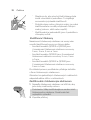
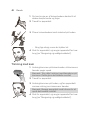
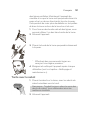
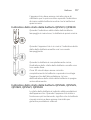
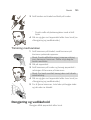
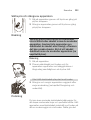
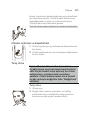
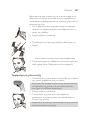
Shaving
1 Switch on the appliance.
2 Place the blade on the skin and move the
appliance up or against the grain in long strokes
while you press it lightly.
Note: Make sure you hold the surface of the
blade flat against your skin.
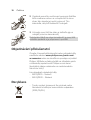
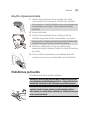
3 Switch off and clean the appliance after every
use (see ‘Cleaning and maintenance’).
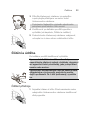
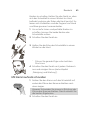
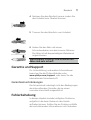
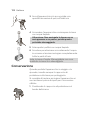
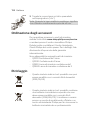
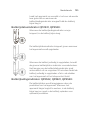
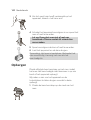
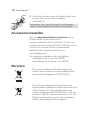
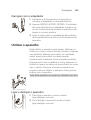
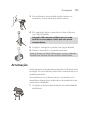
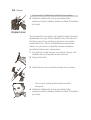
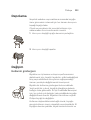
Edging
You can also use both edges of the blade to create
sharp lines and perfect edges. Hold the appliance
in such a way that the blade is perpendicular to
the skin and one of its edges touches the skin. This
allows more precise detailing of sideburns and the
area around the mouth and nose.
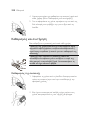
1 To create sharp edges and lines, you can use
either edge of the blade.
2 Switch on the appliance.
13
English

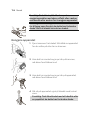
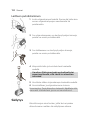
3 Place the edge of the blade perpendicular onto
the skin.
-
Make straight strokes while applying gentle
pressure.
4 Switch off and clean the appliance after every
use (see ‘Cleaning and maintenance’).
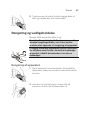
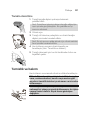
Trimming
Trimming tips
-
Always make sure that the tips of the click-
on stubble comb point in the direction in
which you move the appliance.
-
Make sure that the flat part of the comb is
always in full contact with the skin to obtain
an even trimming result.
-
Since hair grows in different directions, you
need to move the appliance in different
directions as well (upward, downward or
across).
-
Trimming is easier when the skin and hair are
dry.
Trimming combs
The click-on stubble combs allow you to trim hair
to different lengths.
- QP2531 and QP2530 come with 4click-on
stubble combs: 5mm, 3mm, 2mm and 1mm.
- QP2526, QP2525 and QP2520 come with
3click-on stubble combs: 5mm, 3mm and
1mm.
14
English

- QP2522 and QP2521 come with 2click-on
stubble combs: 5mm and 1mm.
Start with the 5mm comb to acquire practice with
this appliance.
The indication on each comb corresponds to the
hair length in millimeters.
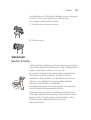
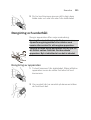
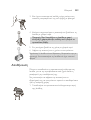
Trimming with comb
1 Place the comb onto the blade, with the teeth
of the comb pointing upwards.
Note: Always trim in the direction of the teeth of
the comb. This will give you the best results.
2 Switch on the appliance.
3 Place the comb onto the skin and move the
appliance in the direction of the teeth of the
comb.
Note: For the best result, move it against the
grain.
4 Switch off and clean the appliance after every
use (see ‘Cleaning and maintenance’).
5 To remove the comb, hold it on both sides and
pull it off the blade.
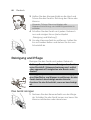
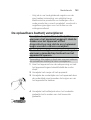
Cleaning and maintenance
Clean the appliance after every use.
Caution: Never use compressed air, scouring
pads, abrasive cleaning agents or aggressive
liquids such as petrol or acetone to clean the
appliance.
15
English

Caution: Do not tap the appliance against a
surface to remove water from it, as this may
cause damage. Replace the blade if it is
damaged.
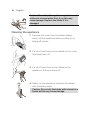
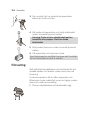
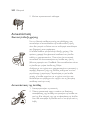
Cleaning the appliance
1 Remove the comb from the blade. Always
switch off the appliance before putting on or
taking off combs.
2 If a lot of hairs have accumulated on the comb,
first blow them off.
3 If a lot of hairs have accumulated on the
appliance, first blow them off.
4 Switch on the appliance and rinse the blade
with lukewarm water.
Caution: Do not dry the blade with a towel or a
tissue as this may cause damage.
16
English

5 Rinse the combs with lukewarm water.
6 Carefully shake off excess water and let all parts
air dry completely.
Note: The blade is fragile. Handle it carefully.
Replace the blade if it is damaged.
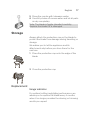
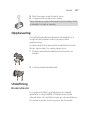
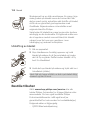
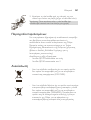
Storage
Always attach the protection cap on the blade to
protect the blade from damage during travelling or
storage.
We advise you to let the appliance and its
attachments dry before you store them for the
next use.
1 Place the protection cap onto the edge of the
blade.
2 Close the protection cap.
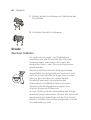
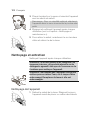
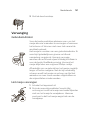
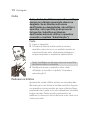
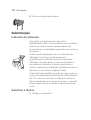
Replacement
Usage indicator
For optimal cutting and gliding performance, we
advise you to replace the blade every 4 months,
when it no longer provides the shaving or trimming
results you expect.
17
English

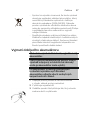
The blade is equipped with a usage indicator. A
green bar will gradually appear on the blade as
you use it. When it is highly visible, it is
recommended to replace your blade for the best
OneBlade experience. Always replace the blade
with an original Philips blade.
Depending on your usage behavior, the exact
lifetime of the blade could be longer or shorter.
Similar to a manual blade, the blade becomes
blunt over time, which results in increased hair
pulling and reduced cutting performance.
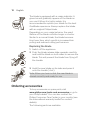
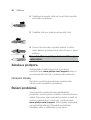
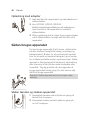
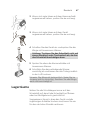
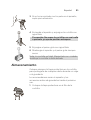
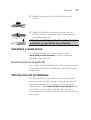
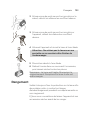
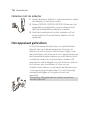
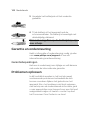
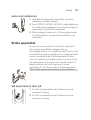
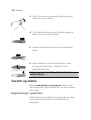
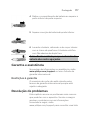
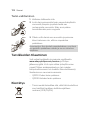
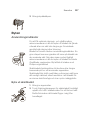
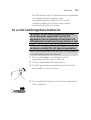
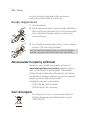
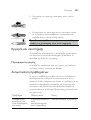
Replacing the blade
1 Switch off the appliance.
1
2
2 Push the blade release slide upwards carefully,
and hold the blade on both sides to remove the
blade. This will prevent the blade from flying off
the handle.
3 Hold the new blade on its sides and press it
onto the handle (‘click’).
Note: When you hear a click, the new blade is
placed correctly and ready for use.
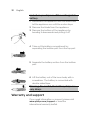
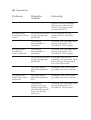
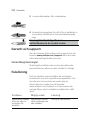
Ordering accessories
To buy accessories or spare parts, visit
www.philips.com/parts-and-accessories or go to
your Philips dealer. You can also contact the
Philips Consumer Care Center in your country (see
the international warranty leaflet for contact
details).
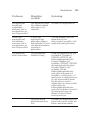
The following parts are available:
18
English

- QP210 Blade 1-pack
- QP220 Blade 2-pack
- QP610 Replacement blade 1-pack
- QP620 Replacement blade 2-pack
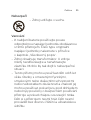
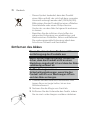
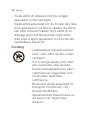
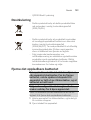
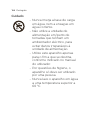
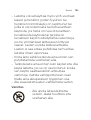
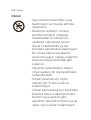
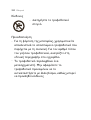
Recycling
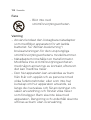
- This symbol means that this product shall not
be disposed of with normal household waste
(2012/19/EU).
- This symbol means that this product contains a
built-in rechargeable battery which shall not be
disposed of with normal household waste
(2006/66/EC). Please take your product to an
official collection point or a Philips service
center to have a professional remove the
rechargeable battery.
- Follow your country’s rules for the separate
collection of electrical and electronic products
and rechargeable batteries. Correct disposal
helps prevent negative consequences for the
environment and human health.
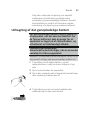
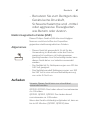
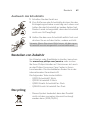
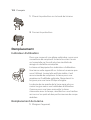
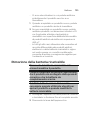
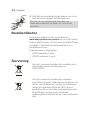
Removing the rechargeable battery
Only remove the rechargeable battery when
you discard the product.
Before you remove the battery, make sure
that the product is disconnected from the
wall socket and that the battery is
completely empty.
Take any necessary safety precautions
when you handle tools to open the product
19
English

and when you dispose of the rechargeable
battery.
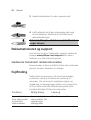
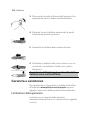
1 Disconnect the appliance from the mains and
let the appliance run until the motor stops.
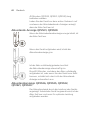
2 Remove the blade from the appliance.
3 Remove the bottom of the appliance by
bending it downwards and pulling it off.
4 Take out the battery compartment by
separating the bottom part from the top part.
5 Separate the battery section from the bottom
part.
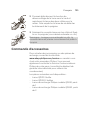
6 Lift the battery out of the inner body with a
screwdriver. The battery is connected with
double-sided tape.
Warning: Be careful, the battery strips are
very sharp.
Warranty and support
If you need information or support, please visit
www.philips.com/support or read the
international warranty leaflet.
20
English
Sidan laddas...
Sidan laddas...
Sidan laddas...
Sidan laddas...
Sidan laddas...
Sidan laddas...
Sidan laddas...
Sidan laddas...
Sidan laddas...
Sidan laddas...
Sidan laddas...
Sidan laddas...
Sidan laddas...
Sidan laddas...
Sidan laddas...
Sidan laddas...
Sidan laddas...
Sidan laddas...
Sidan laddas...
Sidan laddas...
Sidan laddas...
Sidan laddas...
Sidan laddas...
Sidan laddas...
Sidan laddas...
Sidan laddas...
Sidan laddas...
Sidan laddas...
Sidan laddas...
Sidan laddas...
Sidan laddas...
Sidan laddas...
Sidan laddas...
Sidan laddas...
Sidan laddas...
Sidan laddas...
Sidan laddas...
Sidan laddas...
Sidan laddas...
Sidan laddas...
Sidan laddas...
Sidan laddas...
Sidan laddas...
Sidan laddas...
Sidan laddas...
Sidan laddas...
Sidan laddas...
Sidan laddas...
Sidan laddas...
Sidan laddas...
Sidan laddas...
Sidan laddas...
Sidan laddas...
Sidan laddas...
Sidan laddas...
Sidan laddas...
Sidan laddas...
Sidan laddas...
Sidan laddas...
Sidan laddas...
Sidan laddas...
Sidan laddas...
Sidan laddas...
Sidan laddas...
Sidan laddas...
Sidan laddas...
Sidan laddas...
Sidan laddas...
Sidan laddas...
Sidan laddas...
Sidan laddas...
Sidan laddas...
Sidan laddas...
Sidan laddas...
Sidan laddas...
Sidan laddas...
Sidan laddas...
Sidan laddas...
Sidan laddas...
Sidan laddas...
Sidan laddas...
Sidan laddas...
Sidan laddas...
Sidan laddas...
Sidan laddas...
Sidan laddas...
Sidan laddas...
Sidan laddas...
Sidan laddas...
Sidan laddas...
Sidan laddas...
Sidan laddas...
Sidan laddas...
Sidan laddas...
Sidan laddas...
Sidan laddas...
Sidan laddas...
Sidan laddas...
Sidan laddas...
Sidan laddas...
Sidan laddas...
Sidan laddas...
Sidan laddas...
Sidan laddas...
Sidan laddas...
Sidan laddas...
Sidan laddas...
Sidan laddas...
Sidan laddas...
Sidan laddas...
Sidan laddas...
Sidan laddas...
Sidan laddas...
Sidan laddas...
Sidan laddas...
Sidan laddas...
Sidan laddas...
Sidan laddas...
Sidan laddas...
Sidan laddas...
Sidan laddas...
Sidan laddas...
Sidan laddas...
Sidan laddas...
Sidan laddas...
Sidan laddas...
Sidan laddas...
Sidan laddas...
Sidan laddas...
Sidan laddas...
Sidan laddas...
Sidan laddas...
Sidan laddas...
Sidan laddas...
Sidan laddas...
Sidan laddas...
Sidan laddas...
Sidan laddas...
Sidan laddas...
Sidan laddas...
Sidan laddas...
Sidan laddas...
Sidan laddas...
Sidan laddas...
Sidan laddas...
Sidan laddas...
Sidan laddas...
Sidan laddas...
Sidan laddas...
Sidan laddas...
Sidan laddas...
Sidan laddas...
Sidan laddas...
Sidan laddas...
Sidan laddas...
Sidan laddas...
Sidan laddas...
Sidan laddas...
Sidan laddas...
Sidan laddas...
Sidan laddas...
Sidan laddas...
Sidan laddas...
Sidan laddas...
Sidan laddas...
Sidan laddas...
Sidan laddas...
Sidan laddas...
Sidan laddas...
Sidan laddas...
Sidan laddas...
Sidan laddas...
Sidan laddas...
Sidan laddas...
Sidan laddas...
Sidan laddas...
Sidan laddas...
Sidan laddas...
Sidan laddas...
Sidan laddas...
Sidan laddas...
Sidan laddas...
Sidan laddas...
Sidan laddas...
Sidan laddas...
Sidan laddas...
Sidan laddas...
Sidan laddas...
Sidan laddas...
Sidan laddas...
Sidan laddas...
Sidan laddas...
Sidan laddas...
Sidan laddas...
Sidan laddas...
Sidan laddas...
Sidan laddas...
Sidan laddas...
Sidan laddas...
Sidan laddas...
Sidan laddas...
Sidan laddas...
Sidan laddas...
Sidan laddas...
Sidan laddas...
Sidan laddas...
Sidan laddas...
Sidan laddas...
Sidan laddas...
Sidan laddas...
Sidan laddas...
Sidan laddas...
Sidan laddas...
Sidan laddas...
Sidan laddas...
Sidan laddas...
Sidan laddas...
Sidan laddas...
Sidan laddas...
Sidan laddas...
Sidan laddas...
Sidan laddas...
Sidan laddas...
Sidan laddas...
Sidan laddas...
Sidan laddas...
Sidan laddas...
Sidan laddas...
-
 1
1
-
 2
2
-
 3
3
-
 4
4
-
 5
5
-
 6
6
-
 7
7
-
 8
8
-
 9
9
-
 10
10
-
 11
11
-
 12
12
-
 13
13
-
 14
14
-
 15
15
-
 16
16
-
 17
17
-
 18
18
-
 19
19
-
 20
20
-
 21
21
-
 22
22
-
 23
23
-
 24
24
-
 25
25
-
 26
26
-
 27
27
-
 28
28
-
 29
29
-
 30
30
-
 31
31
-
 32
32
-
 33
33
-
 34
34
-
 35
35
-
 36
36
-
 37
37
-
 38
38
-
 39
39
-
 40
40
-
 41
41
-
 42
42
-
 43
43
-
 44
44
-
 45
45
-
 46
46
-
 47
47
-
 48
48
-
 49
49
-
 50
50
-
 51
51
-
 52
52
-
 53
53
-
 54
54
-
 55
55
-
 56
56
-
 57
57
-
 58
58
-
 59
59
-
 60
60
-
 61
61
-
 62
62
-
 63
63
-
 64
64
-
 65
65
-
 66
66
-
 67
67
-
 68
68
-
 69
69
-
 70
70
-
 71
71
-
 72
72
-
 73
73
-
 74
74
-
 75
75
-
 76
76
-
 77
77
-
 78
78
-
 79
79
-
 80
80
-
 81
81
-
 82
82
-
 83
83
-
 84
84
-
 85
85
-
 86
86
-
 87
87
-
 88
88
-
 89
89
-
 90
90
-
 91
91
-
 92
92
-
 93
93
-
 94
94
-
 95
95
-
 96
96
-
 97
97
-
 98
98
-
 99
99
-
 100
100
-
 101
101
-
 102
102
-
 103
103
-
 104
104
-
 105
105
-
 106
106
-
 107
107
-
 108
108
-
 109
109
-
 110
110
-
 111
111
-
 112
112
-
 113
113
-
 114
114
-
 115
115
-
 116
116
-
 117
117
-
 118
118
-
 119
119
-
 120
120
-
 121
121
-
 122
122
-
 123
123
-
 124
124
-
 125
125
-
 126
126
-
 127
127
-
 128
128
-
 129
129
-
 130
130
-
 131
131
-
 132
132
-
 133
133
-
 134
134
-
 135
135
-
 136
136
-
 137
137
-
 138
138
-
 139
139
-
 140
140
-
 141
141
-
 142
142
-
 143
143
-
 144
144
-
 145
145
-
 146
146
-
 147
147
-
 148
148
-
 149
149
-
 150
150
-
 151
151
-
 152
152
-
 153
153
-
 154
154
-
 155
155
-
 156
156
-
 157
157
-
 158
158
-
 159
159
-
 160
160
-
 161
161
-
 162
162
-
 163
163
-
 164
164
-
 165
165
-
 166
166
-
 167
167
-
 168
168
-
 169
169
-
 170
170
-
 171
171
-
 172
172
-
 173
173
-
 174
174
-
 175
175
-
 176
176
-
 177
177
-
 178
178
-
 179
179
-
 180
180
-
 181
181
-
 182
182
-
 183
183
-
 184
184
-
 185
185
-
 186
186
-
 187
187
-
 188
188
-
 189
189
-
 190
190
-
 191
191
-
 192
192
-
 193
193
-
 194
194
-
 195
195
-
 196
196
-
 197
197
-
 198
198
-
 199
199
-
 200
200
-
 201
201
-
 202
202
-
 203
203
-
 204
204
-
 205
205
-
 206
206
-
 207
207
-
 208
208
-
 209
209
-
 210
210
-
 211
211
-
 212
212
-
 213
213
-
 214
214
-
 215
215
-
 216
216
-
 217
217
-
 218
218
-
 219
219
-
 220
220
-
 221
221
-
 222
222
-
 223
223
-
 224
224
-
 225
225
-
 226
226
-
 227
227
-
 228
228
-
 229
229
-
 230
230
-
 231
231
-
 232
232
-
 233
233
-
 234
234
-
 235
235
-
 236
236
-
 237
237
-
 238
238
-
 239
239
-
 240
240
-
 241
241
-
 242
242
-
 243
243
-
 244
244
-
 245
245
-
 246
246
-
 247
247
-
 248
248


Philips QP2520/65 Användarmanual
- Kategori
- Kroppsvårdare / rakapparater
- Typ
- Användarmanual
på andra språk
- italiano: Philips QP2520/65 Manuale utente
- čeština: Philips QP2520/65 Uživatelský manuál
- español: Philips QP2520/65 Manual de usuario
- Deutsch: Philips QP2520/65 Benutzerhandbuch
- português: Philips QP2520/65 Manual do usuário
- français: Philips QP2520/65 Manuel utilisateur
- Türkçe: Philips QP2520/65 Kullanım kılavuzu
- English: Philips QP2520/65 User manual
- dansk: Philips QP2520/65 Brugermanual
- suomi: Philips QP2520/65 Ohjekirja
- Nederlands: Philips QP2520/65 Handleiding
Relaterade papper
-
Philips QP2520/60 Användarmanual
-
Philips QP2620/65 Användarmanual
-
-
Philips QP2630/30 Användarmanual
-
-
-
-
Philips QP6620/30 Användarmanual
-
-